一,安裝Ubuntu WSL 1.Windows中設置WSL並安裝Ubuntu wsl “控制面板”——>"程式”——>"啟用或關閉Windows功能"中勾選如下,否則安裝後無法開啟 在Windows商店中搜索Ubuntu並下載安裝 2.更換為國內源 將Ubuntu的更新源換到國內已獲得更好的體驗, ...
一,安裝Ubuntu WSL
1.Windows中設置WSL並安裝Ubuntu wsl
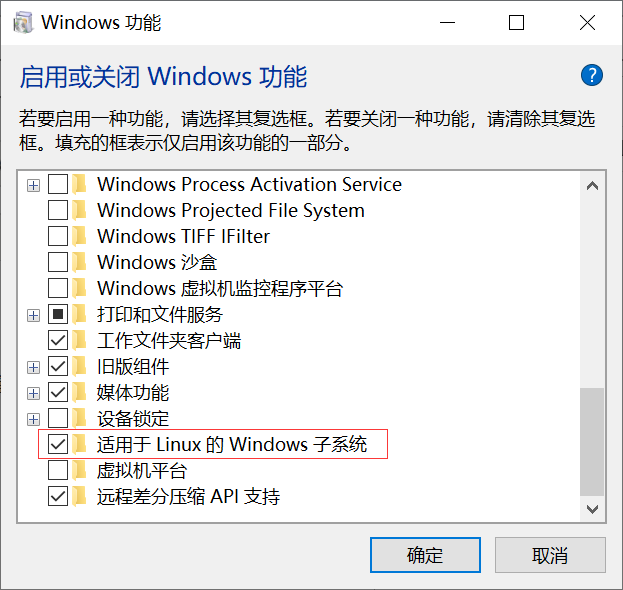
“控制面板”——>"程式”——>"啟用或關閉Windows功能"中勾選如下,否則安裝後無法開啟

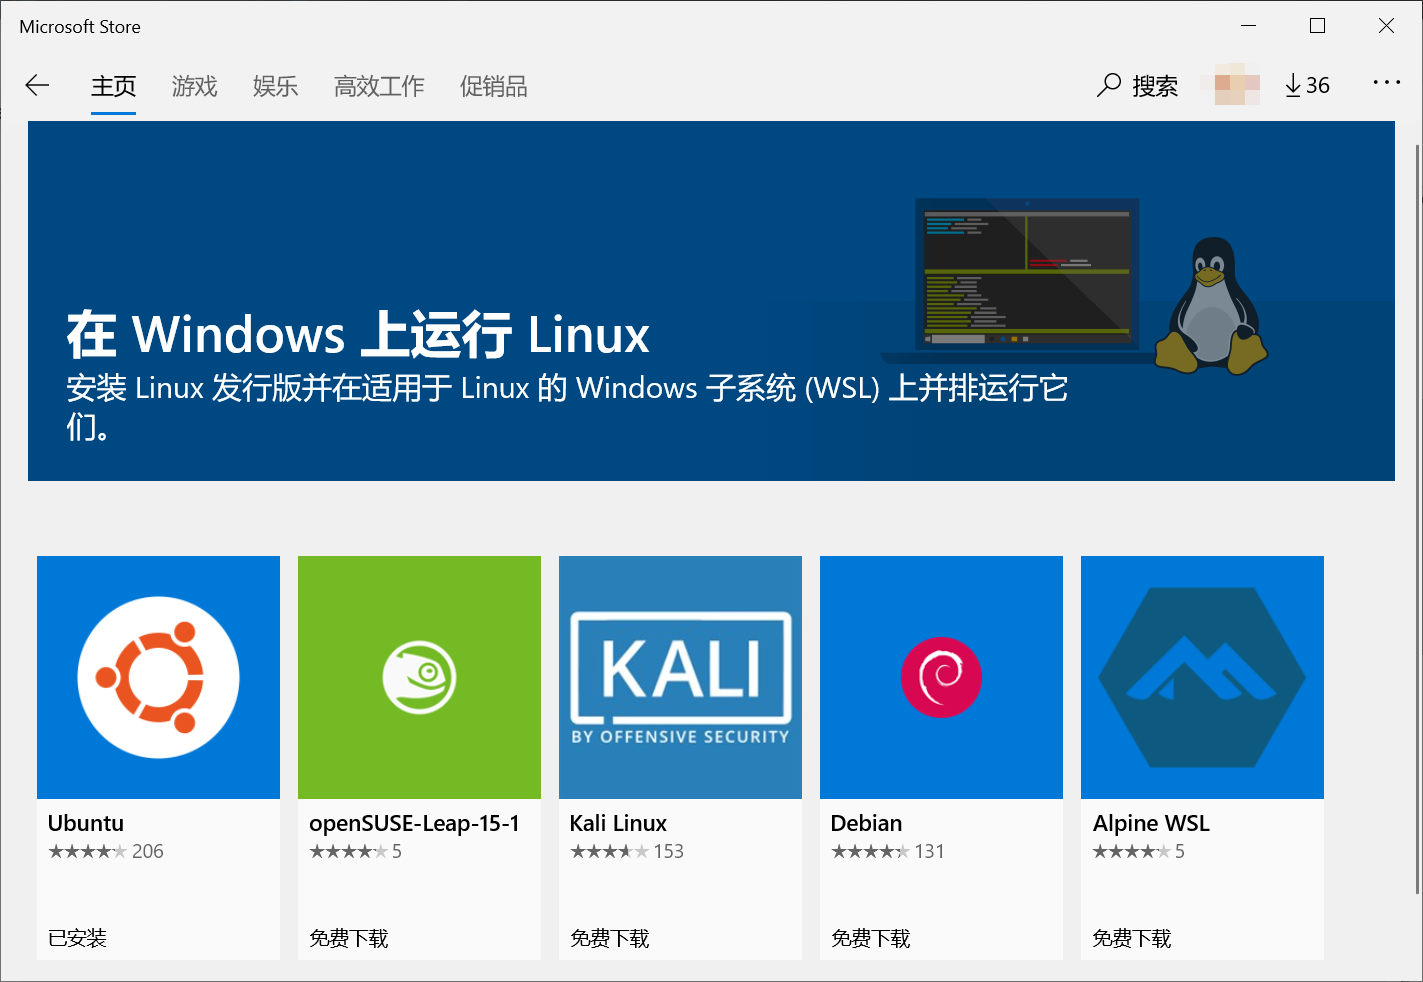
在Windows商店中搜索Ubuntu並下載安裝

2.更換為國內源
將Ubuntu的更新源換到國內已獲得更好的體驗,本人換的為阿裡雲的源,當然你也可以換別的源:
更新源的目錄是在 etc/apt/sources.list,先備份源
sudo cp sources.list sources.list.bakcup
然後在其前添加或將其內容替換為:
deb http://mirrors.aliyun.com/ubuntu/ bionic main restricted universe multiverse
deb-src http://mirrors.aliyun.com/ubuntu/ bionic main restricted universe multiverse

deb http://mirrors.aliyun.com/ubuntu/ bionic-security main restricted universe multiverse
deb-src http://mirrors.aliyun.com/ubuntu/ bionic-security main restricted universe multiverse

deb http://mirrors.aliyun.com/ubuntu/ bionic-updates main restricted universe multiverse
deb-src http://mirrors.aliyun.com/ubuntu/ bionic-updates main restricted universe multiverse

deb http://mirrors.aliyun.com/ubuntu/ bionic-proposed main restricted universe multiverse
deb-src http://mirrors.aliyun.com/ubuntu/ bionic-proposed main restricted universe multiverse

deb http://mirrors.aliyun.com/ubuntu/ bionic-backports main restricted universe multiverse
deb-src http://mirrors.aliyun.com/ubuntu/ bionic-backports main restricted universe multiverse
然後運行更新源
sudo apt-get update
二,OpenJDK12源碼獲取
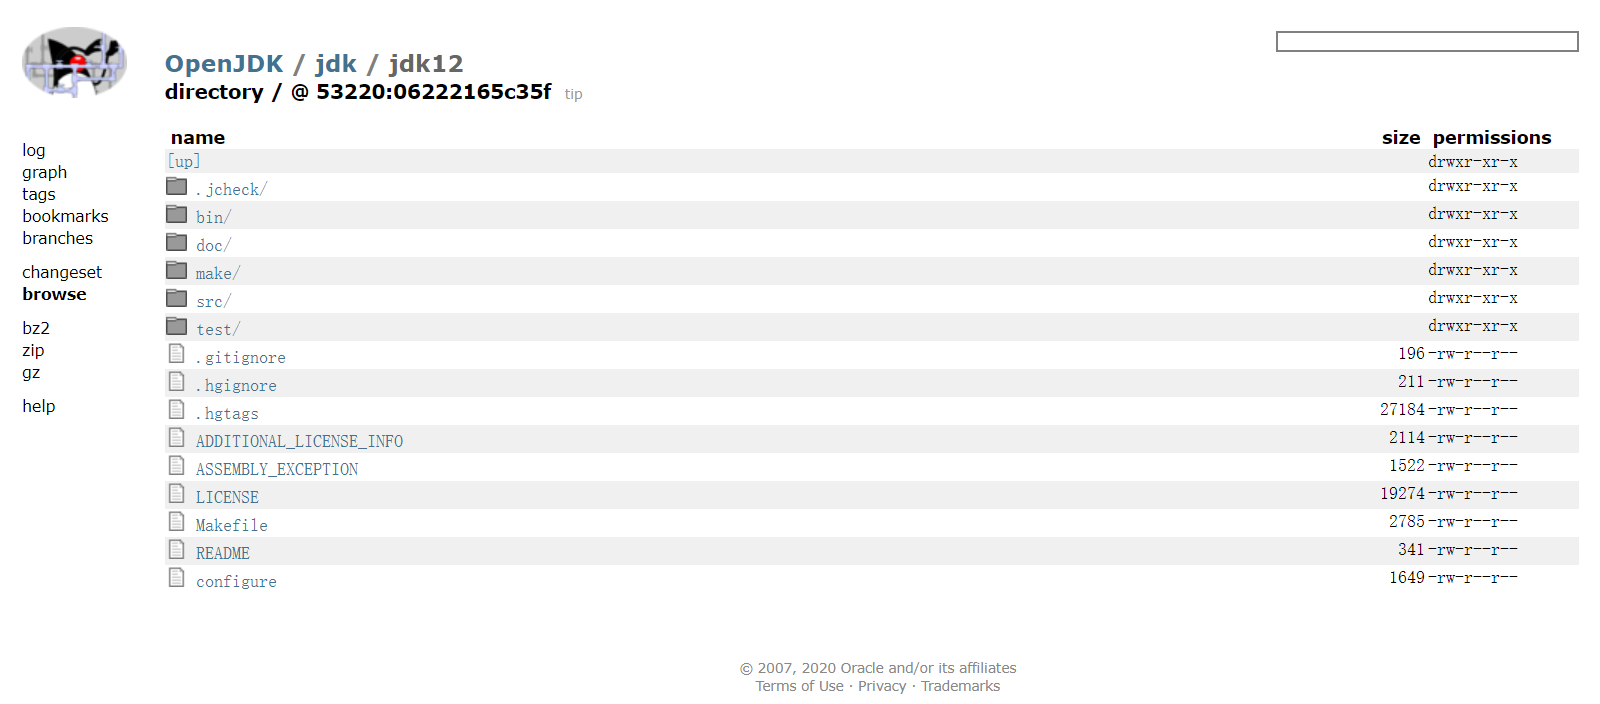
OpenJDK12源碼地址:http://hg.openjdk.java.net/jdk/jdk12/file/06222165c35f
百度網盤 提取碼:0h2s
三,構建編譯環境
下載源碼解壓後,在其doc目錄下有相關的說明文件,
安裝GCC命令
sudo apt-get install build-essential
第三方依賴庫
| 工具 | 庫名稱 | 安裝命令 |
| FreeType | The Free Type Project | sudo apt-get install libfreetype6-dev |
| CUPS | Common UNIX Printing System | sudo apt-get install libcups2-dev |
| X11 | X Window System | sudo apt-get install libx11-dev libxext-dev libxrender-dev libxrandr-dev libxtst-dev libxt-dev |
| ALSA | Advanced Linux Sound Architecture | sudo apt-get install libasound2-dev |
| libffi | Portable Foreign Function Interface Library | sudo apt-get install libffi-dev |
| Autoconf | Extensible Package of M4 Macros | sudo apt-get install autoconf |
安裝OpenJDK11
sudo apt-get install openjdk-11-jdk
安裝zip
sudo apt-get install zip
如沒安裝zip在檢查編譯時可能會報如下錯誤
configure: error: Could not find required tool for ZIPEXE
configure exiting with result code 1
四,進行編譯
編譯時有很多參數可以供使用,如設置編譯一個FastDebug版的,只有Server模式的HotSpot的虛擬機
bash configure --enable-debug --with-jvm-variants=server
如果環境已經構建好會出現如下類似內容:
====================================================
A new configuration has been successfully created in
/home/flytree/jdk12/build/linux-x86_64-server-fastdebug
using configure arguments '--enable-debug --with-jvm-variants=server'.

Configuration summary:
* Debug level:    fastdebug
* HS debug level: fastdebug
* JVM variants:   server
* JVM features:   server: 'aot cds cmsgc compiler1 compiler2 epsilongc g1gc graal jfr jni-check jvmci jvmti management nmt parallelgc serialgc services shenandoahgc vm-structs zgc'
* OpenJDK target: OS: linux, CPU architecture: x86, address length: 64
* Version string: 12-internal+0-adhoc.flytree.jdk12 (12-internal)

Tools summary:
* Boot JDK:       openjdk version "11.0.6" 2020-01-14 OpenJDK Runtime Environment (build 11.0.6+10-post-Ubuntu-1ubuntu118.04.1) OpenJDK 64-Bit Server VM (build 11.0.6+10-post-Ubuntu-1ubuntu118.04.1, mixed mode, sharing)  (at /usr/lib/jvm/java-11-openjdk-amd64)
* Toolchain:      gcc (GNU Compiler Collection)
* C Compiler:     Version 7.5.0 (at /usr/bin/gcc)
* C++ Compiler:   Version 7.5.0 (at /usr/bin/g++)

Build performance summary:
* Cores to use:   4
* Memory limit:   12154 MB
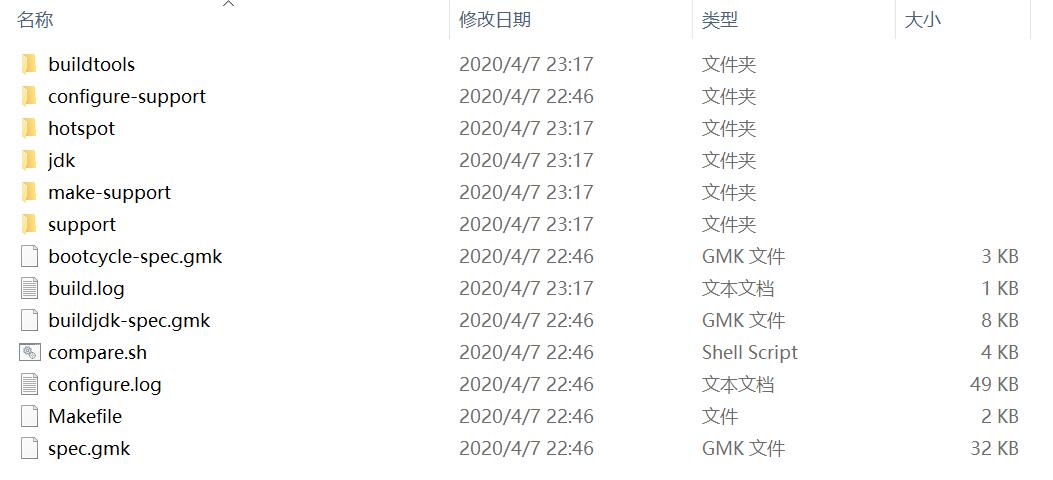
並會產生已下目錄

然後執行以下命令,進行編譯
make images
編譯後得到的JDK

文檔中參數說明:
Configure Arguments for Tailoring the Build
--enable-debug- Set the debug level tofastdebug(this is a shorthand for--with-debug-level=fastdebug)--with-debug-level=<level>- Set the debug level, which can berelease,fastdebug,slowdebugoroptimized. Default isrelease.optimizedis variant ofreleasewith additional Hotspot debug code.--with-native-debug-symbols=<method>- Specify if and how native debug symbols should be built. Available methods arenone,internal,external,zipped. Default behavior depends on platform. See Native Debug Symbols for more details.--with-version-string=<string>- Specify the version string this build will be identified with.--with-version-<part>=<value>- A group of options, where<part>can be any ofpre,opt,build,major,minor,securityorpatch. Use these options to modify just the corresponding part of the version string from the default, or the value provided by--with-version-string.--with-jvm-variants=<variant>[,<variant>...]- Build the specified variant (or variants) of Hotspot. Valid variants are:server,client,minimal,core,zero,custom. Note that not all variants are possible to combine in a single build.--with-jvm-features=<feature>[,<feature>...]- Use the specified JVM features when building Hotspot. The list of features will be enabled on top of the default list. For thecustomJVM variant, this default list is empty. A complete list of available JVM features can be found usingbash configure --help.--with-target-bits=<bits>- Create a target binary suitable for running on a<bits>platform. Use this to create 32-bit output on a 64-bit build platform, instead of doing a full cross-compile. (This is known as a reduced build.)On Linux, BSD and AIX, it is possible to override where Java by default searches for runtime/JNI libraries. This can be useful in situations where there is a special shared directory for system JNI libraries. This setting can in turn be overriden at runtime by setting the
java.library.pathproperty.
--with-jni-libpath=<path>- Use the specified path as a default when searching for runtime libraries.Configure Arguments for Native Compilation
--with-devkit=<path>- Use this devkit for compilers, tools and resources--with-sysroot=<path>- Use this directory as sysroot--with-extra-path=<path>[;<path>]- Prepend these directories to the default path when searching for all kinds of binaries--with-toolchain-path=<path>[;<path>]- Prepend these directories when searching for toolchain binaries (compilers etc)--with-extra-cflags=<flags>- Append these flags when compiling JDK C files--with-extra-cxxflags=<flags>- Append these flags when compiling JDK C++ files--with-extra-ldflags=<flags>- Append these flags when linking JDK librariesConfigure Arguments for External Dependencies
--with-boot-jdk=<path>- Set the path to the Boot JDK--with-freetype=<path>- Set the path to FreeType--with-cups=<path>- Set the path to CUPS--with-x=<path>- Set the path to X11--with-alsa=<path>- Set the path to ALSA--with-libffi=<path>- Set the path to libffi--with-jtreg=<path>- Set the path to JTReg. See Running TestsCertain third-party libraries used by the JDK (libjpeg, giflib, libpng, lcms and zlib) are included in the JDK repository. The default behavior of the JDK build is to use this version of these libraries, but they might be replaced by an external version. To do so, specify
systemas the<source>option in these arguments. (The default isbundled).
--with-libjpeg=<source>- Use the specified source for libjpeg--with-giflib=<source>- Use the specified source for giflib--with-libpng=<source>- Use the specified source for libpng--with-lcms=<source>- Use the specified source for lcms--with-zlib=<source>- Use the specified source for zlib參考:《深入理解Java虛擬機:JVM高級特性與最佳實踐》(第三版)
五,使用編譯後的JDK
將編譯後的JDK目錄,設置為JAVA_HOME,修改文件
sudo vim ~/.bashrc
在其最後添加
export JAVA_HOME=/home/flytree/jdk12/build/linux-x86_64-server-fastdebug/jdk
export JRE_HOME=${JAVA_HOME}/jre
export CLASSPATH=.:${JAVA_HOME}/lib:${JRE_HOME}/lib
export PATH=${JAVA_HOME}/bin:$PATH
執行‘source ~/.bashrc’使得保存生效,執行'java -version'看時否有效
$ java -version
openjdk version "12-internal" 2019-03-19
OpenJDK Runtime Environment (fastdebug build 12-internal+0-adhoc.flytree.jdk12)
OpenJDK 64-Bit Server VM (fastdebug build 12-internal+0-adhoc.flytree.jdk12, mixed mode)
編寫測試類
vim Hello.java
public class Hello {
    public static void main(String[] args) {
        System.out.println("Hello flytree");
    }
}
運行測試類
# javac Hello.java
# java Hello
Hello flytree


