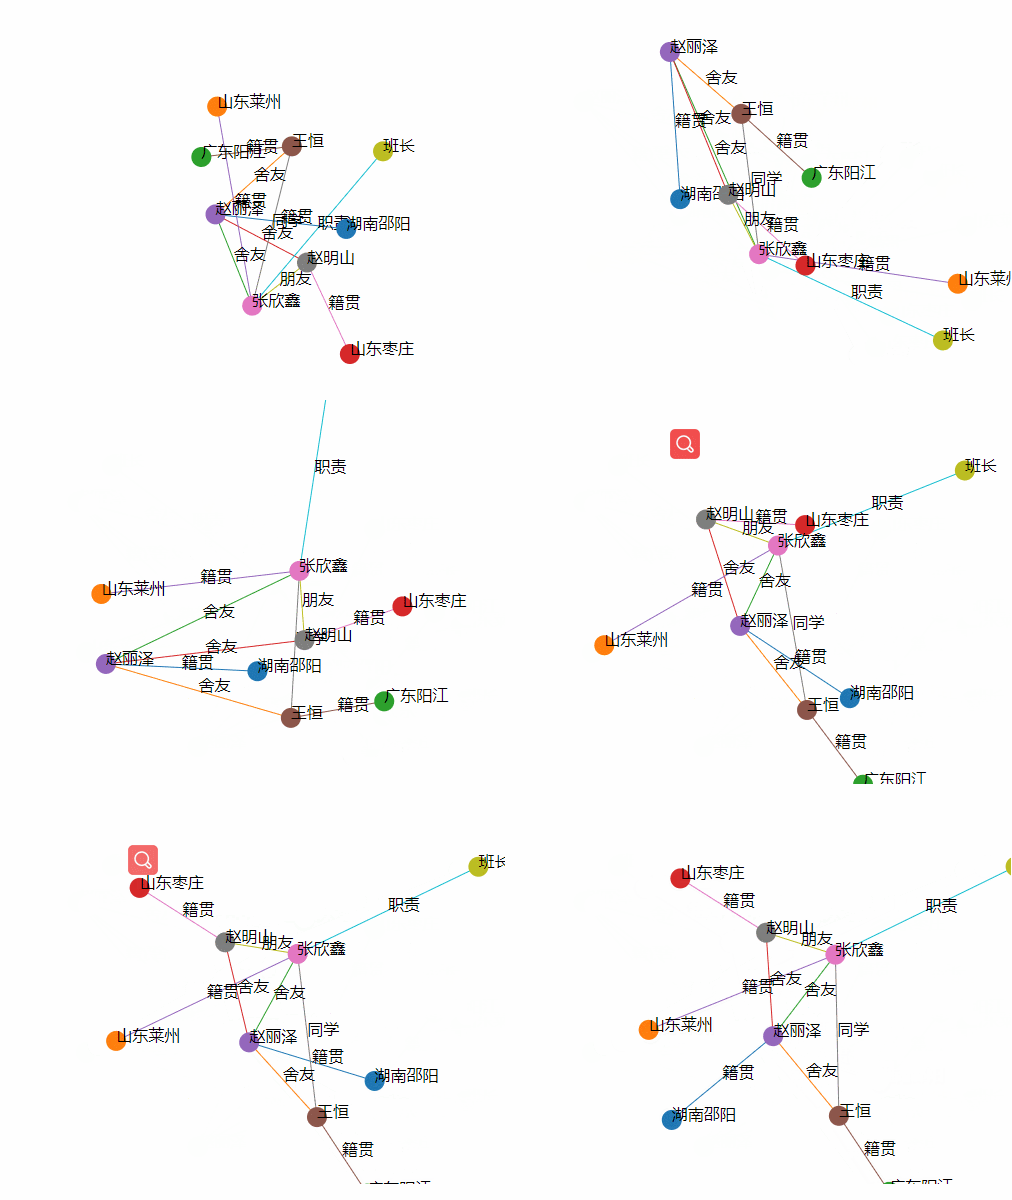
力導向圖的概念這裡就不細說了,力導向圖適合繪製關係型的信息; 下麵先來說幾個關於力導向圖的知識點: 1、d3.forceSimulation([nodes]) 創建一個新的力導向圖; 2、simulation.force(name[, force]) 如果指定了 force 則表示添加指定 name ...
力導向圖的概念這裡就不細說了,力導向圖適合繪製關係型的信息;
下麵先來說幾個關於力導向圖的知識點:
創建一個新的力導向圖;
2、simulation.force(name[, force])
如果指定了 force 則表示添加指定 name 的 force(力學模型)並返回模擬,如下:
var simulation = d3.forceSimulation(nodes).force("charge", d3.forceManyBody());
如果要移除對應的 name 的模擬,可以為其指定 null,如下:
simulation.force("charge", null);
如果指定了 nodes 則將模擬的節點設置為指定的對象數組,並根據需要創建它們的位置和速度,然後 重新初始化並且綁定 force 返回當前模擬。如果沒有指定 nodes 則返回當前模擬的節點數組。
根據指定的 links 以及預設參數創建一個彈簧力模型。如果沒有指定 links 則預設為空數組。
如果指定了 links 則將其設置為該彈簧力模型的關聯邊數組,並重新計算每個邊的 distance 和 strength 參數,返回當前力模型。如果沒有指定 links 則返回當前力模型的邊數組,預設為空。
簡單來講就是讓力導向圖隨時更新並且動起來的。
創建一個新的拖拽行為並返回自身。drag 既是一個對象,也是一個函數,通常通過 selection.call 被應用在選中的元素上。
d3.selectAll(".node").call(d3.drag().on("start", started));
有了這些新知識 我麽開始繪圖
代碼:
<!DOCTYPE html>
<html lang="en">
<head>
    <meta charset="UTF-8">
    <title>force</title>
    <script src="https://d3js.org/d3.v5.min.js"></script>
</head>
<body>

<svg height="400" width="500"></svg>

</body>

<script>

    //數據
    var nodes = [//節點集
        {name:"湖南邵陽"},
        {name:"山東萊州"},
        {name:"廣東陽江"},
        {name:"山東棗莊"},
        {name:"趙麗澤"},
        {name:"王恆"},
        {name:"張欣鑫"},
        {name:"趙明山"},
        {name:"班長"}
    ];
    var edges = [//邊集
        {source:0,target:4,relation:"籍貫",value:1.3},
        {source:4,target:5,relation:"舍友",value:1},
        {source:4,target:6,relation:"舍友",value:1},
        {source:4,target:7,relation:"舍友",value:1},
        {source:1,target:6,relation:"籍貫",value:2},
        {source:2,target:5,relation:"籍貫",value:0.9},
        {source:3,target:7,relation:"籍貫",value:1},
        {source:5,target:6,relation:"同學",value:1.6},
        {source:6,target:7,relation:"朋友",value:0.7},
        {source:6,target:8,relation:"職責",value:2}
    ];

    var margin = 30;//邊距
    var svg = d3.select('svg');
    var width = svg.attr('width');
    var height = svg.attr('height');

    //創建一個分組 並設置偏移
    var g = svg.append('g').attr('transform','translate('+ margin +','+ margin +')');


    //新建一個顏色比例尺
    var scaleColor = d3.scaleOrdinal()
        .domain(d3.range(nodes.length))
        .range(d3.schemeCategory10);

    //新建一個力導向圖
    var forceSimulation = d3.forceSimulation()
        .force("link",d3.forceLink())
        .force("charge",d3.forceManyBody())
        .force("center",d3.forceCenter());


    //生成節點數據
    forceSimulation.nodes(nodes)
        .on('tick',linksTick);//這個函數下麵會講解


    //生成邊數據
    forceSimulation.force('link')
        .links(edges)
        .distance(function (d,i) {
            return d.value*100;//設置邊長
        });

    //設置圖形 中心點
    forceSimulation.force('center')
        .x(width/2)//設置x坐標
        .y(height/2)//設置y坐標

    //再來看下頂點數據 和 邊數據
    console.log(nodes);
    console.log(edges);


    //繪製邊  這裡註意一下繪製順序  在d3中  各元素是有層級關係的,先繪製的在下麵
    var links = g.append('g')
        .selectAll('line')
        .data(edges)
        .enter()
        .append('line')
        .attr('stroke',function (d,i) {
            return scaleColor(i);//設置邊線顏色
        })
        .attr('storke-width','1');//設置邊線寬度


    //繪製邊上的文字
    var linksText = g.append('g')
        .selectAll('text')
        .data(edges)
        .enter()
        .append('text')
        .text(function (d,i) {
            return d.relation;
        });


    //創建節點分組
    var gs = g.selectAll('.circle')
        .data(nodes)
        .enter()
        .append('g')
        .attr('transform',function (d,i) {
            return 'translate('+ d.x +','+ d.y +')'
        })
        .call(
            d3.drag()//相當於移動端的拖拽手勢  分以下三個階段
                .on('start',start)
                .on('drag',drag)
                .on('end',end)
        );

    //繪製節點
    gs.append('circle')
        .attr('r',10)
        .attr('fill',function (d,i) {
            return scaleColor(i);
        });

    //繪製文字
    gs.append('text')
        .text(function (d,i) {
            return d.name;
        });


    function linksTick(){
        links
            .attr("x1",function(d){return d.source.x;})
            .attr("y1",function(d){return d.source.y;})
            .attr("x2",function(d){return d.target.x;})
            .attr("y2",function(d){return d.target.y;});

        linksText
            .attr("x",function(d){
                return (d.source.x+d.target.x)/2;
            })
            .attr("y",function(d){
                return (d.source.y+d.target.y)/2;
            });

        gs && gs.attr('transform',function (d,i) {
            return 'translate('+ d.x +','+ d.y +')';
        })

    }


    function start(d){
        if(!d3.event.active){//event.active 屬性對判斷併發的拖拽手勢序列中的 start 事件和 end 事件: 在拖拽手勢開始時為0,在拖拽結束最後一個手勢事件時為0
            //這裡就是drag的過程中
            forceSimulation.alphaTarget(0.8).restart();//設置衰減繫數,對節點位置移動過程的模擬,數值越高移動越快,數值範圍[0,1]
        }
        d.fx = d.x;
        d.fy = d.y;
    }

    function drag(d){
        d.fx = d3.event.x;
        d.fy = d3.event.y;
    }

    function end(d) {
        if (!d3.event.active) {
            forceSimulation.alphaTarget(0);
        }
        d.fx = null;
        d.fy = null;
    }


</script>

</html>
效果:


