vue項目的開發 我們已經通過命令行創建了一個vue項目,並且打開了這個項目。下麵是這個文件的src文件夾,這個文件夾放了整個項目的核心代碼。 一、vue文件的用處簡介。 1.assets文件夾,用來存放圖片,文件等資源。直接這樣就可以訪問到 src="./assets/logo.png",最好的訪 ...
vue項目的開發
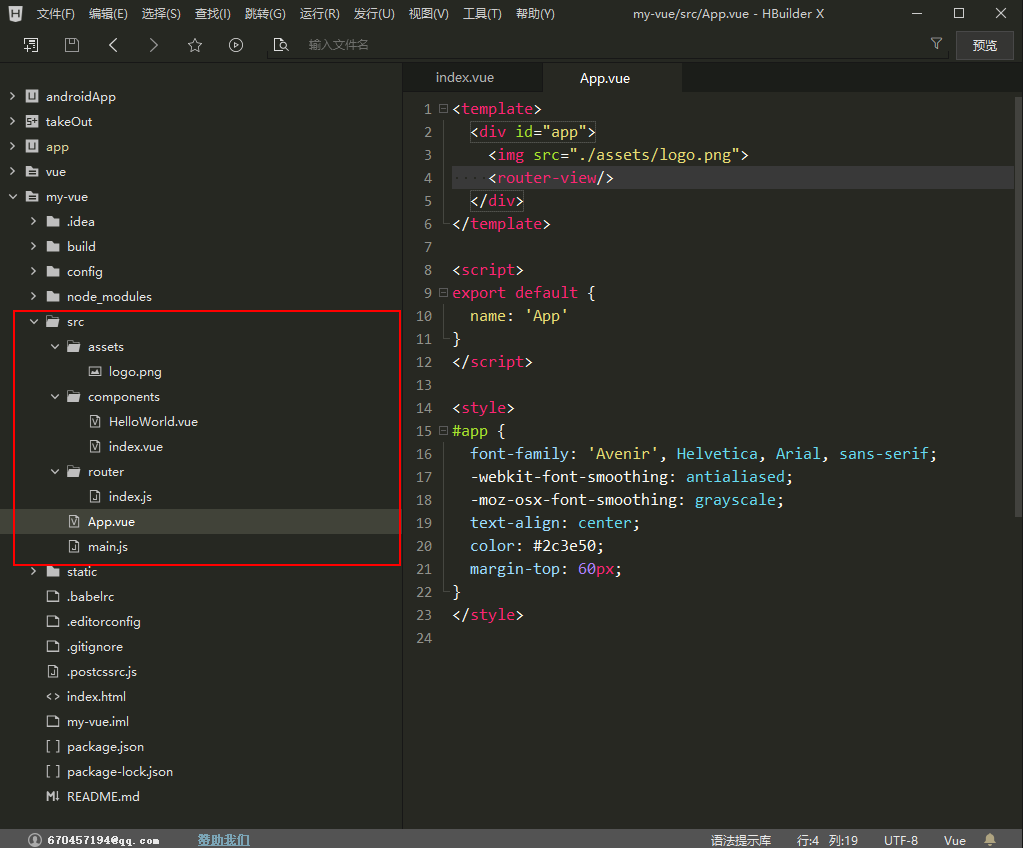
我們已經通過命令行創建了一個vue項目,並且打開了這個項目。下麵是這個文件的src文件夾,這個文件夾放了整個項目的核心代碼。
一、vue文件的用處簡介。
1.assets文件夾,用來存放圖片,文件等資源。直接這樣就可以訪問到 src="./assets/logo.png",最好的訪問方式 src="@/assets/logo.png" , @可以自己設置指向的文件夾,
2.componets文件夾,主要是用來存放我們的vue文件,之要路由能找到,怎麼寫都行。
3.router文件夾,主要是用來存放路由,vue的頁面入口至於一個就是App.vue, 其他所有的頁面都相當於App.vue的組件,路由的作用就是控制這些組建的替換,從直觀上感覺就是頁面的跳轉,我們也可以這樣理解。下麵會詳細介紹。
4.App.vue,這個vue是整個項目的入口,在裡面寫的樣式是全局的樣式,路由渲染的組件會渲染到 router-view裡面。預設的 <img src=".assets.logo.png">要去掉,要不然每個頁面都有。
5.main.js主要用來存放組件,引用組件的配置文件,關於組件後面會詳細的介紹。
6.處了src文件夾,config中index.js還配置了路徑埠值等。
二、新建vue頁面
1.新建頁面
我們在components下麵新建了一個index.vue頁面。點擊事件 @click="countNum"。 頁面賦值{{}} 。
<template>
  <div>
      這是一個首頁<br>
      點了幾次按鈕{{count}}<br>
      <button @click="countNum">點我</button>
  </div>
</template>
<script>
    export default {
        data() {
            return {
                count: 0
            }
        },
        created(){ //這裡的js執行是在頁面還沒有載入時候

        },
        mounted(){ //這裡的js執行是在頁面載入完成時候

        },
        methods: {
            countNum(){  //這裡是執行事件的方法
              this.count  += 1;
            }
        }
    }
</script>
<style scoped>
/* scoped 屬性是讓css只在這個頁面執行 */

</style>
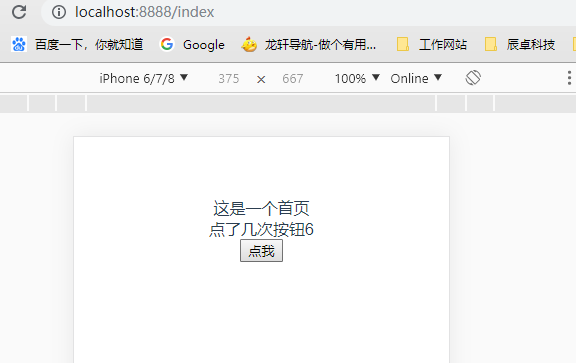
如下圖頁面新建完成,我們去寫路由跳轉。
2.路由跳轉
vueRouter 新添加的頁面在路由里註冊才能跳轉。我們找到註冊的時候path 就是我們跳轉的地址。
import Vue from 'vue'
import Router from 'vue-router'
import HelloWorld from '@/components/HelloWorld'

import index from '@/components/index'  //新添加的頁面在路由里註冊才能跳轉
Vue.use(Router)

export default new Router({
  routes: [
    {
      path: '/',             //這是頁面首頁
      name: 'HelloWorld',
      component: HelloWorld
    },
    {
      path: '/index',        //index頁面就是 我們新建的頁面
      name: 'index',
      component: index
    }
  ],
  mode: "history"  // 預設mode:hash 訪問鏈接http://localhost:8000/#/   我們設置為"history" 訪問鏈接http://localhost:8000/
})
這樣我們就能訪問到這個頁面。路由這一塊應該沒有什麼問題。
三、使用組件開發
我們會通過組件寫一個頁面的首頁來介紹組件。
1.組件的安裝和引入。
常用的組件安裝,安裝組件在命令行打開,複製指令回車,就可以安裝。

移動端常用組件:
Vant Weapp 安裝指令 :
npm i vant -S //vue安裝
npm i vant-weapp -S --production   //微信小程式安裝

//在 main.js里全局引入

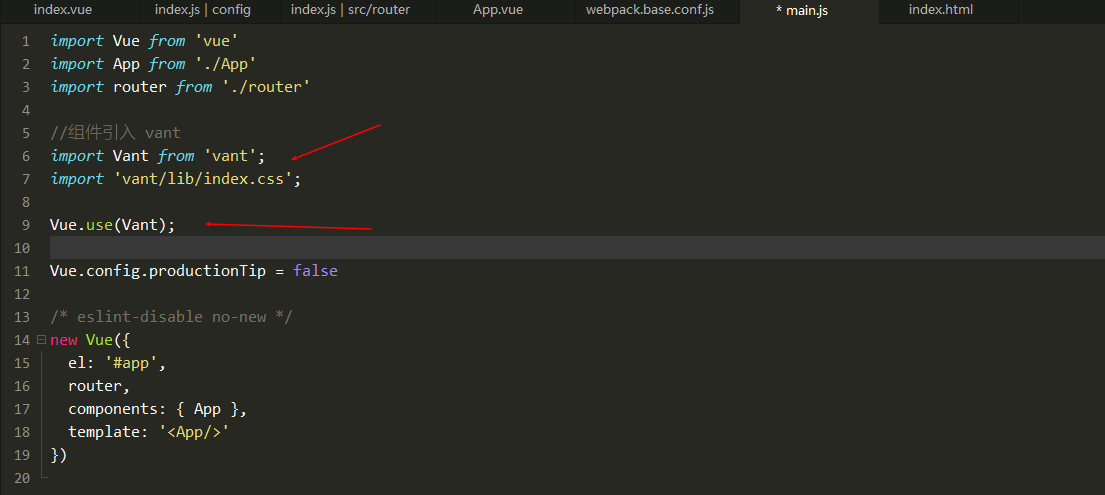
import Vant from 'vant';

import 'vant/lib/index.css';

Vue.use(Vant);
Vux 安裝指令 :
npm install vux --save
//在 main.js里全局引入
import Vue from 'vue'

import { Actionsheet } from 'vux'

Vue.component('actionsheet', Actionsheet)
pc端常用組件:
element ui 安裝指令 :
npm i element-ui -S
vue-baidu-map 安裝指令 :
$ npm install vue-baidu-map --save
我們舉個例子,就非常容易理解。
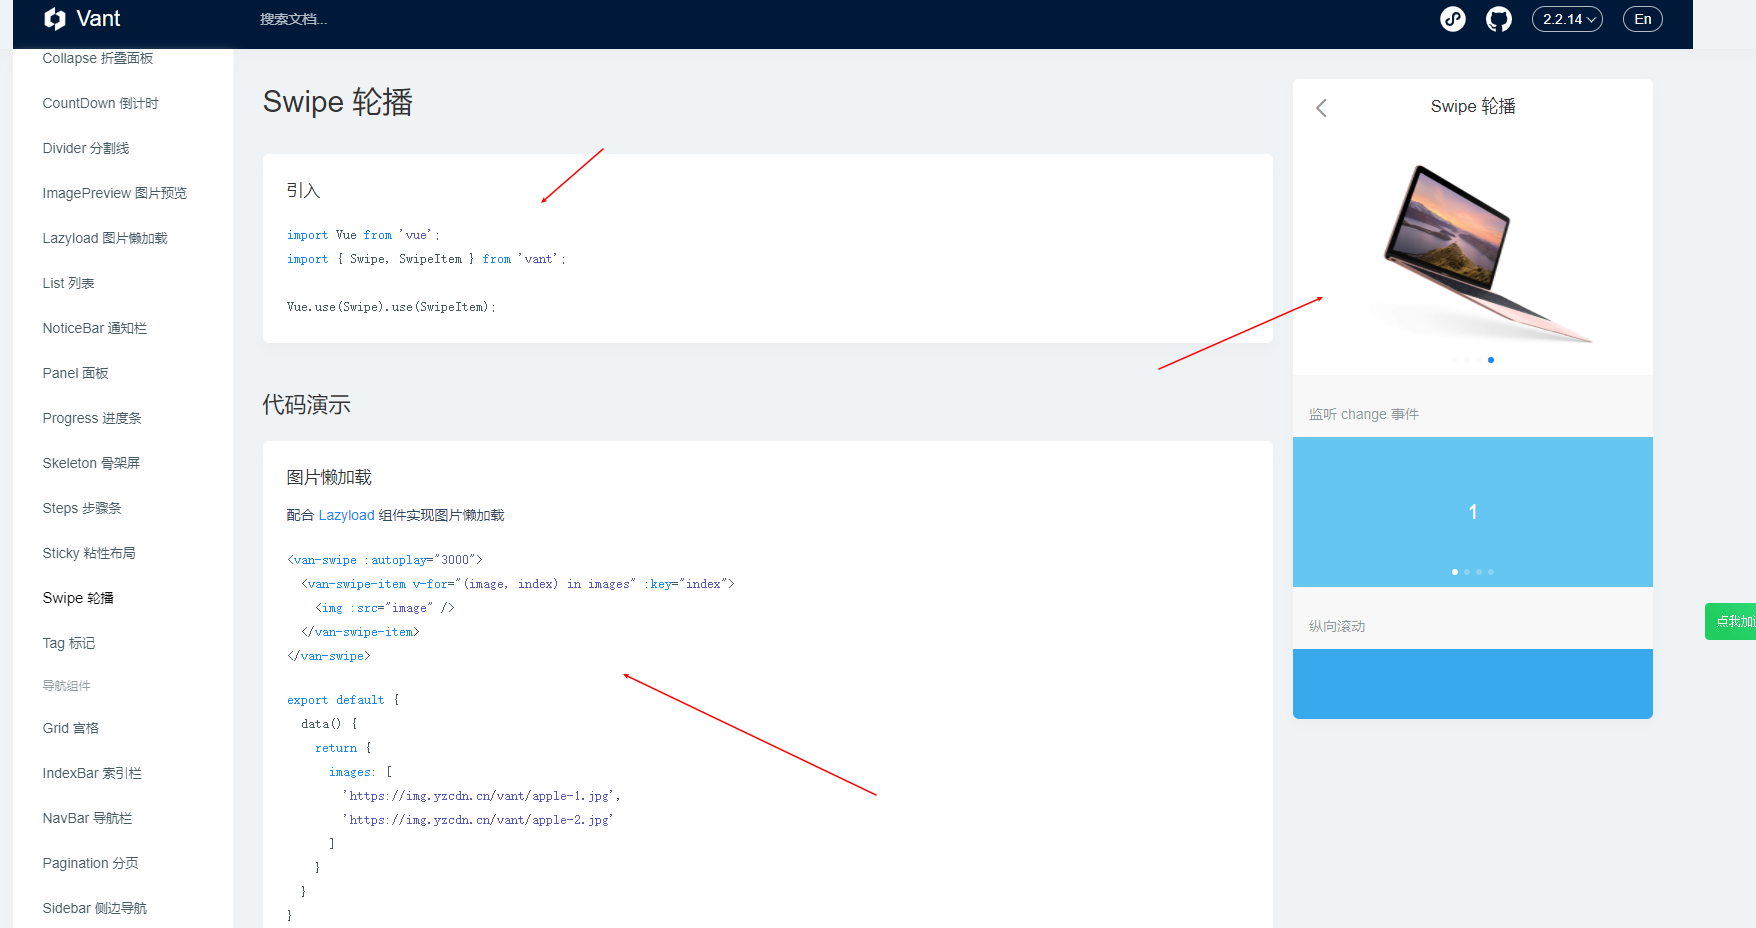
這是vant 官方的輪播組件使用教程。main.js引入。頁面代碼演示,右側結果展示。
我們先在main.js引入。我們是全局引入。如果對vue熟悉後,建議vue組件模塊引入。
然後再在index.vue複製組件代碼,
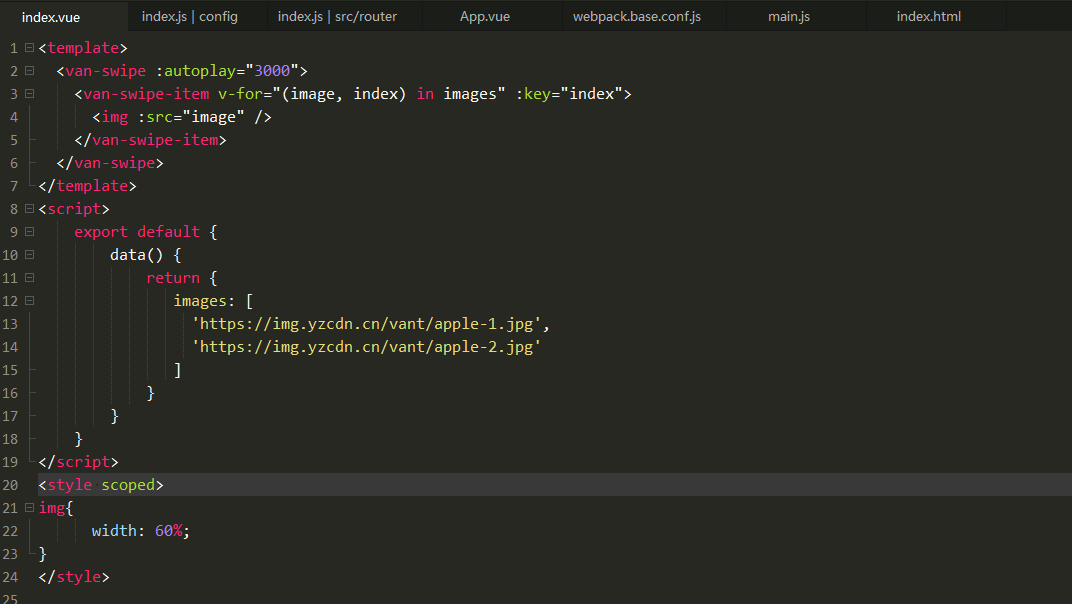
十幾行代碼就引用成功了一個輪播圖。其他的可以去官網去看使用方法,https://youzan.github.io/vant/?source=vuejsorg#/zh-CN/swipe

四、自定義組件開發
我們自己寫一個vue頁面,把這個頁面當組件。頁面使用組件並且傳遞參數。
我們新建一個導航欄頁面navigationBar.vue,這個頁面是每一個頁面的頭部,不需要單獨顯示,所有不需要路由註冊。
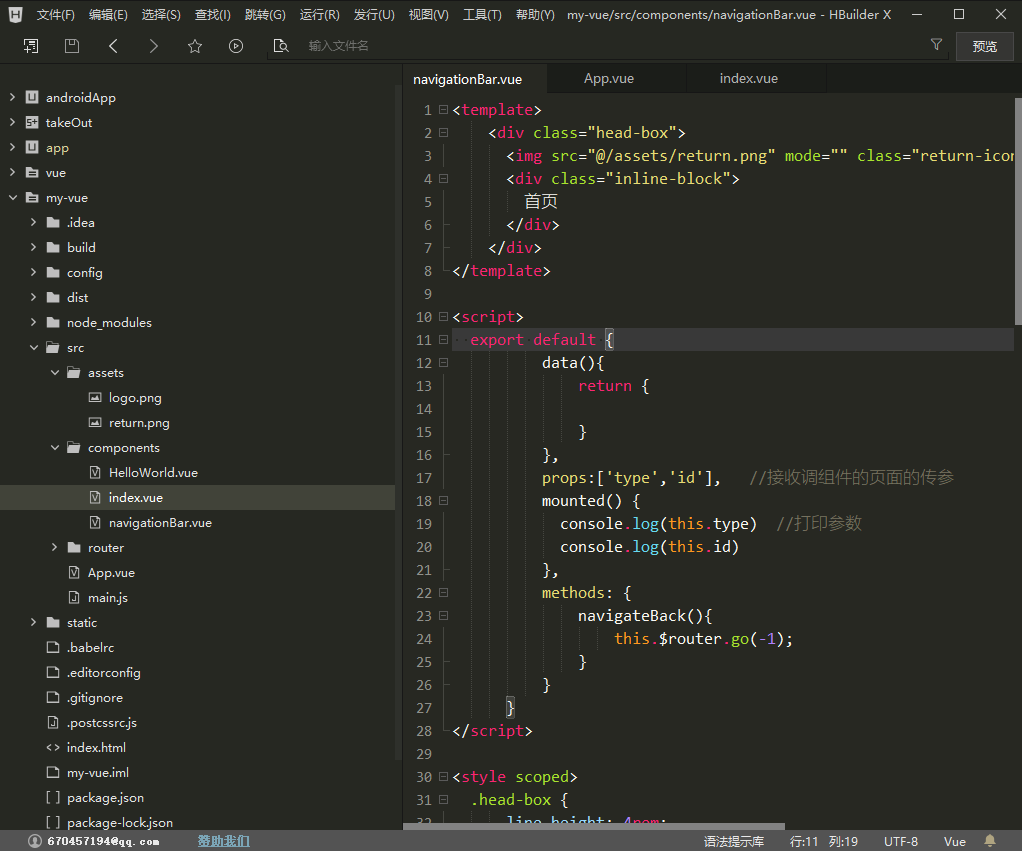
代碼如下:
<template>
    <div class="head-box">
      <img src="@/assets/return.png" mode="" class="return-icon" v-on:click="navigateBack"/>
      <div class="inline-block">
        首頁
      </div>
    </div>
</template>

<script>
  export default {
          data(){
              return {

              }
          },
          props:['type','id'],   //接收調組件的頁面的傳參
          mounted() {
            console.log(this.type)  //列印參數
            console.log(this.id)
          },
          methods: {
              navigateBack(){
                  this.$router.go(-1);
              }
          }
      }
</script>

<style scoped>
  .head-box {
      line-height: 4rem;
      font-size: 1.1rem;
      text-align: center;
      /* padding-top: 1.6rem; */
      background: linear-gradient(to right, rgba(255, 139, 26, 1), rgba(255, 104, 32, 1));
      color: #FFFFFF;
      position: fixed;
      z-index: 2;
      width: 100%;
      top: 0;
    }

    .head-img {
      width: 1.8rem;
      height: 1.8rem;
      position: relative;
      float: left;
      top: 1.25rem;
      margin: 0 0.9rem;
    }

    .fr {
      float: right;
    }

    .inline-block {
      display: inline-block;
    }

    .return-icon {
      position: absolute;
      left: 0.625rem;
      height: 1.375rem;
      width: 1.375rem;
      margin-top: 1.25rem;
    }
</style>
組件頁面建好後我們在index.vue使用這個組件並傳遞參數type和id。index.vue中的代碼:
<template>
  <div>
    <!-- 組件的調用傳參 -->
    <navigationBar type="1" :id="id"></navigationBar>
    <van-swipe :autoplay="3000">
      <van-swipe-item v-for="(image, index) in images" :key="index">
        <img :src="image" />
      </van-swipe-item>
    </van-swipe>
  </div>
  </div>
</template>
<script>
  //找到這個組件
  import navigationBar from '../components/navigationBar.vue'

  export default {
    // 註冊這個組件
    components: {
      navigationBar
    },
    data() {
      return {
        id:'123456789',
        images: [
          'https://img.yzcdn.cn/vant/apple-1.jpg',
          'https://img.yzcdn.cn/vant/apple-2.jpg'
        ]
      }
    }
  }
</script>
<style scoped>
  img {
    width: 60%;
  }

  .van-swipe {
    text-align: center;
    margin-top: 5rem;
  }
</style>
在頁面里運行一下。我們看到了組件navigationBar.vue,和控制台列印的index.vue傳的參數。
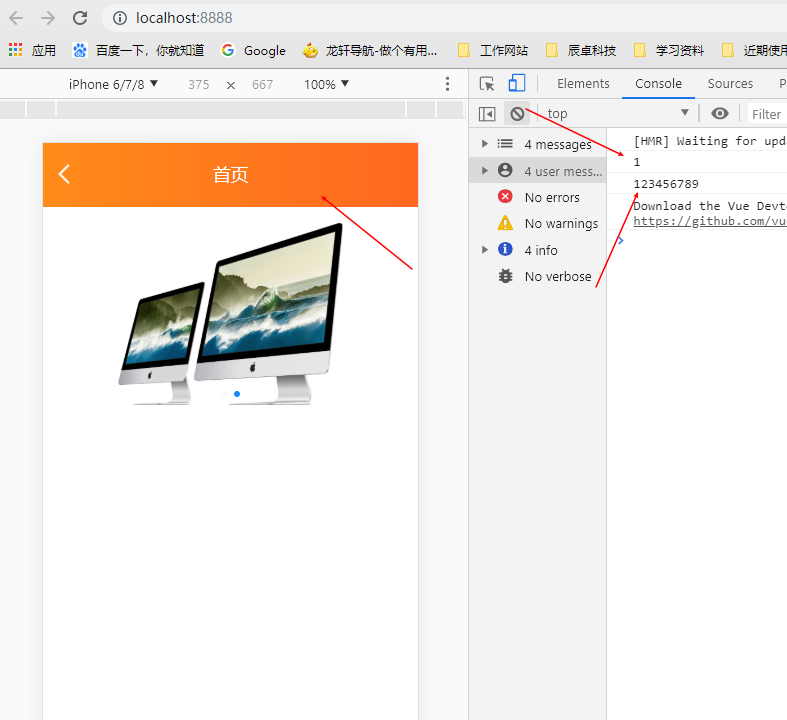
組件開發就算入門了。如果需要瞭解更多只能自己動手,認認真真去自己做一個項目。
五、Vuex的使用
Vuex 是一個專為 Vue.js 應用程式開發的狀態管理模式。它採用集中式存儲管理應用的所有組件的狀態,並以相應的規則保證狀態以一種可預測的方式發生變化。主要作用是在當前頁面給store的數據賦值,其他頁面不刷新store的值就能自動變化。如果用不到不要引入。但是,如果您需要構建一個中大型單頁應用,您很可能會考慮如何更好地在組件外部管理狀態,Vuex 將會成為自然而然的選擇。
簡單的說如果你需要在頁面的組件里對一個數據賦值,並且需要在這個頁面不刷新就能顯示這個數據,緩存做不到。我們就可以用vuex來實現。vuex組件的使用還是比較麻煩的,一步步來要有耐心。
1.安裝組件
命令行安裝組件 vuex 官網。
npm install vuex --save

已經安裝成功。
2.新建store文件
vuex和router是一個級別的模塊。我們在src下新建一個文件夾store,store文件加下加index.js文件。
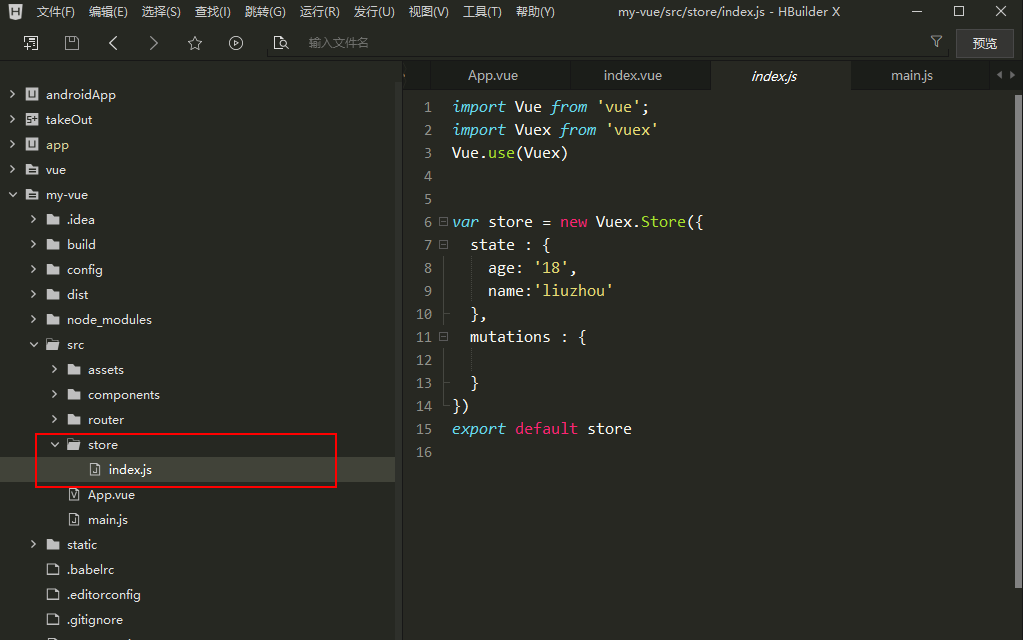
index里代碼:
import Vue from 'vue';
import Vuex from 'vuex'
Vue.use(Vuex)


var store = new Vuex.Store({
  state : {
    age: '18',
    name:'liuzhou'
  },
  mutations : {

  }
})
export default store
store下麵有兩個對象state和mutations。state下又有兩個數據:{ age: '18', name:'liuzhou' } 。我們成功會訪問它。
3.在main.js里註冊。
代碼如下:
import Vue from 'vue'
import App from './App'
import router from './router'

//組件引入 vant
import Vant from 'vant';
import 'vant/lib/index.css';

Vue.use(Vant);

Vue.config.productionTip = false

import store from './store'   //找到store
/* eslint-disable no-new */
new Vue({
  el: '#app',
  router,
  store,                     //引入store
  components: { App },
  template: '<App/>'
})
在main.js找到並引入store。這樣我們就完成了vuex的安裝。
4.在頁面的使用。
我們在index.vue里訪問一下:
this.$store.state.age

我們在初始化的時候修改變數值並都列印了,看一下結果。
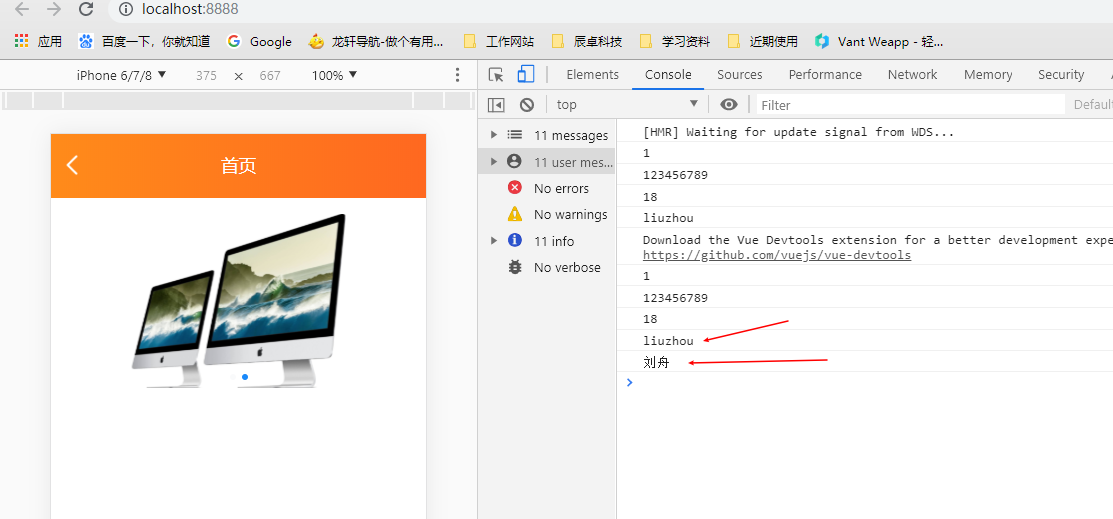
數據的操作都沒有問題。
做到這裡基本上開發一個vue項目都沒問題了,遇到的問題都可以在網上找組件或者自己寫組件就行了。
原文地址:https://www.cnblogs.com/liuzhou1/p/11906008.html
vue項目的創建文章 鏈接:https://www.cnblogs.com/liuzhou1/p/11905985.html


