上一章快速使用SqlSugar搭建了netcore api項目,我的第一個netcore2.2 api項目搭建(一) 這一章實現目標二:api使用Swagger,實現api文檔管理 效果圖:第一張收縮,第二張展開,共有2個控制器:values和Account;控制器有註釋,api有註釋,實體有註釋 ...
上一章快速使用SqlSugar搭建了netcore api項目,我的第一個netcore2.2 api項目搭建(一)
這一章實現目標二:api使用Swagger,實現api文檔管理
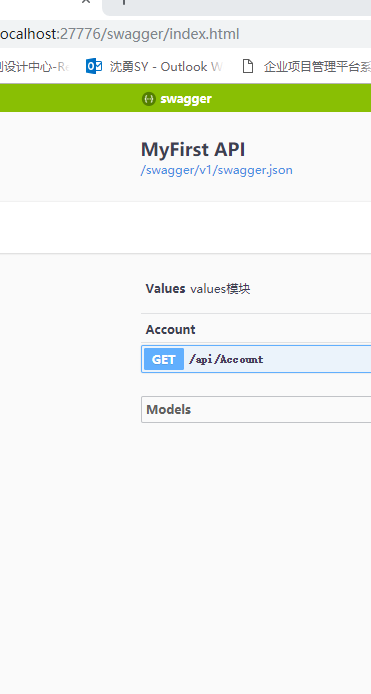
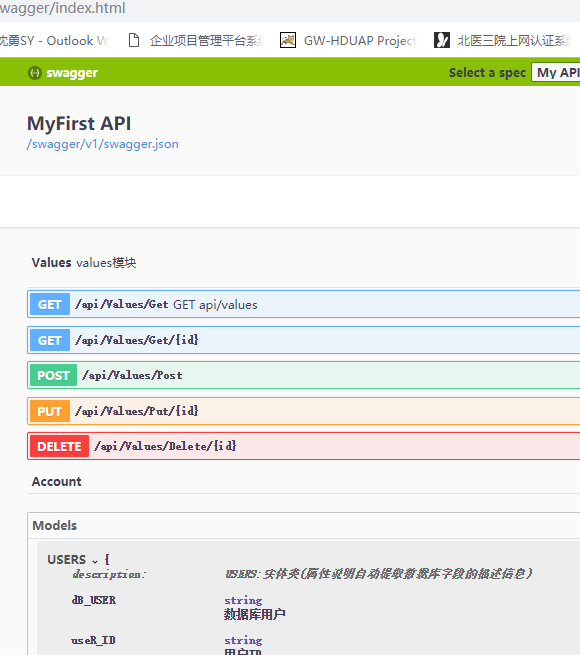
效果圖:第一張收縮,第二張展開,共有2個控制器:values和Account;控制器有註釋,api有註釋,實體有註釋
1.1添加swagger引用
nuget搜索:Swashbuckle.AspNetCore,安裝

1.2在startup中註冊swagger

public void ConfigureServices(IServiceCollection services)
        {
            services.AddMvc().SetCompatibilityVersion(CompatibilityVersion.Version_2_2);

            //添加api管理
            // Register the Swagger generator, defining 1 or more Swagger documents
            services.AddSwaggerGen(options =>
            {
                options.SwaggerDoc("v1", new Info
                {
                    //Version = "v1",
                    Title = "MyFirst API",//" API",
                    //Description = "",
                    //TermsOfService = "None",
                    //Contact = new Contact
                    //{
                    //    Name = "",
                    //    Email = string.Empty,
                    //    Url = ""
                    //},
                    //License = new License
                    //{
                    //    Name = "Use under LICX",
                    //    Url = ""
                    //}
                });

                // Set the comments path for the Swagger JSON and UI.
                var xmlFile = $"{Assembly.GetExecutingAssembly().GetName().Name}.xml";
                var xmlPath = Path.Combine(AppContext.BaseDirectory, xmlFile);
                options.IncludeXmlComments(xmlPath, true);
                xmlPath = Path.Combine(AppContext.BaseDirectory, "JH.OPEMR.Model.xml");
                options.IncludeXmlComments(xmlPath, true);
            });
        }
View Code
註意這段:

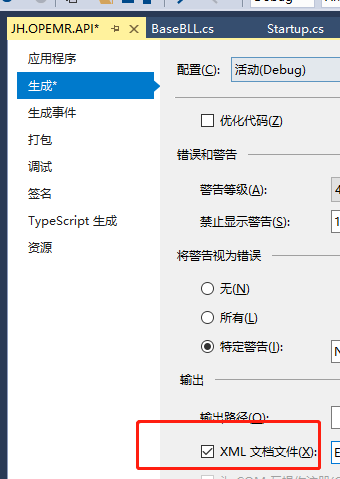
這段代碼是添加註釋,如果有多個文件註釋,只要逐個添加就好了,不建議將xml合併,並且這個需要項目生成相應xml

1.3在Configure中啟用swagger

public void Configure(IApplicationBuilder app, IHostingEnvironment env)
        {
            if (env.IsDevelopment())
            {
                app.UseDeveloperExceptionPage();
            }

            //啟用Swagger
            // Enable middleware to serve generated Swagger as a JSON endpoint.
            app.UseSwagger();
            // Enable middleware to serve swagger-ui (HTML, JS, CSS, etc.),
            // specifying the Swagger JSON endpoint.
            app.UseSwaggerUI(options =>
            {
                options.SwaggerEndpoint("/swagger/v1/swagger.json", "My API V1");

            });

            app.UseMvc();
        }
View Code
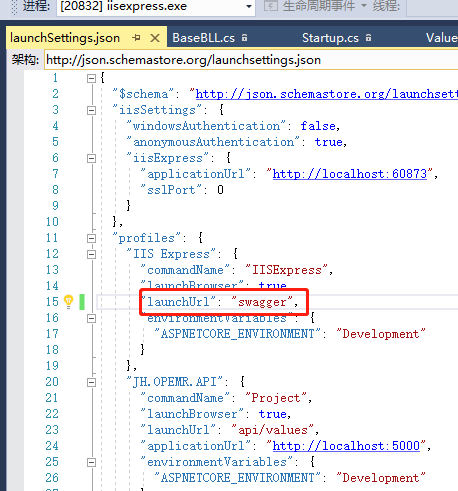
F5運行之前將啟動頁改成swagger
F5運行

ok,swagger添加完成。
but,我嘗試添加了一個GetUsers方法。。。
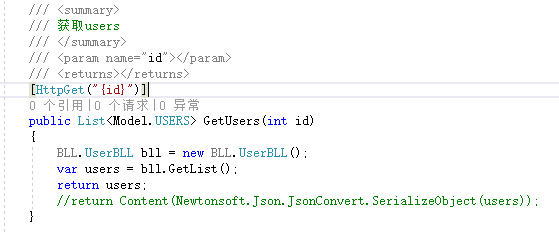

swagger失敗,該死api路由,很不好理解,還是改成這樣吧

F5,變成這樣,直觀多了。。。
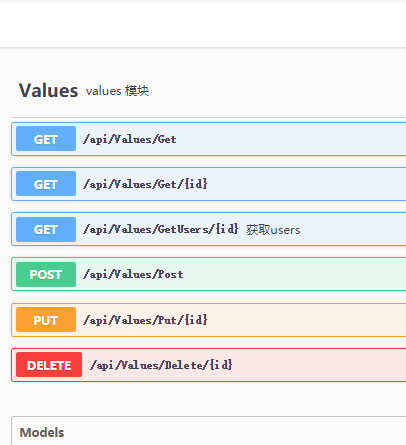
至此,swagger添加完畢


