
先把全部源碼上傳,只是一個Demo,希望大家指點一下不足之處,見本文底部。 1.設置界面 2.詳情頁面 好了,現在慢慢敘述裡面的一些方法。 3.實現拷貝的方法: (1) public static void LeftCopyRight(object left, object right) { var ...
先把全部源碼上傳,只是一個Demo,希望大家指點一下不足之處,見本文底部。
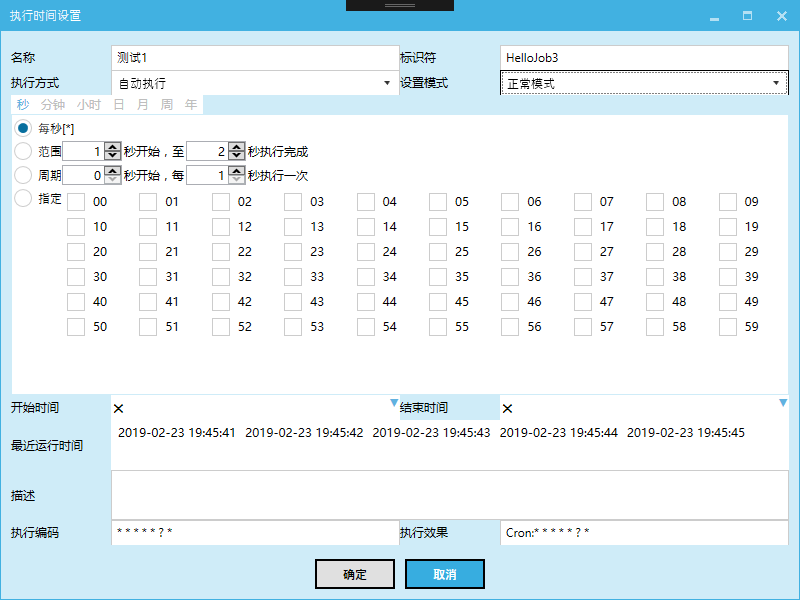
1.設置界面
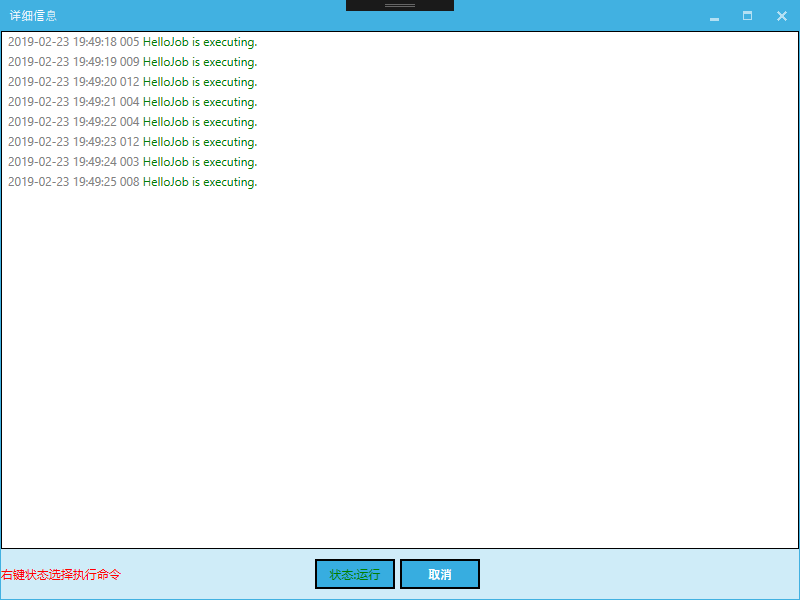
2.詳情頁面
好了,現在慢慢敘述裡面的一些方法。
3.實現拷貝的方法:
(1) public static void LeftCopyRight(object left, object right)
{
var Properties = left.GetType().GetProperties();
foreach (var Propertie in Properties)
{
//迴圈遍歷屬性
if (Propertie.CanRead && Propertie.CanWrite)
{
//進行屬性拷貝
Propertie.SetValue(left, Propertie.GetValue(right, null), null);
}
}
}
CopyHelper.LeftCopyRight(run, (this.DataContext as SetWindowViewModel).Run);
(2)用json
this.Run = JsonConvert.DeserializeObject<BaseRunner>(JsonConvert.SerializeObject(run));
(3)書本上標準的序列化方法,這裡不做介紹。
4.讀取保存在本地json格式的配置文件
try
{
if (!File.Exists(JsonPath)) // 判斷是否已有相同文件
{
FileStream fs = new FileStream(JsonPath, FileMode.Create, FileAccess.ReadWrite);
fs.Close();
}
localRuns = JsonConvert.DeserializeObject<List<BaseRunner>>(File.ReadAllText(JsonPath));
}
catch (Exception ex)
{
log.Fatal(ex);
}
保存配置文件
try
{
File.WriteAllText(JsonPath, JsonConvert.SerializeObject(TaskRuns.Select(p => p as BaseRunner)));
}
catch (Exception ex)
{
log.Fatal(ex);
}
文件位置 public static string JsonPath = System.AppDomain.CurrentDomain.BaseDirectory + "JobTasks.json";
5.裡面一共添加了3個任務,使用反射的方法,需要添加新的任務,只需要按照Jobs下HelloJob建立任務即可。
然後在系統啟動的時候把你的任務添加上。這裡特別希望有個朋友指點一下,如何能夠不用手動加的方法,如何將反射直接用在泛型方法上,這樣啟動就可自動啟動了。


TaskRuns = new List<IRun>();
            try
            {
                Assembly asm = Assembly.GetExecutingAssembly();
                Type[] types = asm.GetTypes();

                foreach (Type t in types)
                {
                    if (new ArrayList(t.GetInterfaces()).Contains(typeof(IJob)))
                    {
                        IJob job = ObjectUtils.InstantiateType<IJob>(t);
                        if (job != null)
                        {
                            IRun run = null;
                            if (job is HelloJob)
                            {
                                run = new SimpleRunner<HelloJob>();
                            }
                            else if (job is HelloJob2)
                            {
                                run = new SimpleRunner<HelloJob2>();
                            }
                            else if (job is HelloJob3)
                            {
                                run = new SimpleRunner<HelloJob3>();
                            }

                            if (run != null)
                            {
                                if (localRuns != null)
                                {
                                    var localRun = localRuns.Where(p => p.Name == run.Name).FirstOrDefault();
                                    if (localRun != null)
                                    {
                                        CopyHelper.LeftCopyRight(run, localRun);
                                    }
                                }
                                if (run.TriggerState != TriggerState.Normal || run.Mode == Mode.Hand)
                                {
                                    run.TriggerState = TriggerState.None;
                                }
                                run.CronSecondSet.Init();
                                run.CronMinuteSet.Init();
                                run.CronHourSet.Init();
                                run.CronDaySet.Init();
                                run.CronMonthSet.Init();
                                run.CronWeekSet.Init();
                                run.CronYearSet.Init();
                                run.LogOut = this.LogOut;
                                run.IsEdit = false;
                                TaskRuns.Add(run);
                            }
                        }
                    }
                }
            }
            catch (Exception ex)
            {
                log.Fatal(ex);
            }
View Code
6.Cron與DateTime互轉
public class CronHelper
    {
        public static string DateTime2Cron(DateTime date)
        {
            return date.ToString("ss mm HH dd MM ? yyyy");
        }

        public static DateTime Cron2DateTime(string cron)
        {
            return DateTime.ParseExact(cron, "ss mm HH dd MM ? yyyy", System.Globalization.CultureInfo.CurrentCulture);
        }

        public static DateTimeOffset DateTime2DateTimeOffset(DateTime datetime)
        {
            return DateTime.SpecifyKind(datetime, DateTimeKind.Unspecified);
        }

        public static DateTime DateTimeOffset2DateTime(DateTimeOffset datetimeoffset)
        {
            return datetimeoffset.DateTime;
        }
    }
CronHelper
最後,廢話少說,上
鏈接:https://pan.baidu.com/s/1DpY8Tzwd1ggXVQkPH4bSlw
提取碼:eon2
暫時永久有效,如果大家覺得不好,我將刪除。

