一、Canvas canvas是HTML5中新增一個HTML5標簽與操作canvas的javascript API,它可以實現在網頁中完成動態的2D與3D圖像技術。<canvas> 標記和 SVG以及 VML 之間的一個重要的不同是,<canvas> 有一個基於 JavaScript 的繪圖 API ...
一、Canvas
canvas是HTML5中新增一個HTML5標簽與操作canvas的javascript API,它可以實現在網頁中完成動態的2D與3D圖像技術。<canvas> 標記和 SVG以及 VML 之間的一個重要的不同是,<canvas> 有一個基於 JavaScript 的繪圖 API,而 SVG 和 VML 使用一個 XML 文檔來描述繪圖。SVG 繪圖很容易編輯與生成,但功能明顯要弱一些。
canvas可以完成動畫、游戲、圖表、圖像處理等原來需要Flash完成的一些功能。、
瀏覽器支持情況如下:
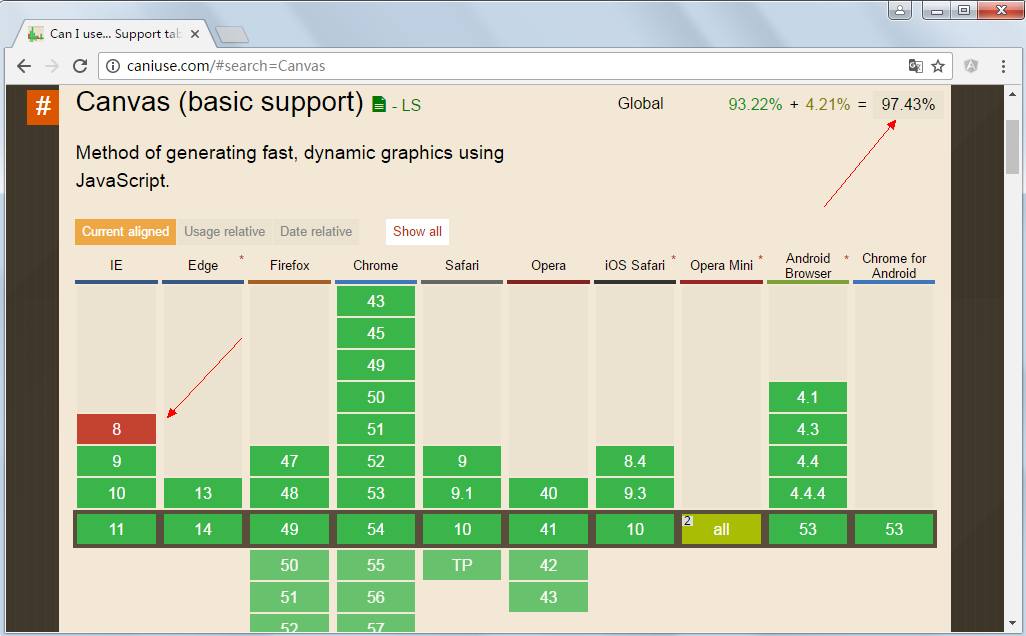
1.1、創建canvas元素
<canvas id="can" width="800" height="600">不支持Canvas</canvas>
以上代碼創建了一個寬度為800像素,高度為600像素的canvas。不建議使用CSS樣式指定寬度和高度。
canvas標簽中間的內容為替代顯示內容,當瀏覽器不支持canvas標簽時會顯示出來。
創建了canvas元素後,要在canvas元素上面繪製圖象,首先必須獲取canvas環境上下文:
canvas.getContext(畫布上繪製的類型)
2d: 表示2維
experimental-webgl: 表示試驗版3維
webgl:表示3維
Hello Wolrd示例代碼:
<!DOCTYPE html>
<html>
    <head>
        <meta charset="UTF-8">
        <title>canvas繪圖1</title>
    </head>
    <body>
        <canvas id="canvas1" width="800" height="600"></canvas>
        <script type="text/javascript">
           //獲得畫布元素
            var canvas1=document.getElementById("canvas1");
            //獲得2維繪圖的上下文
            var ctx=canvas1.getContext("2d");

            //設置線寬
            ctx.lineWidth=10;
            //設置線的顏色
            ctx.strokeStyle="blue";

            //將畫筆移動到00點
            ctx.moveTo(0,0);
            //畫線到800,600的坐標
            ctx.lineTo(800,600);

            //執行畫線
            ctx.stroke();
        </script>
    </body>
</html>
運行效果:
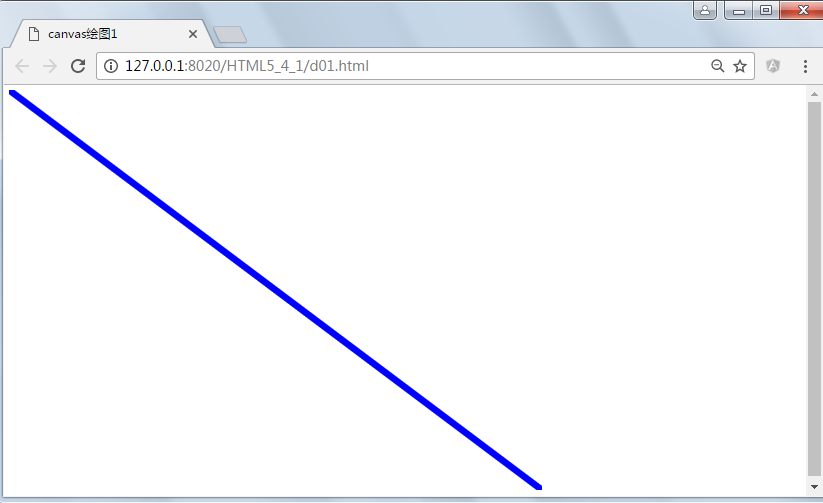
在頁面上就顯示了一條直線,另存為後就是一張背景透明的png圖片。
練習:畫一個100X100的正方形在畫布正中央
1.2、畫線
context.moveTo(x,y)
把畫筆移動到x,y坐標,建立新的子路徑。
context.lineTo(x,y)
建立上一個點到x,y坐標的直線,如果沒有上一個點,則等同於moveTo(x,y),把(x,y)添加到子路徑中。
context.stroke()
描繪子路徑
            //設置線寬
            ctx.lineWidth = 10;
            //設置線的顏色
            ctx.strokeStyle = "blue";
            //將畫筆移到x0,y0處
            context.moveTo(x0, y0);
            //從x0,y0到x1,y1畫一條線
            ontext.lineTo(x1, y1);
            //從x1,y1到x2,y2畫條線
            ontext.lineTo(x2, y2);
            //執行填充
            ontext.fill();
            //執行畫線
            context.stroke();
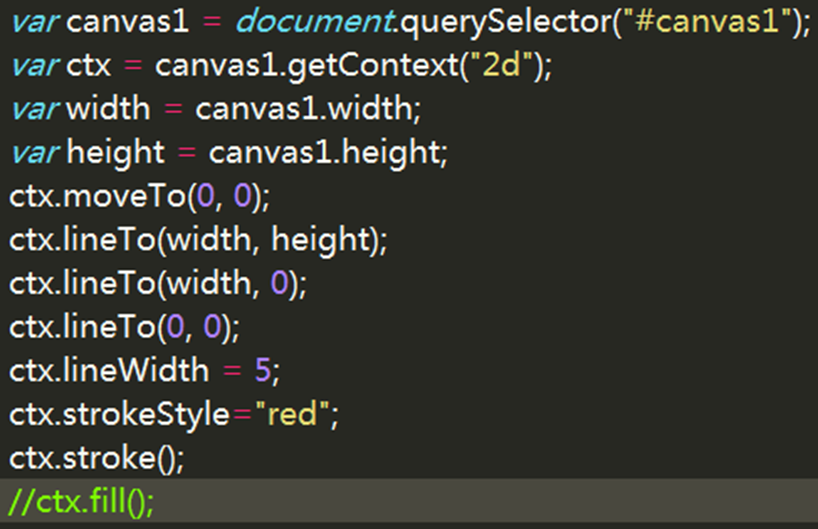
結合javascript事件實現滑鼠自由劃線:
<!DOCTYPE html>
<html>

    <head>
        <meta charset="UTF-8">
        <title>canvas繪圖2</title>
    </head>

    <body>
        <canvas id="canvas1" width="800" height="600"></canvas>
        <script type="text/javascript">
            //獲得畫布元素
            var canvas1 = document.getElementById("canvas1");
            //獲得2維繪圖的上下文
            var ctx = canvas1.getContext("2d");

            //設置線寬
            ctx.lineWidth = 10;
            //設置線的顏色
            ctx.strokeStyle = "blue";

            canvas1.onmousemove=function(e){
                //劃線到當前客戶端的x與y座標
                ctx.lineTo(e.clientX, e.clientY);
                //執行畫線
                ctx.stroke();
            }
        </script>
    </body>

</html>
運行效果:
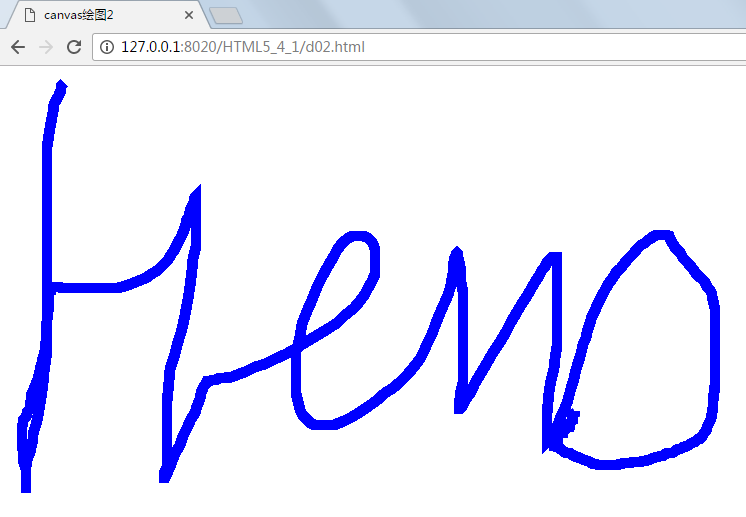
移動手機端:

<!DOCTYPE html>
<html>

    <head>
        <meta charset="utf-8">
        <title></title>
        <meta name="viewport" content="width=device-width,initial-scale=1,minimum-scale=1,maximum-scale=1,user-scalable=no" />
        <script>
            var canvas1;
            var ctx;
            var width;
            var height;
            var msg;
            window.onload = function() {
                canvas1 = document.getElementById("canvas1");
                msg = document.getElementById("msg");
                ctx = canvas1.getContext("2d");
                width = canvas1.width;
                height = canvas1.height;
                ctx.fillRect(0, 0, width, height);
                ctx.moveTo(0, 0);
                ctx.lineTo(100, 100);
                ctx.strokeStyle = "red";
                ctx.lineWidth = 2;
                ctx.stroke();
                canvas1.onmousemove = function(e) {
                    ctx.lineTo(e.clientX, e.clientY);
                    ctx.stroke();
                }
                canvas1.ontouchmove = function(e) {
                    e.preventDefault();
                    var touchE=e.targetTouches[0]
                    msg.innerHTML += touchE.clientX+","+touchE.clientY+ "<br/>";
                    ctx.lineTo(touchE.clientX, touchE.clientY);
                    ctx.stroke();
                }
                canvas1.ontouchstart = function() {
                    msg.innerHTML += "ontouchstart" + "<br/>";
                }
                canvas1.ontouchend = function() {
                    msg.innerHTML += "ontouchend" + "<br/>";
                }
            }
        </script>
    </head>

    <body>
        <canvas id="canvas1" width="500" height="500">不支持</canvas>
        <div id="msg"></div>
    </body>

</html>
View Code
1.2.1、路徑與closePath,beginPath,fill
canvas的環境上下文中總有唯一一個路徑,路徑包含多個子路徑,這些子路徑可以看成是一系列點的集合。
beginPath()
清空子路徑,一般用於開始路徑的創建。在幾次迴圈地創建路徑的過程中,每次開始創建時都要調用beginPath函數。
closePath()
如果當前子路徑是打開的,就關閉它。否則把子路徑中的最後一個點和路徑中的第一個點連接起來,形成閉合迴路。
canvas繪圖有兩種模式,一種是fill,一種是stroke,fill是填充,stroke是描邊線,fillstyle,strokeStyle指定繪圖樣式
示例代碼:
<!DOCTYPE html>
<html>
    <head>
        <meta charset="UTF-8">
        <title>路徑與closePath,beginPath,fill</title>
    </head>
    <body>
        <canvas id="canvas1" width="600" height="600"></canvas>
        <script type="text/javascript">
            //獲得畫布元素
            var canvas1 = document.getElementById("canvas1");
            //獲得2維繪圖的上下文
            var ctx = canvas1.getContext("2d");

            //設置線寬
            ctx.lineWidth = 10;
            //設置線的顏色
            ctx.strokeStyle = "blue";

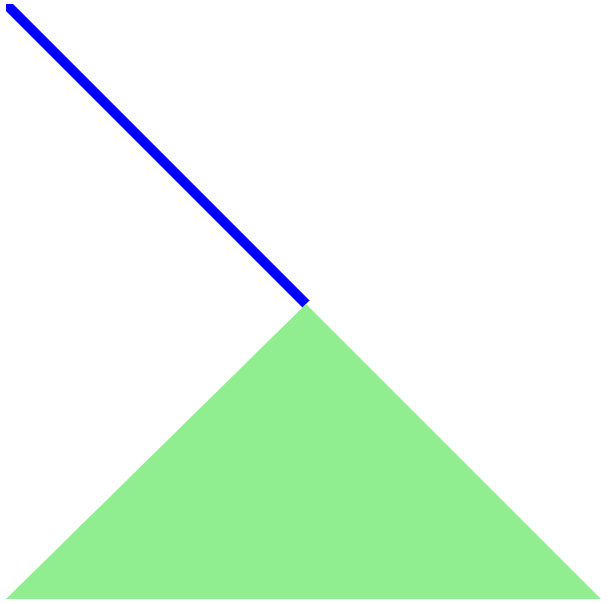
            ctx.moveTo(0,0);  //移動畫筆到0,0點
            ctx.lineTo(300,300);  //畫線到300,300的位置
            ctx.stroke();  //執行描邊

            ctx.beginPath();  //清空子路徑,一般用於開始路徑的創建
            ctx.strokeStyle = "red";
            ctx.moveTo(300,300);
            ctx.lineTo(0,595);  //畫線到0,300的位置
            ctx.lineTo(595,595);  //畫線到右下角
            ctx.closePath();  //閉合
            //ctx.stroke();  //執行描邊
            ctx.fillStyle="lightgreen";  //設置填充顏色
            ctx.fill();  //執行填充
        </script>
    </body>
</html>
運行效果:
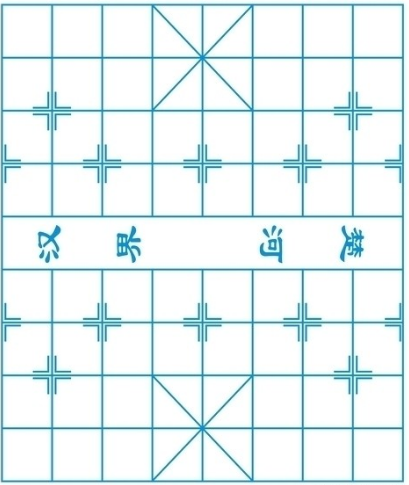
練習:試著完成一個象棋或圍棋棋盤。
1.3、繪製矩形
context.strokeRect(x,y,width,height)
以x,y為左上角,繪製寬度為width,高度為height的矩形。
context.fillRect(x,y,width,height)
以x,y為左上角,填充寬度為width,高度為height的矩形。
context.clearRect(x,y,width,height)
清除以x,y為左上角,寬度為width,高度為height的矩形區域。
示例代碼:
<!DOCTYPE html>
<html>
    <head>
        <meta charset="UTF-8">
        <title>繪製矩形</title>
    </head>
    <body>
        <canvas id="canvas1" width="600" height="600"></canvas>
        <script type="text/javascript">
            //獲得畫布元素
            var canvas1 = document.getElementById("canvas1");
            //獲得2維繪圖的上下文
            var ctx = canvas1.getContext("2d");

            //設置線寬
            ctx.lineWidth = 10;
            //設置線的顏色
            ctx.strokeStyle ="dodgerblue";

            //畫一個空心的矩形,
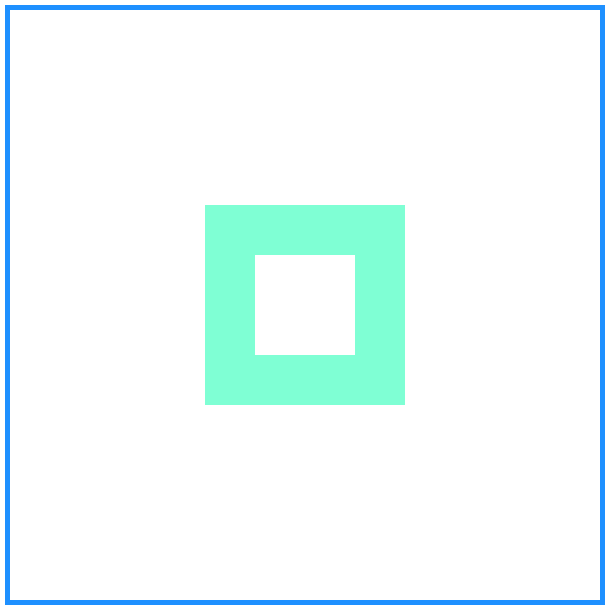
            ctx.strokeRect(0,0,600,600);

            //畫一個實心矩形
            ctx.fillStyle="aquamarine";
            ctx.fillRect(200,200,200,200);

            //清除指定的矩形區域
            ctx.clearRect(250,250,100,100);
        </script>
    </body>
</html>
運行效果:
1.4、繪製圓弧
context.arc(x,y,radius,startAngle,endAngle,anticlockwise)
arc方法用來繪製一段圓弧路徑,以(x,y)圓心位置radius為半徑、startAngle為起始弧度、endAngle為終止弧度來,而在畫圓弧時的旋轉方向則由最後一個參數 anticlockwise 來指定,如果為 true 就是逆時針,false 則為順時針,Math.PI * 2 剛好為一周。
示例代碼:
<!DOCTYPE html>
<html>
    <head>
        <meta charset="UTF-8">
        <title>繪製圓弧</title>
    </head>
    <body>
        <canvas id="canvas1" width="600" height="600"></canvas>
        <script type="text/javascript">
            //獲得畫布元素
            var canvas1 = document.getElementById("canvas1");
            //獲得2維繪圖的上下文
            var ctx = canvas1.getContext("2d");

            //設置線寬
            ctx.lineWidth = 10;
            //設置線的顏色
            ctx.strokeStyle ="dodgerblue";

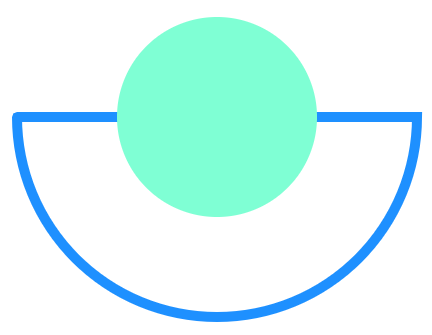
            //畫一段圓弧,300,300是圓心,200是半徑,0是超始角度,Math.PI是結束角度,是否逆時鐘
            ctx.arc(300,300,200,0,Math.PI,false);
            //閉合
            ctx.closePath();
            ctx.stroke();
            ctx.beginPath();
            ctx.fillStyle="aquamarine";
            ctx.arc(300,300,100,0,Math.PI*2,false);
            ctx.fill();
        </script>
    </body>
</html>
運行效果:
練習:
a、模擬鐘錶的時,分,秒
b、模擬水波,一個黑色的屏幕,多個從中心隨機產生彩色的圈不斷的放大,接觸到屏幕結束。
1.5、繪製圖像
context.drawImage(image,x,y)
把image圖像繪製到畫布上x,y坐標位置。
context.drawImage(image,x,y,w,h)
把image圖像繪製到畫布上x,y坐標位置,圖像的寬度是w,高度是h。
context.drawImage(image,sx,sy,sw,sh,dx,dy,dw,dh)
截取image圖像以sx,sy為左上角坐標,寬度為sw,高度為sh的一塊矩形區域繪製到畫布上以dx,dy坐標位置,圖像寬度是dw,高度是dh。
其中image可以是htmlImageElement元素,htmlcanvasElement元素,htmlVideoElement元素
示例代碼:
<!DOCTYPE html>
<html>
    <head>
        <meta charset="UTF-8">
        <title>繪製圖像</title>
    </head>
    <body>
        <canvas id="canvas1" width="600" height="600"></canvas>
        <img src="img/apple.png" id="apple" hidden="hidden" />
        <script type="text/javascript">
           //必須當頁面中的圖片資源載入成功
            window.onload = function() {
                //獲得畫布元素
                var canvas1 = document.getElementById("canvas1");
                //獲得2維繪圖的上下文
                var ctx = canvas1.getContext("2d");

                //設置線寬
                ctx.lineWidth = 10;
                //設置線的顏色
                ctx.strokeStyle = "dodgerblue";
                ctx.moveTo(0,0);
                ctx.strokeRect(0,0,600,600);

                //圖片
                var apple = document.getElementById("apple");
                //將圖像繪製到畫布的,圖片的左上角
                ctx.drawImage(apple, 300-52, 300-63);
            }
        </script>
    </body>

</html>
運行效果:

1.6、繪製文字
context.fillText(text,x,y,[maxWidth])
在canvas上填充文字,text表示需要繪製的文字,x,y分別表示繪製在canvas上的橫,縱坐標,最後一個參數可選,表示顯示文字的最大寬度,防止文字顯示溢出。
context.strokeText(text,x,y,[maxWidth])
在canvas上描邊文字,參數的意義同fillText
使用context.font屬性設置字體
context.font='italic bolder 48px 黑體';
示例代碼:
<!DOCTYPE html>
<html>
    <head>
        <meta charset="UTF-8">
        <title>繪製文字</title>
    </head>
    <body>
        <canvas id="canvas1" width="600" height="600"></canvas>
        <img src="img/apple.png" id="apple" hidden="hidden" />
        <script type="text/javascript">
           //必須當頁面中的圖片


