書接上回,上一回我們按照“低耦合高內聚”的組織架構方針對項目的整體結構進行了優化,本回將會繼續編寫業務,那就是用戶的登錄邏輯,將之前用戶管理模塊中添加的用戶賬號進行賬號和密碼的校驗,校驗通過後留存當前登錄用戶的信息,過程中使用圖形驗證碼強制進行人機交互,防止賬號的密碼被暴力破解。 登錄邏輯 首先在邏 ...
書接上回,上一回我們按照“低耦合高內聚”的組織架構方針對項目的整體結構進行了優化,本回將會繼續編寫業務,那就是用戶的登錄邏輯,將之前用戶管理模塊中添加的用戶賬號進行賬號和密碼的校驗,校驗通過後留存當前登錄用戶的信息,過程中使用圖形驗證碼強制進行人機交互,防止賬號的密碼被暴力破解。
登錄邏輯
首先在邏輯層handler包中,創建用戶模塊文件user.go:
package handler

import (


	"github.com/kataras/iris/v12"
)

//用戶登錄模板
func User_signin(ctx iris.Context) {

	ctx.View("/signin.html")

}
這裡通過上下文管理器結構體ctx渲染用戶登錄模板。
隨後,在views模板目錄中,添加用戶登錄模板signin.html:
<div class="row justify-content-center">

        <div class="col-md-10 col-lg-8 article">

            <div class="article-body page-body mx-auto" style="max-width: 400px;">

                <h1 class="text-center mb-4">登 錄</h1>

                <div class="socialaccount_ballot">
                    <div class="text-center mb-3">
                        <ul class="list-unstyled">

                            <li><a title="GitHub" class="socialaccount_provider github btn btn-secondary btn-lg w-100" href="JavaScript:void(0)">Connect With <strong>Meta Mask</strong></a></li>

                        </ul>
                    </div>

                    <div class="text-center text-muted my-3">— or —</div>
                </div>

                    <div class="form-group">

                        <div id="div_id_login" class="form-group">

                            <label for="id_login" class="requiredField"> Username<span class="asteriskField">*</span></label>
                            <div class=""><input type="text" placeholder="請輸入用戶名" v-model="username" autofocus="" class="textinput textInput form-control"></div>
                        </div>
                    </div>

                            <div class="form-group">
                                <div id="div_id_password" class="form-group">
                                    <label for="id_password" class="requiredField"> Password<span class="asteriskField">*</span></label>
                                    <div class="">
                                        <input type="password" placeholder="請輸入密碼" v-model="password"  minlength="8" maxlength="99" class="textinput textInput form-control">
                                    </div>
                                </div>
                            </div>


                            <div class="text-center"><button class="btn btn-primary btn-lg text-wrap px-5 mt-2 w-100" name="jsSubmitButton">點擊登錄</button></div></div>

                </div>

    </div>
這裡的表單中有兩個欄位,分別是Username和Password。
隨後通過Vue.js進行數據雙向綁定邏輯:
const App = {
            data() {
                return {
                    username: "",
                    password: "",
                };
            },
            created: function() {


            },
            methods: {
            },
        };
const app = Vue.createApp(App);
app.config.globalProperties.axios = axios;
app.mount("#app");
隨後添加登錄模板路由邏輯:
app.Get("/signin/", handler.User_signin)
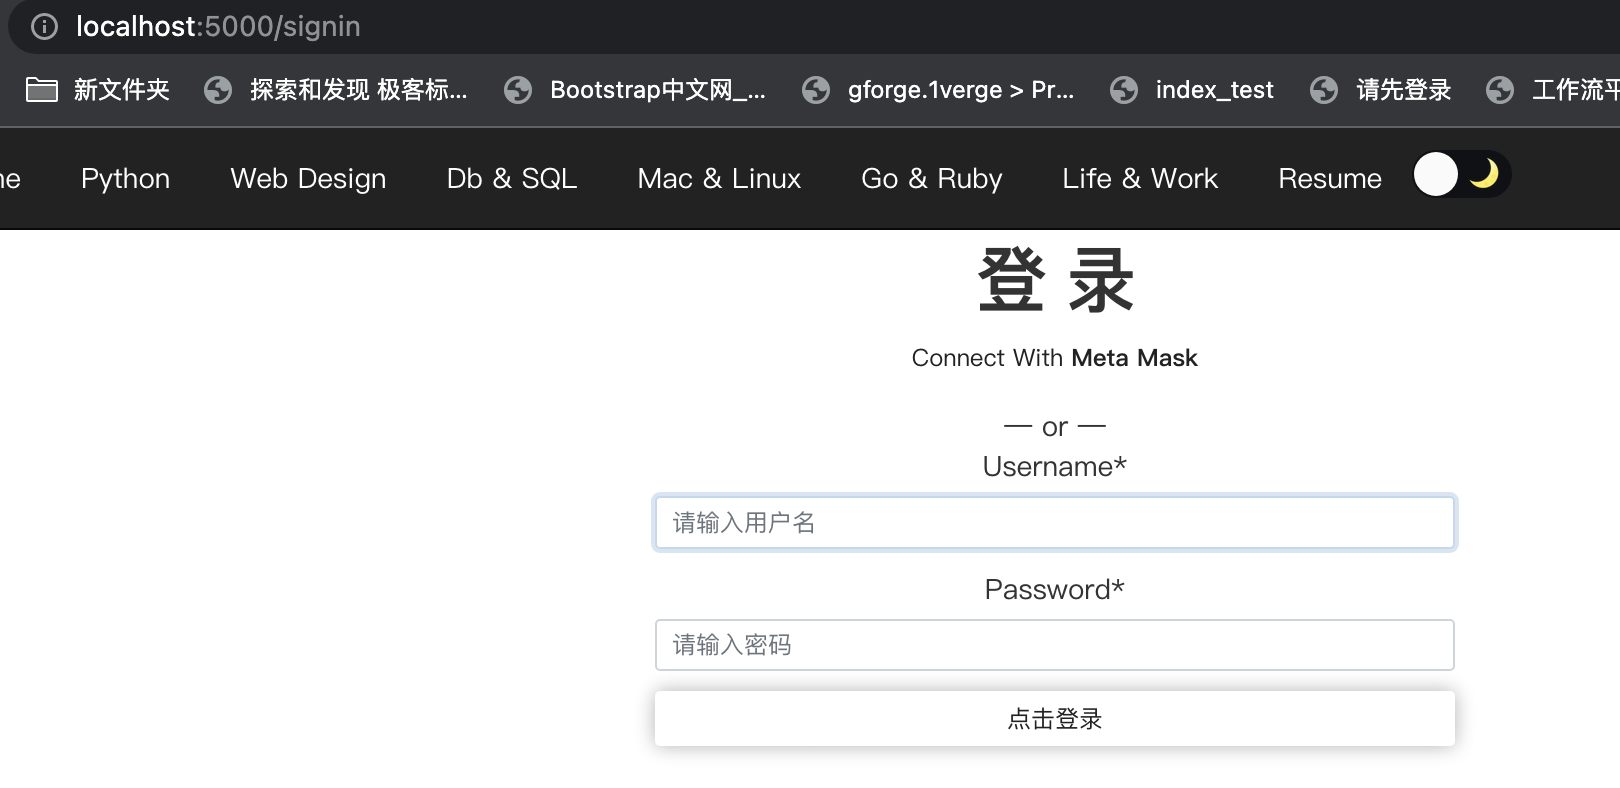
訪問 http://localhost:5000/signin/ 如圖所示:
隨後編寫登錄後臺業務user.go:
//登錄動作
func Signin(ctx iris.Context) {

	db := database.Db()
	defer func() {
		_ = db.Close()
	}()

	Username := ctx.PostValue("username")
	Password := ctx.PostValue("password")

	user := &model.User{}

	db.Where(&model.User{Username: Username, Password: mytool.Make_password((Password))}).First(&user)

	ret := make(map[string]interface{}, 0)

	if user.ID == 0 {

		ret["errcode"] = 1
		ret["msg"] = "登錄失敗,賬號或者密碼錯誤"
		ctx.JSON(ret)
		return

	}
	ret["errcode"] = 0
	ret["msg"] = "登錄成功"
	ret["username"] = user.Username
	ctx.JSON(ret)

}
這裡通過db.Where函數進行用戶名和密碼的檢索,註意密碼需要通過mytool.Make_password函數轉換為密文。
隨後通過判斷主鍵ID的值來判定賬號的合法性,這裡註意返回值字典的值通過介面(interface)聲明初始化,如此字典的value就可以相容不同的數據類型。
在和前端聯調之前,編寫測試腳本tests.go:
package main

import (
	"bytes"
	"fmt"
	"io/ioutil"
	"net/http"
	"net/url"
)

func main() {

	formValues := url.Values{}
	formValues.Set("username", "123")
	formValues.Set("password", "123")
	formDataStr := formValues.Encode()
	formDataBytes := []byte(formDataStr)
	formBytesReader := bytes.NewReader(formDataBytes)

	resp, err := http.Post("http://localhost:5000/signin/", "application/x-www-form-urlencoded;charset=utf-8", formBytesReader)
	if err != nil {
		fmt.Println(err)
		return
	}
	body, err := ioutil.ReadAll(resp.Body)

	fmt.Println(string(body))

}
這裡模擬表單數據,向後端Iris發起Post請求,程式返回:
{"errcode":0,"msg":"登錄成功","username":"123"}
登錄成功後,返回當前登錄用戶賬號。
反之:
{"errcode":1,"msg":"登錄失敗,賬號或者密碼錯誤"}
返回錯誤碼以及提示信息。
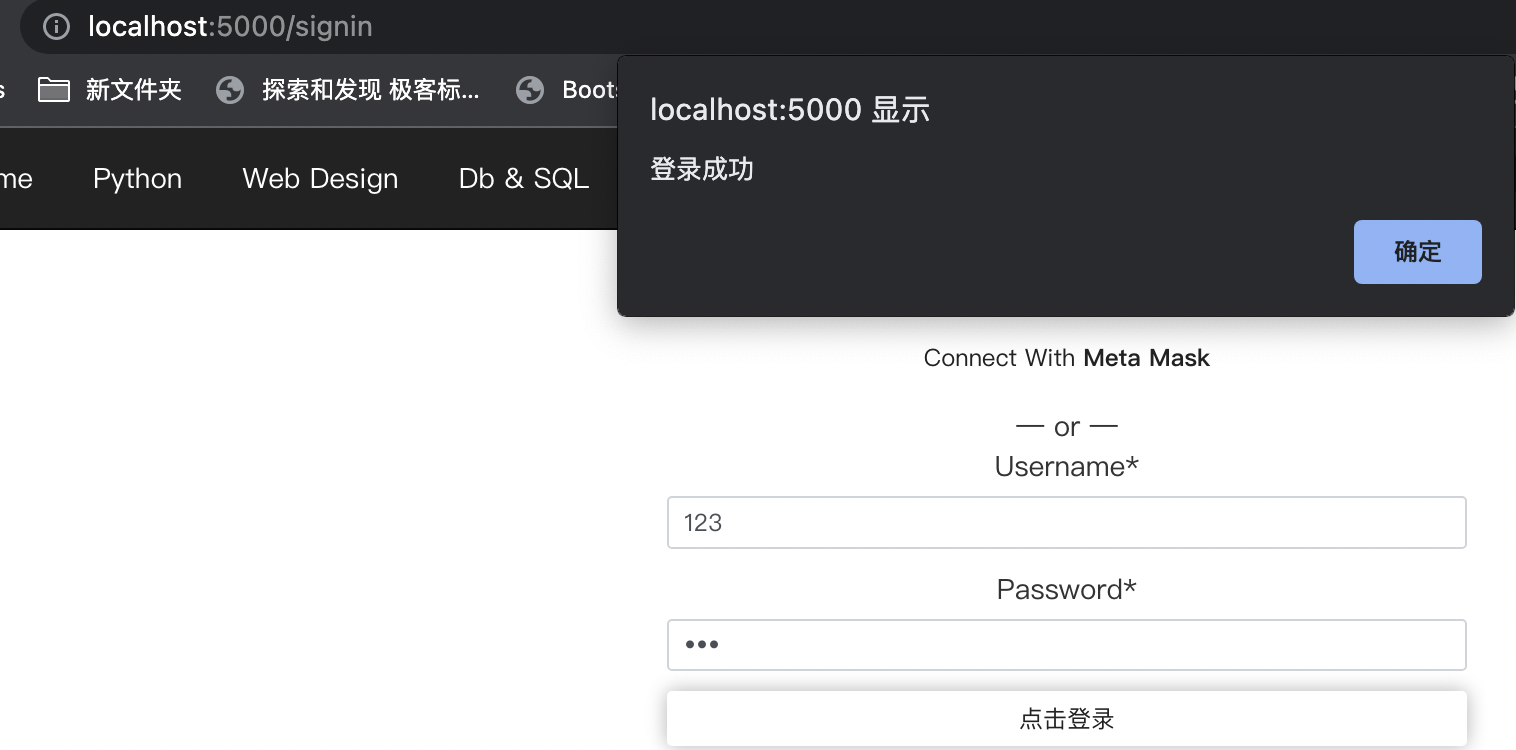
接著前端編寫非同步請求邏輯:
//登錄請求
                signin:function(){

                    this.myaxios("http://localhost:5000/signin/","post",{"username":this.username,"password":this.password}).then(data => {
                        console.log(data)
                        alert(data.msg);
                    });

                }
如圖所示:
至此,登錄邏輯就完成了。
圖像驗證碼
圖形驗證碼的主要作用是強制當前用戶進行人機交互,藉此來抵禦人工智慧的自動化攻擊,可以防止惡意破解密碼、刷票、論壇灌水,有效防止黑客對某一個特定註冊用戶用特定程式暴力破解進行不斷的登錄嘗試。
首先在項目內安裝三方的驗證碼校驗包:
go get -u github.com/dchest/captcha
隨後在工具類中添加驗證碼生成邏輯mytool.go:
package mytool

import (
	"crypto/md5"
	"fmt"
	"io"

	"github.com/dchest/captcha"
	"github.com/kataras/iris/v12"
)

const (
	StdWidth  = 80
	StdHeight = 40
)

func GetCaptchaId(ctx iris.Context) {
	m := make(map[string]interface{}, 0)
	m["errcode"] = 0
	m["msg"] = "獲取成功"
	m["captchaId"] = captcha.NewLen(4)
	ctx.JSON(m)
	return
}
這裡定義常量StdWidth和StdHeight,意為圖片寬和高,然後通過captcha.NewLen(4)函數獲取驗證碼的標識,這裡NewLen(4)標識生成四位驗證碼,如果不需要定製化操作,也可以使用captcha.New()返回預設長度的驗證碼。
接著添加路由:
app.Post("/captcha/", mytool.GetCaptchaId)
繼續使用tests.go腳本進行測試:
package main

import (
	"bytes"
	"fmt"
	"io/ioutil"
	"net/http"
	"net/url"
)

func main() {

	formValues := url.Values{}
	formValues.Set("username", "123")
	formValues.Set("password", "1243")
	formDataStr := formValues.Encode()
	formDataBytes := []byte(formDataStr)
	formBytesReader := bytes.NewReader(formDataBytes)

	resp, err := http.Post("http://localhost:5000/captcha/", "application/x-www-form-urlencoded;charset=utf-8", formBytesReader)
	if err != nil {
		fmt.Println(err)
		return
	}
	body, err := ioutil.ReadAll(resp.Body)

	fmt.Println(string(body))

}
程式返回:
{"captchaId":"qGlf8P9RJtJJzc3Q1v4z","errcode":0,"msg":"獲取成功"}
這裡就獲取到captchaId的值為qGlf8P9RJtJJzc3Q1v4z,隨後編寫邏輯,使用captchaId渲染具體的圖片緩衝區:
func GetCaptchaImg(ctx iris.Context) {
	captcha.Server(StdWidth, StdHeight).
		ServeHTTP(ctx.ResponseWriter(), ctx.Request())
}
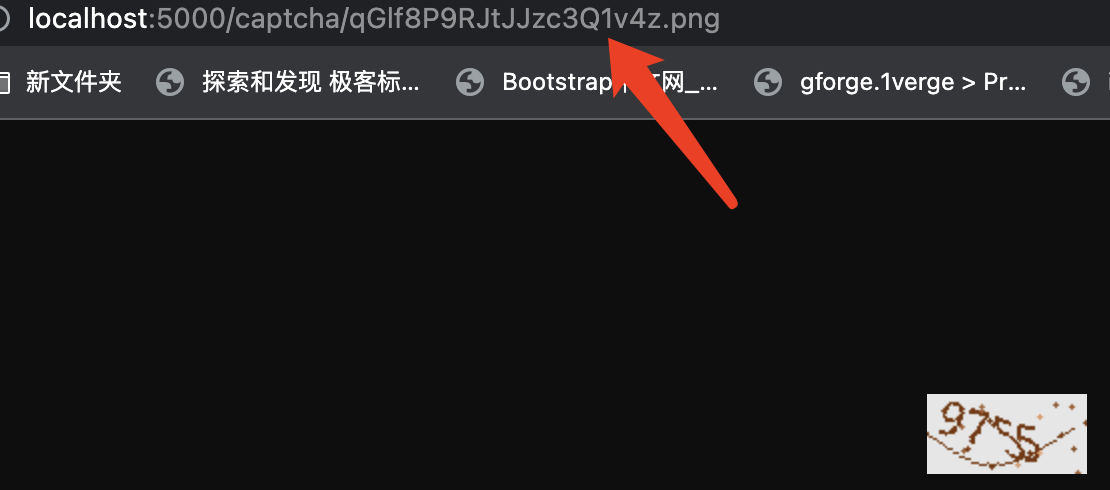
這裡通過captcha.Server將圖片渲染出來,配置路由:
app.Get("/captcha/*/", mytool.GetCaptchaImg)
註意必須通過Get方式進行請求,因為需要瀏覽器對圖片進行訪問,如圖所示:
隨後,編寫前端邏輯,首先登錄頁面初始化時,生成驗證碼id:
//獲取驗證碼標識
                get_cid:function(){

                    this.myaxios("http://localhost:5000/captcha/","post").then(data => {
                        console.log(data)
                        this.cid = data.captchaId;


                    });

                }
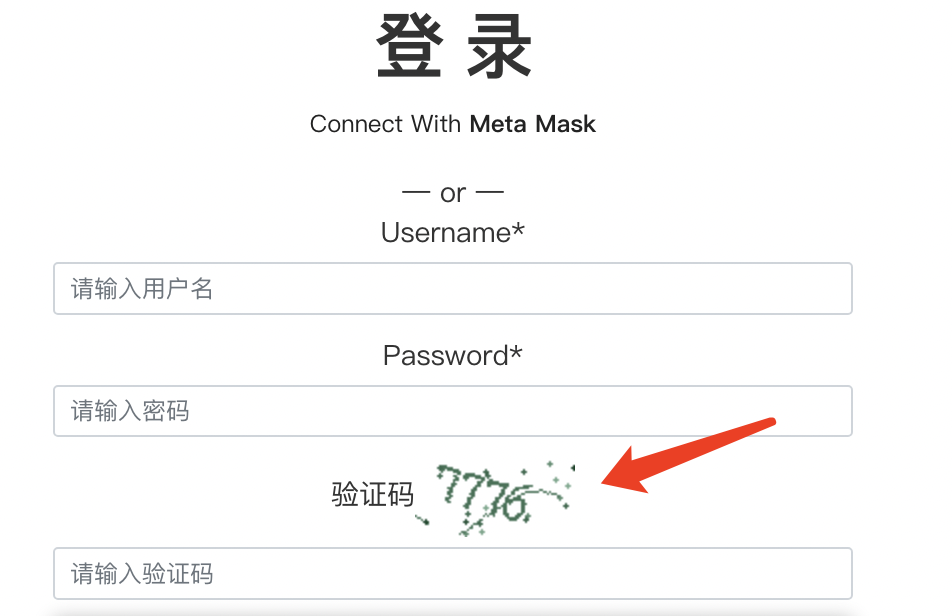
隨後添加驗證碼欄位,將驗證碼展示在表單中:
<div class="form-group">
                                <div id="div_id_password" class="form-group">
                                    <label for="id_password" class="requiredField"> 驗證碼<span class="asteriskField">

                                        <img v-if="cid"  :src="'http://localhost:5000/captcha/'+cid+'.png'" />

                                    </span></label>
                                    <div class="">
                                        <input type="text" placeholder="請輸入驗證碼" v-model="code"  minlength="8" maxlength="99" class="textinput textInput form-control">
                                    </div>
                                </div>
                            </div>
這裡通過拼接將獲取到的驗證碼id綁定在圖片標簽中,如圖所示:
接著,改寫用戶登錄邏輯user.go:
ret := make(map[string]interface{}, 0)

	cid := ctx.PostValue("cid")
	code := ctx.PostValue("code")

	if captcha.VerifyString(cid, code) == false {

		ret["errcode"] = 2
		ret["msg"] = "登錄失敗,驗證碼錯誤"
		ctx.JSON(ret)
		return

	}
這裡增加兩個參數,驗證碼標識以及用戶輸入的表單驗證碼,通過captcha.VerifyString函數進行比對,如果二者吻合那麼證明用戶輸入正確,否則輸入錯誤。
同樣地,前端應對增加表單請求欄位:
//登錄請求
                signin:function(){


                    this.myaxios("http://localhost:5000/signin/","post",{"username":this.username,"password":this.password,"cid":this.cid,"code":this.code}).then(data => {
                        console.log(data)
                        alert(data.msg);
                    });

                }
如圖所示:
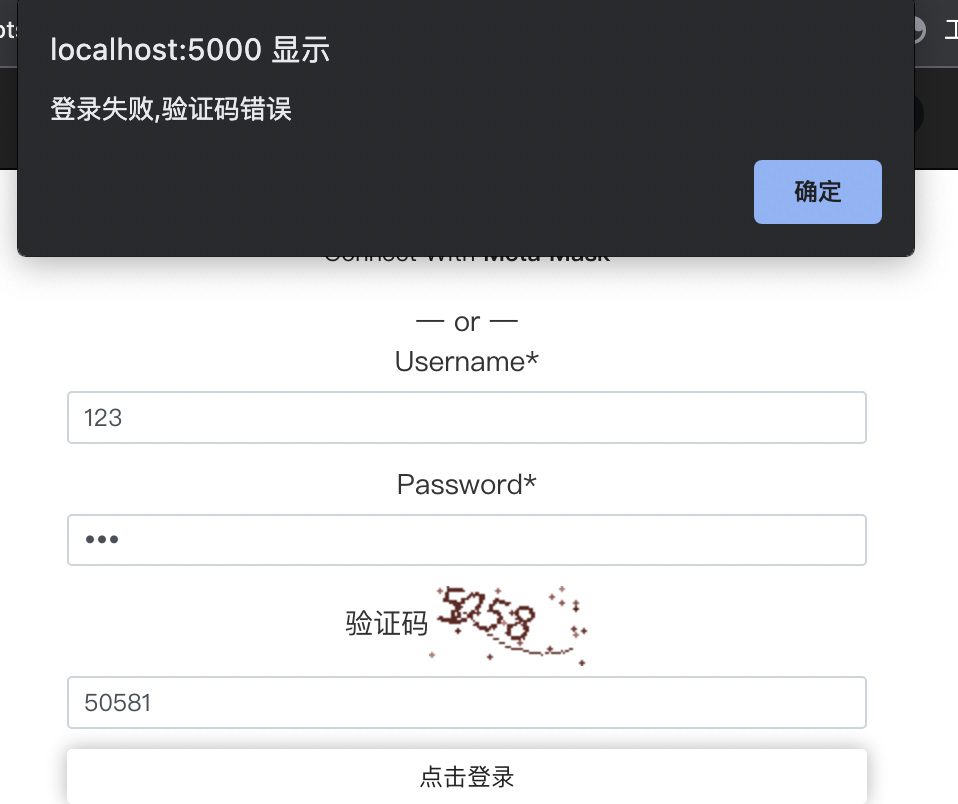
至此,集成圖像驗證碼的登錄邏輯就完成了。
結語
每一次captcha.NewLen(4)返回的驗證碼標識都是唯一的,所以也就避免了多個賬號併發登錄所帶來的覆蓋問題,同時驗證碼本體和其生命周期都存儲在Iris服務的記憶體中,既靈活又方便。登錄成功以後,下一步就面臨用戶信息留存方案的選擇。該項目已開源在Github:https://github.com/zcxey2911/IrisBlog ,與君共觴,和君共勉。


