1. 登錄表單配置 1.1 快速入門 理解了入門案例之後,接下來我們再來看一下登錄表單的詳細配置,首先創建一個新的Spring Boot項目,引入Web和Spring Security依賴,代碼如下: <dependency> <groupId>org.springframework.boot</g ...
1. 登錄表單配置
1.1 快速入門
理解了入門案例之後,接下來我們再來看一下登錄表單的詳細配置,首先創建一個新的Spring Boot項目,引入Web和Spring Security依賴,代碼如下:
<dependency>
    <groupId>org.springframework.boot</groupId>
    <artifactId>spring-boot-starter-security</artifactId>
</dependency>
<dependency>
    <groupId>org.springframework.boot</groupId>
    <artifactId>spring-boot-starter-web</artifactId>
</dependency>
項目創建好之後,為了方便測試,需要在application.yml中添加如下配置,將登錄用戶名和密碼固定下來:
spring:
  security:
    user:
      name: buretuzi
      password: 123456
接下來,我們在resources/static目錄下創建一個login.html頁而,這個是我們自定義的登錄頁面:
查看代碼
 <!DOCTYPE html>
<html lang="en">
<head>
    <meta charset="UTF-8">
    <title>登錄</title>
    <link href="//maxcdn.bootstrapcdn.com/bootstrap/4.1.1/css/bootstrap.min.css" rel="stylesheet" id="bootstrap-css">
    <script src="//maxcdn.bootstrapcdn.com/bootstrap/4.1.1/js/bootstrap.min.js"></script>
    <script src="//cdnjs.cloudflare.com/ajax/libs/jquery/3.2.1/jquery.min.js"></script>
</head>
<style>
    #login .container #login-row #login-column #login-box {
        border: 1px solid #9c9c9c;
        background-color: #EAEAEA;
    }
</style>
<body>
    <div id="login">
        <div class="container">
            <div id="login-row" class="row justify-content-center align-items-center">
                <div id="login-column" class="col-md-6">
                    <div id="login-box" class="col-md-12">
                        <form id="login-form" class="form" action="/dologin" method="post">
                            <h3 class="text-center text-info">登錄</h3>
                            <div class="form-group">
                                <label for="username" class="text-info">用戶名:</label><br>
                                <input type="text" name="uname" id="username" class="form-control">
                            </div>
                            <div class="form-group">
                                <label for="password" class="text-info">密碼:</label><br>
                                <input type="text" name="passwd" id="password" class="form-control">
                            </div>
                            <div class="form-group">
                                <input type="submit" name="submit" class="btn btn-info btn-md" value="登錄">
                            </div>
                        </form>
                    </div>
                </div>
            </div>
        </div>
    </div>
</body>
</html>
這個logmt.html中的核心內容就是一個登錄表單,登錄表單中有三個需要註意的地方,
- form的action,這裡給的是/doLogin,表示表單要提交到/doLogin介面上。
- 用戶名輸入框的name屬性值為uname,當然這個值是可以自定義的,這裡採用了uname。
- 密碼輸入框的name屬性值為passwd, passwd也是可以自定義的。
login.html定義好之後,接下來定義兩個測試介面,作為受保護的資源。當用戶登錄成功 後,就可以訪問到受保護的資源。介面定義如下:
package com.intehel.demo.controller;

import org.springframework.web.bind.annotation.RequestMapping;
import org.springframework.web.bind.annotation.RestController;

@RestController
public class LoginController {
    @RequestMapping("/index")
    public String index(){
        return "login";
    }
    @RequestMapping("/hello")
    public String hello(){
        return "hello";
    }
}
最後再提供一個Spring Security的配置類:
package com.intehel.demo.config;

import org.springframework.context.annotation.Configuration;
import org.springframework.security.config.annotation.web.builders.HttpSecurity;
import org.springframework.security.config.annotation.web.configuration.WebSecurityConfigurerAdapter;

@Configuration
public class SecurityConfig extends WebSecurityConfigurerAdapter {
    @Override
    protected void configure(HttpSecurity http) throws Exception {
        http.authorizeRequests()
                .anyRequest().authenticated()
                .and()
                .formLogin()
                .loginPage("/loginNew.html")
                .loginProcessingUrl("/doLogin")
                .defaultSuccessUrl("/index")
                .failureUrl("/loginNew.html")
                .usernameParameter("uname")
                .passwordParameter("passwd")
                .permitAll()
                .and()
                .csrf().disable();
    }
}
在Spring Security中,如果我們需要自定義配置,基本上都是繼承自WebSecurityConfigurerAdapter來實現的,當然WebSecurityConfigurerAdapter本身的配置還是比較複雜,同時也是比較豐富的,這裡先不做過多的展開,僅就結合上面的代碼來解釋,在下節中將會對這裡的配置再做更加詳細的介紹。
- 首先configure方法中是一個鏈式配置,當然也可以不用鏈式配置,每一個屬性配置完畢後再從重新開始寫起
- authorizeRequests()方法表示開啟許可權配置(該方法的含義其實比較複雜,在後面還會再次介紹該方法),.anyRequest().authenticated()表示所有的請求都要認證之後才能訪問.
- 有的讀者會對and()方法表示疑惑,and()方法會返回HttpSecurityBuilder對象的一個 子類(實際上就是HttpSecurity),所以and()方法相當於又回到HttpSecurity實例,重新開啟 新一輪的配置。如果覺得and()方法很難理解,也可以不用and()方法, 在.anyRequest().authenticated。配置完成後直接用分號(;)結束,然後通過http.formLogin()繼續配置表單登錄。
- formLogin()表示開啟表單登錄配置,loginPage用來配置登錄頁面地址; loginProcessingUrl用來配置登錄介面地址;defaultSuccessUrl表示登錄成功後的跳轉地址; failureUrl表示登錄失敗後的跳轉地址;usernameParameter表示登錄用戶名的參數名稱; passwordParameter表示登錄密碼的參數名稱;permitAll表示跟登錄相關的頁面和介面不做攔截, 直接通過。需要註意的是,loginProcessingUrl、usernameParameter、passwordParameter 需要和login-html中登錄表單的配置一致。
- 最後的csrf().disable()表示禁用CSRF防禦功能,Spring Security自帶了 CSRF防禦機制,但是我們這裡為了測試方便,先將CSRF防禦機制關閉,在後面將會詳細介紹CSRF攻擊與防禦問題。
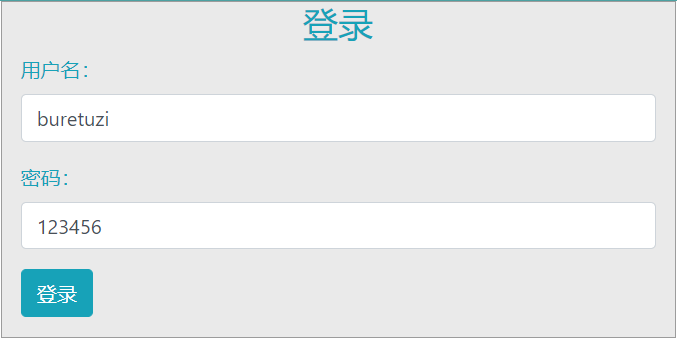
配置完成後,啟動Spring Boot項目,瀏覽器地址欄中輸入http://localhost:8080/index,會自動跳轉到http://localhost:8080/loginNew.html頁面,如圖2-5所示。輸入用戶名和密碼進行登錄(用 戶名為buretuzi,密碼為123456),登錄成功之後,就可以訪問到index頁面了,如圖2-6所示。

圖2-5

圖2-6
經過上面的配置,我們已經成功自定義了一個登錄頁面出來,用戶在登錄成功之後,就可以訪問受保護的資源了。
1.2 配置細節
當然,前面的配置比較粗糙,這裡還有一些配置的細節需要和讀者分享一下。
在前面的配置中,我們用defaultSuccessUrl表示用戶登錄成功後的跳轉地址,用failureUrl 表示用戶登錄失敗後的跳轉地址。關於登錄成功和登錄失敗,除了這兩個方法可以配置之外, 還有另外兩個方法也可以配置。
1.2.1 登錄成功
當用戶登錄成功之後,除了 defaultSuccessUrl方法可以實現登錄成功後的跳轉之外, successForwardUrl也可以實現登錄成功後的跳轉,代碼如下:
@Configuration
public class SecurityConfig extends WebSecurityConfigurerAdapter {
    @Override
    protected void configure(HttpSecurity http) throws Exception {
        http.authorizeRequests()
                .anyRequest().authenticated()
                .and()
                .formLogin()
                .loginPage("/loginNew.html")
                .loginProcessingUrl("/doLogin")
                .successForwardUrl("/index")
                .failureUrl("/loginNew.html")
                .usernameParameter("uname")
                .passwordParameter("passwd")
                .permitAll()
                .and()
                .csrf().disable();
    }
}
defaultSuccessUrl 和 successForwardUrl 的區別如下:
- defaultSuccessUrl表示當用戶登錄成功之後,會自動重定向到登錄之前的地址上, 如果用戶本身就是直接訪問的登錄頁面,則登錄成功後就會重定向到defaultSuccessUrl指定的頁面中。例如,用戶在未認證的情況下,訪問了/hello頁面,此時會自動重定向到登錄頁面, 當用戶登錄成功後,就會自動重定向到/hello頁面;而用戶如果一開始就訪問登錄頁面,則登錄成功後就會自動重定向到defaultSuccessUrl所指定的頁面中,
- successForwardUrl則不會考慮用戶之前的訪問地址,只要用戶登錄成功,就會通過伺服器端跳轉到successForwardUrl所指定的頁面
- defaultSuccessUrl有一個重載方法,如果重載方法的第二個參數傳入true,則 defaultSuccessUrl的效果與successForwardUrl類似,即不考慮用戶之前的訪問地址,只要登錄成功,就重定向到defaultSuccessUrl所指定的頁面。不同之處在於,defaultSuccessUrl是通過重定向實現的跳轉(客戶端跳轉),successForwardUrl則是通過伺服器端跳轉實現的。
無論是 defaultSuccessUrl 還是 successForwardUrl,最終所配置的都是 AuthenticationSuccessHandler介面的實例。
Spring Security中專門提供了 AuthenticationSuccessHandler介面用來處理登錄成功事項:
public interface AuthenticationSuccessHandler {
	default void onAuthenticationSuccess(HttpServletRequest request,
			HttpServletResponse response, FilterChain chain, Authentication authentication)
			throws IOException, ServletException{
		onAuthenticationSuccess(request, response, authentication);
		chain.doFilter(request, response);
	}
	void onAuthenticationSuccess(HttpServletRequest request,
			HttpServletResponse response, Authentication authentication)
			throws IOException, ServletException;
}由上述代碼可以看到,AuthenticationSuccessHandler介面中一共定義了兩個方法,其中一 個是default方法,此方法是Spring Security 5.2開始加入進來的,在處理特定的認證請求 AuthenticationFilter中會用到;另外一個非default方法,則用來處理登錄成功的具體事項,其 中request和response參數好理解,authentication參數保存了登錄成功的用戶信息。我們將在後面的章節中詳細介紹authentication參數。
AuthenticationSuccessHandler介面共有三個實現類,如圖2-7所示。

圖2-7
(1) SimpleUrlAuthenticationSuccessHandler繼承自 AbstractAuthenticationTargetUrlRequestHandler,通過 AbstractAuthenticationTargetUrlRequestHandler 中的 handle 方法實現請求重定向。
(2)SavedRequestAwareAuthenticationSuccessHandler在 SimpleUrlAuthenticationSuccessHandler的基礎上增加了請求緩存的功能,可以記錄之前請求的地址,進而在登錄成功後重定向到一開始訪問的地址。
(3) ForwardAuthenticationSuccessHandler的實現則比較容易,就是一個服務端跳轉。
我們來重點分析 SavedRequestAwareAuthenticationSuccessHandler和ForwardAuthenticationSuccessHandler的實現。
當通過defaultSuccessUrl來設置登錄成功後重定向的地址時,實際上對應的實現類就是 SavedRequestAwareAuthenticationSuccessHandler。
public class SavedRequestAwareAuthenticationSuccessHandler extends
		SimpleUrlAuthenticationSuccessHandler {
	protected final Log logger = LogFactory.getLog(this.getClass());
	private RequestCache requestCache = new HttpSessionRequestCache();
	@Override
	public void onAuthenticationSuccess(HttpServletRequest request,
			HttpServletResponse response, Authentication authentication)
			throws ServletException, IOException {
		SavedRequest savedRequest = requestCache.getRequest(request, response);
		if (savedRequest == null) {
			super.onAuthenticationSuccess(request, response, authentication);
			return;
		}
		String targetUrlParameter = getTargetUrlParameter();
		if (isAlwaysUseDefaultTargetUrl()
				|| (targetUrlParameter != null && StringUtils.hasText(request
						.getParameter(targetUrlParameter)))) {
			requestCache.removeRequest(request, response);
			super.onAuthenticationSuccess(request, response, authentication);

			return;
		}
		clearAuthenticationAttributes(request);
		// Use the DefaultSavedRequest URL
		String targetUrl = savedRequest.getRedirectUrl();
		logger.debug("Redirecting to DefaultSavedRequest Url: " + targetUrl);
		getRedirectStrategy().sendRedirect(request, response, targetUrl);
	}
	public void setRequestCache(RequestCache requestCache) {
		this.requestCache = requestCache;
	}
}
這裡的核心方法就是onAuthenticationSuccess:
- 首先從requestcache中獲取緩存下來的請求,如果沒有獲取到緩存請求,就說明用戶在訪問登錄頁面之前並沒有訪問其他頁面,此時直接調用父類的onAuthenticationSuccess方法來處理,最終會重定向到defaultSuccessUrl指定的地址。
- 接下來會獲取一個targetUrlParameter,這個是用戶顯式指定的、希望登錄成功後重定向的地址,例如用戶發送的登錄請求是http://localhost:8080/doLogin?target=/hello,這就表示當用戶登錄成功之後,希望自動重定向到/hello這個介面,getTargetUrlParameter就是要獲取重定向地址參數的key,也就是上面的target,拿到target之後,就可以獲取到重定向地址了。
- 如果 targetUrlParameter 存在,或者用戶設置了 alwaysUseDefaultTargetUrl 為 true, 這個時候緩存下來的請求就沒有意義了。此時會直接調用父類的onAuthenticationSuccess方法完成重定向口 targetUrlParameter存在,則直接重定向到targetUrlParameter指定的地址;alwaysUseDefaultTargetUrl 為 true,則直接重定向到 defaultSuccessUrl 指定的地址;如果 targetUrlParameter 存在並且 alwaysUseDefaultTargetUrl 為 true,則重定向到 defaultSuccessUrl 指定的地址。
- 如果前面的條件都不滿足,那麼最終會從緩存請求savedRequest中獲取重定向地址, 然後進行重定向操作。
這就是SavedRequestAwareAuthenticationSuccessHandler的實現邏輯,升發者也可以配置 自己的 SavedRequestAwareAuthenticationSuccessHandler,代碼如下:
@Configuration
public class SecurityConfig extends WebSecurityConfigurerAdapter {
    @Override
    protected void configure(HttpSecurity http) throws Exception {
        http.authorizeRequests()
                .anyRequest().authenticated()
                .and()
                .formLogin()
                .loginPage("/loginNew.html")
                .loginProcessingUrl("/doLogin")
                .successForwardUrl("/index")
                .failureUrl("/loginNew.html")
                .usernameParameter("uname")
                .passwordParameter("passwd")
                .permitAll()
                .and()
                .csrf().disable();
    }
    SavedRequestAwareAuthenticationSuccessHandler successHandler(){
        SavedRequestAwareAuthenticationSuccessHandler handler = new SavedRequestAwareAuthenticationSuccessHandler();
        handler.setDefaultTargetUrl("/index");
        handler.setTargetUrlParameter("target");
        return handler;
    }
}
註意在配置時指定了 targetUrlParameter為target,這樣用戶就可以在登錄請求中,通過 target來指定跳轉地址了,然後我們修改一下前面login.html中的form表單:
<form id="login-form" class="form" action="/doLogin?target=/hello" method="post">
    <h3 class="text-center text-info">登錄</h3>
    <div class="form-group">
        <label for="username" class="text-info">用戶名:</label><br>
        <input type="text" name="uname" id="username" class="form-control">
    </div>
    <div class="form-group">
        <label for="password" class="text-info">密碼:</label><br>
        <input type="text" name="passwd" id="password" class="form-control">
    </div>
    <div class="form-group">
        <input type="submit" name="submit" class="btn btn-info btn-md" value="登錄">
    </div>
</form>
在form表單中,action修改/doLogin?target=/hello,這樣當用戶登錄成功之後,就始終跳轉到/hello介面了。
當我們通過successForwardUrl來設置登錄成功後重定向的地址時,實際上對應的實現類 就是 ForwardAuthenticationSuccessHandler,ForwardAuthenticationSuccessHandler 的源碼特別簡單,就是一個服務端轉發,代碼如下:
public class ForwardAuthenticationSuccessHandler implements AuthenticationSuccessHandler {
	private final String forwardUrl;
	public ForwardAuthenticationSuccessHandler(String forwardUrl) {
		Assert.isTrue(UrlUtils.isValidRedirectUrl(forwardUrl),
				() -> "'" + forwardUrl + "' is not a valid forward URL");
		this.forwardUrl = forwardUrl;
	}
	public void onAuthenticationSuccess(HttpServletRequest request, HttpServletResponse response, Authentication authentication) throws IOException, ServletException {
		request.getRequestDispatcher(forwardUrl).forward(request, response);
	}
}由上述代碼可以看到,主要功能就是調用getRequestDispatcher方法進行服務端轉發。 AuthenticationSuccessHandler預設的三個實現類,無論是哪一個,都是用來處理頁面跳轉的,有時候頁面跳轉並不能滿足我們的需求,特別是現在流行的前後端分離開發中,用戶登錄成功後,就不再需要頁面跳轉了,只需要給前端返回一個JSON數據即可,告訴前端登錄成功還是登錄失敗,前端收到消息之後自行處理。像這樣的需求,我們可以通過自定義 AuthenticationSuccessHandler 的實現類來完成:
package com.intehel.demo.handler;

import com.fasterxml.jackson.databind.ObjectMapper;
import org.springframework.security.core.Authentication;
import org.springframework.security.web.authentication.AuthenticationSuccessHandler;
import javax.servlet.ServletException;
import javax.servlet.http.HttpServletRequest;
import javax.servlet.http.HttpServletResponse;
import java.io.IOException;
import java.util.HashMap;
import java.util.Map;

public class MyAuthenticationSuccessHandler implements AuthenticationSuccessHandler {
    @Override
    public void onAuthenticationSuccess(
            HttpServletRequest request, HttpServletResponse response, Authentication authentication)
            throws IOException, ServletException {
        response.setContentType("application/json;charset=UTF-8");
        Map<String,Object> resp = new HashMap<String,Object>();
        resp.put("status",200);
        resp.put("msg","登錄成功");
        ObjectMapper om = new ObjectMapper();
        String s = om.writeValueAsString(resp);
        response.getWriter().write(s);
    }
}
在自定義的 MyAuthenticationSuccessHandler中,重寫 onAuthenticationSuccess方法,在該方法中,通過HttpServletResponse對象返回一段登錄成功的JSON字元串給前端即可。最後, 在 SecurityConfig中配置自定義的 MyAuthenticationSuccessHandler,代碼如下:
@Configuration
public class SecurityConfig extends WebSecurityConfigurerAdapter {
    @Override
    protected void configure(HttpSecurity http) throws Exception {
        http.authorizeRequests()
                .anyRequest().authenticated()
                .and()
                .formLogin()
                .loginPage("/loginNew.html")
                .loginProcessingUrl("/doLogin")
                .successHandler(new MyAuthenticationSuccessHandler())
                .failureUrl("/loginNew.html")
                .usernameParameter("uname")
                .passwordParameter("passwd")
                .permitAll()
                .and()
                .csrf().disable();
    }
}
配置完成後,重啟項目,此時,當用戶成功登錄之後,就不會進行頁面跳轉了,而是返回一段JSON字元串。

1.2.2 登錄失敗
接下來看登錄失敗的處理邏輯。為了方便在前端頁面展示登錄失敗的異常信息,我們首先在項目的pom.xml文件中引入thymeleaf依賴,代碼如下:
<dependency>
    <groupId>org.springframework.boot</groupId>
    <artifactId>spring-boot-starter-thymeleaf</artifactId>
    <version>2.0.7.RELEASE</version>
</dependency>
然後在resources/templates目錄下新建mylogin.html,代碼如下:
查看代碼
 <!DOCTYPE html>
<html lang="en" xmlns:th="http://www.thymeleaf.org">
<head>
    <meta charset="UTF-8">
    <title>登錄</title>
    <link href="//maxcdn.bootstrapcdn.com/bootstrap/4.1.1/css/bootstrap.min.css" rel="stylesheet" id="bootstrap-css">
    <script src="//maxcdn.bootstrapcdn.com/bootstrap/4.1.1/js/bootstrap.min.js"></script>
    <script src="//cdnjs.cloudflare.com/ajax/libs/jquery/3.2.1/jquery.min.js"></script>
</head>
<style>
    #login .container #login-row #login-column #login-box {
        border: 1px solid #9c9c9c;
        background-color: #EAEAEA;
    }
</style>
<body>
<div id="login">
    <div class="container">
        <div id="login-row" class="row justify-content-center align-items-center">
            <div id="login-column" class="col-md-6">
                <div id="login-box" class="col-md-12">
                    <form id="login-form" class="form" action="/doLogin?target=/hello" method="post">
                        <h3 class="text-center text-info">登錄</h3>
                        <div th:text="${SPRING SECURITY LAST EXCEPTION}"></div>
                        <div class="form-group">
                            <label for="username" class="text-info">用戶名:</label><br>
                            <input type="text" name="uname" id="username" class="form-control">
                        </div>
                        <div class="form-group">
                            <label for="password" class="text-info">密碼:</label><br>
                            <input type="text" name="passwd" id="password" class="form-control">
                        </div>
                        <div class="form-group">
                            <input type="submit" name="submit" class="btn btn-info btn-md" value="登錄">
                        </div>
                    </form>
                </div>
            </div>
        </div>
    </div>
</div>
</body>
</html>
mylogin.html和前面的login.html基本類似,前面的login.html是靜態頁面,這裡的 mylogin.html是thymeleaf模板頁面,mylogin.html頁面在form中多了一個div,用來展示登錄失敗時候的異常信息,登錄失敗的異常信息會放在request中返回到前端,開發者可以將其直接提取岀來展示。
既然mylogm.html是動態頁面,就不能像靜態頁面那樣直接訪問了,需要我們給mylogin.html頁面提供一個訪問控制器:
package com.intehel.demo.controller;

import org.springframework.stereotype.Controller;
import org.springframework.web.bind.annotation.RequestMapping;

@Controller
public class MyLoginController {
    @RequestMapping("/mylogin.html")
    public String myLogin(){
        return "mylogin";
    }
}
最後再在SecurityConfig中配置登錄頁面,代碼如下:
@Configuration
public class SecurityConfig extends WebSecurityConfigurerAdapter {
    @Override
    protected void configure(HttpSecurity http) throws Exception {
        http.authorizeRequests()
                .anyRequest().authenticated()
                .and()
                .formLogin()
                .loginPage("/mylogin.html")
                .loginProcessingUrl("/doLogin")
                .defaultSuccessUrl("/index.html")
                .failureUrl("/mylogin.html")
                .usernameParameter("uname")
                .passwordParameter("passwd")
                .permitAll()
                .and()
                .csrf().disable();
    }
}
failureUrl表示登錄失敗後重定向到mylogin.html頁面。重定向是一種客戶端跳轉,重定向不方便攜帶請求失敗的異常信息(只能放在URL中)。
如果希望能夠在前端展示請求失敗的異常信息,可以使用下麵這種方式:
@Configuration
public class SecurityConfig extends WebSecurityConfigurerAdapter {
    @Override
    protected void configure(HttpSecurity http) throws Exception {
        http.authorizeRequests()
                .anyRequest().authenticated()
                .and()
                .formLogin()
                .loginPage("/mylogin.html")
                .loginProcessingUrl("/doLogin")
                .defaultSuccessUrl("/index.html")
                .failureForwardUrl("/mylogin.html")
                .usernameParameter("uname")
                .passwordParameter("passwd")
                .permitAll()
                .and()
                .csrf().disable();
    }
}
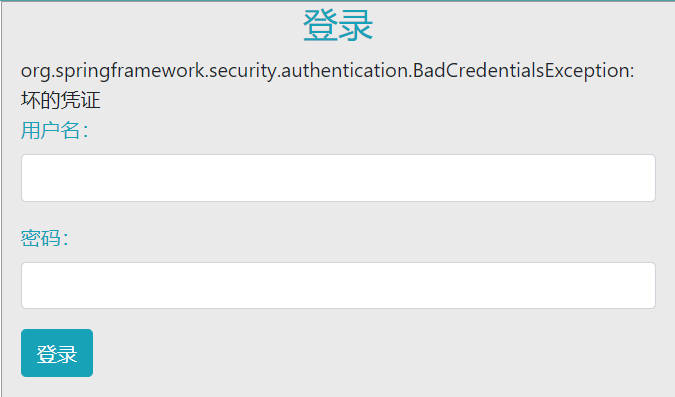
failureForwardUrl方法從名字上就可以看出,這種跳轉是一種伺服器端跳轉,伺服器端跳轉的好處是可以攜帶登錄異常信息,如果登錄失敗,自動跳轉回登錄頁面後,就可以將錯誤信息展示出來,如圖2-8所示。

圖 2-8
無論是 failureUrl 還是 failureForwardUrl,最終所配置的都是 AuthenticationFailureHandler 介面的實現。Spring Security中提供了 AuthenticationFailureHandler 介面,用來規範登錄失敗的 實現:
public interface AuthenticationFailureHandler {
	void onAuthenticationFailure(HttpServletRequest request,
			HttpServletResponse response, AuthenticationException exception)
			throws IOException, ServletException;
}
AuthenticationFailureHandler 介面中只有一個 onAuthenticationFailure 方法,用來處理登錄 失敗請求,request和response參數很好理解,最後的exception則表示登錄失敗的異常信息。 Spring Security 中為 AuthenticationFailureHandler 一共提供了五個實現類,如圖 2-9 所示

圖2-9
- SimpleUrlAuthenticationFailureHandler預設的處理邏輯就是通過重定向跳轉到登錄頁 面,當然也可以通過配置forwardToDestination屬性將重定向改為伺服器端跳轉,failureUrl方法的底層實現邏輯就是 SimpleUrlAuthenticationFailureHandler。
- ExceptionMappingAuthenticationFailureHandler可以實現根據不同的異常類型,映射到不同的路徑
- ForwardAuthenticationFailureHandler表示通過伺服器端跳轉來重新回到登錄頁面, failureForwardUrl 方法的底層實現邏輯就是 ForwardAuthenticationFailureHandler。
- AuthenticationEntryPointFailureHandler是 Spring Security 5.2 新引進的處理類,可以 通過AuthenticationEntryPoint來處理登錄異常。
- DelegatingAuthenticationFailureHandler可以實現為不同的異常類型配置不同的登錄失敗處理回調。
這裡舉一個簡單的例子。假如不使用failureForwardUrl 方法,同時又想在登錄失敗後通過伺服器端跳轉回到登錄頁面,那麼可以自定義SimpleUrlAuthenticationFailureHandler配置,並將forwardToDestination屬性設置為true,代碼如下:
@Configuration
public class SecurityConfig extends WebSecurityConfigurerAdapter {
    @Override
    protected void configure(HttpSecurity http) throws Exception {
        http.authorizeRequests()
                .anyRequest().authenticated()
                .and()
                .formLogin()
                .loginPage("/mylogin.html")
                .loginProcessingUrl("/doLogin")
                .defaultSuccessUrl("/index.html")
                .failureHandler(failureHandler())
                .usernameParameter("uname")
                .passwordParameter("passwd")
                .permitAll()
                .and()
                .csrf().disable();
    }
    SimpleUrlAuthenticationFailureHandler failureHandler(){
        SimpleUrlAuthenticationFailureHandler handler =
                new SimpleUrlAuthenticationFailureHandler("/mylogin.html");
        handler.setUseForward(true);
        return handler;
    }
}這樣配置之後,如果用戶再次登錄失敗,就會通過服務端跳轉重新回到登錄頁面,登錄頁而也會展示相應的錯誤信息,效果和failureForwardUrl 一致。
SimpleUrlAuthenticationFailureHandler的源碼也很簡單,我們一起來看一下實現邏輯(源碼比較長,這裡列出來核心部分):
public class SimpleUrlAuthenticationFailureHandler implements
		AuthenticationFailureHandler {
	protected final Log logger = LogFactory.getLog(getClass());
	private String defaultFailureUrl;
	private boolean forwardToDestination = false;
	private boolean allowSessionCreation = true;
	private RedirectStrategy redirectStrategy = new DefaultRedirectStrategy();
	public SimpleUrlAuthenticationFailureHandler() {
	}
	public SimpleUrlAuthenticationFailureHandler(String defaultFailureUrl) {
		setDefaultFailureUrl(defaultFailureUrl);
	}
	public void onAuthenticationFailure(HttpServletRequest request,
			HttpServletResponse response, AuthenticationException exception)
			throws IOException, ServletException {

		if (defaultFailureUrl == null) {
			logger.debug("No failure URL set, sending 401 Unauthorized error");

			response.sendError(HttpStatus.UNAUTHORIZED.value(),
				HttpStatus.UNAUTHORIZED.getReasonPhrase());
		}
		else {
			saveException(request, exception);

			if (forwardToDestination) {
				logger.debug("Forwarding to " + defaultFailureUrl);

				request.getRequestDispatcher(defaultFailureUrl)
						.forward(request, response);
			}
			else {
				logger.debug("Redirecting to " + defaultFailureUrl);
				redirectStrategy.sendRedirect(request, response, defaultFailureUrl);
			}
		}
	}
	protected final void saveException(HttpServletRequest request,
			AuthenticationException exception) {
		if (forwardToDestination) {
			request.setAttribute(WebAttributes.AUTHENTICATION_EXCEPTION, exception);
		}
		else {
			HttpSession session = request.getSession(false);

			if (session != null || allowSessionCreation) {
				request.getSession().setAttribute(WebAttributes.AUTHENTICATION_EXCEPTION,
						exception);
			}
		}
	}
	public void setDefaultFailureUrl(String defaultFailureUrl) {
		Assert.isTrue(UrlUtils.isValidRedirectUrl(defaultFailureUrl),
				() -> "'" + defaultFailureUrl + "' is not a valid redirect URL");
		this.defaultFailureUrl = defaultFailureUrl;
	}
	protected boolean isUseForward() {
		return forwardToDestination;
	}
	public void setUseForward(boolean forwardToDestination) {
		this.forwardToDestination = forwardToDestination;
	}
}從這段源碼中可以看到,當用戶構造SimpleUrlAuthenticationFailureHandler對象的時候, 就傳入了 defaultFailureUrl也就是登錄失敗時要跳轉的地址。在onAuthenticationFailure方法中,如果發現defaultFailureUrl為null,則直接通過response返回異常信息,否則調用 saveException 方法。在 saveException 方法中,如果 fowardToDestination 屬性設置為ture,表示通過伺服器端跳轉回到登錄頁面,此時就把異常信息放到request中。再回到 onAuthenticationFailure方法中,如果用戶設置fowardToDestination 為 true,就通過伺服器 端跳轉回到登錄頁面,否則通過重定向回到登錄頁面。
如果是前後端分離開發,登錄失敗時就不需要頁面跳轉了,只需要返回JSON字元串給前端即可,此時可以通過自定義AuthenticationFailureHandler的實現類來完成,代碼如下
package com.intehel.demo.handler;

import com.fasterxml.jackson.databind.ObjectMapper;
import org.springframework.security.core.AuthenticationException;
import org.springframework.security.web.authentication.AuthenticationFailureHandler;
import javax.servlet.ServletException;
import javax.servlet.http.HttpServletRequest;
import javax.servlet.http.HttpServletResponse;
import java.io.IOException;
import java.util.HashMap;
import java.util.Map;

public class MyAuthenticationFailureHandler implements AuthenticationFailureHandler {
    @Override
    public void onAuthenticationFailure(
            HttpServletRequest request, HttpServletResponse response, AuthenticationException exception)
            throws IOException, ServletException {
        response.setContentType("application/json;charset=UTF-8");
        Map<String,Object> resp = new HashMap<String,Object>();
        resp.put("status",500);
        resp.put("msg","登錄失敗"+exception.getMessage());
        ObjectMapper om = new ObjectMapper();
        String s = om.writeValueAsString(resp);
        response.getWriter().write(s);
    }
}
然後在SecurityConfig中進行配置即可:
package com.intehel.demo.config;

import com.intehel.demo.handler.MyAuthenticationFailureHandler;
import org.springframework.context.annotation.Configuration;
import org.springframework.security.config.annotation.web.builders.HttpSecurity;
import org.springframework.security.config.annotation.web.configuration.WebSecurityConfigurerAdapter;

@Configuration
public class SecurityConfig extends WebSecurityConfigurerAdapter {
    @Override
    protected void configure(HttpSecurity http) throws Exception {
        http.authorizeRequests()
                .anyRequest().authenticated()
                .and()
                .formLogin()
                .loginPage("/mylogin.html")
                .loginProcessingUrl("/doLogin")
                .defaultSuccessUrl("/index.html")
                .failureHandler(new MyAuthenticationFailureHandler())
                .usernameParameter("uname")
                .passwordParameter("passwd")
                .permitAll()
                .and()
                .csrf().disable();
    }
}
配置完成後,當用戶再次登錄失敗,就不會進行頁而跳轉了,而是直接返回JSON字元串, 如圖2-10所示。

圖 2-10
1.2.3 註銷登錄
Spring Security中提供了預設的註銷頁面,當然開發者也可以根據自己的需求對註銷登錄進行定製。
@Configuration
public class SecurityConfig extends WebSecurityConfigurerAdapter {
    @Override
    protected void configure(HttpSecurity http) throws Exception {
        http.authorizeRequests()
                .anyRequest().authenticated()
                .and()
                .formLogin()
                .loginPage("/mylogin.html")
                .loginProcessingUrl("/doLogin")
                .defaultSuccessUrl("/index.html")
                .failureHandler(new MyAuthenticationFailureHandler())
                .usernameParameter("uname")
                .passwordParameter("passwd")
                .permitAll()
                .and()
                .logout()
                .logoutUrl("/logout")
                .invalidateHttpSession(true)
                .clearAuthentication(true)
                .logoutSuccessUrl("/mylogin.html")
                .and()
                .csrf().disable();
    }
}- 通過.logout()方法開啟註銷登錄配置。
- logoutUrl指定了註銷登錄請求地址,預設是GET請求,路徑為/logout。
- invalidateHttpSession 表示是否使 session 失效,預設為 true。
- clearAuthentication表示是否清除認證信息,預設為true。
- logoutSuccessUrl表示註銷登錄後的跳轉地址。
配置完成後,再次啟動項目,登錄成功後,在瀏覽器中輸入http://localhost:8080/logout就可以發起註銷登錄請求了,註銷成功後,會自動跳轉到mylogin.html頁面。
如果項目有需要,開發者也可以配置多個註銷登錄的請求,同時還可以指定請求的方法。
package com.intehel.demo.config;

import com.intehel.demo.handler.MyAuthenticationFailureHandler;
import org.springframework.context.annotation.Configuration;
import org.springframework.security.config.annotation.web.builders.HttpSecurity;
import org.springframework.security.config.annotation.web.configuration.WebSecurityConfigurerAdapter;
import org.springframework.security.web.util.matcher.AntPathRequestMatcher;
import org.springframework.security.web.util.matcher.OrRequestMatcher;

@Configuration
public class SecurityConfig extends WebSecurityConfigurerAdapter {
    @Override
    protected void configure(HttpSecurity http) throws Exception {
        http.authorizeRequests()
                .anyRequest().authenticated()
                .and()
                .formLogin()
                .loginPage("/mylogin.html")
                .loginProcessingUrl("/doLogin")
                .defaultSuccessUrl("/index.html")
                .failureHandler(new MyAuthenticationFailureHandler())
                .usernameParameter("uname")
                .passwordParameter("passwd")
                .permitAll()
                .and()
                .logout()
                .logoutRequestMatcher(new OrRequestMatcher(new AntPathRequestMatcher("/logout1","GET"),
                        new AntPathRequestMatcher("/logout2","POST")))
                .invalidateHttpSession(true)
                .clearAuthentication(true)
                .logoutSuccessUrl("/mylogin.html")
                .and()
                .csrf().disable();
    }
}
上面這個配置表示註銷請求路徑有兩個:
- 第一個是/logout1,請求方法是GET。
- 第二個是/logout2,請求方法是POST。
使用任意一個請求都可以完成登錄註銷。
如果項目是前後端分離的架構,註銷成功後就不需要頁面跳轉了,只需將註銷成功的信息返回給前端即可,此時我們可以自定義返回內容:
@Configuration
public class SecurityConfig extends WebSecurityConfigurerAdapter {
    @Override
    protected void configure(HttpSecurity http) throws Exception {
        http.authorizeRequests()
                .anyRequest().authenticated()
                .and()
                .formLogin()
                .loginPage("/mylogin.html")
                .loginProcessingUrl("/doLogin")
                .defaultSuccessUrl("/index.html")
                .failureHandler(new MyAuthenticationFailureHandler())
                .usernameParameter("uname")
                .passwordParameter("passwd")
                .permitAll()
                .and()
                .logout()
                .logoutRequestMatcher(new OrRequestMatcher(new AntPathRequestMatcher("/logout1","GET"),
                        new AntPathRequestMatcher("/logout2","POST")))
                .invalidateHttpSession(true)
                .clearAuthentication(true)
                .logoutSuccessHandler((req,resp,auth)->{
                    resp.setContentType("application/json;charset=UTF-8");
                    Map<String,Object> result = new HashMap<String,Object>();
                    result.put("status",200);
                    result.put("msg","註銷成功!");
                    ObjectMapper om = new ObjectMapper();
                    String s = om.writeValueAsString(result);
                    resp.getWriter().write(s);
                })
                .and()
                .csrf().disable();
    }
}
配置 logoutSuccessHandler 和 logoutSuccessUrl 類似於前面所介紹的 successHandler 和defaultSuccessUrl之間的關係,只是類不同而已,因此這裡不再贅述,讀者可以按照我們前面的分析思路自行分析。
配置完成後,重啟項目,登錄成功後再去註銷登錄,無論是使用/logout1還是/logout2進行註銷,只要註銷成功後,就會返回一段JSON字元串。
如果開發者希望為不同的註銷地址返回不同的結果,也是可以的,配置如下:
查看代碼
 @Configuration
public class SecurityConfig extends WebSecurityConfigurerAdapter {
    @Override
    protected void configure(HttpSecurity http) throws Exception {
        http.authorizeRequests()
                .anyRequest().authenticated()
                .and()
                .formLogin()
                .loginPage("/mylogin.html")
                .loginProcessingUrl("/doLogin")
                .defaultSuccessUrl("/index.html")
                .failureHandler(new MyAuthenticationFailureHandler())
                .usernameParameter("uname")
                .passwordParameter("passwd")
                .permitAll()
                .and()
                .logout()
                .logoutRequestMatcher(new OrRequestMatcher(new AntPathRequestMatcher("/logout1","GET"),
                        new AntPathRequestMatcher("/logout2","POST")))
                .invalidateHttpSession(true)
                .clearAuthentication(true)
                .defaultLogoutSuccessHandlerFor((req,resp,auth)->{
                    resp.setContentType("application/json;charset=UTF-8");
                    Map<String,Object> result = new HashMap<String,Object>();
                    result.put("status",200);
                    result.put("msg","使用logout1註銷成功!");
                    ObjectMapper om = new ObjectMapper();
                    String s = om.writeValueAsString(result);
                    resp.getWriter().write(s);
                },new AntPathRequestMatcher("/logout1","GET"))
                .defaultLogoutSuccessHandlerFor((req,resp,auth)->{
                    resp.setContentType("application/json;charset=UTF-8");
                    Map<String,Object> result = new HashMap<String,Object>();
                    result.put("status",200);
                    result.put("msg","使用logout2註銷成功!");
                    ObjectMapper om = new ObjectMapper();
                    String s = om.writeValueAsString(result);
                    resp.getWriter().write(s);
                },new AntPathRequestMatcher("/logout1","GET"))
                .and()
                .csrf().disable();
    }
}
通過defaultLogoutSuccessHandlerFor方法可以註冊多個不同的註銷成功回調函數,該方法第一個參數是註銷成功回調,第二個參數則是具體的註銷請求。當用戶註銷成功後,使用了哪個註銷請求,就給出對應的響應信息。


