有的時候我們只想根據一個請求地址跳轉到一個頁面中,中間並沒有任何的處理流程,這個時候創建一個 Controller 類再編寫方法來跳轉就顯得很繁瑣。這個時候我們就可以使用 來直接進行跳轉。 使用 view controller 主要分為三步: 第一步:開啟 mvc 命名空間 第二部:編寫 view ...
有的時候我們只想根據一個請求地址跳轉到一個頁面中,中間並沒有任何的處理流程,這個時候創建一個 Controller 類再編寫方法來跳轉就顯得很繁瑣。這個時候我們就可以使用 view-controller 來直接進行跳轉。
使用 view-controller 主要分為三步:
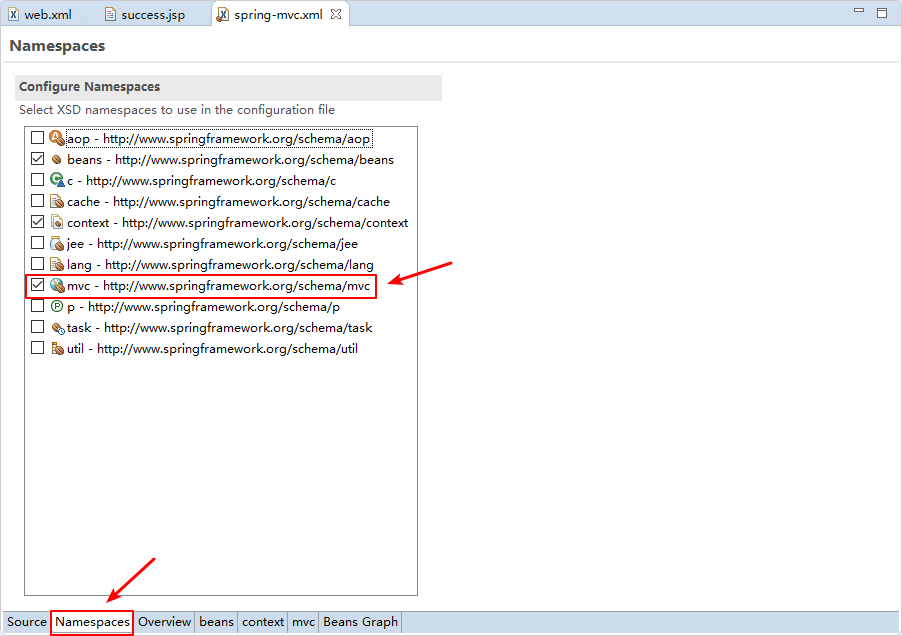
第一步:開啟 mvc 命名空間
第二部:編寫 view-controller 標簽
第三步:開啟 mvc 註解驅動標簽(註意:這裡一定要開啟 mvc 註解驅動模式)
一、開啟 mvc 命名空間:

二、在 spring-mvc.xml 文件中編寫 view-controller 標簽:
<mvc:view-controller path="/hello" view-name="success"/>
三、開啟 mvc 註解驅動標簽
註意:一定要開啟!一定要開啟!一定要開啟!不然的話只有你配置的路徑才會識別,@RequestMapping 配置的路徑就失效了!
<mvc:annotation-driven></mvc:annotation-driven>
下麵附上 spring-mvc.xml 的整體代碼:
<?xml version="1.0" encoding="UTF-8"?>
<beans xmlns="http://www.springframework.org/schema/beans"
	xmlns:xsi="http://www.w3.org/2001/XMLSchema-instance"
	xmlns:context="http://www.springframework.org/schema/context"
	xmlns:mvc="http://www.springframework.org/schema/mvc"
	xsi:schemaLocation="http://www.springframework.org/schema/mvc http://www.springframework.org/schema/mvc/spring-mvc-4.3.xsd
		http://www.springframework.org/schema/beans http://www.springframework.org/schema/beans/spring-beans.xsd
		http://www.springframework.org/schema/context http://www.springframework.org/schema/context/spring-context-4.3.xsd">

	<context:component-scan base-package="com.pudding" />

	<bean class="org.springframework.web.servlet.view.InternalResourceViewResolver">
		<property name="prefix" value="/WEB-INF/views/" />
		<property name="suffix" value=".jsp" />
	</bean>

	<mvc:view-controller path="/hello" view-name="success"/>

	<mvc:annotation-driven></mvc:annotation-driven>

</beans>


