1 簡介 是高性能的 資料庫,經常作為緩存流行於各大互聯網架構中。本文將介紹如何在 中整合 ,使用 的方式操作。 代碼結構如下: 2 整合過程 2.1 安裝Redis資料庫 為了節省時間,就直接通過 來安裝了,可以參考文章: "Docker安裝Redis並介紹漂亮的可視化客戶端進行操作" ,可以快速 ...
1 簡介
Redis是高性能的NoSQL資料庫,經常作為緩存流行於各大互聯網架構中。本文將介紹如何在Springboot中整合Spring Data Redis,使用Repository的方式操作。
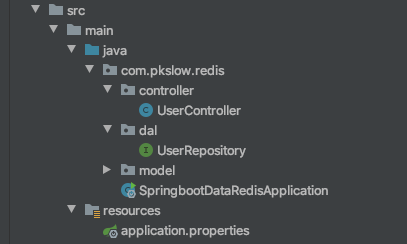
代碼結構如下:
2 整合過程
2.1 安裝Redis資料庫
為了節省時間,就直接通過Docker來安裝了,可以參考文章:Docker安裝Redis並介紹漂亮的可視化客戶端進行操作,可以快速安裝並使用客戶端進行查看和操作。
2.2 引入相關依賴
我們引入Springboot Web的依賴,以啟動REST服務。還需要引入Spring Data Redis相關的依賴。最後,還需要commons-pool2,不然會因為缺少類而無法啟動。
<dependency>
  <groupId>org.springframework.boot</groupId>
  <artifactId>spring-boot-starter-web</artifactId>
</dependency>
<dependency>
  <groupId>org.springframework.boot</groupId>
  <artifactId>spring-boot-starter-data-redis</artifactId>
</dependency>
<dependency>
  <groupId>org.apache.commons</groupId>
  <artifactId>commons-pool2</artifactId>
</dependency>
2.3 配置連接信息
配置Redis的連接信息,這個信息跟你安裝時的配置有關,同時配置了連接池,各項的配置及相關解釋如下:
# Redis資料庫索引,預設為0
spring.redis.database=0
# Redis埠
spring.redis.port=6379
# Redis伺服器主機
spring.redis.host=localhost
# 連接池最大連接數
spring.redis.lettuce.pool.max-active=8
# 連接池最大空閑
spring.redis.lettuce.pool.max-idle=8
# 連接池最小空閑
spring.redis.lettuce.pool.min-idle=2
# 連接池最大阻塞等待時間
spring.redis.lettuce.pool.max-wait=1ms
# 超時時間
spring.redis.lettuce.shutdown-timeout=100ms
2.4 創建實體類
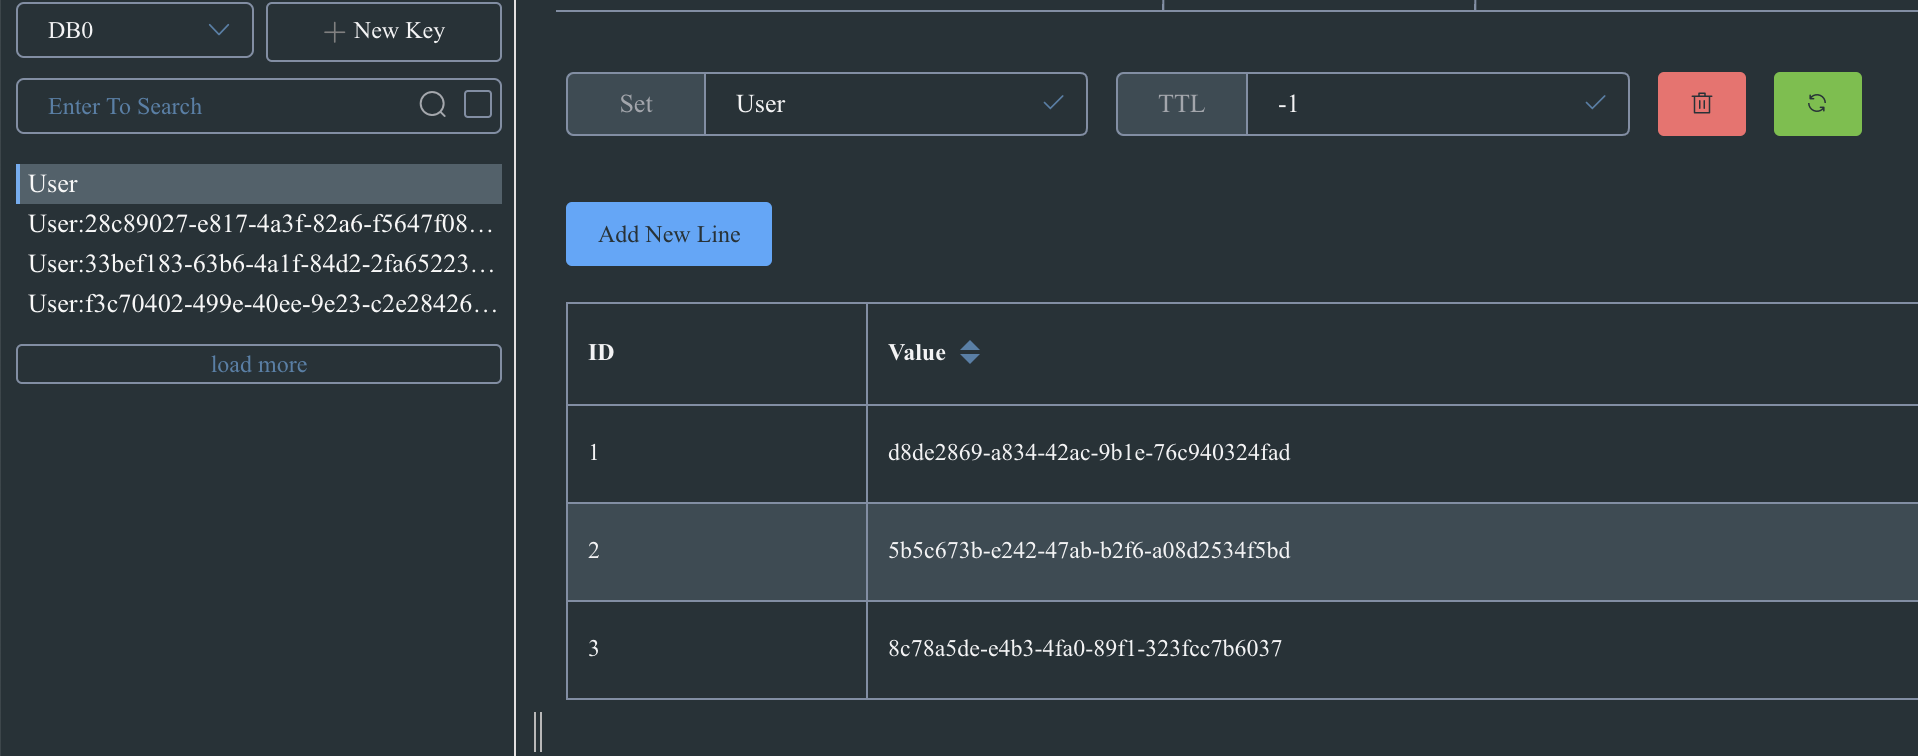
存入Redis中的數據類型,可以是自定義的一個類,註意需要加上註解@RedisHash和@Id。存入Redis的數據為Set類型。
具體代碼如下:
package com.pkslow.redis.model;

import org.springframework.data.annotation.Id;
import org.springframework.data.redis.core.RedisHash;
import java.util.Date;

@RedisHash("User")
public class User {
    @Id
    private String userId;
    private String name;
    private Integer age;
    private Date createTime = new Date();

    public String getUserId() {
        return userId;
    }

    public void setUserId(String userId) {
        this.userId = userId;
    }

    public String getName() {
        return name;
    }

    public void setName(String name) {
        this.name = name;
    }

    public Integer getAge() {
        return age;
    }

    public void setAge(Integer age) {
        this.age = age;
    }

    public Date getCreateTime() {
        return createTime;
    }

    public void setCreateTime(Date createTime) {
        this.createTime = createTime;
    }
}
2.5 資料庫訪問層UserRepository介面
直接繼承CrudRepository介面就行了,不用自己來實現,需要註意CrudRepository<User, String>的泛型類型:
package com.pkslow.redis.dal;

import com.pkslow.redis.model.User;
import org.springframework.data.repository.CrudRepository;

public interface UserRepository extends CrudRepository<User, String> {
}
2.6 實現Controller
Controller實現了RESTful風格的增刪改查功能,只要把UserRepository註入便可以使用它來操作:
package com.pkslow.redis.controller;

import com.pkslow.redis.dal.UserRepository;
import com.pkslow.redis.model.User;
import org.springframework.beans.factory.annotation.Autowired;
import org.springframework.web.bind.annotation.*;

@RestController
@RequestMapping("/user")
public class UserController {
    @Autowired
    private final UserRepository userRepository;

    public UserController(UserRepository userRepository) {
        this.userRepository = userRepository;
    }

    @GetMapping("")
    public Iterable<User> getAllUsers() {
        return userRepository.findAll();
    }

    @GetMapping("/{userId}")
    public User getByUserId(@PathVariable String userId) {
        return userRepository.findById(userId).orElse(new User());
    }

    @PostMapping("")
    public User addNewUser(@RequestBody User user) {
        return userRepository.save(user);
    }

    @DeleteMapping("/{userId}")
    public String delete(@PathVariable String userId) {
        User user = new User();
        user.setUserId(userId);
        userRepository.deleteById(userId);
        return "deleted: " + userId;
    }

    @PutMapping("")
    public User update(@RequestBody User user) {
        return userRepository.save(user);
    }
}
3 Postman介面測試
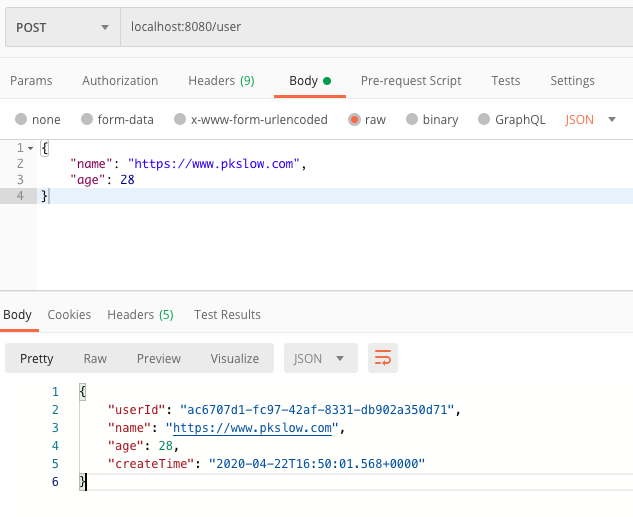
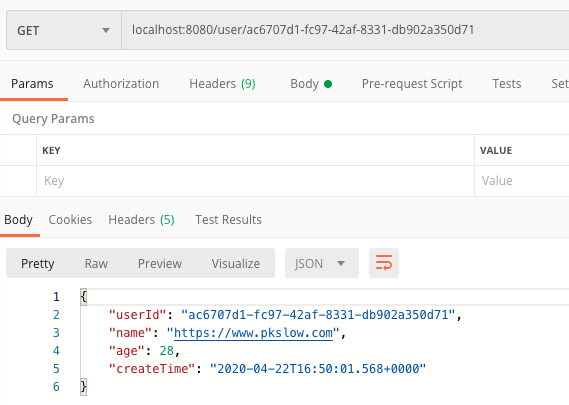
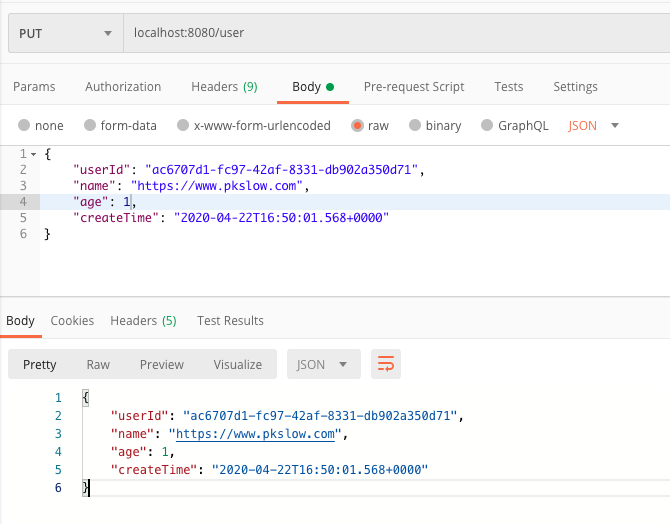
本文使用Postman進行測試,結果顯示的時間為GMT時間,每個功能測試如下:
(1)新增User
(2)根據UserId查詢特定User
(3)修改User
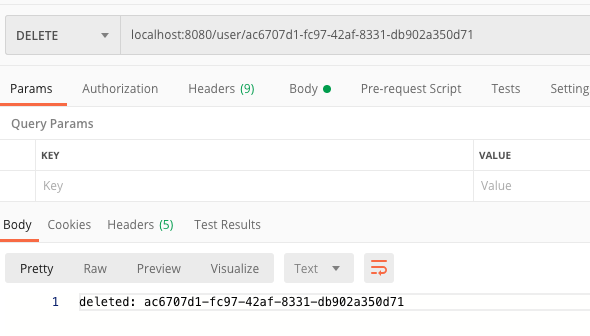
(4)刪除一個User
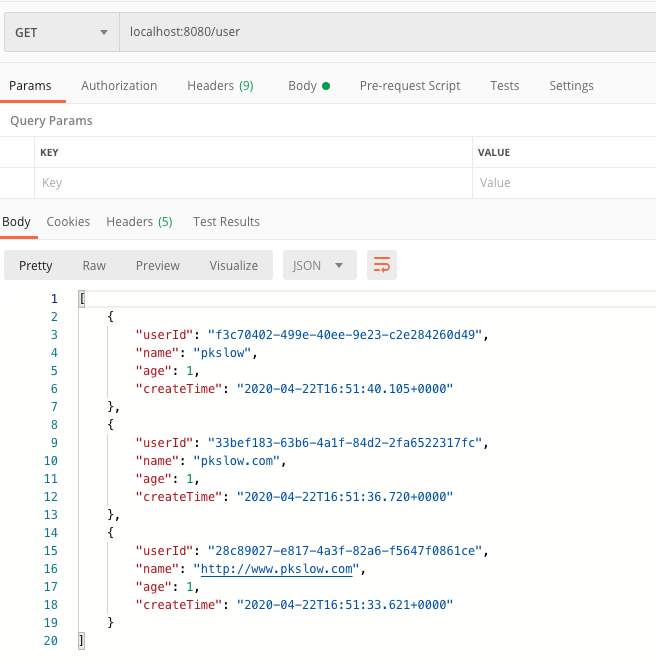
(5)查詢所有User
在Redis中的數據如下所示:
4 總結
本文通過實例講解瞭如何整合Springboot和Redis,使用的是Repository的方式。詳細代碼可在南瓜慢說公眾號回覆<SpringbootRedisRepository>獲取。
歡迎訪問南瓜慢說 www.pkslow.com獲取更多精彩文章!
歡迎關註微信公眾號<南瓜慢說>,將持續為你更新...

多讀書,多分享;多寫作,多整理。


