
rpm可以實現程式的快速,簡單安裝(跟編譯安裝比),但是rpm自己不能解決依賴,所以很多工具為了自動解決依賴應運而生,其中yum就是其中之一。 yum解決依賴的辦法: 必須有個文件伺服器,裡面放置所以的rpm包,以及包的相關元數據( qi, qR得到的數據)。元數據可以使用 來創建。並放置在repo ...
rpm可以實現程式的快速,簡單安裝(跟編譯安裝比),但是rpm自己不能解決依賴,所以很多工具為了自動解決依賴應運而生,其中yum就是其中之一。
yum解決依賴的辦法:
必須有個文件伺服器,裡面放置所以的rpm包,以及包的相關元數據(-qi,-qR得到的數據)。元數據可以使用
createrepo來創建。並放置在repodata目錄下。這個文件伺服器可以使用ftp,http,nfs協議來傳輸數據,也可以使用file:///(本地服務)。
客戶端使用yum程式,安裝程式包。安裝時,查詢文件伺服器,自己從文件伺服器找依賴,並安裝。
yum是一個程式,查看本機是否安裝了yum:
# rpm -q yum
yum-3.4.3-161.el7.centos.noarch
查看yum程式所使用的配置文件:
/etc/yum.conf是主配置文件,它裡面引用了目錄/etc/yum.repos.d/,所以/etc/yum.repos.d/目錄下的*.repo也是yum的配置文件.它提供了所以倉庫的公共配置。
實現了把配置文件分割成了許多獨立的小的配置文件。
/etc/yum.repos.d/目錄下的*.repo:為倉庫的指向提供配置信息。
# rpm -qc yum
/etc/logrotate.d/yum#log用
/etc/yum.conf
/etc/yum/version-groups.conf#版本控制
/etc/yum.conf內容:
[main]
cachedir=/var/cache/yum/$basearch/$releasever
keepcache=0
debuglevel=2
logfile=/var/log/yum.log
exactarch=1
obsoletes=1
gpgcheck=1
plugins=1
installonly_limit=5
bugtracker_url=http://bugs.centos.org/set_project.php?project_id=23&ref=http://bugs.centos.org/bug_report_page.php?category=yum
distroverpkg=centos-release


#  This is the default, if you make this bigger yum won't see if the metadata
# is newer on the remote and so you'll "gain" the bandwidth of not having to
# download the new metadata and "pay" for it by yum not having correct
# information.
#  It is esp. important, to have correct metadata, for distributions like
# Fedora which don't keep old packages around. If you don't like this checking
# interupting your command line usage, it's much better to have something
# manually check the metadata once an hour (yum-updatesd will do this).
# metadata_expire=90m

# PUT YOUR REPOS HERE OR IN separate files named file.repo
# in /etc/yum.repos.d
[main]:主配置,相當於程式的指向入口
cachedir:緩存路徑
keepcache:是否保持緩存
debuglevel:調試級別
logfile:日誌文件
exactarch:是否做精確匹配。如果OS是centos7,當找到的rpm包,既有centos6的也有centos7的,如果此處的值是1,則選擇centos7的。
gpgcheck:安裝時,是否檢查完整性和來源合法性。1則檢查
plugins:yum是否支持插件。1則支持
使用whatis查看是否有man幫助。
# whatis yum.conf
yum.conf (5) - Configuration file for yum(8).使用:man 5 yum.conf可以得到詳細的yum.conf配置文件的詳細幫助。
倉庫指向的定義
[repositoryid]:倉庫的id
name=倉庫的名字
baseurl=url://path/to/repository/:倉庫在哪裡,地址可以有多個,那麼選哪個呢?根據failovermethod選。
baseurl=url://server1/path/to/repository/
url://server2/path/to/repository/
url://server3/path/to/repository/
- failovermethod={roundrobin|priority}。預設為roundrobin,意味隨機選一個url
- gpgcheck={1|0}:1則檢查。預設是1.
- enabled={1|0}:是否使用此repo
- gpgkey=URL:公鑰
- enablegroups={1|0}:1則使用組功能。預設是1.
- const=預設是1000.有多個符合就選cost小的。
centos7下/etc/yum.repos.d/下的repo配置文件有幾個,只有CentOS-Base.repo文件里repo的enabled是1,也就是可以使用狀態,其餘的配置文件里的repo的enabled都是0.
# ls /etc/yum.repos.d/
CentOS-Base.repo           CentOS-CR.repo         CentOS-fasttrack.repo  CentOS-Sources.repo
CentOS-Base.repo_20191129  CentOS-Debuginfo.repo  CentOS-Media.repo      CentOS-Vault.repo
查看配置文件:/etc/yum.repos.d/CentOS-Base.repo的內容。
[base]
name=CentOS-$releasever - Base
baseurl=https://mirrors.tuna.tsinghua.edu.cn/centos/$releasever/os/$basearch/
#mirrorlist=http://mirrorlist.centos.org/?release=$releasever&arch=$basearch&repo=os
gpgcheck=1
gpgkey=file:///etc/pki/rpm-gpg/RPM-GPG-KEY-CentOS-7

#released updates
[updates]
name=CentOS-$releasever - Updates
baseurl=https://mirrors.tuna.tsinghua.edu.cn/centos/$releasever/updates/$basearch/
#mirrorlist=http://mirrorlist.centos.org/?release=$releasever&arch=$basearch&repo=updates
gpgcheck=1
gpgkey=file:///etc/pki/rpm-gpg/RPM-GPG-KEY-CentOS-7

#additional packages that may be useful
[extras]
name=CentOS-$releasever - Extras
baseurl=https://mirrors.tuna.tsinghua.edu.cn/centos/$releasever/extras/$basearch/
#mirrorlist=http://mirrorlist.centos.org/?release=$releasever&arch=$basearch&repo=extras
gpgcheck=1
gpgkey=file:///etc/pki/rpm-gpg/RPM-GPG-KEY-CentOS-7

#additional packages that extend functionality of existing packages
[centosplus]
name=CentOS-$releasever - Plus
baseurl=https://mirrors.tuna.tsinghua.edu.cn/centos/$releasever/centosplus/$basearch/
#mirrorlist=http://mirrorlist.centos.org/?release=$releasever&arch=$basearch&repo=centosplus
gpgcheck=1
enabled=0
gpgkey=file:///etc/pki/rpm-gpg/RPM-GPG-KEY-CentOS-7
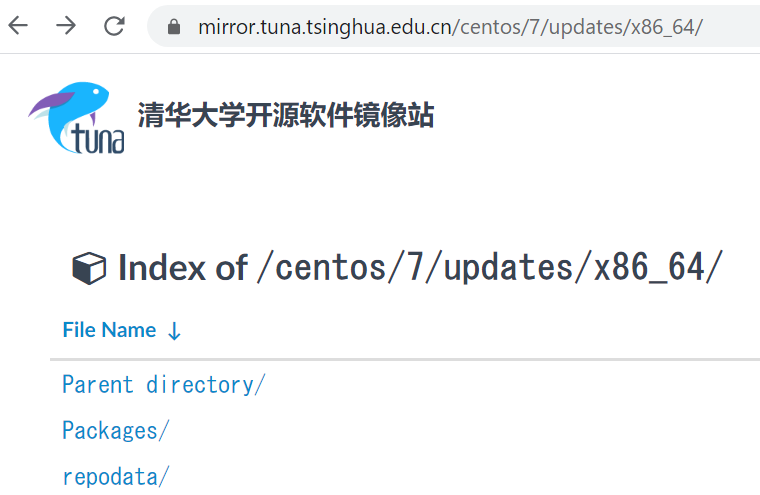
指定baseurl的技巧:指到repodata所在的網頁的URL。
上面的updates的baseurl的值就是下圖的網頁地址欄的URL。理由是repodata在這裡。
查看repo list:
# yum repolist
Loaded plugins: fastestmirror, langpacks
Loading mirror speeds from cached hostfile
repo id                                                     repo name                                                     status
!base/7/x86_64                                              CentOS-7 - Base                                               10,097
!extras/7/x86_64                                            CentOS-7 - Extras                                                323
!updates/7/x86_64                                           CentOS-7 - Updates                                             1,446
repolist: 11,866
repo id:
repo name:是配置文件/etc/yum.repos.d/CentOS-Base.repo里的name的值
status:這個repo里的rmp包的數量。
yum命令介紹
yum [options][command] [package ...]
顯示repo(倉庫)列表(list):repolist [all|enabled|disabled]
- all:顯示全部
- enabled:顯示可用的。預設值。就是本地repo配置文件里enabled=1的repo會顯示出來。
- disabled:顯示不可用的。就是本地repo配置文件里enabled=0的repo會顯示出來。
# yum repolist all
# yum repolist enabled
# yum repolist disabled
顯示指定repo里有哪些rpm包:
yum list [all | glob_exp1] [glob_exp2] [...]顯示所有的包:
# yum list可以使用glob_exp。
顯示內容的第三列:repo配置文件中的repoid
# yum list php*
Loaded plugins: fastestmirror, langpacks
Loading mirror speeds from cached hostfile
Available Packages
php.x86_64                  5.4.16-46.1.el7_7            updates
php-bcmath.x86_64           5.4.16-46.1.el7_7            updates
php-pear.noarch             1:1.9.4-21.el7               base
php-pecl-memcache.x86_64    3.0.8-4.el7                  base
顯示repo中還未安裝的包:
yum list available [glob_exp1][...]# yum list available顯示repo中的可以升級的包:
yum list updates [glob_exp1][...]# yum list updates顯示已經安裝的包:
yum list installed [glob_exp1][...]- @anaconda:安裝系統時,安裝的包。
- installed:後來自己安裝的。
# yum list installed
zlib.x86_64              1.2.7-18.el7                        @anaconda
zsh.x86_64               5.0.2-33.el7                        installed
顯示已經安裝了的extra repo中的包:
yum list extras [glob_exp1][...]# yum list extras顯示已經安裝的包,哪些已經廢棄了:
yum list distro-extras [glob_exp1][...]# yum list distro-extras安裝包:
yum install package1 [package2如果repo里有多個版本,可以指定版本,例如:
yum install gcc-4.8.5也可以不指定版本,則安裝最新版:
yum install gcc升級包:
yum update [package1][package2] [...]# yum update gcc Loaded plugins: fastestmirror, langpacks Loading mirror speeds from cached hostfile No packages marked for update降級:
downgrade package1 [package2][...]類似:
rpm -Uvh --oldpackage重新覆蓋安裝:
reinstall package1 [package2][...]類似:
rpm -ivh --replacepkgs檢查有哪些包可以升級:
yum check-update卸載包:
yum remove | erase package1 [package2][...]當卸載的包,被別的包依賴時,別的包也一併被卸載
卸載cpp:由於gcc依賴於cpp,所有如果卸載cpp,則gcc也會被卸載。
查看包的信息:
yum info [glob_exp1][...]類似rpm -qi
# yum info gcc
Loaded plugins: fastestmirror, langpacks
Loading mirror speeds from cached hostfile
Installed Packages
Name        : gcc
Arch        : x86_64
Version     : 4.8.5
Release     : 39.el7
Size        : 37 M
Repo        : installed
From repo   : base
Summary     : Various compilers (C, C++, Objective-C, Java, ...)
URL         : http://gcc.gnu.org
License     : GPLv3+ and GPLv3+ with exceptions and GPLv2+ with exceptions and LGPLv2+ and BSD
Description : The gcc package contains the GNU Compiler Collection version 4.8.
            : You'll need this package in order to compile C code
查看程式或文件是有哪個包提供的:
yum provides | whatprovides feature1 [feature2類似rpm -qf file
# yum provides /usr/bin/gcc
Loaded plugins: fastestmirror, langpacks
Loading mirror speeds from cached hostfile
gcc-4.8.5-39.el7.x86_64 : Various compilers (C, C++, Objective-C, Java, ...)
Repo        : base
Matched from:
Filename    : /usr/bin/gcc

gcc-4.8.5-39.el7.x86_64 : Various compilers (C, C++, Objective-C, Java, ...)
Repo        : @base
Matched from:
Filename    : /usr/bin/gcc
清除元數據文件在本地的緩存:
clean [ packages | metadata | expire-cache | rpmdb | plugins | all ]yum按文件時,會把程式包和元數據文件緩存在本地,當安裝結束,yum會刪除程式包文件,但是不會刪除 元數據文件。
構建緩存:
yum makecache [fast]用關鍵字搜索信息:
yum search string1 [string2][...]從包名和包的summary里搜索指定的關鍵字。
# yum search bash
Loaded plugins: fastestmirror, langpacks
Loading mirror speeds from cached hostfile
====================================================== N/S matched: bash =======================================================
bash-completion.noarch : Programmable completion for Bash
bash-doc.x86_64 : Documentation files for bash
libguestfs-bash-completion.noarch : Bash tab-completion scripts for libguestfs tools
libvirt-bash-completion.x86_64 : Bash completion script
pcp-pmda-bash.x86_64 : Performance Co-Pilot (PCP) metrics for the Bash shell
bash.x86_64 : The GNU Bourne Again shell

  Name and summary matches only, use "search all" for everything.
顯示某個包所依賴的包:
deplist package1 [package2][...]# yum deplist gcc Loaded plugins: fastestmirror, langpacks Loading mirror speeds from cached hostfile package: gcc.x86_64 4.8.5-39.el7 dependency: /bin/sh provider: bash.x86_64 4.2.46-33.el7 dependency: /sbin/install-info provider: info.x86_64 5.1-5.el7 ...查看yum的安裝,更新,卸載的歷史:
yum history不帶參數則是history listhistory [info|list|packages-list|packages-info|summary|addon-info|redo|undo|rollback|new|sync|stats]# yum history Loaded plugins: fastestmirror, langpacks ID | Login user | Date and time | Action(s) | Altered ------------------------------------------------------------------------------- 5 | root <root> | 2020-02-15 23:00 | Install | 2 4 | root <root> | 2020-02-15 22:59 | Erase | 8 3 | root <root> | 2020-02-15 22:48 | Update | 11 < 2 | ys <ys> | 2019-11-29 17:38 | Install | 8 > 1 | System <unset> | 2019-11-29 16:44 | Install | 1458 history list上面是彙總的信息,如果想看id為5的詳細信息,也就是id為5的安裝了哪些包,則使用:
# yum history info 5
Loaded plugins: fastestmirror, langpacks
Transaction ID : 5
Begin time     : Sat Feb 15 23:00:14 2020
Begin rpmdb    : 1459:fe9d7def2a5edd098cfe39ebe0732b67038170b5
End time       :            23:00:19 2020 (5 seconds)
End rpmdb      : 1461:ed3657ce694e0e90ea8bf62a092f06422c81ac28
User           : root <root>
Return-Code    : Success
Command Line   : install gcc
Transaction performed with:
    Installed     rpm-4.11.3-35.el7.x86_64                      @anaconda
    Installed     yum-3.4.3-161.el7.centos.noarch               @anaconda
    Installed     yum-plugin-fastestmirror-1.1.31-50.el7.noarch @anaconda
Packages Altered:
    Dep-Install cpp-4.8.5-39.el7.x86_64 @base
    Install     gcc-4.8.5-39.el7.x86_64 @base
history info
查看yumdb大小:
# yum history stats
Loaded plugins: fastestmirror, langpacks
File        : //var/lib/yum/history/history-2020-02-16.sqlite
Size        : 23,552
Transactions: 0
history stats
本地安裝/升級:想安裝的包在yum repo中沒有,可以下載一個rpm包安裝。但為什麼不用rpm呢,因為rpm不能解決依賴,而yum可以,所以即使是本地的rpm包,也可以使用yum安裝,但是參數是rpm文件名。
localinstall/localupdate是為了相容以前的版本,應該使用intall/update 參數是rpm文件名。
localinstall rpmfile1 [rpmfile2][...]
(maintained for legacy reasons only - use install)
localupdate rpmfile1 [rpmfile2][...]
(maintained for legacy reasons only - use update)
組安裝/更新/卸載/查看
查看有哪些組可供安裝:
# yum groups list
Loaded plugins: fastestmirror, langpacks
Loading mirror speeds from cached hostfile
Available Environment Groups:
   Minimal Install
   Compute Node
   Infrastructure Server
   File and Print Server
   Basic Web Server
   Virtualization Host
   Server with GUI
   GNOME Desktop
   KDE Plasma Workspaces
   Development and Creative Workstation
Installed Groups:
   Development Tools
Available Groups:
   Compatibility Libraries
   Console Internet Tools
   Graphical Administration Tools
   Legacy UNIX Compatibility
   Scientific Support
   Security Tools
   Smart Card Support
   System Administration Tools
   System Management
Done
查看某個組裡有哪些包:
# yum groups info Development\ Tools
Loaded plugins: fastestmirror, langpacks
Loading mirror speeds from cached hostfile

Group: Development Tools
 Group-Id: development
 Description: A basic development environment.
 Mandatory Packages:
    gcc
   =gcc-c++
    gettext
   =libtool
    make
 Default Packages:
    byacc
   =gcc-gfortran
    swig
   =systemtap
 Optional Packages:
   ElectricFence
   ant
   babel
   bzr
Mandatory Packages:必須安裝的包
Default Packages:預設安裝的包
Optional Packages:可選安裝的包
安裝:
# yum groups install "Development Tools"更新:
# yum groups update "Development Tools"
Loaded plugins: fastestmirror, langpacks
Loading mirror speeds from cached hostfile
Maybe run: yum groups mark install (see man yum)
No packages in any requested group available to install or updates
刪除:
# yum groups remove Development\ Tools
拿光碟作為repo
1,先掛載centos系統安裝盤到/media目錄。
2,創建文件local.repo
[base]
name=local repo centos
baseurl=file:///media/
enabled=1
gpgcheck=0
3,然後就可以正常使用yum命令了。
yum 常用的命令行選項
- 禁止進行gpg check:--nogpgcheck
- 自動回答yes:-y
- 不輸出安裝信息:-q
- 禁用指定的repo(可以使用glob匹配):--disablerepo=repoid(glob)
- 啟用指定的repo(可以使用glob匹配):--enablerepo=repoid(glob)
- 禁用所有插件:--noplugins
yum的repo配置文件中可用的變數
$releasever:當前OS的發行版的主版本號。centos7的話,此變數的值就是7
$arch:架構。比如i386,i486等
$basearch:基礎架構。如果是ix86架構的話,則此變數的值為i386
$YUM0-$YUM9:自定義變數
使用變數的例子:
name=CentOS-$releasever - Updates
baseurl=https://mirrors.tuna.tsinghua.edu.cn/centos/$releasever/updates/$basearch/
自己創建yum repo:createrepo [options] <directory>
使用createrepo很簡單,只需要指定rpm包所在的目錄。
就會做成目錄:repodata
# pwd
/tmp/repos
# createrepo ./
Spawning worker 0 with 19 pkgs
Workers Finished
Saving Primary metadata
Saving file lists metadata
Saving other metadata
Generating sqlite DBs
Sqlite DBs complete
# ls -d repodata/
repodata/
repodata目錄的文件構成:
# ll repodata/
total 52
-rw-r--r--. 1 root root 12690 Feb 16 11:24 7150dafd709770a783ea087b2ff869aaecfb007b0fcce6f544924c4c1e1e4405-primary.sqlite.bz2
-rw-r--r--. 1 root root  4184 Feb 16 11:24 7f43292a24f471448badbf18db488dbe52efc22237170ad2f6fc7aa36ac45a0e-primary.xml.gz
-rw-r--r--. 1 root root  2686 Feb 16 11:24 8351058925b5438dbe9abd2c246c64f3eafcc741f644ef268ac8747a82bc48ab-filelists.xml.gz
-rw-r--r--. 1 root root  2655 Feb 16 11:24 a5b6ce405bfa9814e77ab3159b77aa4a2c55ac445a5244ff449b1125badc2a9b-other.xml.gz
-rw-r--r--. 1 root root  5918 Feb 16 11:24 c58fa90f9a3825f07092ff63f524a86183a0e9f99e19d3a84b785cef2edf93f8-other.sqlite.bz2
-rw-r--r--. 1 root root  5423 Feb 16 11:24 fa9fbb57fe96cf749733a6232b4860f70c7abd60b7b0c72f9486771f63f9a4ec-filelists.sqlite.bz2
-rw-r--r--. 1 root root  2976 Feb 16 11:24 repomd.xml
創建repo配置文件:
[local2]
name=your repo centos
baseurl=file:///tmp/repos
enabled=1
gpgcheck=0
驗證:repoid:local2已經可以使用了
# yum repolist local2
Loaded plugins: fastestmirror, langpacks
Loading mirror speeds from cached hostfile
repo id                                                 repo name                                                         status
local2                                                  your repo centos                                                  19
repolist: 19
cento下的開發包組:
- Development Tools:要想自己編譯源碼,必須安裝此包組。
- Server Platform Development
- Desktop Platform Development(圖形界面的)
編譯源碼安裝:
1,configure腳本使用和作用
作用:指定安裝到哪,啟用哪些特性
使用:每個源代碼的configure的用法可能都不一樣,所有使用前,用:configure --help查看都支持哪些選項。
選項分類:
安裝路徑設定:
--prefix=/path/to/somewhere:指定安裝路徑(方便以後卸載,直接把目錄刪除)。不指定可能安裝到了/usr/local
--sysconfdir=/path/to/somewhere:指定配置文件放到哪裡
交叉編譯設定:
--build=BUILD configure for building on BUILD [guessed]
--host=HOST:編譯後運行的目標架構。cross-compile to build programs to run on HOST [BUILD]
--target=TARGET configure for building compilers for TARGET [HOST]
安裝特性設定:
--disable-FEATURE
--enable-FEATURE[=ARG]
設定安裝時依賴哪些包,不依賴哪些包
--with-PACKAGE[=ARG]:ARG為路徑信息等。
--without-PACKAGE
源碼安裝結束後的配置
1,把可執行程式目錄添加到PATH環境變數
新建文件:/etc/profile.d/NAME.sh
添加 export PATH=/PATH/TO/BIN:$PATH
2,添加庫文件路徑
新建文件:/etc/ld.so.conf.d/name.conf
添加:/PATH/TO/lib
3,讓系統找到頭文件
創建頭文件的符號鏈接:`ln -s /PATH/TO/include /usr/include/
4,導出幫助手冊
編輯/etc/man_db.conf,添加:
#MANDATORY_MANPATH                      /usr/src/pvm3/man
#
MANDATORY_MANPATH                       /usr/man
MANDATORY_MANPATH                       /usr/share/man
MANDATORY_MANPATH                       /usr/local/share/man
MANDATORY_MANPATH                       /PATH/TO/man
c/c++ 學習互助QQ群:877684253


