
安裝 urllib庫更適合寫爬蟲文件,scrapy更適合做爬蟲項目。 步驟: 1. 先更改pip源,國外的太慢了,參考:https://www.jb51.net/article/159167.htm 2. 升級pip:python m pip install upgrade pip 3. pip i ...
安裝
urllib庫更適合寫爬蟲文件,scrapy更適合做爬蟲項目。
步驟:
- 先更改pip源,國外的太慢了,參考:https://www.jb51.net/article/159167.htm
- 升級pip:python -m pip install --upgrade pip
- pip install wheel
- pip install lxml
- pip install Twisted
- pip install scrapy
常用命令
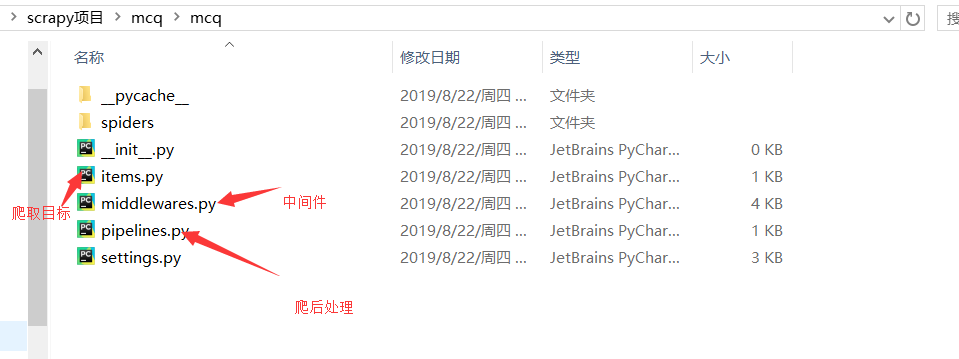
核心目錄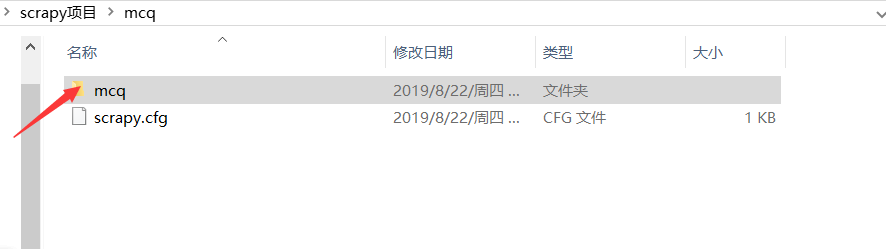
- 新建項目:scrapy startproject mcq
- 運行獨立的爬蟲文件(不是項目):比如
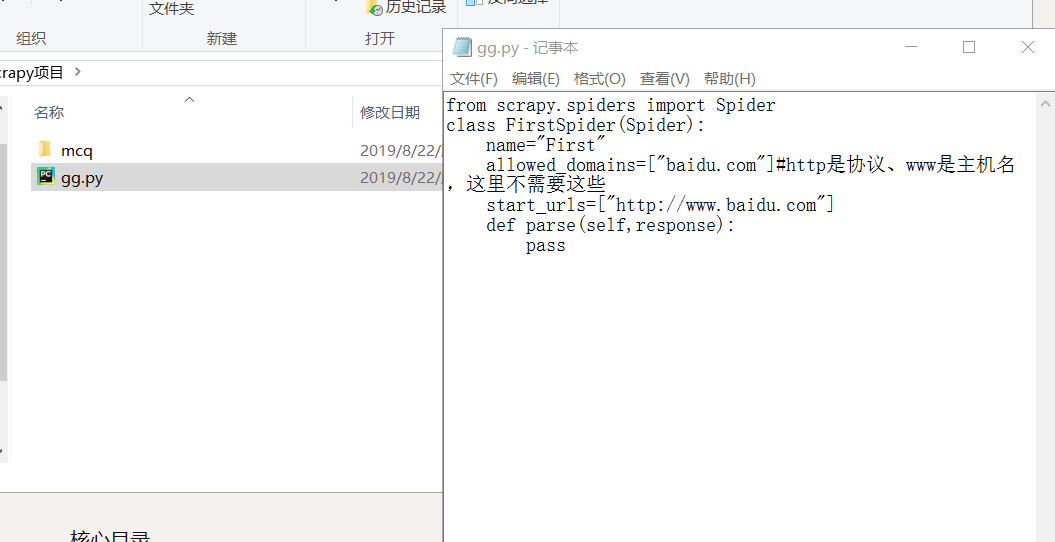
然後輸入命令scrapy runspider gg.py
獲取設置信息:cd到項目,比如scrapy settings --get BOT_NAME
互動式爬取:scrapy shell http://www.baidu.com,可以使用python代碼
scrapy版本信息:scrapy version
爬取並且在瀏覽器顯示:scrapy view http://news.1152.com,將網頁下載到本地打開
測試本地硬體性能:scrapy bench ,每分鐘可以爬取多少頁面
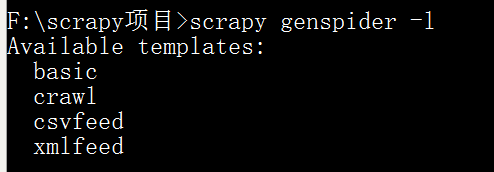
依據模板創建爬蟲文件:scrapy genspider -l ,有以下模板
選擇basic,scrapy genspider -t basic haha baidu.com (註意:這裡填可爬取的功能變數名稱,功能變數名稱是不以www、edu……開頭的)


測試爬蟲文件是否合規:scrapy check haha
運行爬蟲項目下的文件:scrapy crawl haha
不顯示中間的日誌信息:scrapy crawl haha --nolog查看當前項目下可用的爬蟲文件:scrapy list
指定某個爬蟲文件獲取url:
F:\scrapy項目\mcq>scrapy parse --spider=haha http://www.baidu.com
XPath表達式
XPath與正則簡單對比:
- XPath表達式效率會高一點
- 正則表達式功能強一點
- 一般來說,優先選擇XPath,但是XPath解決不了的問題我們就選正則去解決
/:逐層提取
text()提取標簽下麵的文本
如要提取標題:/html/head/title/text()
//標簽名:提取所有名為……的標簽
如提取所有的div標簽://div
//標簽名[@屬性='屬性值']:提取屬性為……的標簽
@屬性表示取某個屬性值
使用scrapy做噹噹網商品爬蟲
新建爬蟲項目:F:\scrapy項目>scrapy startproject dangdang
F:\scrapy項目>cd dangdang
F:\scrapy項目\dangdang>scrapy genspider -t basic dd dangdang.com

修改items.py:
# -*- coding: utf-8 -*-

# Define here the models for your scraped items
#
# See documentation in:
# https://docs.scrapy.org/en/latest/topics/items.html

import scrapy


class DangdangItem(scrapy.Item):
    # define the fields for your item here like:
    # name = scrapy.Field()
    title=scrapy.Field() #商品標題
    link=scrapy.Field() #商品鏈接
    comment=scrapy.Field() #商品評論
我們翻一下頁,分析兩個鏈接:
http://category.dangdang.com/pg2-cid4008154.html
http://category.dangdang.com/pg3-cid4008154.html
可以找到初始鏈接:http://category.dangdang.com/pg1-cid4008154.html
分析頁面源碼,可以從name="itemlist-title" 下手,因為這個正好有48個結果,即一頁商品的數量。
ctrl+f 條評論,可以發現正好有48條記錄。
dd.py:
# -*- coding: utf-8 -*-
import scrapy
from dangdang.items import DangdangItem
from scrapy.http import Request
class DdSpider(scrapy.Spider):
    name = 'dd'
    allowed_domains = ['dangdang.com']
    start_urls = ['http://category.dangdang.com/pg1-cid4008154.html']

    def parse(self, response):
        item=DangdangItem()
        item["title"]=response.xpath("//a[@name='itemlist-title']/@title").extract()
        item["link"]=response.xpath("//a[@name='itemlist-title']/@href").extract()
        item["comment"]=response.xpath("//a[@name='itemlist-review']/text()").extract()
        # print(item["title"])
        yield item
        for i in range(2,11): #爬取2~10頁
            url='http://category.dangdang.com/pg'+str(i)+'-cid4008154.html'
            yield Request(url, callback=self.parse)
對於dd里的Request:
url: 就是需要請求,併進行下一步處理的url
callback: 指定該請求返回的Response,由那個函數來處理。
先把settings.py的robots改為False:
settings.py:
# -*- coding: utf-8 -*-

# Scrapy settings for dangdang project
#
# For simplicity, this file contains only settings considered important or
# commonly used. You can find more settings consulting the documentation:
#
#     https://docs.scrapy.org/en/latest/topics/settings.html
#     https://docs.scrapy.org/en/latest/topics/downloader-middleware.html
#     https://docs.scrapy.org/en/latest/topics/spider-middleware.html

BOT_NAME = 'dangdang'

SPIDER_MODULES = ['dangdang.spiders']
NEWSPIDER_MODULE = 'dangdang.spiders'


# Crawl responsibly by identifying yourself (and your website) on the user-agent
#USER_AGENT = 'dangdang (+http://www.yourdomain.com)'

# Obey robots.txt rules
ROBOTSTXT_OBEY = False

# Configure maximum concurrent requests performed by Scrapy (default: 16)
#CONCURRENT_REQUESTS = 32

# Configure a delay for requests for the same website (default: 0)
# See https://docs.scrapy.org/en/latest/topics/settings.html#download-delay
# See also autothrottle settings and docs
#DOWNLOAD_DELAY = 3
# The download delay setting will honor only one of:
#CONCURRENT_REQUESTS_PER_DOMAIN = 16
#CONCURRENT_REQUESTS_PER_IP = 16

# Disable cookies (enabled by default)
#COOKIES_ENABLED = False

# Disable Telnet Console (enabled by default)
#TELNETCONSOLE_ENABLED = False

# Override the default request headers:
#DEFAULT_REQUEST_HEADERS = {
#   'Accept': 'text/html,application/xhtml+xml,application/xml;q=0.9,*/*;q=0.8',
#   'Accept-Language': 'en',
#}

# Enable or disable spider middlewares
# See https://docs.scrapy.org/en/latest/topics/spider-middleware.html
#SPIDER_MIDDLEWARES = {
#    'dangdang.middlewares.DangdangSpiderMiddleware': 543,
#}

# Enable or disable downloader middlewares
# See https://docs.scrapy.org/en/latest/topics/downloader-middleware.html
#DOWNLOADER_MIDDLEWARES = {
#    'dangdang.middlewares.DangdangDownloaderMiddleware': 543,
#}

# Enable or disable extensions
# See https://docs.scrapy.org/en/latest/topics/extensions.html
#EXTENSIONS = {
#    'scrapy.extensions.telnet.TelnetConsole': None,
#}

# Configure item pipelines
# See https://docs.scrapy.org/en/latest/topics/item-pipeline.html

ITEM_PIPELINES = {
   'dangdang.pipelines.DangdangPipeline': 300,
}
# Enable and configure the AutoThrottle extension (disabled by default)
# See https://docs.scrapy.org/en/latest/topics/autothrottle.html
#AUTOTHROTTLE_ENABLED = True
# The initial download delay
#AUTOTHROTTLE_START_DELAY = 5
# The maximum download delay to be set in case of high latencies
#AUTOTHROTTLE_MAX_DELAY = 60
# The average number of requests Scrapy should be sending in parallel to
# each remote server
#AUTOTHROTTLE_TARGET_CONCURRENCY = 1.0
# Enable showing throttling stats for every response received:
#AUTOTHROTTLE_DEBUG = False

# Enable and configure HTTP caching (disabled by default)
# See https://docs.scrapy.org/en/latest/topics/downloader-middleware.html#httpcache-middleware-settings
#HTTPCACHE_ENABLED = True
#HTTPCACHE_EXPIRATION_SECS = 0
#HTTPCACHE_DIR = 'httpcache'
#HTTPCACHE_IGNORE_HTTP_CODES = []
#HTTPCACHE_STORAGE = 'scrapy.extensions.httpcache.FilesystemCacheStorage'
運行:F:\scrapy項目\dangdang>scrapy crawl dd --nolog
去settings.py將pipeline開啟:
pipelines.py:
# -*- coding: utf-8 -*-
import pymysql
# Define your item pipelines here
#
# Don't forget to add your pipeline to the ITEM_PIPELINES setting
# See: https://docs.scrapy.org/en/latest/topics/item-pipeline.html


class DangdangPipeline(object):
    def process_item(self, item, spider):
        conn=pymysql.connect(host='127.0.0.1',user="root",passwd="123456",db="dangdang")
        cursor = conn.cursor()
        for i in range(len(item["title"])):
            title=item["title"][i]
            link=item["link"][i]
            comment=item["comment"][i]
            # print(title+":"+link+":"+comment)
            sql="insert into goods(title,link,comment) values('%s','%s','%s')"%(title,link,comment)
            # print(sql)
            try:
                cursor.execute(sql)
                conn.commit()
            except Exception as e:
                print(e)
        conn.close()
        return item
登錄mysql,創建一個資料庫:mysql> create database dangdang;
mysql> use dangdang
mysql> create table goods(id int(32) auto_increment primary key,title varchar(100),link varchar(100) unique,comment varchar(100));
最後運行 scrapy crawl dd --nolog

每頁48條,48*10=480,爬取成功!
完整項目源代碼參考我的github
scrapy模擬登陸實戰
以這個網站為例http://edu.iqianyue.com/,我們不爬取內容,只模擬登陸,所以不需要寫item.py
點擊登陸,用fiddler查看真正的登陸網址:http://edu.iqianyue.com/index_user_login

修改login.py:
# -*- coding: utf-8 -*-
import scrapy
from scrapy.http import FormRequest, Request


class LoginSpider(scrapy.Spider):
    name = 'login'
    allowed_domains = ['iqianyue.com']
    start_urls = ['http://iqianyue.com/']
    header={"User-Agent":"Mozilla/5.0 (Windows NT 10.0; Win64; x64; rv:68.0) Gecko/20100101 Firefox/68.0"}
    #編寫start_request()方法,第一次會預設調取該方法中的請求
    def start_requests(self):
        #首先爬一次登錄頁,然後進入回調函數parse()
        return [Request("http://edu.iqianyue.com/index_user_login",meta={"cookiejar":1},callback=self.parse)]
    def parse(self, response):
        #設置要傳遞的post信息,此時沒有驗證碼欄位
        data={
            "number":"swineherd",
            "passwd":"123",
        }
        print("登錄中……")
        #通過ForRequest.from_response()進行登錄
        return FormRequest.from_response(response,
                                          #設置cookie信息
                                          meta={"cookiejar":response.meta["cookiejar"]},
                                          #設置headers信息模擬成瀏覽器
                                          headers=self.header,
                                          #設置post表單中的數據
                                          formdata=data,
                                          #設置回調函數
                                          callback=self.next,
                                          )
    def next(self,response):
        data=response.body
        fp=open("a.html","wb")
        fp.write(data)
        fp.close()
        print(response.xpath("/html/head/title/text()").extract())
        #登錄後訪問
        yield Request("http://edu.iqianyue.com/index_user_index",callback=self.next2,meta={"cookiejar":1})
    def next2(self,response):
        data=response.body
        fp=open("b.html","wb")
        fp.write(data)
        fp.close()
        print(response.xpath("/html/head/title/text()").extract())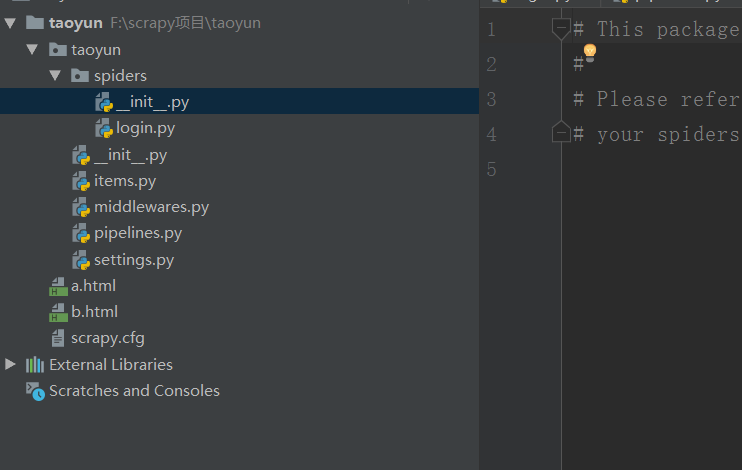
scrapy新聞爬蟲實戰
目標:爬取百度新聞首頁所有新聞
F:>cd scrapy項目
F:\scrapy項目>scrapy startproject baidunews
F:\scrapy項目>cd baidunews
F:\scrapy項目\baidunews>scrapy genspider -t basic n1 baidu.com
抓包分析
找到json文件:
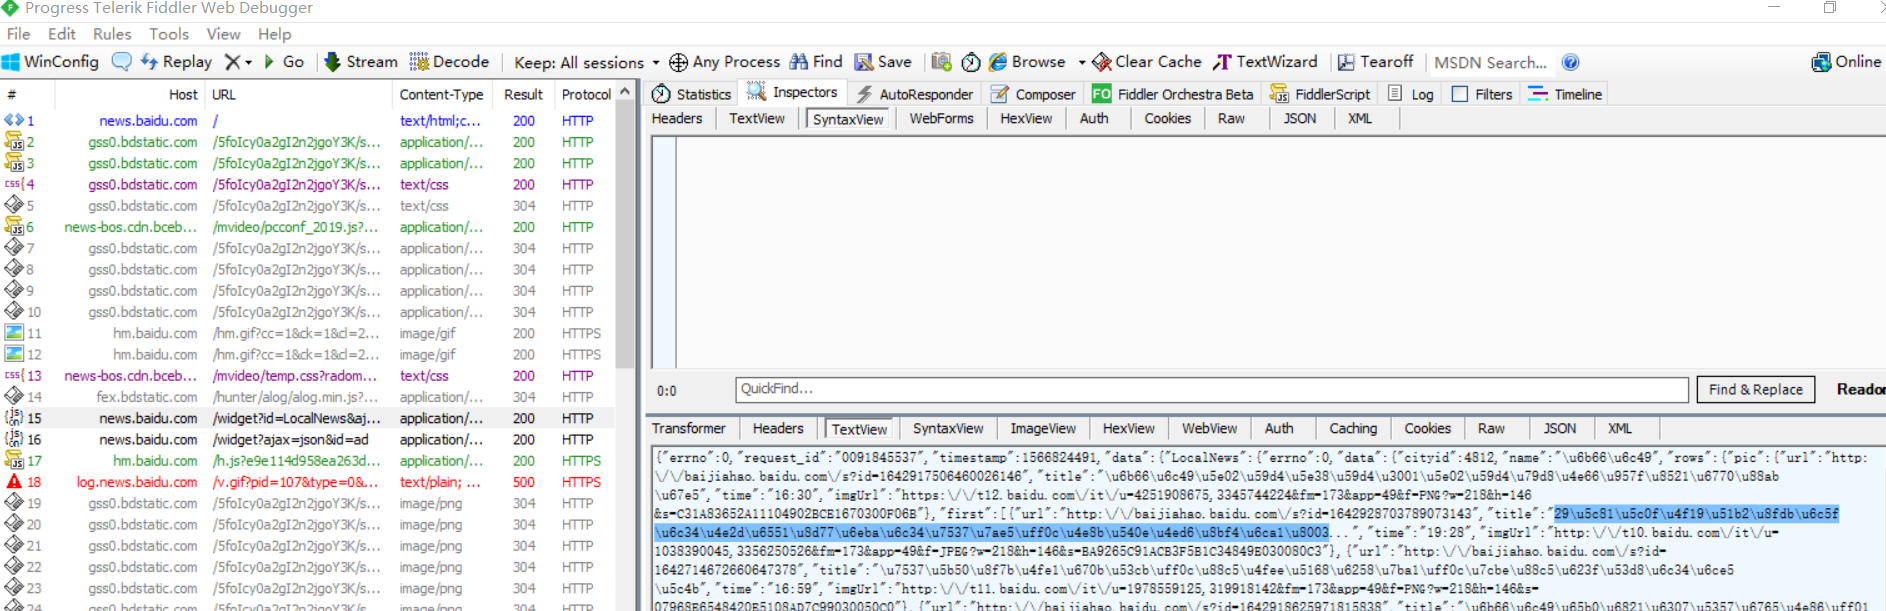
idle查看一下
首頁ctrl+f:
在首頁往下拖觸發所有新聞,在fiddler中找到存儲url、title等等的js文件(並不是每一個js文件都有用)
發現不止js文件有新聞信息,還有別的,要細心在fiddler找!
http://news.baidu.com/widget?id=LocalNews&ajax=json&t=1566824493194
http://news.baidu.com/widget?id=civilnews&t=1566824634139
http://news.baidu.com/widget?id=InternationalNews&t=1566824931323
http://news.baidu.com/widget?id=EnterNews&t=1566824931341
http://news.baidu.com/widget?id=SportNews&t=1566824931358
http://news.baidu.com/widget?id=FinanceNews&t=1566824931376
http://news.baidu.com/widget?id=TechNews&t=1566824931407
http://news.baidu.com/widget?id=MilitaryNews&t=1566824931439
http://news.baidu.com/widget?id=InternetNews&t=1566824931456
http://news.baidu.com/widget?id=DiscoveryNews&t=1566824931473
http://news.baidu.com/widget?id=LadyNews&t=1566824931490
http://news.baidu.com/widget?id=HealthNews&t=1566824931506
http://news.baidu.com/widget?id=PicWall&t=1566824931522
我們可以發現真正影響新聞信息的是widget?後面的id值
寫個腳本把id提取出來: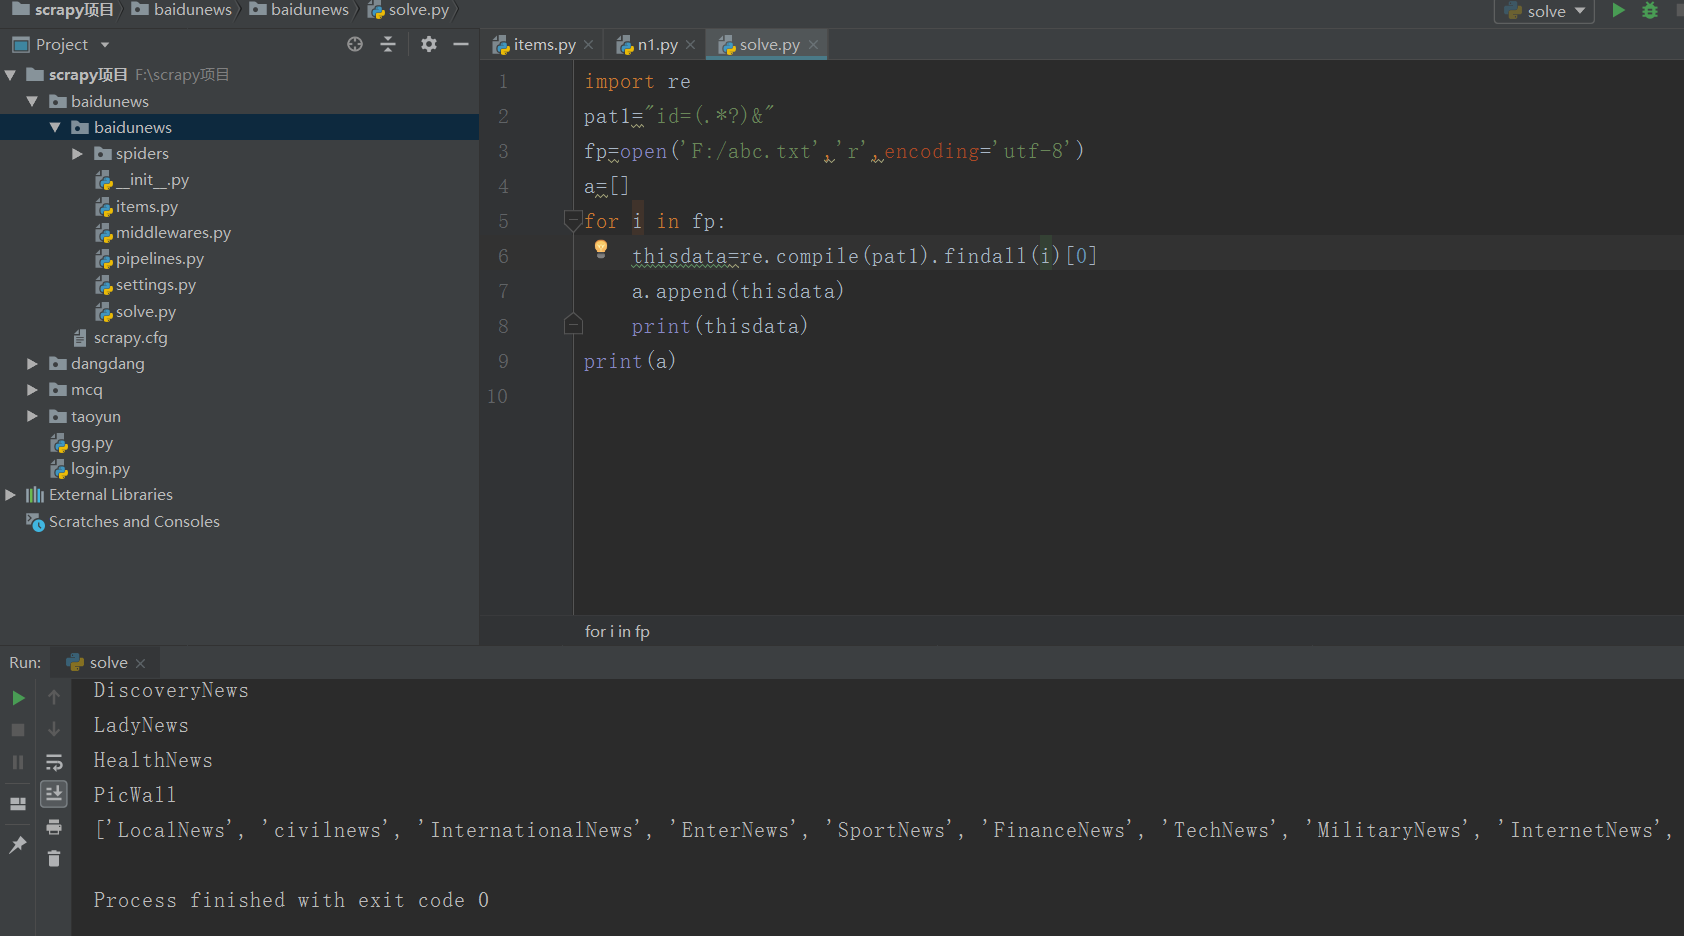
兩種不同的鏈接的源代碼的url也不同:


items.py:
# -*- coding: utf-8 -*-

# Define here the models for your scraped items
#
# See documentation in:
# https://docs.scrapy.org/en/latest/topics/items.html

import scrapy


class BaidunewsItem(scrapy.Item):
    # define the fields for your item here like:
    # name = scrapy.Field()
    title=scrapy.Field()
    link=scrapy.Field()
    content=scrapy.Field()
n1.py:
# -*- coding: utf-8 -*-
import scrapy
from baidunews.items import BaidunewsItem #從核心目錄
from scrapy.http import Request
import re
import time
class N1Spider(scrapy.Spider):
    name = 'n1'
    allowed_domains = ['baidu.com']
    start_urls = ["http://news.baidu.com/widget?id=LocalNews&ajax=json"]
    allid=['LocalNews', 'civilnews', 'InternationalNews', 'EnterNews', 'SportNews', 'FinanceNews', 'TechNews', 'MilitaryNews', 'InternetNews', 'DiscoveryNews', 'LadyNews', 'HealthNews', 'PicWall']
    allurl=[]
    for k in range(len(allid)):
        thisurl="http://news.baidu.com/widget?id="+allid[k]+"&ajax=json"
        allurl.append(thisurl)

    def parse(self, response):
        while True: #每隔5分鐘爬一次
            for m in range(len(self.allurl)):
                yield Request(self.allurl[m], callback=self.next)
                time.sleep(300) #單位為秒
    cnt=0
    def next(self,response):
        print("第" + str(self.cnt) + "個欄目")
        self.cnt+=1
        data=response.body.decode("utf-8","ignore")
        pat1='"m_url":"(.*?)"'
        pat2='"url":"(.*?)"'
        url1=re.compile(pat1,re.S).findall(data)
        url2=re.compile(pat2,re.S).findall(data)
        if(len(url1)!=0):
            url=url1
        else :
            url=url2
        for i in range(len(url)):
            thisurl=re.sub("\\\/","/",url[i])
            print(thisurl)
            yield Request(thisurl,callback=self.next2)
    def next2(self,response):
        item=BaidunewsItem()
        item["link"]=response.url
        item["title"]=response.xpath("/html/head/title/text()")
        item["content"]=response.body
        print(item)
        yield item
將settings的pipeline開啟:
將robots改為False,scrapy crawl n1 --nolog即可運行
scrapy豆瓣網登錄爬蟲
要在settings裡加上:
USER_AGENT = 'Mozilla/5.0 (Macintosh; Intel Mac OS X 10_8_3) AppleWebKit/536.5 (KHTML, like Gecko) Chrome/19.0.1084.54 Safari/536.5'
關於scrapy.http.FormRequest和scrapy.http.FormRequest.from_response的用法區別參考這篇博客:https://blog.csdn.net/qq_33472765/article/details/80958820
d1.py:
# -*- coding: utf-8 -*-
import scrapy
from scrapy.http import Request, FormRequest


class D1Spider(scrapy.Spider):
    name = 'd1'
    allowed_domains = ['douban.com']
    # start_urls = ['http://douban.com/']
    headers = {"User-Agent": "Mozilla/5.0 (Windows NT 10.0; Win64; x64; rv:68.0) Gecko/20100101 Firefox/68.0"}

    def start_requests(self):
        # 首先爬一次登錄頁,然後進入回調函數parse()
        print("開始:")
        return [Request("https://accounts.douban.com/passport/login",meta={"cookiejar":1},callback=self.login)]

    def login(self, response):
        #判斷驗證碼
        captcha=response.xpath("//")
        data = {
            "ck": "",
            "name": "***",
            "password": "***",
            "remember": "false",
            "ticket": ""
        }
        print("登陸中……")
        return FormRequest(url="https://accounts.douban.com/j/mobile/login/basic",
                                         # 設置cookie信息
                                         meta={"cookiejar": response.meta["cookiejar"]},
                                         # 設置headers信息模擬成瀏覽器
                                         headers=self.headers,
                                         # 設置post表單中的數據
                                         formdata=data,
                                         # 設置回調函數
                                         callback=self.next,
                                         )
    def next(self,response):
        #跳轉到個人中心
        yield Request("https://www.douban.com/people/202921494/",meta={"cookiejar":1},callback=self.next2)
    def next2(self, response):
        title = response.xpath("/html/head/title/text()").extract()
        print(title)
現在的豆瓣是滑塊驗證碼,對於現在的我這個菜雞還不會處理。
在urllib中使用XPath表達式
先安裝lxml模塊:pip install lxml,然後將網頁數據通過lxml下的etree轉化為treedata的形式。
import urllib.request
from lxml import etree
data=urllib.request.urlopen("http://www.baidu.com").read().decode("utf-8","ignore")
treedata=etree.HTML(data)
title=treedata.xpath("//title/text()")
print(title)

