
一、簡要說明 ABP vNext 框架在使用依賴註入服務的時候,是直接使用的微軟提供的 Microsoft.Extensions.DependencyInjection 包。這裡與原來的 ABP 框架就不一樣了,原來的 ABP 框架還需要抽象出來一個 用來管理整個 IoC 容器,現在則直接操作 與 ...
一、簡要說明
ABP vNext 框架在使用依賴註入服務的時候,是直接使用的微軟提供的 Microsoft.Extensions.DependencyInjection 包。這裡與原來的 ABP 框架就不一樣了,原來的 ABP 框架還需要抽象出來一個 IIocManager 用來管理整個 IoC 容器,現在則直接操作 IServiceCollection 與 IServiceProvider 進行組件的註冊/解析。
這裡需要註意的是,雖然現在的依賴註入服務是使用微軟官方那一套庫進行操作,但是 ABP vNext 還是為我們提供了組件自動註冊、攔截器這些基礎功能。
二、源碼分析
2.1 組件自動註冊
ABP vNext 仍然在其 Core 庫為我們提供了三種介面,即 ISingletonDependency 和 ITransientDependency 、IScopedDependency 介面,方便我們的類型/組件自動註冊,這三種介面分別對應了對象的 單例、瞬時、範圍 生命周期。只要任何類型/介面實現了以上任意介面,ABP vNext 就會在系統啟動時候,將這些對象註冊到 IoC 容器當中。
那麼究竟是在什麼時候呢?回顧上一章的模塊系統的文章,在模塊系統調用模塊的 ConfigureService() 的時候,就會有一個 services.AddAssembly(module.Type.Assembly) ,他會將模塊的所屬的程式集傳入。
public class ModuleLoader : IModuleLoader
{
    // ... 其他代碼
    protected virtual void ConfigureServices(List<IAbpModuleDescriptor> modules, IServiceCollection services)
    {
        // ... 其他代碼
        //ConfigureServices
        foreach (var module in modules)
        {
            if (module.Instance is AbpModule abpModule)
            {
                // 是否跳過服務的自動註冊,預設為 false。
                if (!abpModule.SkipAutoServiceRegistration)
                {
                    services.AddAssembly(module.Type.Assembly);
                }
            }

            module.Instance.ConfigureServices(context);
        }
        // ... 其他代碼
    }
    // ... 其他代碼
}
看來核心就在於這個 AddAssembly() 擴展方法了,跳轉到方法的內部,發現真正幹事的是 IConventionalRegistrar 對象,暫且稱之為規約註冊器,而且我們可以擁有多個規約註冊器,你可以自己實現自動註冊規則。
public static IServiceCollection AddAssembly(this IServiceCollection services, Assembly assembly)
{
    // 獲得所有規約註冊器,然後調用規約註冊器的 AddAssmbly 方法註冊類型。
    foreach (var registrar in services.GetConventionalRegistrars())
    {
        registrar.AddAssembly(services, assembly);
    }

    return services;
}
該介面定義了三個方法,支持傳入程式集、類型數組、具體類型,他們的預設實現都在抽象類 ConventionalRegistrarBase 當中。
public interface IConventionalRegistrar
{
    void AddAssembly(IServiceCollection services, Assembly assembly);

    void AddTypes(IServiceCollection services, params Type[] types);

    void AddType(IServiceCollection services, Type type);
}
抽象類當中的實現也非常簡單,他們最終都是調用的 AddType() 方法來將類型註冊到 IServiceCollection 當中的。
public abstract class ConventionalRegistrarBase : IConventionalRegistrar
{
    public virtual void AddAssembly(IServiceCollection services, Assembly assembly)
    {
        // 獲得程式集內的所有類型,過濾掉抽象類和泛型類型。
        var types = AssemblyHelper
            .GetAllTypes(assembly)
            .Where(
                type => type != null &&
                        type.IsClass &&
                        !type.IsAbstract &&
                        !type.IsGenericType
            ).ToArray();

        AddTypes(services, types);
    }

    public virtual void AddTypes(IServiceCollection services, params Type[] types)
    {
        foreach (var type in types)
        {
            AddType(services, type);
        }
    }

    public abstract void AddType(IServiceCollection services, Type type);
}
所以我們的重點就在於 AddType() 方法,ABP vNext 框架預設的規約註冊器叫做 DefaultConventionalRegistrar,跳轉到其定義可以發現在其內部,除了對三種生命周期介面處理之外,如果類型使用了 DependencyAttribute 特性,也會根據該特性的參數配置進行不同的註冊邏輯。
public override void AddType(IServiceCollection services, Type type)
{
    // 判斷類型是否標註了 DisableConventionalRegistration 特性,如果有標註,則跳過。
    if (IsConventionalRegistrationDisabled(type))
    {
        return;
    }

    // 獲得 Dependency 特性,如果沒有則返回 null。
    var dependencyAttribute = GetDependencyAttributeOrNull(type);
    // 優先使用 Dependency 特性所指定的生命周期,如果不存在則根據 type 實現的介面確定生命周期。
    var lifeTime = GetLifeTimeOrNull(type, dependencyAttribute);

    if (lifeTime == null)
    {
        return;
    }

    // 獲得等待註冊的類型定義,類型的定義優先使用 ExposeServices 特性指定的類型,如果沒有則使用
    // 類型當中介面以 I 開始,後面為實現類型名稱的介面。
    foreach (var serviceType in AutoRegistrationHelper.GetExposedServices(services, type))
    {
        var serviceDescriptor = ServiceDescriptor.Describe(serviceType, type, lifeTime.Value);

        if (dependencyAttribute?.ReplaceServices == true)
        {
            // 替換服務。
            services.Replace(serviceDescriptor);
        }
        else if (dependencyAttribute?.TryRegister == true)
        {
            // 註冊服務。
            services.TryAdd(serviceDescriptor);
        }
        else
        {
            // 註冊服務。
            services.Add(serviceDescriptor);
        }
    }
}
這裡就是在 GetLifeTimeOrNull() 內部的 GetServiceLifetimeFromClassHierarcy() 方法確定了每個介面對應的生命周期。
protected virtual ServiceLifetime? GetServiceLifetimeFromClassHierarcy(Type type)
{
    if (typeof(ITransientDependency).GetTypeInfo().IsAssignableFrom(type))
    {
        return ServiceLifetime.Transient;
    }

    if (typeof(ISingletonDependency).GetTypeInfo().IsAssignableFrom(type))
    {
        return ServiceLifetime.Singleton;
    }

    if (typeof(IScopedDependency).GetTypeInfo().IsAssignableFrom(type))
    {
        return ServiceLifetime.Scoped;
    }

    return null;
}
如果讀者有用過 AutoFac 或者 Castle Windsor 這些依賴註入框架的話,就知道我們要註冊一個類型,需要知道該類型的定義和實現。這裡的 AutoRegistrationHelper 工具類就會為我們確定註冊類型的類型定義,與其預設實現。
例如我有兩個介面 IDemoTest、IDemoTestTwo,和他們的預設實現 DemoTest ,我可以有以下幾種方法來確定我的註冊類型。
// 指定了兩個介面類型的實現都是 DemoTest,在註冊的時候就會執行兩次註冊。
// 分別是 services.AddTransient<IDemoTest,DemoTest>();
// services.AddTransient<IDemoTestTwo,DemoTest>();
[ExposeServices(typeof(IDemoTest),typeof(IDemoTestTwo))]
public class DemoTest : IDemoTest,ITransientDependency
{

}

// 或者不顯式指定,只需要介面定義符合約定即可。
// services.AddTransient<IDemoTest,DemoTest>();
public class DemoTest : IDemoTest,ITransientDependency
{

}

// 如果連註冊介面都沒有指定,那麼就直接註入當前的實現類型。
// services.AddTransient<DemoTest>();
public class DemoTest : ITransientDependency
{

}
2.2 方法攔截器
2.2.1 ABP vNext 新的抽象層
在 ABP vNext 框架當中,將方法攔截器抽象了一層 IAbpInterceptor,但實際實現還是使用的 Castle.Core 所提供的動態代理功能,其定義在 Volo.Abp.Dependency.DynamicProxy 文件夾當中,如下圖。
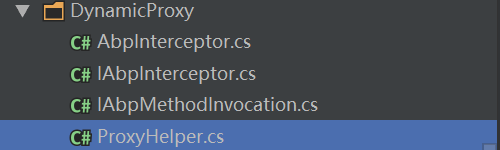
ABP vNext 將攔截器和方法調用模型都進行了定義,其中 AbpInterceptor 則是 IAbpInterceptor 的預設抽象實現。在ProxyHelper 工具類當中,提供了從代理對象獲取真實類型的方法。(PS: 通過 Castle.Core 代理後的對象與原有類型定義是不一致的。)
// ABP vNext 當中的攔截器定義
public interface IAbpInterceptor
{
    // 同步方法攔截。
    void Intercept(IAbpMethodInvocation invocation);

    // 非同步方法攔截。
    Task InterceptAsync(IAbpMethodInvocation invocation);
}

// ABP vNext 當中攔截器的預設抽象實現。
public abstract class AbpInterceptor : IAbpInterceptor
{
    public abstract void Intercept(IAbpMethodInvocation invocation);

    // 非同步方法本質上還是調用同步方法,並返回一個已完成的 Task。
    public virtual Task InterceptAsync(IAbpMethodInvocation invocation)
    {
        Intercept(invocation);
        return Task.CompletedTask;
    }
}
至於 IAbpMethodInvocation 介面,則是封裝了一個被攔截方法調用時的各種參數,例如被攔截方法的在調用時所傳遞的參數,返回值類型,方法定義等。而 ABP vNext 也為它建立了一個 CastleAbpMethodInvocationAdapter 適配器,實現了上述介面。
public interface IAbpMethodInvocation
{
    object[] Arguments { get; }

    IReadOnlyDictionary<string, object> ArgumentsDictionary { get; }

    Type[] GenericArguments { get; }

    object TargetObject { get; }

    MethodInfo Method { get; }

    object ReturnValue { get; set; }

    void Proceed();

    Task ProceedAsync();
}
2.2.2 Castle.Core 動態代理的集成
ABP vNext 在實際使用的時候,還是通過 Castle.Core 提供的動態代理功能來實現攔截器,相關的代碼存放在 Volo.Abp.Castle.Core 庫和 Volo.Abp.Autofac 庫當中。
首先我們來看 Castle.Core 庫對介面 IAbpMethodInvocation 和 IAbpInterceptor 的實現,在 CastleAbpInterceptorAdapter 中通過適配器來定義了一個標準的 Castle 攔截器,這個攔截器可以傳入 ABP vNext 定義的 IAbpInterceptor 作為其泛型參數。
public class CastleAbpInterceptorAdapter<TInterceptor> : IInterceptor
    where TInterceptor : IAbpInterceptor
{

}
Castle 的攔截器也會有一個 Intercept() 方法,該方法將在被攔截方法執行的時候觸發。在觸發之後,會根據當前方法的定義進行不同的操作,這裡非同步方法和同步方法處理邏輯是不一樣的。
public void Intercept(IInvocation invocation)
{
    var proceedInfo = invocation.CaptureProceedInfo();

    var method = invocation.MethodInvocationTarget ?? invocation.Method;

    // 判斷執行的方法是否是非同步方法。
    if (method.IsAsync())
    {
        InterceptAsyncMethod(invocation, proceedInfo);
    }
    else
    {
        InterceptSyncMethod(invocation, proceedInfo);
    }
}
這裡我們以非同步方法為例,其內部又會根據方法的返回值是否是 Task 進行不同的操作,因為如果是泛型的 Task,說明該非同步方法是有返回值的,所以處理邏輯也不一樣。
private void InterceptAsyncMethod(IInvocation invocation, IInvocationProceedInfo proceedInfo)
{
    if (invocation.Method.ReturnType == typeof(Task))
    {
        invocation.ReturnValue = MethodExecuteWithoutReturnValueAsync
            .Invoke(this, new object[] { invocation, proceedInfo });
    }
    else
    {
        invocation.ReturnValue = MethodExecuteWithReturnValueAsync
            .MakeGenericMethod(invocation.Method.ReturnType.GenericTypeArguments[0])
            .Invoke(this, new object[] {invocation, proceedInfo});
    }
}
進一步解析在返回類型為 Task 時,它所調用的方法。
private async Task ExecuteWithoutReturnValueAsync(IInvocation invocation, IInvocationProceedInfo proceedInfo)
{
    // 註意這裡,該用法在之前的 C# 多線程學習筆記文章有說過,作用是出讓當前核心給其他線程。
    await Task.Yield();

    // 調用真實的攔截器,根據傳入的方法調用模型去攔截真實的方法。
    await _abpInterceptor.InterceptAsync(
        new CastleAbpMethodInvocationAdapter(invocation, proceedInfo)
    );
}
從上述代碼可以得知,ABP vNext 的攔截器動作現在被包裹在一個 Castle 攔截器內部進行的。
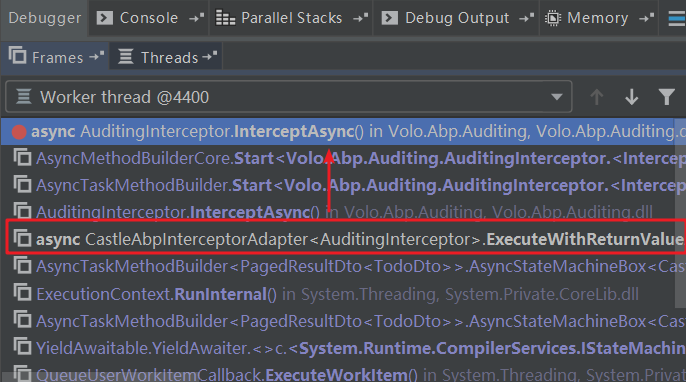

那麼,我們的 Castle.Core 攔截器在什麼時候與類型進行綁定的呢,每個攔截器又是如何與特性的類型進行註冊的呢?這裡我以審計日誌攔截器為例,看一下它在系統當中是如何註冊,並被使用的。
審計日誌相關的代碼存放在 Volo.Abp.Auditing 庫中,我們找到 AuditingInterceptor 類型,查看其定義可以看到它也是繼承自 AbpInterceptor 抽象基類。
public class AuditingInterceptor : AbpInterceptor, ITransientDependency
{

}
接著我們根據名字找到了攔截器的註冊工具類 AuditingInterceptorRegistrar,在類型的定義當中 ShouldIntercept() 與 ShouldAuditTypeByDefault() 根據傳入的 Type 類型,根據特定的邏輯決定是否為該類型關聯審計日誌攔截器。
private static bool ShouldIntercept(Type type)
{
    if (ShouldAuditTypeByDefault(type))
    {
        return true;
    }

    // 如果類型的任意方法啟用了 Auditied 特性,則應用攔截器。
    if (type.GetMethods().Any(m => m.IsDefined(typeof(AuditedAttribute), true)))
    {
        return true;
    }

    return false;
}

public static bool ShouldAuditTypeByDefault(Type type)
{
    // 判斷類型是否使用了 Audited 特性,使用了則應用審計日誌攔截器。
    if (type.IsDefined(typeof(AuditedAttribute), true))
    {
        return true;
    }

    // 判斷類型是否使用了 DisableAuditing 特性,使用了則不關聯攔截器。
    if (type.IsDefined(typeof(DisableAuditingAttribute), true))
    {
        return false;
    }

    // 如果類型實現了 IAuditingEnabled 介面,則啟用攔截器。
    if (typeof(IAuditingEnabled).IsAssignableFrom(type))
    {
        return true;
    }

    return false;
}
我們這裡需要關註的是 RegisterIfNeeded() 方法,它在審計日誌模塊的預載入方法就被添加到了一個 ServiceRegistrationActionList 集合當中,這個集合會在後面 AutoFac 進行類型註冊的時候被使用。
public static void RegisterIfNeeded(IOnServiceRegistredContext context)
{
    // 如果類型允許被審計日誌攔截器所攔截,則在類型關聯的攔截器上下文當中添加審計日誌攔截器。
    if (ShouldIntercept(context.ImplementationType))
    {
        context.Interceptors.TryAdd<AuditingInterceptor>();
    }
}
public override void PreConfigureServices(ServiceConfigurationContext context)
{
// 將這個 Action 加入 List。
context.Services.OnRegistred(AuditingInterceptorRegistrar.RegisterIfNeeded);
}繼續查看 OnRegistred() 的代碼,得到如下的定義,可以看到最後的 Action 會被添加到一個 ServiceRegistrationActionList 訪問器中。
public static void OnRegistred(this IServiceCollection services, Action<IOnServiceRegistredContext> registrationAction)
{
    GetOrCreateRegistrationActionList(services).Add(registrationAction);
}

public static ServiceRegistrationActionList GetRegistrationActionList(this IServiceCollection services)
{
    return GetOrCreateRegistrationActionList(services);
}

private static ServiceRegistrationActionList GetOrCreateRegistrationActionList(IServiceCollection services)
{
    var actionList = services.GetSingletonInstanceOrNull<IObjectAccessor<ServiceRegistrationActionList>>()?.Value;
    if (actionList == null)
    {
        actionList = new ServiceRegistrationActionList();
        services.AddObjectAccessor(actionList);
    }

    return actionList;
}
AutoFac 在執行註冊操作的時候,會調用 AutofacRegistration 靜態類的 Register 方法,該方法會遍歷整個 IServiceCollection 集合。在將類型註冊到 AutoFac 的 IoC 容器中的時候,在它的內部會調用 AbpRegistrationBuilderExtensions 提供的擴展方法為具體的類型添加過濾器。
private static void Register(
        ContainerBuilder builder,
        IServiceCollection services)
{
    var moduleContainer = services.GetSingletonInstance<IModuleContainer>();
    // 獲取之前添加的上下文集合,即審計日誌攔截器在預載入方法添加的 Action 集合。
    var registrationActionList = services.GetRegistrationActionList();

    foreach (var service in services)
    {
        if (service.ImplementationType != null)
        {
            var serviceTypeInfo = service.ServiceType.GetTypeInfo();
            if (serviceTypeInfo.IsGenericTypeDefinition)
            {
                builder
                    .RegisterGeneric(service.ImplementationType)
                    .As(service.ServiceType)
                    .ConfigureLifecycle(service.Lifetime)
                    // 這裡是重點,傳入了 Action 集合,調用了擴展方法。
                    .ConfigureAbpConventions(moduleContainer, registrationActionList);
            }
            // ... 註釋了其他代碼。
        }
        // ... 註釋了其他代碼。
    }
}
下麵是擴展方法所定義的相關代碼,註意閱讀註釋。
public static IRegistrationBuilder<TLimit, TActivatorData, TRegistrationStyle> ConfigureAbpConventions<TLimit, TActivatorData, TRegistrationStyle>(
        this IRegistrationBuilder<TLimit, TActivatorData, TRegistrationStyle> registrationBuilder,
        IModuleContainer moduleContainer,
        ServiceRegistrationActionList registrationActionList)
    where TActivatorData : ReflectionActivatorData
{
    // ... 註釋了其他代碼。
    registrationBuilder = registrationBuilder.InvokeRegistrationActions(registrationActionList, serviceType, implementationType);
    // ... 註釋了其他代碼。
}

private static IRegistrationBuilder<TLimit, TActivatorData, TRegistrationStyle> InvokeRegistrationActions<TLimit, TActivatorData, TRegistrationStyle>(this IRegistrationBuilder<TLimit, TActivatorData, TRegistrationStyle> registrationBuilder, ServiceRegistrationActionList registrationActionList, Type serviceType, Type implementationType)
    where TActivatorData : ReflectionActivatorData
{
    // 構造上下文,以便去調用之前傳入的 Action。
    var serviceRegistredArgs = new OnServiceRegistredContext(serviceType, implementationType);

    foreach (var registrationAction in registrationActionList)
    {
        // 以審計日誌攔截器為例,這裡會調用在預載入方法傳入的 AuditingInterceptorRegistrar.RegisterIfNeeded 方法。
        registrationAction.Invoke(serviceRegistredArgs);
    }

    // 這裡的 Interceptors 實際上就是 AuditingInterceptorRegistrar.RegisterIfNeeded 內部添加的攔截器哦。
    if (serviceRegistredArgs.Interceptors.Any())
    {
        registrationBuilder = registrationBuilder.AddInterceptors(
            serviceType,
            serviceRegistredArgs.Interceptors
        );
    }

    return registrationBuilder;
}

private static IRegistrationBuilder<TLimit, TActivatorData, TRegistrationStyle> AddInterceptors<TLimit, TActivatorData, TRegistrationStyle>(
    this IRegistrationBuilder<TLimit, TActivatorData, TRegistrationStyle> registrationBuilder,
    Type serviceType,
    IEnumerable<Type> interceptors)
    where TActivatorData : ReflectionActivatorData
{
    // ... 註釋了其他代碼。

    foreach (var interceptor in interceptors)
    {
        // 構造真實的攔截器,並與類型集成。
        registrationBuilder.InterceptedBy(
            typeof(CastleAbpInterceptorAdapter<>).MakeGenericType(interceptor)
        );
    }

    return registrationBuilder;
}
2.3 對象訪問器
在第一章節的時候,我們就遇到過 IObjectAccessor<T> 介面,基本上是針對該介面所提供的 Value 屬性進行操作,下麵就是該介面的定義和它的預設實現 ObjectAccessor<T>,十分簡單,就一個泛型的 Value。
public interface IObjectAccessor<out T>
{
    [CanBeNull]
    T Value { get; }
}

public class ObjectAccessor<T> : IObjectAccessor<T>
{
    public T Value { get; set; }

    public ObjectAccessor()
    {

    }

    public ObjectAccessor([CanBeNull] T obj)
    {
        Value = obj;
    }
}
僅僅看上述的代碼,是看不出什麼名堂的,接著我們來到它的擴展方法定義 ServiceCollectionObjectAccessorExtensions 。
可以看到其核心的代碼在於 ObjectAccessor<T> AddObjectAccessor<T>(this IServiceCollection services, ObjectAccessor<T> accessor) 這個重載方法。它首先判斷某個特定泛型的對象訪問器是否被註冊,如果被註冊直接拋出異常,沒有則繼續。
最後呢通過一個小技巧,將某個特定類型的對象訪問器作為單例註冊到 IoC 容器的頭部,方便快速檢索。
public static ObjectAccessor<T> AddObjectAccessor<T>(this IServiceCollection services, ObjectAccessor<T> accessor)
{
    if (services.Any(s => s.ServiceType == typeof(ObjectAccessor<T>)))
    {
        throw new Exception("An object accessor is registered before for type: " + typeof(T).AssemblyQualifiedName);
    }

    //Add to the beginning for fast retrieve
    services.Insert(0, ServiceDescriptor.Singleton(typeof(ObjectAccessor<T>), accessor));
    services.Insert(0, ServiceDescriptor.Singleton(typeof(IObjectAccessor<T>), accessor));

    return accessor;
}
使用的時候,從第一章就有見到,這裡的對象訪問器可以傳入一個類型。這個時候其 Value 就是空的,但並不影響該類型的解析,只需要在真正使用之前將其 Value 值賦值為實例對象即可。
只是目前來看,該類型的作用並不是十分明顯,更多的時候是一個占位類型而已,你可以在任意時間替換某個類型的對象訪問器內部的 Value 值。
2.4 服務的範圍工廠
我們知道在依賴註入框架當中,有一種特別的生命周期叫做 Scoped 周期,這個周期在我之前的相關文章有講過,它是一個比較特別的生命周期。
簡單來說,Scoped 對象的生命周期只有在某個範圍內是單例存在的,例如以下偽代碼,用戶會請求 ScopedTest() 介面:
public class HomeController()
{
    public Task ScopedTest()
    {
        using(var scope = ScopedFactory.CreateScope<TestApp>())
        {
            scope.ChildContainer.Resolve<TestApp>.Name = "111";
            scope.ChildContainer.Resolve<TestController>();
        }
    }
}

public class TestController()
{
    public TestController(TestApp app)
    {
        Console.WritleLine(app.Name);
    }
}
最後在 TestController 中,控制台會輸出 111 作為結果,在 HomeController 中 ScopedTest() 語句塊結束的時候,obj 對象會被釋放,在後續的請求當中,TestApp 都是作為一個 Scoped 對象生存的。
所以流程可以分為以下幾步:
- 通過 ScopeFactory 創建一個 Scope 範圍。
- 通過 Scope 範圍內的子容器,解析對象。
- 子容器在解析時,如果解析出來的類型是 Scope 生命周期,則在整個 Scope 存活期間,它都是單例的。
- Scope 範圍釋放,會調用銷毀內部的子容器,並銷毀掉所有解析出來的對象。
在 Volo.Abp.Autofac 庫當中,定義了使用 AutoFac 封裝的範圍工廠與服務範圍類型的定義,他們將會作為預設的 IServiceScopeFactory 實現。
internal class AutofacServiceScopeFactory : IServiceScopeFactory
{
    private readonly ILifetimeScope _lifetimeScope;

    public AutofacServiceScopeFactory(ILifetimeScope lifetimeScope)
    {
        this._lifetimeScope = lifetimeScope;
    }

    public IServiceScope CreateScope()
    {
        return new AutofacServiceScope(this._lifetimeScope.BeginLifetimeScope());
    }
}
這裡可以看到,在構建這個工廠的時候,會註入一個 ILifetimScope,這個東西就是 AutoFac 提供的 子容器。在 CreateScope() 方法內部,我們通過構造一個 Scope 作為具體的範圍解析對象,並將子容器傳入到它的內部。
internal class AutofacServiceScope : IServiceScope
{
    private readonly ILifetimeScope _lifetimeScope;

    public AutofacServiceScope(ILifetimeScope lifetimeScope)
    {
        // 構造子容器。
        this._lifetimeScope = lifetimeScope;
        this.ServiceProvider = this._lifetimeScope.Resolve<IServiceProvider>();
    }

    public IServiceProvider ServiceProvider { get; }

    public void Dispose()
    {
        // 範圍釋放的時候,釋放子容器。
        this._lifetimeScope.Dispose();
    }
}
那麼是在什麼時候,我們的範圍工廠會被調用來構造一個 IServiceScope 對象呢?就是在 ASP.NET Core 每次請求的時候,它在獲得其內部的 RequestServices 時,就會通過 IServiceProvidersFeature 來創建一個 Scope 範圍。
public IServiceProvider RequestServices
{
    get
    {
        if (!_requestServicesSet)
        {
            _context.Response.RegisterForDispose(this);
            // 通過工廠,創建一個範圍解析對象,這裡就是 AutofacServiceScopeFactory。
            _scope = _scopeFactory.CreateScope();
            _requestServices = _scope.ServiceProvider;
            _requestServicesSet = true;
        }
        return _requestServices;
    }

    set
    {
        _requestServices = value;
        _requestServicesSet = true;
    }
}
所以,我們在每次請求的時候,針對於 Scope 聲明周期的對象,預設的話都是在整個請求處理期間,都是單例的,除非顯式使用 using 語句塊聲明作用域。
而在 ABP vNext 中給我們提供了兩個 Scoped Factory,分別是 HttpContextServiceScopeFactory 和 DefaultServiceScopeFactory ,它們都繼承自 IHybridServiceScopeFactory 介面。
這個 IHybridServiceScopeFactory 介面只是一個空的介面,並繼承自 Microsoft Dependency Inject 提供的 IServiceScopeFactory 工廠介面。
但在實際註入的時候,並不會替換掉預設的 IServiceScopeFactory 實現。因為在 IHybridServiceScopeFactory 的預設兩個實現的定義上,他們都顯式得通過 ExposeServices 特性說明瞭自己是哪些類型的預設實現,且一般使用的時候,都是通過註入 IHybridServiceScopeFactory 並結合 using 語句塊來操作。
例如在 Volo.Abp.Data 庫的 DataSeeder 類型中,有如下用法。
public async Task SeedAsync(DataSeedContext context)
{
    using (var scope = ServiceScopeFactory.CreateScope())
    {
        foreach (var contributorType in Options.Contributors)
        {
            var contributor = (IDataSeedContributor) scope
                .ServiceProvider
                .GetRequiredService(contributorType);

            await contributor.SeedAsync(context);
        }
    }
}
只是這兩個實現有什麼不同呢?通過兩個類型的名字就可以看出來,一個是給 ASP.NET Core MVC 程式使用的,另一個則是預設的範圍工廠,下麵我們從代碼層面上來比較一下兩者之間的差別。
[ExposeServices(
    typeof(IHybridServiceScopeFactory),
    typeof(DefaultServiceScopeFactory)
    )]
public class DefaultServiceScopeFactory : IHybridServiceScopeFactory, ITransientDependency
{
    // 直接註入封裝的 AutofacServiceScopeFactory。
    protected IServiceScopeFactory Factory { get; }

    public DefaultServiceScopeFactory(IServiceScopeFactory factory)
    {
        Factory = factory;
    }

    public IServiceScope CreateScope()
    {
        // 通過 AutofacServiceScopeFactory 創建一個 scope。
        return Factory.CreateScope();
    }
}
HttpContextServiceScopeFactory 是放在 AspNetCore 模塊下的,從他的 Dependency 特性可以看出來,他會替換掉預設的 DefaultServiceScopeFactory 實現。
[ExposeServices(
    typeof(IHybridServiceScopeFactory),
    typeof(HttpContextServiceScopeFactory)
    )]
[Dependency(ReplaceServices = true)]
public class HttpContextServiceScopeFactory : IHybridServiceScopeFactory, ITransientDependency
{
    protected IHttpContextAccessor HttpContextAccessor { get; }

    // AutoFacServiceScopeFactory
    protected IServiceScopeFactory ServiceScopeFactory { get; }

    public HttpContextServiceScopeFactory(
        IHttpContextAccessor httpContextAccessor,
        IServiceScopeFactory serviceScopeFactory)
    {
        HttpContextAccessor = httpContextAccessor;
        ServiceScopeFactory = serviceScopeFactory;
    }

    public virtual IServiceScope CreateScope()
    {
        // 假如 HTTP 上下文為空,直接使用 AutoFacScopeFactory 創建一個範圍。
        var httpContext = HttpContextAccessor.HttpContext;
        if (httpContext == null)
        {
            return ServiceScopeFactory.CreateScope();
        }

        // 使用 HttpContext 的 RequestServices 構建一個 Scope。
        return new NonDisposedHttpContextServiceScope(httpContext.RequestServices);
    }

    protected class NonDisposedHttpContextServiceScope : IServiceScope
    {
        public IServiceProvider ServiceProvider { get; }

        public NonDisposedHttpContextServiceScope(IServiceProvider serviceProvider)
        {
            ServiceProvider = serviceProvider;
        }

        public void Dispose()
        {

        }
    }
}
可以看到,後者如果在 HttpContext 不為 null 的時候,是使用的 HttpContext.RequestServices 作為這個 Scope 的解析器。
RequestServices, on the other hand, is a scoped container created from the root on each request.
翻譯成中文的意思就是,它是在每個請求的的時候創建的獨立範圍容器,其實就是開頭所說的子容器。
2.5 類型註冊完成的動作
其實這個玩意兒應該放在 2.2 節之前講,只是在寫完之後我才看到相關類型是放在依賴註入相關的文件夾當中,這裡還請各位讀者理解一下。
早期在 Castle Windsor 當中,類型在註冊完成的時候會有一個註冊完成的事件,用戶可以掛載該事件來進行一些特殊的處理,比如說為類型添加動態代理。在 ABP vNext 當中因為支持多種不同的依賴註入框架,所以就沒有類似的事件來做處理。
ABP vNext 則封裝了一個 ServiceRegistrationActionList 類型,該類型用於存儲在類型註冊完成之後,用戶可以執行的操作,可以看到它就是一個 Action 集合,用於存放一系列回調方法。
public class ServiceRegistrationActionList : List<Action<IOnServiceRegistredContext>>
{

}
由 2.2 節得知,這個玩意兒是在每一個類型註冊完成之後,都會被遍歷調用其中的 Action 動作。在調用的時候,會將當前註冊完成的類型封裝成一個 IOnServiceRegistredContext 對象,傳遞給具體的委托,這樣委托就能夠知道當前調用的類型,也就能夠將攔截器放在其 Interceptors 屬性當中了。
public interface IOnServiceRegistredContext
{
    ITypeList<IAbpInterceptor> Interceptors { get; }

    Type ImplementationType { get; }
}
三、總結
ABP vNext 框架針對於依賴註入這塊的工作也進行了大量的精簡,就代碼量來說,比原有 ABP 框架減少了差不多一半左右,而且整個邏輯也比原來更加簡潔易懂。
開發人員在使用的時候,其實最多的是關註如何註入自己想要的類型。通過瞭解 ABP vNext 底層的代碼, 方便我們清楚攔截器和依賴註入框架的具體過程,這樣在後面擴展功能的時候才能夠做到心中有數。

