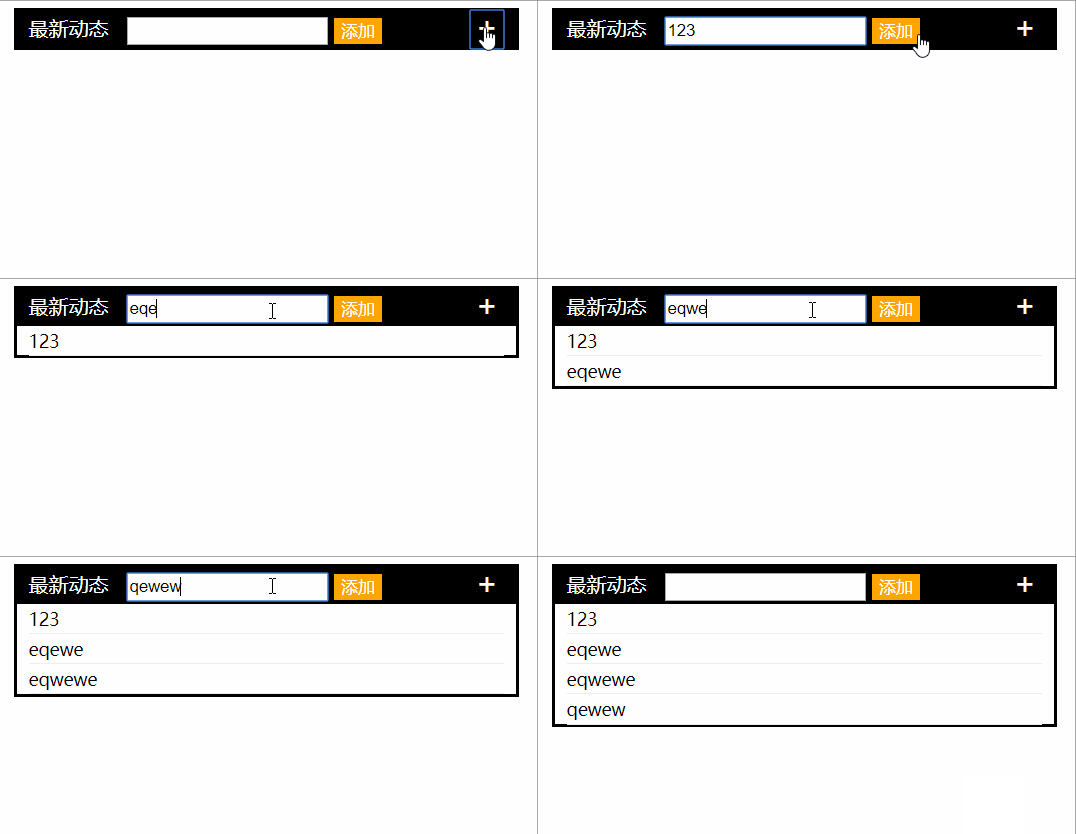
案例1:效果 代碼: 1 <!DOCTYPE html PUBLIC "-//W3C//DTD XHTML 1.0 Transitional//EN" "http://www.w3.org/TR/xhtml1/DTD/xhtml1-transitional.dtd"> 2 <html xmlns=" ...
案例1:效果

代碼:

 1 <!DOCTYPE html PUBLIC "-//W3C//DTD XHTML 1.0 Transitional//EN" "http://www.w3.org/TR/xhtml1/DTD/xhtml1-transitional.dtd">
 2 <html xmlns="http://www.w3.org/1999/xhtml" xml:lang="en">
 3 <head>
 4     <meta http-equiv="Content-Type" content="text/html;charset=UTF-8">
 5     <title>添加對話</title>
 6     <style type="text/css">
 7         body,ul,p{margin: 0;padding: 0;}
 8         ul{list-style: none;}
 9         img{border: 0; vertical-align: middle;}
10         .box{
11             float: left;
12             width: 400px;
13             margin: 50px;
14             border: 2px solid black;
15         }
16         .box .title{
17             position: relative;
18             width: 100%;
19             height: 30px;
20             background-color: black;
21             line-height: 30px;
22             color: white;
23         }
24         .box .title #btn{
25             position: absolute;
26             right: 10px;
27             background: none;
28             border: 0;
29             font-size: 25px;
30             color: white;
31             cursor: pointer;
32         }
33         .box .title span{
34             margin: 0 10px;
35         }
36         .box .title #conin{
37             vertical-align: middle;
38         }
39         .box .title #add{
40             background-color: orange;
41             border: 0;
42             color: white;
43             cursor: pointer;
44             vertical-align: middle;
45         }
46         .box .title #textbox{
47             display: none;
48             /*display: inline-block;*/
49         }
50         .box ul p{
51             margin: 0 10px;
52             padding: 2px 0;
53             border-bottom: 1px solid #eee;
54             font-size: 14px;
55         }
56     </style>
57 </head>
58 <body>
59    <div class="box">
60        <div class="title">
61            <span>最新動態</span>
62            <div id="textbox">
63                 <input type="text" id="conin" class="conin" />
64                 <input type="button" id="add" value="添加" />
65            </div>
66            <button title="新建" id="btn" >+</button>
67        </div>
68        <ul id="body">
69        </ul>
70    </div>
71    <script type="text/javascript">
72    //box
73         var Otxtbox = document.getElementById("textbox");
74         var Oin = document.getElementById("conin");
75         var Oadd = document.getElementById("add");
76
77         var Obtn = document.getElementById("btn");
78
79         var Obody = document.getElementById("body");
80         //顯示輸入框
81         Obtn.onclick = function(){
82             Otxtbox.style.display = "inline-block";
83         };
84         //新建li,清空輸入框
85         Oadd.onclick = function(){
86             var txt = Oin.value;
87             if(txt){
88                 Obody.innerHTML += "<li><p>" + txt + "</p></li>";
89                 Oin.value = "";
90             }else{
91                 alert("請輸入!");
92             }
93         };
94    </script>
95 </body>
96 </html>
View Code
原理:
這裡有兩個點擊事件,首先看第一個:點擊+號顯示輸入框;
1、獲取+這個元素,id為btn,同時獲取輸入框,id為textbox;給btn添加onclick事件,事件直接控制輸入框的樣式display即可。
2、獲取添加按鈕,id為add,給按鈕添加onclick事件,點擊新增列表項,依次添加到列表ul的innerHTML中即可。列表項中的文字用輸入框內的value值代替。
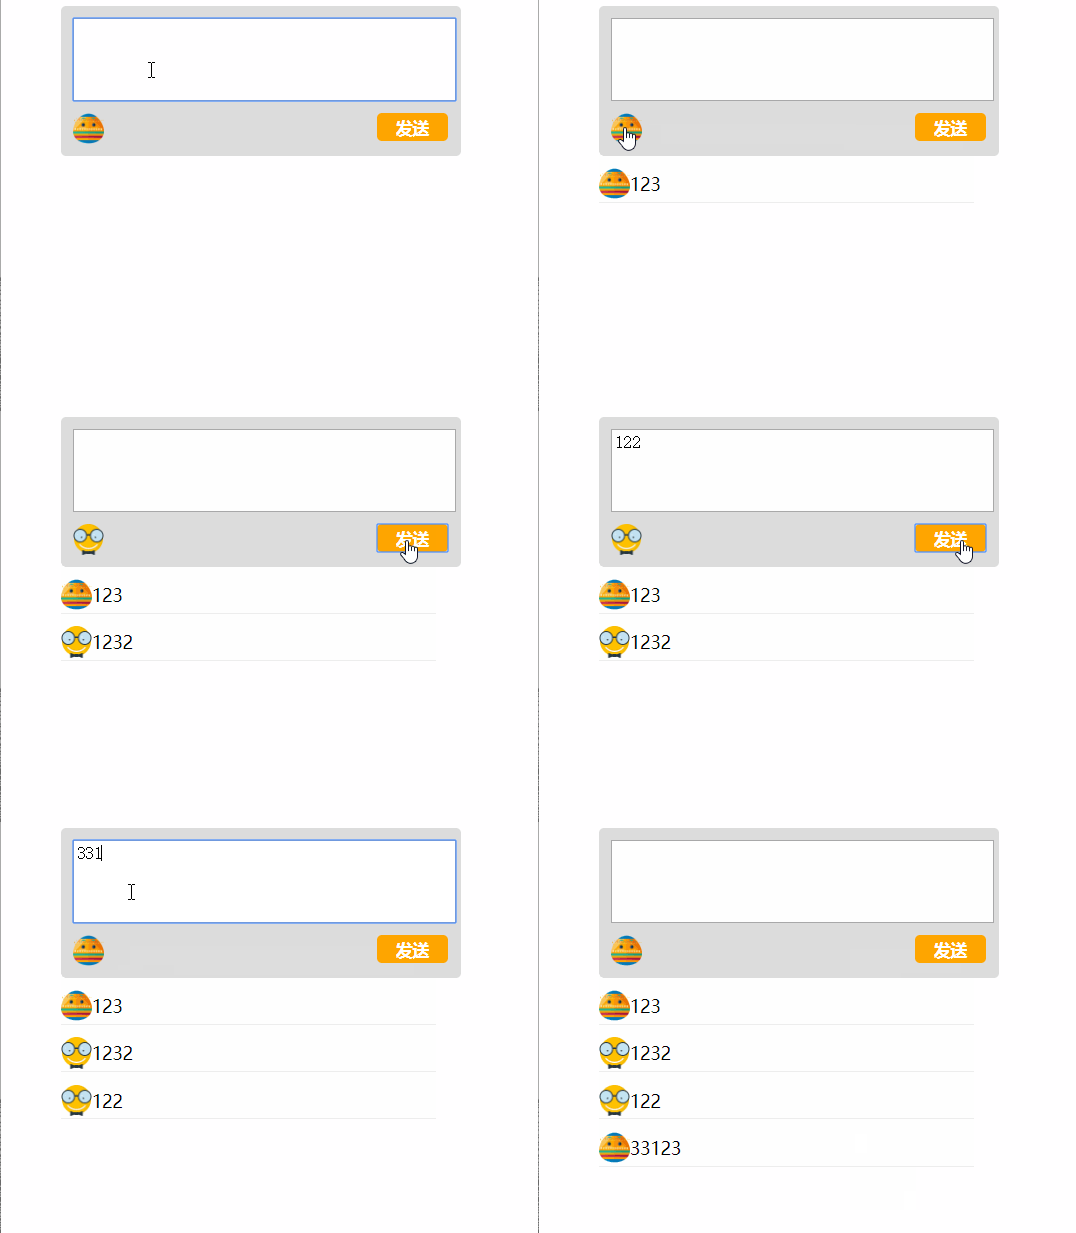
案例2:效果

代碼:

<!DOCTYPE html PUBLIC "-//W3C//DTD XHTML 1.0 Transitional//EN" "http://www.w3.org/TR/xhtml1/DTD/xhtml1-transitional.dtd">
<html xmlns="http://www.w3.org/1999/xhtml" xml:lang="en">
<head>
    <meta http-equiv="Content-Type" content="text/html;charset=UTF-8">
    <title>添加對話</title>
    <style type="text/css">
        body,ul,p{margin: 0;padding: 0;}
        ul{list-style: none;}
        img{border: 0; vertical-align: middle;}
        .box2{
            float: left;
            width: 300px;
            margin: 50px;
        }
        .box2 .top{
            width: 100%;
            height: 100px;
            padding: 10px;
            background-color: #ddd;
            border-radius: 4px;
        }
        .box2 .top .txt{
            height: 60px;
            width: 98%;
            margin-bottom: 10px;
            resize: none;
        }
        .box2 .top span{
            display: inline-block;
            width: 25px;
            height: 25px;
            background: url("images/emoji3.png") no-repeat center center/cover;
            cursor: pointer;
        }
        .box2 .top span.other{
            background:url("images/emoji1.png") no-repeat center center/cover;
        }
        .box2 .top .send{
            float: right;
            padding: 2px 15px;
            background-color: orange;
            border: 0;
            border-radius: 4px;
            color: white;
            font-weight: bold;
            cursor: pointer;
        }
        .box2 ul li{
            margin-top: 10px;
            padding-bottom: 2px;
            border-bottom: 1px solid #eee;
        }
        .box2 ul li img{
            width: 25px;
            height: 25px;
        }
        .box2 ul li span{
            vertical-align: middle;
            font-size: 14px;
        }
    </style>
</head>
<body>
   <div class="box2">
       <div class="top">
           <textarea class="txt" id="txt"></textarea>
           <span id="photo"></span>
           <input type="button" value="發送" class="send" id="send"/>
       </div>
       <ul id="messages">
       </ul>
   </div>
   <script type="text/javascript">
    //box2
        var Otxt = document.getElementById("txt");
        var Osend = document.getElementById("send");
        var Omes = document.getElementById("messages");

        var Ophoto = document.getElementById("photo");
        //圖片路徑數組
        var aImg = ["images/emoji1.png","images/emoji3.png"];
        //記錄當前圖片
        var nNum = 1;

        //圖片切換
        Ophoto.onclick = function(){
            if(nNum){
                nNum--;
                this.setAttribute("class", "other");
            }else{
                nNum++;
                this.removeAttribute('class');
            }
        }
        //新增消息列表項li
        Osend.onclick = function(){
            if(Otxt.value){
                Omes.innerHTML += "<li><img src='" + aImg[nNum] + "' alt='images'/><span>"
                 + Otxt.value + "</span></li>";
                Otxt.value = "";
            }else{
                alert("請輸入信息!");
            }
        }
   </script>
</body>
</html>
View Code
原理:
頁面中兩個出發事件都為點擊事件:
1、點擊發送按鈕,給ul添加列表項li,其中圖片為當前輸入框中的圖片,文本為輸入框中的value;
2、輸入框中圖片點擊切換,採用給不同樣式設置不同背景圖片,用js更改class名稱來實現。
3、採用計數器來記錄當前圖片號num,將圖片路徑存儲到一個數組中,每次切換圖片的時候更改num值。新建列表項時用num來取當前圖片。
註意:
獲取元素時:
* ID獲取時,首碼必須是 document.
* 其他方法獲取時,首碼可以是某一個節點對象,表明不是從所有節點裡面找,而是只從該節點子元素裡面找,節省資源。
通過ID獲取
document.getElementById()
通過class獲取,不相容IE8及以下
.getElementsByClassName()
獲取的是個 類數組 (類似於數組,可以用下標,可以用.length)
通過 標簽名 獲取
.getElementsByTagName()
獲取的是個 類數組
通過 name 獲取
.getElementsByName()
獲取的是個 類數組
通過 選擇器 找,不相容IE7及以下
.querySelector() 直接獲取單個節點對象
.querySelectorAll() 獲取類數組


