轉載請標明出處: http://www.cnblogs.com/zhaoyanjun/p/5942616.html 出自[趙彥軍博客] 2016/10/09 前言:以前寫過一篇 Android studio 使用Gradle發佈Android開源項目到JCenter 總結 ,這篇文章主要介紹如何把項 ...
轉載請標明出處:
http://www.cnblogs.com/zhaoyanjun/p/5942616.html
出自[趙彥軍博客] 2016/10/09
前言:以前寫過一篇 Android studio 使用Gradle發佈Android開源項目到JCenter 總結 ,這篇文章主要介紹如何把項目發佈到 jcenter . 本身沒有問題。直到後來,我看到鴻洋大神的博客 Android 快速發佈開源項目到jcenter 這篇博客裡面的方法比我的更簡單,讓我欣喜若狂。現在有一種方法比前面兩種都要簡單,就是本文的主角。JitPack
1、關於 JitPack
JitPack實際上是一個自定義的Maven倉庫,不過它的流程極度簡化,只需要輸入Github項目地址就可發佈項目,大大方便了像我這種懶得配置環境的人。
2、在Android Studio裡面配置Jitpack插件
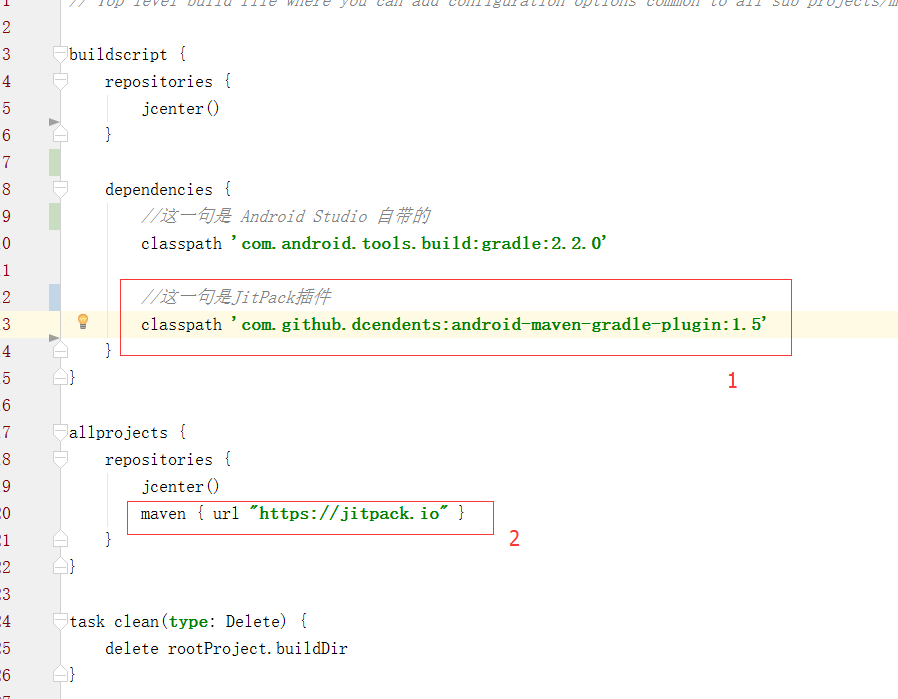
在項目的根目錄下的 build.gradle 文件裡面添加
2.1: 在 dependencies 標簽下麵添加
classpath 'com.github.dcendents:android-maven-gradle-plugin:1.5'
2.2 在repositories 標簽下麵添加
maven { url "https://jitpack.io" }
如圖所示

註意:在配置JitPack插件的時候,需要用到插件的版本號,我在寫這篇博客的時候,最新版是1.5 。查看最新版本號,插件的github倉庫
3、配置Module的build.gradle
在你的Library module裡面的build.gradle文件裡面添加
apply plugin: 'com.github.dcendents.android-maven'
比如這樣
apply plugin: 'com.android.library'
apply plugin: 'com.github.dcendents.android-maven'

android {
    compileSdkVersion 24
    buildToolsVersion "24.0.1"

    defaultConfig {
        minSdkVersion 14
        targetSdkVersion 24
        versionCode 1
        versionName "1.0"
    }
    buildTypes {
        release {
            minifyEnabled false
            proguardFiles getDefaultProguardFile('proguard-android.txt'), 'proguard-rules.pro'
        }
    }
}

dependencies {
    compile fileTree(dir: 'libs', include: ['*.jar'])
}
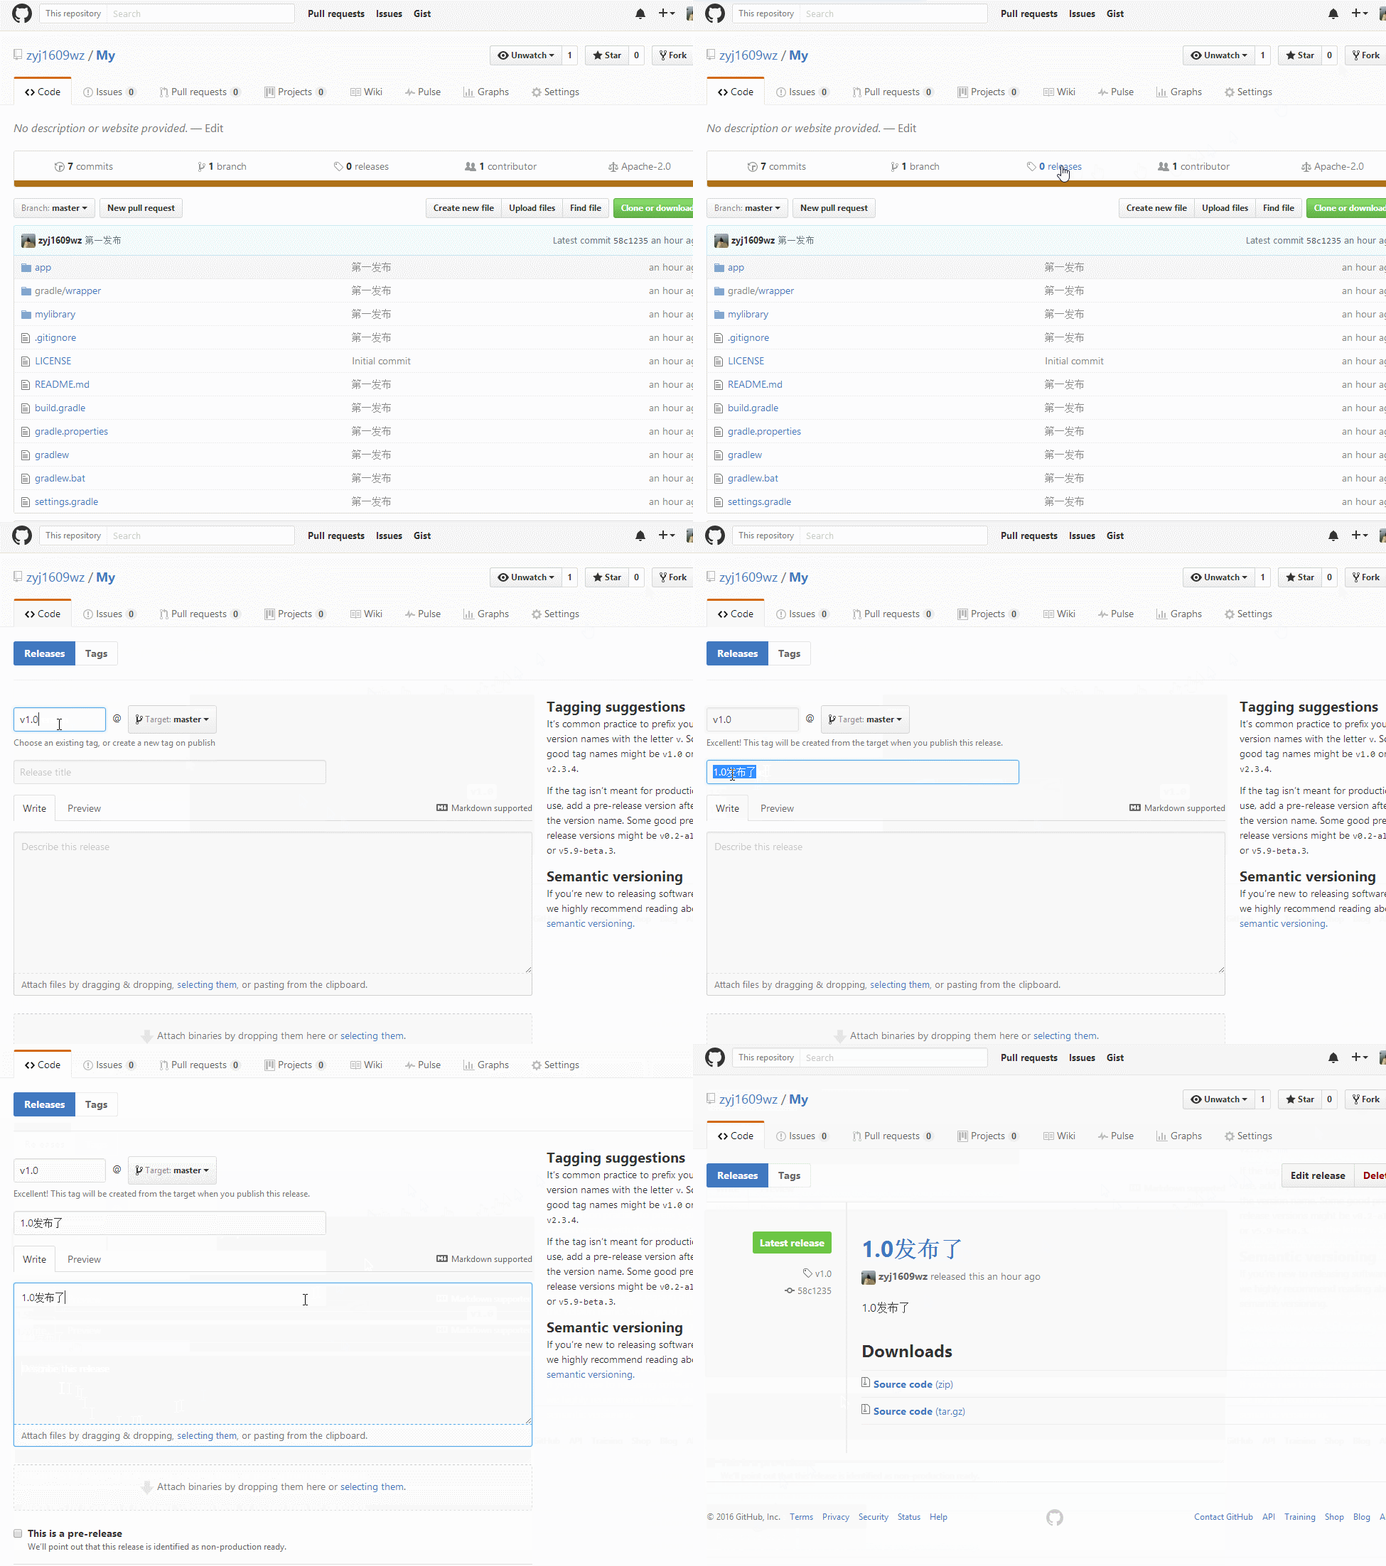
接下來就把項目發佈項目到 github -> 點擊 release -> 點擊創建新的 release版本 ->書寫版本號和release信息

4、獲取引用方式
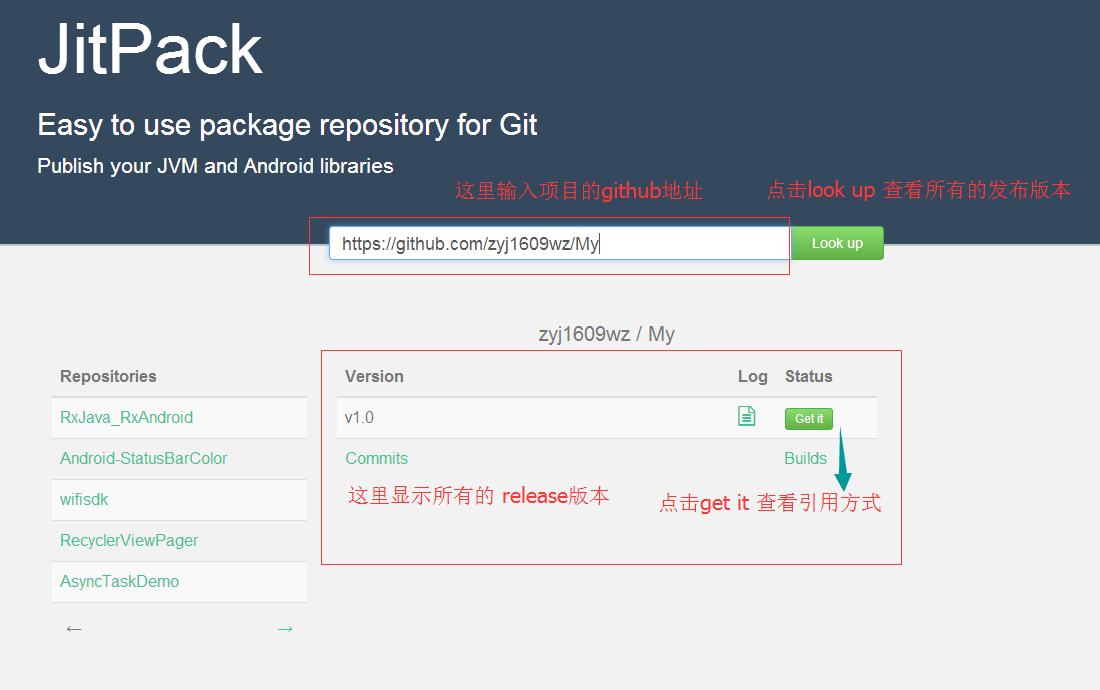
進入 JitPack 網站 https://jitpack.io/ , 可以用github賬戶登錄。

點擊 Get it 就可以查看項目的引用方式,比如:
compile 'com.github.zyj1609wz:My:v1.0'
註意這裡的 zyj1609wz 是我的github用戶名, My 是我的github 倉庫的名字,v1.0 是我創建的release版本的名字。所以我們如果想要開源庫引用名稱比較好看一點,就需要你會起一個好名字,你要起一個好聽的github用戶名,一個好聽的倉庫名,一個清晰的版本號。


