開發了TensorRT C# API 2.0版本,該版本在開發時充分考慮了上一版本應用時出現的問題,併進行了改進。為了更加方便開發者使用,在本次更新中增加了對動態輸入模型的支持,將在本技術文中詳細介紹本次更新內容以及應用案例。 ...
1. 項目介紹
NVIDIA® TensorRT™ 是一款用於高性能深度學習推理的 SDK,包括深度學習推理優化器和運行時,可為推理應用程式提供低延遲和高吞吐量。基於 NVIDIA TensorRT 的應用程式在推理過程中的執行速度比純 CPU 平臺快 36 倍,使您能夠優化在所有主要框架上訓練的神經網路模型,以高精度校準低精度,並部署到超大規模數據中心、嵌入式平臺或汽車產品平臺。

TensorRT 基於 NVIDIA CUDA® 並行編程模型構建,使您能夠在 NVIDIA GPU 上使用量化、層和張量融合、內核調整等技術來優化推理。TensorRT 提供 INT8 使用量化感知訓練和訓練後量化和浮點 16 (FP16) 優化,用於部署深度學習推理應用程式,例如視頻流、推薦、欺詐檢測和自然語言處理。低精度推理可顯著降低延遲,這是許多實時服務以及自主和嵌入式應用所必需的。TensorRT 與 PyTorch 和 TensorFlow 集成,因此只需一行代碼即可實現 6 倍的推理速度。TensorRT 提供了一個 ONNX 解析器,因此您可以輕鬆地將 ONNX 模型從常用框架導入 TensorRT。它還與 ONNX 運行時集成,提供了一種以 ONNX 格式實現高性能推理的簡單方法。
基於這些優勢,TensorRT目前在深度模型部署應用越來越廣泛。但是TensorRT目前只提供了C++與Python介面,對於跨語言使用十分不便。目前C#語言已經成為當前編程語言排行榜上前五的語言,也被廣泛應用工業軟體開發中。為了能夠實現在C#中調用TensorRT部署深度學習模型,我們在之前的開發中開發了TensorRT C# API。雖然實現了該介面,但由於數據傳輸存在問題,當時開發的版本在應用時存在較大的問題。
基於此,我們開發了TensorRT C# API 2.0版本,該版本在開發時充分考慮了上一版本應用時出現的問題,併進行了改進。為了更加方便開發者使用,在本次更新中增加了對動態輸入模型的支持,將在本技術文中詳細介紹本次更新內容以及應用案例。
- TensorRT C# API 項目源碼:
https://github.com/guojin-yan/TensorRT-CSharp-API.git
- TensorRT C# API 項目應用源碼:
https://github.com/guojin-yan/TensorRT-CSharp-API-Samples.git
2. 更新回顧
由於該項目目前還沒有完全開發完成,為了更好的方便大家使用,因此會在最新更新後提供給大家最新的資訊。如果大家在使用時有任何疑問,可以閱讀之前發佈的技術博客:
-
技術博客一:《最新發佈!TensorRT C# API :基於C#與TensorRT部署深度學習模型》
分享了更新版的TensorRT C# API 相關信息,並對擴展介面進行改進,優化哦了模型推理數據載入方式,很大程度上壓縮了數據處理時間;同時分型了最新版本的詳細使用流程,以及提供了配套的使用案例,方便開發者們進行使用。
3. 動態輸入模型支持
在上一版本中,支持了多Bath推理,單其實現方式是導出的推理模型是多Bath的,因此模型推理的Bath是不可更改的。但是目前TensorRT已經支持了動態模型輸入,所以更新了對動態輸入模型的支持。下麵將對更新的API介面以及推理流程進行簡單的介紹:
3.1 新增API
-
public static void OnnxToEngine(string modelPath, int memorySize, string nodeName, Dims minShapes, Dims optShapes, Dims maxShapes)
- 模型轉換介面:可以調用封裝的TensorRT中的ONNX 解釋器,對ONNX模型進行轉換,並根據本機設備信息,編譯本地模型,將模型轉換為TensorRT 支持的engine格式,該介面支持動態輸入模型。
- string modelPath: 本地ONNX模型地址,只支持ONNX格式,且ONNX模型必須為確定的輸入輸出,暫不支持動態輸入。
- int memorySize: 模型轉換時分配的記憶體大小。
- string nodeName: 模型輸入節點名稱,該節點維度確定但是形狀是動態的,一般為: [-1, 3 640, 640],某一維度或其中幾個維度大小為“-1”。
- Dims minShapes: 動態尺寸的最小允許值
- Dims optShapes: 優化(內核選擇)中使用的值、動態尺寸的最優值
- Dims maxShapes: 動態尺寸等的最大允許值
-
public Nvinfer(string modelPath, int maxBatahSize)
-
Nvinfer 初始化介面: 初始化Nvinfer類,主要初始化封裝的推理引擎,該推理引擎中封裝了比較重要的一些類和指針。
-
string modelPath: engine模型路徑。
-
int maxBatahSize: 推理推理支持的最大的Bath。
-
-
public void SetBindingDimensions(int index, Dims dims)/SetBindingDimensions(string nodeName, Dims dims)
- 設置節點維度介面: 通過埠編號或者埠名稱,獲取綁定的埠的形狀信息。
- int index: 綁定埠的編號。
- string nodeName: 綁定埠的名稱。
- Dims dims: 需要設置綁定埠的維度。
3.2 推理流程
對於固定輸入模型的推理流程,主要包括以下四個步驟:
- Nvinfer初始化
- 載入推理數據
- 模型推理
- 獲取推理結果
而當我們使用動態輸入模型時,其推理流程發生了變化,如下圖所示:

當部署動態輸入模型時,推理流程為:
- Nvinfer初始化
- 設置本次推理模型輸入大小
- 載入推理數據
- 模型推理
- 獲取推理結果
與常規的規定輸入模型的推理流程相比,主要是增加了設置本次推理模型輸入大小這一步,其他步驟並未發生較大的變化。此外,如果下一次推理輸入數據形狀大小發生了改變,就需要重新進行設置,如果輸入形狀大小並未對發生變化,則無需進行再次設置。
4. 介面應用
關於該項目的調用方式在上一篇文章中已經進行了詳細介紹,具體使用可以參考《最新發佈!TensorRT C# API :基於C#與TensorRT部署深度學習模型》,下麵結合Yolov8-cls模型詳細介紹一下更新的介面使用方法。
4.1 創建並配置C#項目
首先創建一個簡單的C#項目,然後添加項目配置。
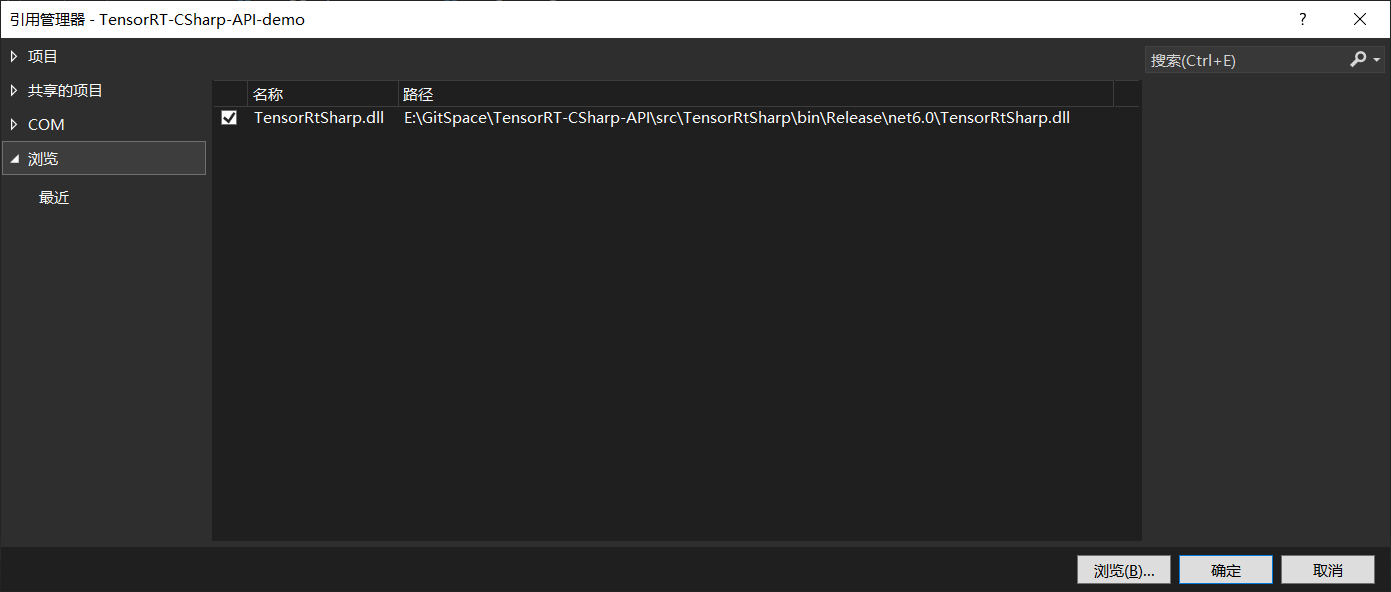
首先是添加TensorRT C# API 項目引用,如下圖所示,添加上文中C#項目生成的dll文件即可。

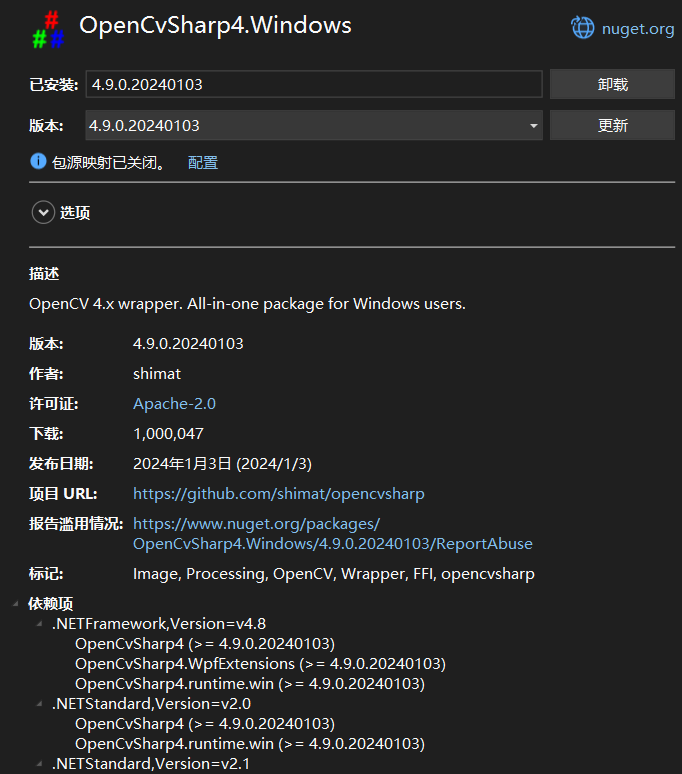
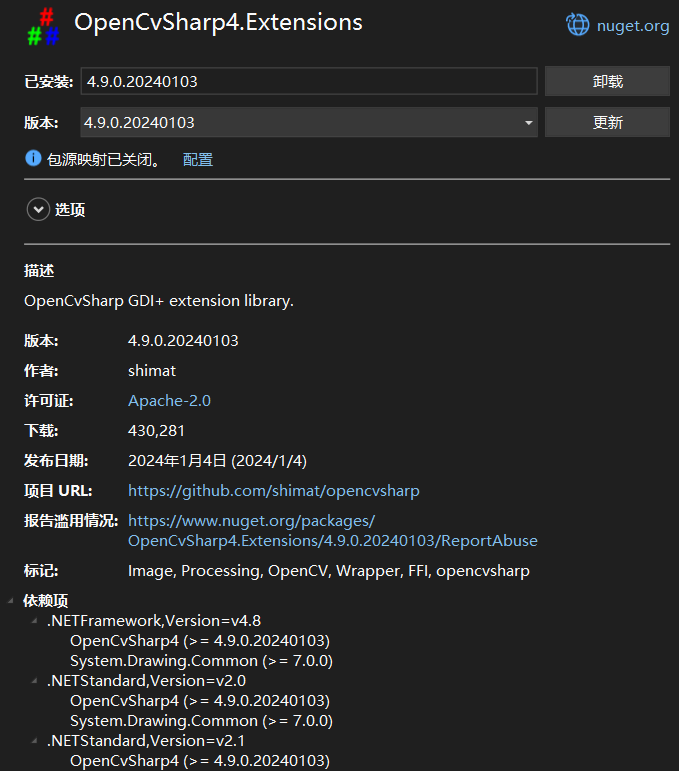
接下來添加OpenCvSharp,此處通過NuGet Package安裝即可,此處主要安裝以下兩個程式包即可:
 |

|
配置好項目後,項目的配置文件如下所示:
<Project Sdk="Microsoft.NET.Sdk">

  <PropertyGroup>
    <OutputType>Exe</OutputType>
    <TargetFramework>net6.0</TargetFramework>
    <RootNamespace>TensorRT_CSharp_API_demo</RootNamespace>
    <ImplicitUsings>enable</ImplicitUsings>
    <Nullable>enable</Nullable>
  </PropertyGroup>

  <ItemGroup>
    <PackageReference Include="OpenCvSharp4.Extensions" Version="4.9.0.20240103" />
    <PackageReference Include="OpenCvSharp4.Windows" Version="4.9.0.20240103" />
  </ItemGroup>

  <ItemGroup>
    <Reference Include="TensorRtSharp">
      <HintPath>E:\GitSpace\TensorRT-CSharp-API\src\TensorRtSharp\bin\Release\net6.0\TensorRtSharp.dll</HintPath>
    </Reference>
  </ItemGroup>

</Project>
4.2 添加推理代碼
此處演示一個簡單的圖像分類項目,以Yolov8-cls項目為例:
(1) 轉換engine模型
動態輸入的模型在進行格式轉換時,需要指定模型推理形狀至此的範圍,minShapes表示模型推理支持的最小形狀,optShapes表示模型推理支持的最佳形狀,maxShapes表示模型推理支持的最大形狀,模型轉換需要消耗較多時間,最終轉換成功後會在模型同級目錄下生成相同名字的.engine文件。
Dims minShapes = new Dims(1, 3, 224, 224);
Dims optShapes = new Dims(10, 3, 224, 224);
Dims maxShapes = new Dims(20, 3, 224, 224);
Nvinfer.OnnxToEngine(onnxPath, 20, "images", minShapes, optShapes, maxShapes);
(2) 定義模型預測方法
下麵代碼是定義的Yolov8-cls模型的預測方法,該方法支持動態Bath輸入模型推理,可以根據用戶輸入圖片數量,自動設置輸入Bath,然後進行推理。
下麵代碼與上一篇文章中的代碼差異主要是增加了predictor.SetBindingDimensions("images", new Dims(batchNum, 3, 224, 224));這一句代碼。同時在初始化時,設置最大支持20Bath,這與上文模型轉換時設置的一致。
public class Yolov8Cls
{
    public Dims InputDims;
    public int BatchNum;
    private Nvinfer predictor;
    public Yolov8Cls(string enginePath)
    {
        predictor = new Nvinfer(enginePath, 20);
        InputDims = predictor.GetBindingDimensions("images");
    }
    public void Predict(List<Mat> images)
    {
        BatchNum = images.Count;
        for (int begImgNo = 0; begImgNo < images.Count; begImgNo += BatchNum)
        {
            DateTime start = DateTime.Now;
            int endImgNo = Math.Min(images.Count, begImgNo + BatchNum);
            int batchNum = endImgNo - begImgNo;
            List<Mat> normImgBatch = new List<Mat>();
            int imageLen = 3 * 224 * 224;
            float[] inputData = new float[BatchNum * imageLen];
            for (int ino = begImgNo; ino < endImgNo; ino++)
            {
                Mat input_mat = CvDnn.BlobFromImage(images[ino], 1.0 / 255.0, new OpenCvSharp.Size(224, 224), 0, true, false);
                float[] data = new float[imageLen];
                Marshal.Copy(input_mat.Ptr(0), data, 0, imageLen);
                Array.Copy(data, 0, inputData, ino * imageLen, imageLen);
            }
            predictor.SetBindingDimensions("images", new Dims(batchNum, 3, 224, 224));
            predictor.LoadInferenceData("images", inputData);
            DateTime end = DateTime.Now;
            Console.WriteLine("[ INFO ] Input image data processing time: " + (end - start).TotalMilliseconds + " ms.");
            predictor.infer();
            start = DateTime.Now;
            predictor.infer();
            end = DateTime.Now;
            Console.WriteLine("[ INFO ] Model inference time: " + (end - start).TotalMilliseconds + " ms.");
            start = DateTime.Now;

            float[] outputData = predictor.GetInferenceResult("output0");
            for (int i = 0; i < batchNum; ++i)
            {
                Console.WriteLine(string.Format("[ INFO ] Classification Top {0} result : ", 2));
                float[] data = new float[1000];
                Array.Copy(outputData, i * 1000, data, 0, 1000);
                List<int> sortResult = Argsort(new List<float>(data));
                for (int j = 0; j < 2; ++j)
                {
                    string msg = "";
                    msg += ("index: " + sortResult[j] + "\t");
                    msg += ("score: " + data[sortResult[j]] + "\t");
                    Console.WriteLine("[ INFO ] " + msg);
                }
            }
            end = DateTime.Now;
            Console.WriteLine("[ INFO ] Inference result processing time: " + (end - start).TotalMilliseconds + " ms.\n");
        }
    }
    public static List<int> Argsort(List<float> array)
    {
        int arrayLen = array.Count;
        List<float[]> newArray = new List<float[]> { };
        for (int i = 0; i < arrayLen; i++)
        {
            newArray.Add(new float[] { array[i], i });
        }
        newArray.Sort((a, b) => b[0].CompareTo(a[0]));
        List<int> arrayIndex = new List<int>();
        foreach (float[] item in newArray)
        {
            arrayIndex.Add((int)item[1]);
        }
        return arrayIndex;
    }
}
(3) 預測方法調用
下麵是上述定義的預測方法,為了測試不同Bath性能,此處讀取了多張圖片,並分別預測不同張數圖片,如下所示:
Yolov8Cls yolov8Cls = new Yolov8Cls("E:\\Model\\yolov8\\yolov8s-cls_b.engine");
Mat image1 = Cv2.ImRead("E:\\ModelData\\image\\demo_4.jpg");
Mat image2 = Cv2.ImRead("E:\\ModelData\\image\\demo_5.jpg");
Mat image3 = Cv2.ImRead("E:\\ModelData\\image\\demo_6.jpg");
Mat image4 = Cv2.ImRead("E:\\ModelData\\image\\demo_7.jpg");
Mat image5 = Cv2.ImRead("E:\\ModelData\\image\\demo_8.jpg");

yolov8Cls.Predict(new List<Mat> { image1, image2 });

yolov8Cls.Predict(new List<Mat> { image1, image2, image3 });

yolov8Cls.Predict(new List<Mat> { image1, image2, image3, image4 });

yolov8Cls.Predict(new List<Mat> { image1, image2, image3, image4, image5 });
4.3 項目演示
配置好項目並編寫好代碼後,運行該項目,項目輸出如下所示:
[ INFO ] Input image data processing time: 5.5277 ms.
[ INFO ] Model inference time: 1.3685 ms.
[ INFO ] Classification Top 2 result :
[ INFO ] index: 386     score: 0.8754883
[ INFO ] index: 385     score: 0.08013916
[ INFO ] Classification Top 2 result :
[ INFO ] index: 293     score: 0.89160156
[ INFO ] index: 276     score: 0.05480957
[ INFO ] Inference result processing time: 3.0823 ms.

[ INFO ] Input image data processing time: 2.7356 ms.
[ INFO ] Model inference time: 1.4435 ms.
[ INFO ] Classification Top 2 result :
[ INFO ] index: 386     score: 0.8754883
[ INFO ] index: 385     score: 0.08013916
[ INFO ] Classification Top 2 result :
[ INFO ] index: 293     score: 0.89160156
[ INFO ] index: 276     score: 0.05480957
[ INFO ] Classification Top 2 result :
[ INFO ] index: 14      score: 0.99853516
[ INFO ] index: 88      score: 0.0006980896
[ INFO ] Inference result processing time: 1.5137 ms.

[ INFO ] Input image data processing time: 3.7277 ms.
[ INFO ] Model inference time: 1.5285 ms.
[ INFO ] Classification Top 2 result :
[ INFO ] index: 386     score: 0.8754883
[ INFO ] index: 385     score: 0.08013916
[ INFO ] Classification Top 2 result :
[ INFO ] index: 293     score: 0.89160156
[ INFO ] index: 276     score: 0.05480957
[ INFO ] Classification Top 2 result :
[ INFO ] index: 14      score: 0.99853516
[ INFO ] index: 88      score: 0.0006980896
[ INFO ] Classification Top 2 result :
[ INFO ] index: 294     score: 0.96533203
[ INFO ] index: 269     score: 0.0124435425
[ INFO ] Inference result processing time: 2.7328 ms.

[ INFO ] Input image data processing time: 4.063 ms.
[ INFO ] Model inference time: 1.6947 ms.
[ INFO ] Classification Top 2 result :
[ INFO ] index: 386     score: 0.8754883
[ INFO ] index: 385     score: 0.08013916
[ INFO ] Classification Top 2 result :
[ INFO ] index: 293     score: 0.89160156
[ INFO ] index: 276     score: 0.05480957
[ INFO ] Classification Top 2 result :
[ INFO ] index: 14      score: 0.99853516
[ INFO ] index: 88      score: 0.0006980896
[ INFO ] Classification Top 2 result :
[ INFO ] index: 294     score: 0.96533203
[ INFO ] index: 269     score: 0.0124435425
[ INFO ] Classification Top 2 result :
[ INFO ] index: 127     score: 0.9008789
[ INFO ] index: 128     score: 0.07745361
[ INFO ] Inference result processing time: 3.5664 ms.
通過上面輸出可以看出,不同Bath模型推理時間在1.3685~1.6947ms,大大提升了模型的推理速度。
5. 總結
在本項目中,我們擴展了TensorRT C# API 介面,使其支持動態輸入模型。並結合分類模型部署流程向大家展示了TensorRT C# API 的使用方式,方便大家快速上手使用。
為了方便各位開發者使用,此處開發了配套的演示項目,主要是基於Yolov8開發的目標檢測、目標分割、人體關鍵點識別、圖像分類以及旋轉目標識別,並且支持動態輸入模型,用戶可以同時推理任意張圖像。
- Yolov8 Det 目標檢測項目源碼:
https://github.com/guojin-yan/TensorRT-CSharp-API-Samples/blob/master/model_samples/yolov8_custom_dynamic/Yolov8Det.cs
- Yolov8 Seg 目標分割項目源碼:
https://github.com/guojin-yan/TensorRT-CSharp-API-Samples/blob/master/model_samples/yolov8_custom_dynamic/Yolov8Seg.cs
- Yolov8 Pose 人體關鍵點識別項目源碼:
https://github.com/guojin-yan/TensorRT-CSharp-API-Samples/blob/master/model_samples/yolov8_custom_dynamic/Yolov8Pose.cs
- Yolov8 Cls 圖像分類項目源碼:
https://github.com/guojin-yan/TensorRT-CSharp-API-Samples/blob/master/model_samples/yolov8_custom_dynamic/Yolov8Cls.cs
- Yolov8 Obb 旋轉目標識別項目源碼:
https://github.com/guojin-yan/TensorRT-CSharp-API-Samples/blob/master/model_samples/yolov8_custom_dynamic/Yolov8Obb.cs
同時對本項目開發的案例進行了時間測試,以下時間只是程式運行一次的時間,測試環境為:
-
CPU:i7-165G7
-
CUDA型號:12.2
-
Cudnn:8.9.3
-
TensorRT:8.6.1.6
| Model | Batch | 數據預處理 (ms) | 模型推理 (ms) | 結果後處理 (ms) |
|---|---|---|---|---|
| Yolov8s-Det | 1 | 16.6 | 4.6 | 13.1 |
| 4 | 38.0 | 12.4 | 32.4 | |
| 8 | 70.5 | 23.0 | 80.1 | |
| Yolov8s-Obb | 1 | 28.7 | 8.9 | 17.7 |
| 4 | 81.7 | 25.9 | 67.4 | |
| 8 | 148.4 | 44.6 | 153.0 | |
| Yolov8s-Seg | 1 | 15.4 | 5.4 | 67.4 |
| 4 | 37.3 | 15.5 | 220.6 | |
| 8 | 78.7 | 26.9 | 433.6 | |
| Yolov8s-Pose | 1 | 15.1 | 5.2 | 8.7 |
| 4 | 39.2 | 13.2 | 14.3 | |
| 8 | 67.8 | 23.1 | 27.7 | |
| Yolov8s-Cls | 1 | 9.9 | 1.3 | 1.9 |
| 4 | 14.7 | 1.5 | 2.3 | |
| 8 | 22.6 | 2.0 | 2.9 |
最後如果各位開發者在使用中有任何問題,歡迎大家與我聯繫。


