
學習視頻:【編程不良人】2021年SpringBoot最新最全教程 第十章、項目開發 實現一個登錄註冊,增刪改查功能的系統 10.1 項目開發流程 需求分析 分析用戶主要需求 提取項目核心功能,根據核心功能構建頁面原型 庫表設計: 分析系統有哪些表 分析表之間關聯關係 確定欄位 詳細設計(流程圖、偽 ...
第十章、項目開發
實現一個登錄註冊,增刪改查功能的系統
10.1 項目開發流程
-
需求分析
分析用戶主要需求 提取項目核心功能,根據核心功能構建頁面原型
-
庫表設計:
- 分析系統有哪些表
- 分析表之間關聯關係
- 確定欄位
-
詳細設計(流程圖、偽代碼):
驗證庫表準確性
-
功能實現(編碼)
環境搭建,具體功能實現
-
功能測試,部署,上線,運維,維護
全棧式開發:前端+後端+運維
10.2 需求分析
- 系統有哪些模塊?
- 每個模塊功能有哪些?
- 用戶模塊:登錄、註冊、驗證碼生成
- 員工模塊:查詢、刪除、更新、添加
10.3 庫表設計
用戶表:user
員工表:employee
表與表關係:user,employee 獨立兩張表
創建庫表
create database ems;
use ems;
create TABLE user(
id int auto_increment  ,username VARCHAR(40) COMMENT '用戶名' ,
realname VARCHAR(40) COMMENT '真實姓名' ,
`password` VARCHAR(50) COMMENT '密碼',gender TINYINT(3) COMMENT '性別',
 PRIMARY KEY (`id`)
);

create TABLE employee(
id int auto_increment,
name VARCHAR(40) COMMENT '姓名',
birthday datetime COMMENT '生日',
salary DOUBLE COMMENT '薪資',
gender TINYINT(3) COMMENT '性別',
PRIMARY KEY(id)
)
10.5 編碼環節
技術選型:SpringBoot + MyBatis + JSP + MySQL
環境搭建:Spring Boot + JSP + MyBatis
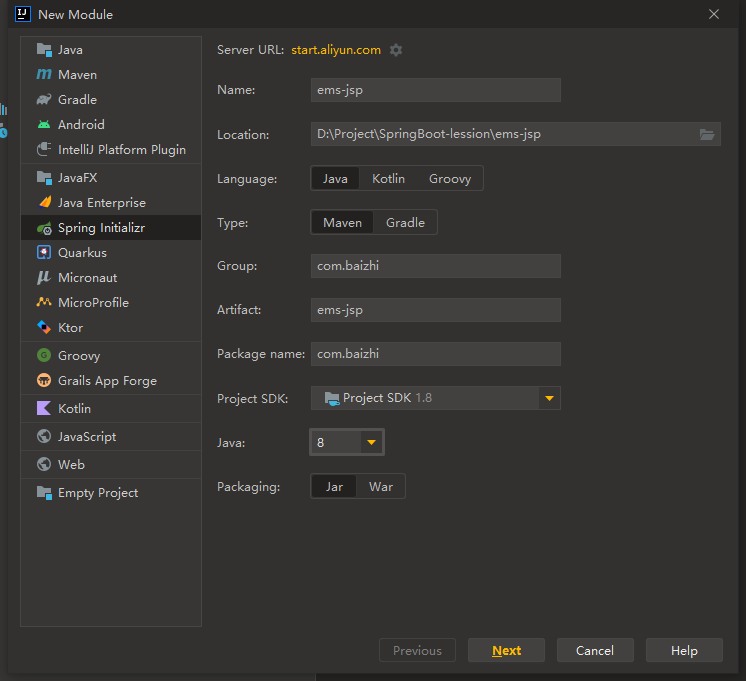
創建名為ems-jsp的項目,並引入web支持依賴,創建完成
環境搭建
pom.xml依賴導入
<dependencies>
    <dependency>
        <groupId>org.springframework.boot</groupId>
        <artifactId>spring-boot-starter-web</artifactId>
    </dependency>

    <dependency>
        <groupId>org.springframework.boot</groupId>
        <artifactId>spring-boot-starter-test</artifactId>
        <scope>test</scope>
    </dependency>
    <!--jsp解析依賴-->
    <dependency>
        <groupId>org.apache.tomcat.embed</groupId>
        <artifactId>tomcat-embed-jasper</artifactId>
    </dependency>

    <!--引入和MyBatis整合相關的依賴-->
    <!--druid-->
    <dependency>
        <groupId>com.alibaba</groupId>
        <artifactId>druid</artifactId>
        <version>1.1.19</version>
    </dependency>
    <!--mysql-->
    <dependency>
        <groupId>mysql</groupId>
        <artifactId>mysql-connector-java</artifactId>
    </dependency>
    <!--mybatis-spring-boot-stater-->
    <dependency>
        <groupId>org.mybatis.spring.boot</groupId>
        <artifactId>mybatis-spring-boot-starter</artifactId>
        <version>3.0.0</version>
    </dependency>

    <!--開啟熱部署-->
    <dependency>
        <groupId>org.springframework.boot</groupId>
        <artifactId>spring-boot-devtools</artifactId>
    </dependency>
</dependencies>
application.yml:
# 應用服務 WEB 訪問埠
server:
  port: 8989
  servlet:
    context-path: /ems-jsp
    jsp:
      init-parameters:
        development: true # 開啟jsp模板開發模式

# 配置jsp展示
spring:
  mvc:
    view:
      prefix: /
      suffix: .jsp
  datasource:
    type: com.alibaba.druid.pool.DruidDataSource
    driver-class-name: com.mysql.cj.jdbc.Driver
    url: jdbc:mysql://localhost:3306/ems?characterEncoding=UTF-8
    username: root
    password: 123456

# 配置mybatis
mybatis:
  mapper-locations: classpath:com.baizhi/mapper/*.xml
  type-aliases-package: com.baizhi.entity

# 配置日誌
logging:
  level:
    com.baizhi: debug
添加dao包掃描
@SpringBootApplication
@MapperScan("com.baizhi.dao")
public class EmsJspApplication {
    public static void main(String[] args) {
        SpringApplication.run(EmsJspApplication.class, args);
    }

}
10.6 驗證碼實現
-
業務邏輯
- 生成隨機字元(依靠工具類VerifyCode)
- 放入session(與前端傳過來的驗證碼進行比對),放進map(傳給前端)
- 生成圖片響應
-
register.jsp
<%@ page language="java" contentType="text/html; charset=UTF-8" pageEncoding="UTF-8"%> <!DOCTYPE html> <html> <head> <meta charset="UTF-8"> <title>Registration Page</title> <link rel="stylesheet" type="text/css" href="css/register.css"> </head> <body> <h2>用戶註冊</h2> <div class="container"> <h3 style="color: red">${param.msg}</h3> <form action="${pageContext.request.contextPath}/user/register" method="post"> 用戶名: <input type="text" name="username"><br> 真實姓名: <input type="text" name="realname" ><br> 密碼: <input type="password" name="password" ><br> <%-- 確認密碼: <input type="password" name="confirmPassword"><br>--%> 性別: <select name="gender" > <option value="1">男</option> <option value="0">女</option> </select><br> <!-- 驗證碼展示 --> <label for="verifyCode">驗證碼:</label><br> <img id="verifyCode" src="" alt="Captcha Image"> <a href="javascript:" id="refresh">換一張</a> <input type="text" name="code"><br> <input type="submit" value="註冊"> </form> </div> <script src="js/jquery.js"></script> <script> // jQuery代碼 $(document).ready(function() { $('#registerForm').submit(function() { return validateRegisterForm(); }); }); // 表單驗證 function validateRegisterForm() { var username = $('#username').val(), password = $('#password').val(), // confirmPassword = $('#confirmPassword').val(), realname = $('#realname').val(), code = $('#code').val(); console.log(backCode,code) if (username === "" || password === "" || realname === "" || code === "") { alert("請填寫所有欄位和驗證碼"); return false; } if (backCode.toLowerCase() === code.toLowerCase()) { alert("驗證碼填寫不正確") refreshVerifyCode();// 刷新驗證碼 return false; } // if (password !== confirmPassword) { // alert("密碼不匹配"); // return false; // } alert("註冊成功,請登錄") return true; } var backCode = ""; // 驗證碼刷新 function refreshVerifyCode() { $.ajax({ url: '${pageContext.request.contextPath}/user/verifyCode', method: 'GET', dataType: 'json', success: function(data) { console.log(data) backCode = data.code; $('#verifyCode').attr('src', data.image); }, error: function(error) { console.error('error:', error); } }); } // 初始化頁面載入時顯示驗證碼 refreshVerifyCode(); // 點擊“換一張”按鈕時刷新驗證碼 $('#refresh').click(function() { refreshVerifyCode(); }); </script> </body> </html> -
css
body { font-family: 'Arial', sans-serif; margin: auto; justify-content: center; align-items: center; width: 500px; height: 800px; /*border: 1px solid red;*/ } .container { padding: 30px; background-color: #ffffff; border-radius: 8px; box-shadow: 0 0 15px rgba(0, 0, 0, 0.1); /*border: 1px solid red;*/ } h2 { text-align: center; } input[type="text"], input[type="password"], input[type="submit"], select { width: calc(100% - 20px); margin-bottom: 15px; padding: 10px; border: 1px solid #dddddd; border-radius: 5px; transition: border-color 0.3s ease-in-out; } input[type="text"]:focus, input[type="password"]:focus, select:focus { outline: none; border-color: #66afe9; } input[type="submit"] { background-color: #4CAF50; color: white; border: none; cursor: pointer; transition: background-color 0.3s ease-in-out; } input[type="submit"]:hover { background-color: seagreen; } -
驗證碼 實現類
package com.baizhi.utils; import javax.imageio.ImageIO; import java.awt.Color; import java.awt.Font; import java.awt.Graphics; import java.awt.image.BufferedImage; import java.io.FileOutputStream; import java.io.IOException; import java.io.OutputStream; import java.util.Random; public class VerifyCode { private int width = 100;// 定義圖片的width private int height = 40;// 定義圖片的height private int codeCount = 4;// 定義圖片上顯示驗證碼的個數 private int lineCount = 20;// 定義圖片上顯示干擾線的條數 private String code = null;// 定義用於保存驗證碼的字元串 private BufferedImage buffImg = null;// 定義圖片Buffer private char[] codeSequence = { 'A', 'B', 'C', 'D', 'E', 'F', 'G', 'H', 'I', 'J', 'K', 'L', 'M', 'N', 'P', 'Q', 'R', 'S', 'T', 'U', 'V', 'W', 'X', 'Y', 'Z', '1', '2', '3', '4', '5', '6', '7', '8', '9' }; public VerifyCode() { this.createCode(); } /** * @param width * 圖片寬 * @param height * 圖片高 */ public VerifyCode(int width, int height) { this.width = width; this.height = height; this.createCode(); } /** * @param width * 圖片寬 * @param height * 圖片高 * @param codeCount * 字元個數 * @param lineCount * 干擾線條數 */ public VerifyCode(int width, int height, int codeCount, int lineCount) { this.width = width; this.height = height; this.codeCount = codeCount; this.lineCount = lineCount; this.createCode(); } public void createCode() { int x = 0, fontHeight = 0, codeY = 0; int red = 0, green = 0, blue = 0; x = width / (codeCount + 2);// 每個字元的寬度 fontHeight = height - 2;// 字體的高度 codeY = height - 4; // 圖像buffer buffImg = new BufferedImage(width, height, BufferedImage.TYPE_INT_RGB); Graphics g = buffImg.createGraphics(); // 創建一個隨機數生成器類 Random random = new Random(); // 將圖像填充為白色 g.setColor(Color.WHITE); g.fillRect(0, 0, width, height); // 創建字體,字體的大小應該根據圖片的高度來定。 Font font = new Font("Fixedsys", Font.PLAIN, fontHeight); // 設置字體。 g.setFont(font); for (int i = 0; i < lineCount; i++) { // 設置隨機開始和結束坐標 int xs = random.nextInt(width);// x坐標開始 int ys = random.nextInt(height);// y坐標開始 int xe = xs + random.nextInt(width / 8);// x坐標結束 int ye = ys + random.nextInt(height / 8);// y坐標結束 // 生成隨機顏色 red = random.nextInt(255); green = random.nextInt(255); blue = random.nextInt(255); g.setColor(new Color(red, green, blue)); g.drawLine(xs, ys, xe, ye); } // randomCode記錄隨機產生的驗證碼 StringBuffer randomCode = new StringBuffer(); // 隨機產生codeCount個字元的驗證碼。 for (int i = 0; i < codeCount; i++) { // 得到隨機產生的驗證碼數字。 String strRand = String.valueOf(codeSequence[random.nextInt(codeSequence.length)]); // 用隨機產生的顏色將驗證碼繪製到圖像中。 red = random.nextInt(255); green = random.nextInt(255); blue = random.nextInt(255); g.setColor(new Color(red, green, blue)); g.drawString(strRand, (i + 1) * x, codeY); // 將產生的四個隨機數組合在一起。 randomCode.append(strRand); } // 將四位數字的驗證碼保存到Session中。 code = randomCode.toString(); } public void write(String path) throws IOException { OutputStream sos = new FileOutputStream(path); this.write(sos); } public void write(OutputStream sos) throws IOException { ImageIO.write(buffImg, "png", sos); sos.close(); } public BufferedImage getBuffImg() { return buffImg; } public String getCode() { return code; } } -
驗證碼生成 請求
@Controller
@RequestMapping("user")
public class UserController {

    /**
     * 生成驗證碼
     */
		@ResponseBody
    @RequestMapping("verifyCode")
    public Map<String, String> verifyCode(HttpServletRequest request) throws IOException {
        Map<String,String> map = new HashMap<>();
        // 1.使用工具類生成驗證碼
        VerifyCode vc = new VerifyCode(120, 40, 4, 100);
        String code = vc.getCode();
        map.put("code", code);
        // 2. 獲取驗證碼的BufferedImage對象
        BufferedImage captchaImage = vc.getBuffImg();
        //4.將圖片轉為base64 [放入src,可以直接顯示圖片]
        ByteArrayOutputStream outputStream = new ByteArrayOutputStream();
        ImageIO.write(captchaImage, "png", outputStream);
        byte[] imageBytes = outputStream.toByteArray();
        String image = "data:image/png;base64," + Base64Utils.encodeToString(imageBytes);
        map.put("image", image);
        return map;
    }
}
10.7 註冊實現
-
業務邏輯

-
Service
@Service @Transactional public class UserServiceImpl implements UserService { @Autowired private UserDao userDao; @Override public void register(User user) { User userDB = userDao.findByUserName(user.getUsername()); if (!ObjectUtils.isEmpty(userDB)) { throw new RuntimeException("用戶名已存在"); } // 註冊之前給密碼進行加密 String passwordSecret = DigestUtils.md5DigestAsHex(user.getPassword().getBytes(StandardCharsets.UTF_8)); user.setPassword(passwordSecret); userDao.save(user); } } -
mapper語句
<select id="findByUserName" resultType="com.baizhi.entity.User"> select id,username,realname,password,gender from `user` where username = #{username} </select> -
api
@Autowired
private UserService userService;

@RequestMapping("register")
public String register(User user, String code, HttpSession session) {
    log.debug("接受的驗證碼:{}", code);
    log.debug("User:{}", user);
    // 比較驗證
    try {
        String sessionCode = session.getAttribute("code").toString();
        if (!sessionCode.equalsIgnoreCase(code)) {
            throw new RuntimeException("驗證碼輸入錯誤!!!");
        }
        userService.register(user);
    } catch (RuntimeException e) {
        e.printStackTrace();
        return "redirect:/register.jsp?msg=" + UriEncoder.encode(e.getMessage());
    }
    return "redirect:/login.jsp";
}
10.8用戶登錄

-
login.jsp
<%@ page language="java" contentType="text/html; charset=UTF-8" pageEncoding="UTF-8"%> <!DOCTYPE html> <html> <head> <meta charset="UTF-8"> <title>Login Page</title> <link rel="stylesheet" href="css/register.css"> </head> <body> <h2>用戶登錄</h2> <h3 style="color: red">${param.msg}</h3> <form action="${pageContext.request.contextPath}/employee/list" method="post"> <label for="username">用戶名:</label><br> <input type="text" id="username" name="username"><br> <label for="password">密碼:</label><br> <input type="password" id="password" name="password"><br> <input type="submit" value="登錄"> <input type="button" onclick="window.location.href='register.jsp'" value="註冊"> </form> </body> </html> -
ServiceImpl
@Override public User login(String username, String password) { //1. 根據用戶名查詢資料庫是否存在 User user = userDao.findByUserName(username); //2.判斷對象是否存在 if (ObjectUtils.isEmpty(user)) { throw new RuntimeException("用戶名輸入錯誤!"); } //3.判斷密碼正確性 String digestPassword = DigestUtils.md5DigestAsHex(password.getBytes(StandardCharsets.UTF_8)); if (!user.getPassword().equals(digestPassword)) { throw new RuntimeException("密碼錯誤!"); } return user; } -
UserController
@RequestMapping("login")
public String login(String username, String password,HttpSession session) throws UnsupportedEncodingException {
    log.debug("接受到的用戶名:{},接收到的密碼:{}", username, password);
    try {
        // 1.執行登錄業務邏輯
        User user = userService.login(username, password);
        // 2.登錄成功,保存用戶信息
        session.setAttribute("user", user);
    } catch (Exception e) {
        e.printStackTrace();
        return "redirect:/login.jsp?msg=" + UriEncoder.encode(e.getMessage());
    }
    return "redirect:/emplist.jsp";
}
10.9 員工列表展示
- 在資料庫查詢所有員工信息
- 在頁面中進行展示
-
emplist.jsp
<%@ taglib prefix="c" uri="http://java.sun.com/jsp/jstl/core" %> <%@ taglib prefix="fmt" uri="http://java.sun.com/jsp/jstl/fmt" %> <%@ page language="java" contentType="text/html; charset=UTF-8" pageEncoding="UTF-8" %> <!DOCTYPE html> <html> <head> <title>用戶列表</title> <link rel="stylesheet" href="${pageContext.request.contextPath}/css/emplist.css"> </head> <body> <div id="container"> <h2>用戶列表</h2> <table> <tr> <th>ID</th> <th>姓名</th> <th>性別</th> <th>薪水</th> <th>生日</th> <th>操作</th> </tr> <c:forEach var="employee" items="${requestScope.employees}"> <tr> <td>${employee.id}</td> <td>${employee.name}</td> <td>${employee.gender?'男':'女'}</td> <td>${employee.salary}</td> <td><fmt:formatDate value="${employee.birthday}" pattern="yyyy-MM-dd"/></td> <td> <a href="javascript:;">刪除</a> <a href="javascript:;">修改</a> </td> </tr> </c:forEach> </table> <a href="javascript:;">添加員工信息</a> </div> </body> </html> -
emplist.css
body { font-family: Arial, sans-serif; margin: 0; padding: 0; } #container { max-width: 800px; margin: 0 auto; padding: 20px; } h2 { text-align: center; } table { width: 100%; border-collapse: collapse; margin-bottom: 20px; } th, td { padding: 10px; text-align: left; border: 1px solid #ccc; } thead { background-color: #f2f2f2; } div > button { margin: 5px; padding: 5px 10px; border: none; background-color: #007bff; color: #fff; cursor: pointer; } div > button:hover { background-color: #0056b3; } select, button { padding: 5px; } div > span { margin: 0 10px; font-weight: bold; } label { font-weight: bold; } -
Service
@Service @Transactional public class EmployeeServiceImpl implements EmployeeService { private final EmployeeDao employeeDao; @Autowired public EmployeeServiceImpl(EmployeeDao employeeDao) { this.employeeDao = employeeDao; } @Override public List<Employee> list() { return employeeDao.list(); } } -
EmployeeController
@Controller
@RequestMapping("employee")
public class EmployeeController {

    private EmployeeService employeeService;

    @Autowired
    public EmployeeController(EmployeeService employeeService) {
        this.employeeService = employeeService;
    }

    /**
     * 員工列表
     *
     * @return
     */
    @RequestMapping("list")
    public String listEmployee(HttpServletRequest request, Model model) {
        //1. 獲取員工列表
        List<Employee> employees = employeeService.list();
//        request.setAttribute("employees", employees);
        model.addAttribute("employees", employees);
        return "emplist";
    }
}
10.10 添加員工信息
- 在EmplyeeController開發一個添加方法
- 接收員工信息
- 將員工信息保存到資料庫
- 跳轉到員工列表展示數據
-
addEmp.jsp
<%@ page language="java" contentType="text/html; charset=UTF-8" pageEncoding="UTF-8" %> <!DOCTYPE html> <html> <head> <title>添加員工</title> <link rel="stylesheet" href="css/addEmp.css"> </head> <body> <h2>添加員工</h2> <div id="container"> <form action="${pageContext.request.contextPath}/employee/add" method="post"> <table> <tr> <td>姓名:</td> <td><input type="text" id="name" name="name"></td> </tr> <tr> <td>薪水:</td> <td><input type="text" id="salary" name="salary"></td> </tr> <tr> <td>生日:</td> <td><input type="text" id="birthday" name="birthday"></td> </tr> <tr> <td>性別:</td> <td> <select name="gender" > <option value="1">男</option> <option value="0">女</option> </select> </td> </tr> <tr> <td colspan="2"><input type="submit" value="添加"></td> </tr> </table> </form> </div> </body> </html> -
addEmp.css
body { font-family: Arial, sans-serif; margin: 0; padding: 0; } #container { max-width: 800px; margin: 0 auto; padding: 20px; } h2 { text-align: center; } table { width: 100%; border-collapse: collapse; margin-bottom: 20px; color: #212529; } td, th { vertical-align: top; padding: 10px; text-align: left; border: 1px solid #ccc; } input[type="text"], input[type="date"], select { width: 60%; padding: .375rem .75rem; border: 1px solid #ced4da; border-radius: .25rem; } input[type="submit"] { color: #fff; background-color: #007bff; border-color: #007bff; padding: .375rem .75rem; border-radius: .25rem; } -
EmployeeDaomapper.xml
<insert id="add" parameterType="Employee" useGeneratedKeys="true" keyProperty="id"> INSERT INTO `ems`.`employee`(`id`, `name`, `birthday`, `salary`, `gender`) VALUES (#{id},#{name},#{birthday},#{salary},#{gender}); </insert> -
EmployeeServiceImpl
public void addEmployee(Employee employee) { employeeDao.add(employee); } -
Controller
@RequestMapping("add")
public String addEmployee(Employee employee) {
    log.debug("員工信息:{}", employee);
    //1. 保存員工信息
    employeeService.addEmployee(employee);
    return "redirect:/employee/list";
}
10.11 更新員工信息
-
顯示員工信息
- 根據id查詢員工信息
- 將對象放進作用域
- 跳轉到更新頁面
-
UpdateEmp.jsp
<%@ taglib prefix="fmt" uri="http://java.sun.com/jsp/jstl/fmt" %> <%@ page language="java" contentType="text/html; charset=UTF-8" pageEncoding="UTF-8" %> <!DOCTYPE html> <html> <head> <title>修改員工信息</title> <link rel="stylesheet" href="${pageContext.request.contextPath}/css/updateEmp.css"> </head> <body> <div id="container"> <h2>修改員工信息</h2> <form action="${pageContext.request.contextPath}/employee/update" method="post"> <input type="text" id="id" name="id" value="${employee.id}" style="display: none"> <label for="name">姓名:</label><br> <input type="text" id="name" name="name" value="${employee.name}"><br> <label for="gender">性別:</label><br> <select id="gender" name="gender"> <option value="1" ${employee.gender?'selected':''}>男</option> <option value="0" ${!employee.gender?'selected':''}>女</option> </select><br> <label for="salary">薪水:</label><br> <input type="text" id="salary" name="salary" value="${employee.salary}"><br> <label for="birthday">生日:</label><br> <input type="text" id="birthday" name="birthday" value="<fmt:formatDate value='${employee.birthday}' pattern='yyyy/MM/dd'/>"/><br> <input type="submit" value="提交"> </form> </div> </body> </html> -
UpdateEmp.css
body { font-family: Arial, sans-serif; } #container { width: 300px; margin: 0 auto; padding: 20px; border: 1px solid #ccc; border-radius: 5px; background-color: #f8f8f8; } h2 { text-align: center; color: #333; } label { font-weight: bold; color: #555; } input[type="text"], input[type="date"],select { width: 70%; padding: 10px; margin: 5px 0 15px; border: 1px solid #ccc; border-radius: 3px; } input[type="submit"] { width: 100%; padding: 10px; color: white; background-color: #007BFF; border: none; border-radius: 3px; cursor: pointer; } input[type="submit"]:hover { background-color: #0056b3; } -
Controller
@RequestMapping("detail") public String detailEmployee(Integer id, Model model) { log.debug("接收的id:{}",id); Employee employee = employeeService.idByEmployee(id); model.addAttribute("employee", employee); return "updateEmp"; } -
更改員工信息
- 獲取更新後的員工信息
- 更新資料庫
-
Controller
@RequestMapping("update")
public String updateEmployee(Employee employee) {
    log.debug("修改的員工信息:{}", employee);
    employeeService.updateEmployee(employee);
    return "redirect:/employee/list";
}
10.12 刪除員工
- 傳遞id給後端進行資料庫刪除
- 返回employee/list重新查資料庫刷新
-
emplist.jsp
<a href="javascript:;" onclick="deleteEmployee()">刪除</a> <script> function deleteEmployee(){ if (window.confirm('確定刪除這條記錄嗎')) { location.href= '${pageContext.request.contextPath}/employee/delete?id=${employee.id}' } } </script> -
Controller
@RequestMapping("delete") public String deleteEmployee(Integer id) { log.debug("接收的id:{}", id); employeeService.deleteEmployee(id); return "redirect:/employee/list"; } -
mapper
<delete id="deleteEmployee">
    delete from `employee`where id =#{id}
</delete>
作者:揚眉劍出鞘
出處: https://www.cnblogs.com/eyewink/
本文版權歸作者和博客園共有,歡迎轉載,但未經作者同意必須保留此段聲明,且在文章頁面明顯位置給出原文連接,否則保留追究法律責任的權利。


