
Nuxt.js是一個基於Vue.js的通用應用框架,主要關註的是應用的UI渲染,利用Vue.js開發服務端渲染的應用所需要的各種配置。 ...
官網:https://www.nuxtjs.cn/
搭建Nuxt2-參考文獻:https://blog.csdn.net/weixin_44198965/article/details/125408111
一、為什麼用Nuxt
SEO:搜索引擎優化
1.1如何進行搜索引擎優化?
- 多頁面
- Title、描述、關鍵字
- 網站內容
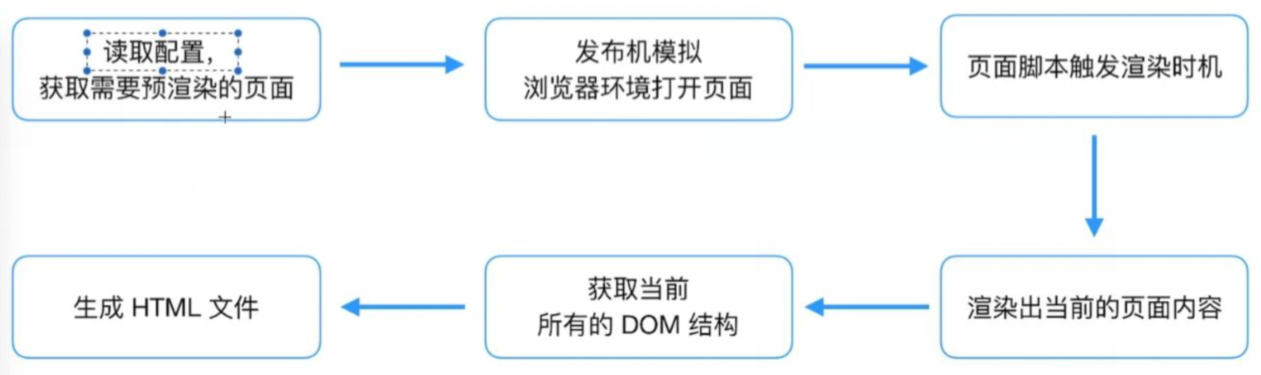
1.2-預渲染
1.2.1-預渲染圖解
1.2.2-如何使用?
(1)vue項目中安裝prerender-spa-plugin
npm install prerender-spa-plugin -S
(2)vue.config.js進行配置
(3)修改Title、描述、關鍵詞:vue-mate-info,下載vue-meta-info
npm install vue-meta-info -S
(4)到頁面組件中進行配置
metaInfo:{
title:"西瓜程式猿",
meta:[{
name:"關鍵詞,西瓜程式猿",
content:"描述"
}]
}
1.2.3-預渲染總結
可以解決:
1.打包多頁面
2.可以解決每個頁面單獨生成title、描述、關鍵詞
3.解決數據是在html生成放在頁面上的,爬蟲可以抓取到內容。存在的問題:
1.預渲染無法配置動態路由
2.如果title、描述、關鍵詞來與介面的數據,配置到met-info也是不行的。適合做什麼項目:
1.一個項目可以某幾個頁面要做SEO
1.3-服務端渲染(通過SSR)
1.3.1-預渲染圖解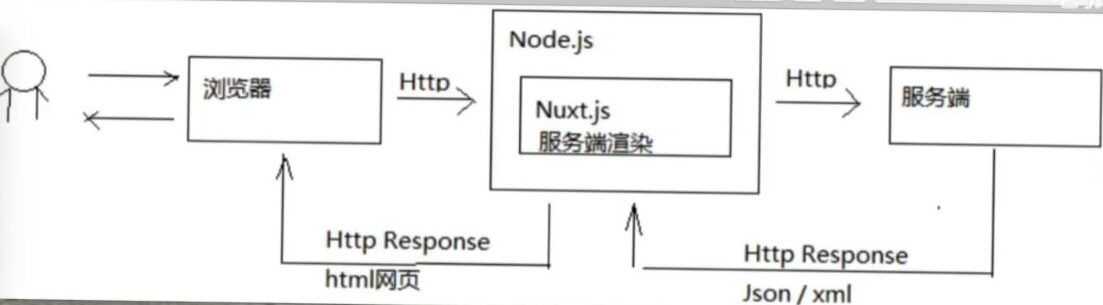
1.3.2-服務端渲染總結
適合做什麼項目:
1.一個項目可能所有頁面要做SEO(博客、內容網站)
1.4-優勢劣勢總結
1.前後端不分離
壓力在後端
好處:安全2.前後端分離
2.1-SPA單頁面應用[vue-cli本身處理不了SEO]
壓力在客戶端2.2預渲染
壓力在客戶端
問題:
1.在heml頁面載入之前數據過來渲染後才有html的DOM結構,這樣的話可能會存在一定時間空白頁面的情況。
2.一個項目不是所有頁面都做SEO。2.3-伺服器渲染
壓力在客戶端
問題:啟2個服務[一個是後端自己的語言服務(C#/Java),一個是Node.JS的服務]
二、Nuxt安裝與使用
2.1-安裝與創建
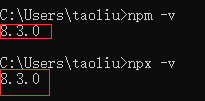
2.1.1- 確保全裝了 npx(npx 在 NPM 版本 5.2.0 預設安裝了):
npm -v
npx -v
2.1.2. 創建一個Nuxt項目
(1)輸入命名進行創建。
npx create-nuxt-app <項目名>
(2)選擇項:
Project name——項目名稱
Programming language——程式設計語言
Package manager——包管理器
UI framework——UI框架
Nuxt.js modules——NuxtJS模塊(如果需要安裝某個需要按"空格"電亮才行)
Linting tools——代碼校驗工具
Testing framework——測試框架
Universal——渲染模式(SSR:服務端渲染、SSG:靜態頁面生成)
Deployment target——部署目標
Development tools——開發工具
What is your GitHub username?——GitHub名稱
Version control system——版本控制工具
演示如下:
創建成功如下如:
2.2-目錄結構(VueCli 與 Nuxt 對比)
pages——頁面(類似於:src/views)
components——組件(類似於:src/components)
static——靜態資源(類似於:scr/assets)
store——vuex狀態樹(類似於:src/store)
muxt.config.js——全局配置文件(類似於:vue.config.js)
如下: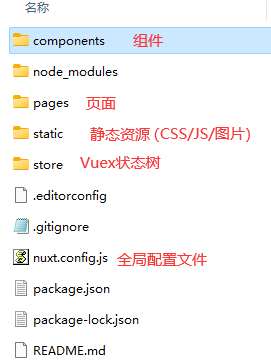
2.2-服務端生命周期
2.1.1-nuxtServerInit(store,context){}
參數1:vuex上下文
參數2:nuxt上下文
2.1.2-middleware()
全局:
全局導航守衛export default function(){ console.log("middleware kimi")}局部:
第一種頁面級別導航守衛 middleware:"kimi",
第二種頁面級別導航守衛 // middleware()
2.1.3-validate({params,query}){}
判斷URL參數是否符合標準,頁面中寫。
validate({params,query}){
校驗參數
...
console.log("3.validate...")
returntrue;
}
2.1.4-asyncData()——限於頁面組件
會在這個裡面做發送請求的操作。
2.1.5-fetch
fetch 方法用於在渲染頁面前填充應用的狀態樹(store)數據, 與 asyncData 方法類似,不同的是它不會設置組件的數據。
2.2-服務端與客戶端共有的生命周期
beforeCreate(){
console.log("6.beforeCreate")
},
created(){
console.log("7.created...")
},
2.3-客戶端生命周期
beforeMount(){
console.log("8.客戶端beforeMount...")
},
mounted(){
console.log("9.客戶端monted...")
},
beforeUpdate(){
console.log("10.beforeUpdate...");
},
updated(){
console.log("11.updated...");
},
beforeDestroy(){
console.log("12.beforeDestroy...");
},
destroyed(){
console.log("13.destroyed...");
}
2.4-Nuxt路由
2.4.1-路由跳轉的三種方式
a連接的形式跳轉
Link的方式
<button @click="toList">js跳轉toList(){
this.$router.push({
path:'/list',
query:{
id:123
},
params:{
id:321
}
});
}
2.4.2-使用已有的VueCli路由文件
(1)安裝插件。
npm install @nuxtjs/router -S
(2)在【nuxt.config.js】文件的【modules】模塊中配置。
modules: [
'@nuxtjs/router'
],
(3)在根路徑刪新建一個【router.js】文件,文件名必須為router。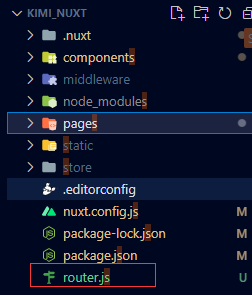
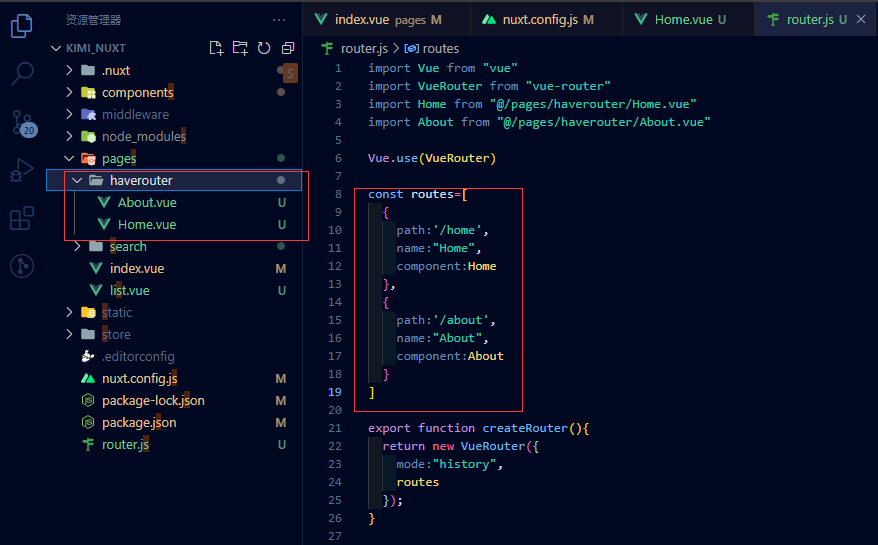
(4)修改該文件的內容。
importVuefrom"vue"
importVueRouterfrom"vue-router"
importHomefrom"@/pages/haverouter/Home.vue"
importAboutfrom"@/pages/haverouter/About.vue"
importNewsfrom"@/pages/haverouter/News.vue"
Vue.use(VueRouter)
const routes=[
  {
    path:'/home',
    name:"Home",
    component:Home
  },
  {
    path:'/about',
    name:"About",
    component:About
  },
  {
    path:'/news',
    name:"News",
    component:News
  }
]
letrouter=newVueRouter({
  mode:"history",
  routes
});
//全局導航守衛
router.beforeEach((to,from,next)=>{
  if(to.name=="About"){
    next("/news")
  }else{
    next()
  }
})
exportfunctioncreateRouter(){
  returnrouter;
}
2.5-Nuxt導航守衛
2.5.1-router.js
vue-cli中怎麼用,next中就怎麼用,幾乎一樣。
//全局導航守衛
router.beforeEach((to,from,next)=>{
  if(to.name=="About"){
    next("/news")
  }else{
    next()
  }
})
2.5.2-NuxtJS
中間件:middleware
全局:
// 全局導航守衛
export default function(store,route,redirect,parms,query,req,res){
  console.log("middleware kimi")
}

局部:
//第一種頁面級別導航守衛
middleware:"kimi",

//第二種頁面級別導航守衛
middleware(){
  console.log("我是全局導航守衛")
}
插件:plugins
(1)在【nuxt.config.js】的plugins進行配置。
plugins: [
'~/plugins/router.js'
],
(2)新建一個【router.js】文件,然後進行配置。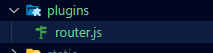
exportdefault ({app})=>{
全局
app.router.beforeEach((to,from,next)=>{
console.log(to)
next();
})
}
2.5.3-使用本地存儲
服務端不能使用localStorage和Cookie
需要使用以下模塊:
(1)安裝
npm install cookie-universal-nuxt -s
(2)在【nuxt.config.js】的【modules】引入
modules: [ 'cookie-universal-nuxt' ],
(3)如何使用
設置cookie:this.$cookies.set('token', 123456) 1
獲取cookie:this.$cookies.get("token") 1
清除cookie:this.$cookies.remove('token')
三、Nuxt配置項
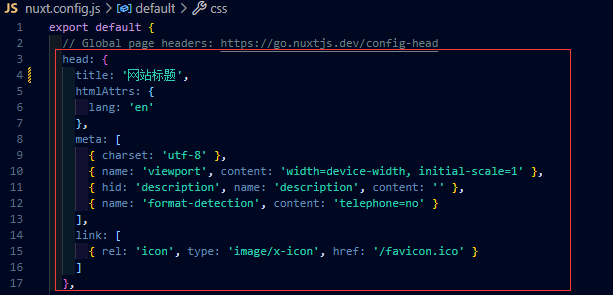
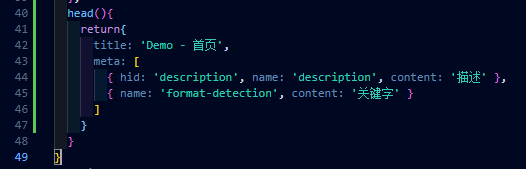
3.1-Head
全局在【nuxt.config.js】的[head]中定義。
局部在每個頁面中定義,全局已有的可以不用在局部定義。
3.2-CSS
3.2.1-使用全局css
3.2.2-使用ElementUI
(1)下載。
npm i element-ui -S
(2)在根目錄新建一個【plugins】文件夾中新建一個【element.js】文件。
importVuefrom"vue"
importElementUI from"element-ui"
Vue.use(ElementUI);
(3)在【nuxt.config.js】文件中進行配置。
  css: [
    "element-ui/lib/theme-chalk/index.css"
  ],

  plugins: [
    '~/plugins/element.js'
  ],
3.3-Model與數據交互
3.3.1-安裝axios
方法一:
(1)安裝:npm install @nuxtjs/axios -S
(2)在【nuxt.config.js】中配置:'@nuxtjs/axios'
方法二:
(1)安裝:npm install axios -S
3.3.2-asyncData生命周期(方法)
pages目錄中的頁面組件才可以使用,components內的.vue文件不可以使用的。
asyncData中沒有this。
3.3.3-fetch生命周期(方法)
fetch是有this的。
3.4-配置代理
(1)安裝
npm install @nuxtjs/axios @nuxtjs/proxy -S
(2)在【nuxt.config.js】文件中配置。
  modules: [
    '@nuxtjs/axios',
    '@nuxtjs/proxy'
  ],
  axios:{
    //是否可以跨域
    proxy:true
  },
  proxy:{
    '/api':{
      target:"http://testapi.xuexiluxian.cn/",
      pathRewrite:{
        '^/api':''
      }
    }
  },
四、Nuxt使用Vuex狀態樹
export const state = () => ({
  counter: 0
})

export const mutations = {
  increment(state) {
    state.counter++
  }
}
五、項目重構(V-Cli項目重構到Nuxt中)
5.1-路由配置
(1)安裝
npm install @nuxt/router -S
(2)在【nuxt.config.js】文件中進行配置。
 modules: [
   "@nuxtjs/router"
 ],
(3)把vue-cli中router文件拷貝到nuxt項目根目錄中,並命名為【router.js】。
(4)然後修改這個文件。
import Vue from 'vue';
import Router from 'vue-router';
import Home from '@/pages/blog/home.vue';//博客首頁

Vue.use(Router);

const routes = [
  { path: '/',component: Home},
];


export function createRouter(){
  return new Router({
    mode: "history",
    routes,
  });
}
5.2-代理和擴展$axios解耦
(1)安裝代理與axios。
npm install @nuxtjs/axios @nuxtjs/proxy -S
(2)在【nuxt.config.js】文件中進行配置。
modules: [
    "@nuxtjs/axios",
    "@nuxtjs/proxy"
  ],
(3)配置代理。
//開啟代理
  axios:{
    proxy:true,
  },
  proxy:{
    "/api":{
      target:"http://xx.xx.xx.xxx:8081"
    }
  },
(4)創建一個【plugins】文件夾,並新建一個名為【axios.js】文件,配置如下:
export default ( {$axios} ) =>{
    //請求攔截器
    $axios.onRequest((config)=>{
        console.log("請求攔截器...");
        return config;
    });

    //異常攔截器
    $axios.onRequest((error)=>{
        console.log("異常攔截器...");
    });

    //響應攔截器
    $axios.onResponse((response)=>{
        console.log("響應攔截器...");
        return response.data;
    });
}
(5)在【nuxt.config.js】文件中進行配置。
  plugins: [
    "~/plugins/axios"
  ],
5.3-引入VueX和組件重構
(1)創建一個【store】文件夾併在裡面新建一個【index.js】文件,內容如下。
import Vue from 'vue'
import Vuex from 'vuex'

//使用Vuex
Vue.use(Vuex)

import app from './modules/app'
const store = () => new Vuex.Store({
  //導入模塊
  modules:{
    app,
  }
});

//導出
export default store;
(2)創建一個【models】文件夾併在裡面新建一個【user.js】文件,內容如下。
//【應用程式模塊】
export default{
  //單一狀態樹,UI可通過this.$store.state.user.*獲得數據
  state:{

  },
  // 唯一擁有更改記憶體數據的介面,不可進行非同步操作
  mutations:{

  },
  // 與mutation通訊,UI層寫入記憶體數據的介面,可非同步操作
  actions:{

  }
}
5.4-引入ElementUI(按需引入)
(1)安裝
npm i element-ui -S
npm i -D babel-plugin-component
(2)新建一個【elementui-ui.js】放在【plugins】文件夾下。
import Vue from 'vue';
// 按需引入ElementUI
import {
    Pagination,
    Dialog,
    Autocomplete,
    Dropdown,
    DropdownMenu,
    DropdownItem,
    Menu,
    Submenu,
    MenuItem,
    MenuItemGroup,
    Input,
    InputNumber,
    Radio,
    RadioGroup,
    RadioButton,
    Checkbox,
    CheckboxButton,
    CheckboxGroup,
    Switch,
    Select,
    Option,
    OptionGroup,
    Button,
    ButtonGroup,
    Table,
    TableColumn,
    DatePicker,
    TimeSelect,
    TimePicker,
    Popover,
    Tooltip,
    Breadcrumb,
    BreadcrumbItem,
    Form,
    FormItem,
    Tabs,
    TabPane,
    Tag,
    Tree,
    Alert,
    Slider,
    Icon,
    Row,
    Col,
    Upload,
    Progress,
    Spinner,
    Badge,
    Card,
    Rate,
    Steps,
    Step,
    Carousel,
    CarouselItem,
    Collapse,
    CollapseItem,
    Cascader,
    ColorPicker,
    Transfer,
    Container,
    Header,
    Aside,
    Main,
    Footer,
    Timeline,
    TimelineItem,
    Link,
    Divider,
    Image,
    Calendar,
    Backtop,
    PageHeader,
    CascaderPanel,
    Loading,
    MessageBox,
    Message,
    Notification,
    Avatar,
    Scrollbar,
    Empty,
    Skeleton,
    SkeletonItem
} from 'element-ui';

Vue.use(Pagination);
Vue.use(Dialog);
Vue.use(Autocomplete);
Vue.use(Dropdown);
Vue.use(DropdownMenu);
Vue.use(DropdownItem);
Vue.use(Menu);
Vue.use(Submenu);
Vue.use(MenuItem);
Vue.use(MenuItemGroup);
Vue.use(Input);
Vue.use(InputNumber);
Vue.use(Radio);
Vue.use(RadioGroup);
Vue.use(RadioButton);
Vue.use(Checkbox);
Vue.use(CheckboxButton);
Vue.use(CheckboxGroup);
Vue.use(Switch);
Vue.use(Select);
Vue.use(Option);
Vue.use(OptionGroup);
Vue.use(Button);
Vue.use(ButtonGroup);
Vue.use(Table);
Vue.use(TableColumn);
Vue.use(DatePicker);
Vue.use(TimeSelect);
Vue.use(TimePicker);
Vue.use(Popover);
Vue.use(Tooltip);
Vue.use(Breadcrumb);
Vue.use(BreadcrumbItem);
Vue.use(Form);
Vue.use(FormItem);
Vue.use(Tabs);
Vue.use(TabPane);
Vue.use(Tag);
Vue.use(Tree);
Vue.use(Alert);
Vue.use(Slider);
Vue.use(Icon);
Vue.use(Row);
Vue.use(Col);
Vue.use(Upload);
Vue.use(Progress);
Vue.use(Spinner);
Vue.use(Badge);
Vue.use(Card);
Vue.use(Rate);
Vue.use(Steps);
Vue.use(Step);
Vue.use(Carousel);
Vue.use(CarouselItem);
Vue.use(Collapse);
Vue.use(CollapseItem);
Vue.use(Cascader);
Vue.use(ColorPicker);
Vue.use(Transfer);
Vue.use(Container);
Vue.use(Header);
Vue.use(Aside);
Vue.use(Main);
Vue.use(Footer);
Vue.use(Timeline);
Vue.use(TimelineItem);
Vue.use(Link);
Vue.use(Divider);
Vue.use(Image);
Vue.use(Calendar);
Vue.use(Backtop);
Vue.use(PageHeader);
Vue.use(CascaderPanel);
Vue.use(Loading.directive);
Vue.use(Avatar);//頭像
Vue.use(Scrollbar);//滾動條
Vue.use(Empty);//空狀態
Vue.use(Skeleton);//骨架屏
Vue.use(SkeletonItem);

//掛載Message
Vue.prototype.$loading = Loading.service;
Vue.prototype.$msgbox = MessageBox;
Vue.prototype.$alert = MessageBox.alert;
Vue.prototype.$confirm = MessageBox.confirm;
Vue.prototype.$prompt = MessageBox.prompt;
Vue.prototype.$notify = Notification;
Vue.prototype.$message = Message;
(3)在【nuxt.config.jf】配置。
  // 全局CSS: https://go.nuxtjs.dev/config-css
  css: [
    "element-ui/lib/theme-chalk/index.css"
  ],


// 在呈現頁面之前要運行的插件: https://go.nuxtjs.dev/config-plugins
  plugins: [
    "@/plugins/element-ui",
  ],


    // 生成配置: https://go.nuxtjs.dev/config-build
  build: {
    //按需引入ElementUI
    transpile: [/^element-ui/],
    babel: {
      plugins: [
        ['component',
          {
            libraryName: 'element-ui',
            styleLibraryName: 'theme-chalk'
          }
        ]
      ]
    }
  }
六、項目上線
6.1-項目打包
(1)運行命令
npm run build
(2)將一下文件拷貝到伺服器上 (根據自己項目文件存放情況選擇) 。
(3)使用pm2啟動
pm2 start
6.2-Nuxt發佈IIS綁定功能變數名稱
參考文獻:
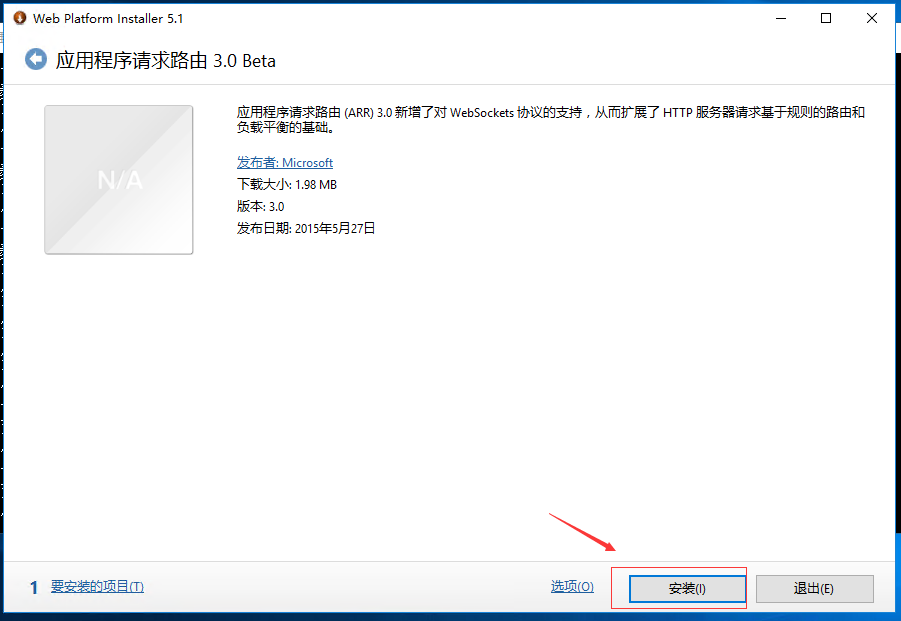
1.安裝ARR:https://www.likecs.com/show-527252.html?sc=504
2.Nuxt.js-IIS發佈部署:https://blog.csdn.net/cplvfx/article/details/113940057
一、在IIS7中使用ARR(Application Request Routing)反向代理虛擬目錄到Nodejs站點
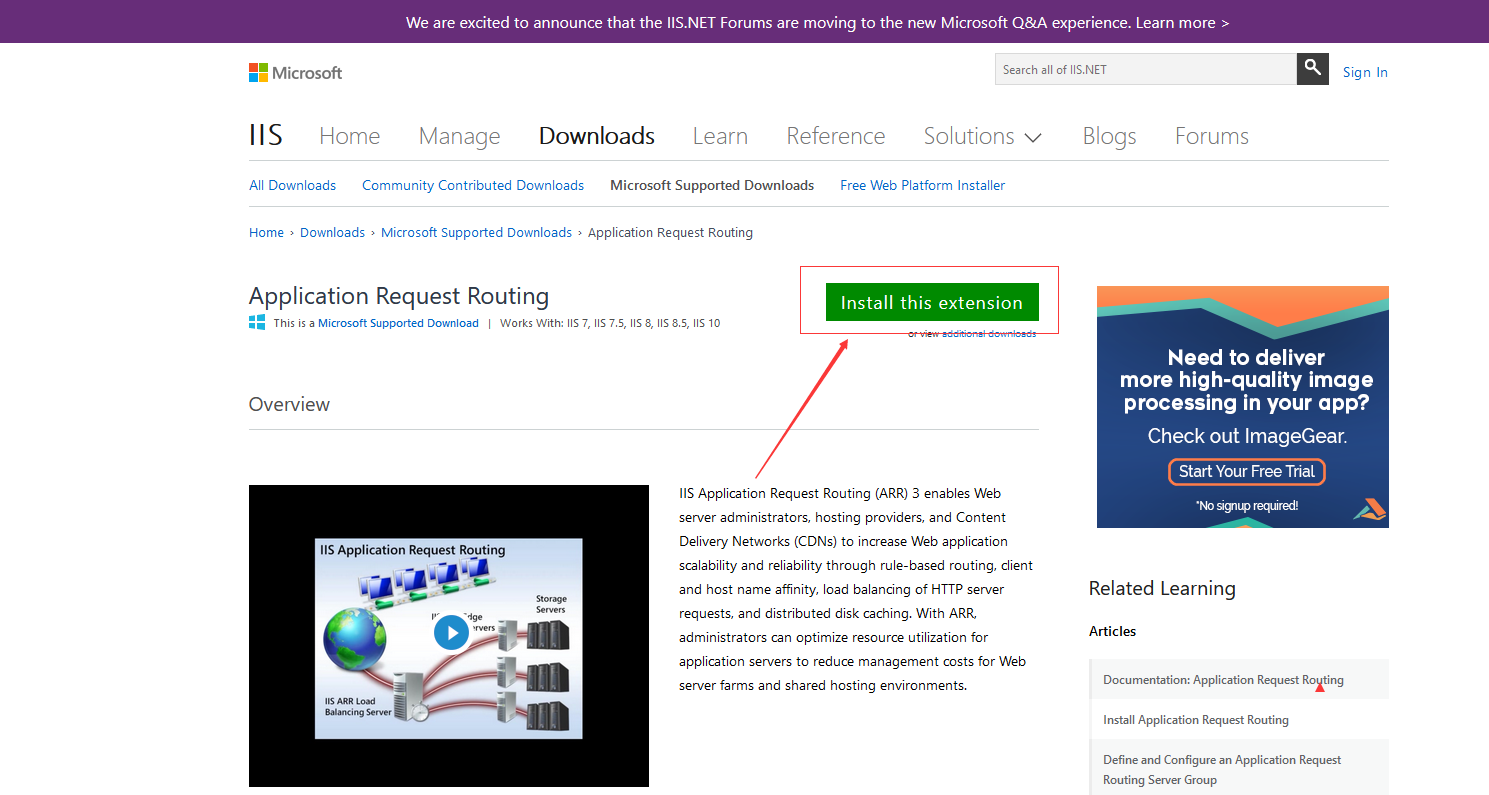

(1)將下載好的文件拷貝到伺服器上,並雙擊安裝(打開時間比較長,慢慢等就好了)。

(2)安裝成功後,重新打開IIS,出現這個圖標說明安裝成功了。
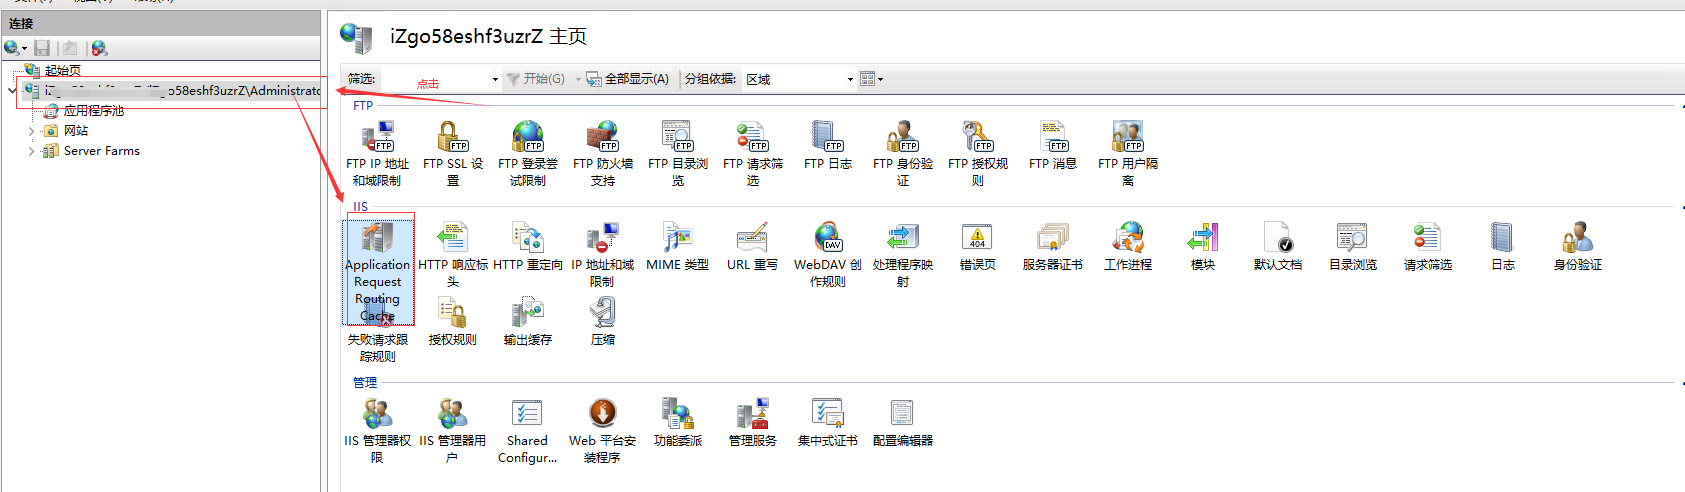
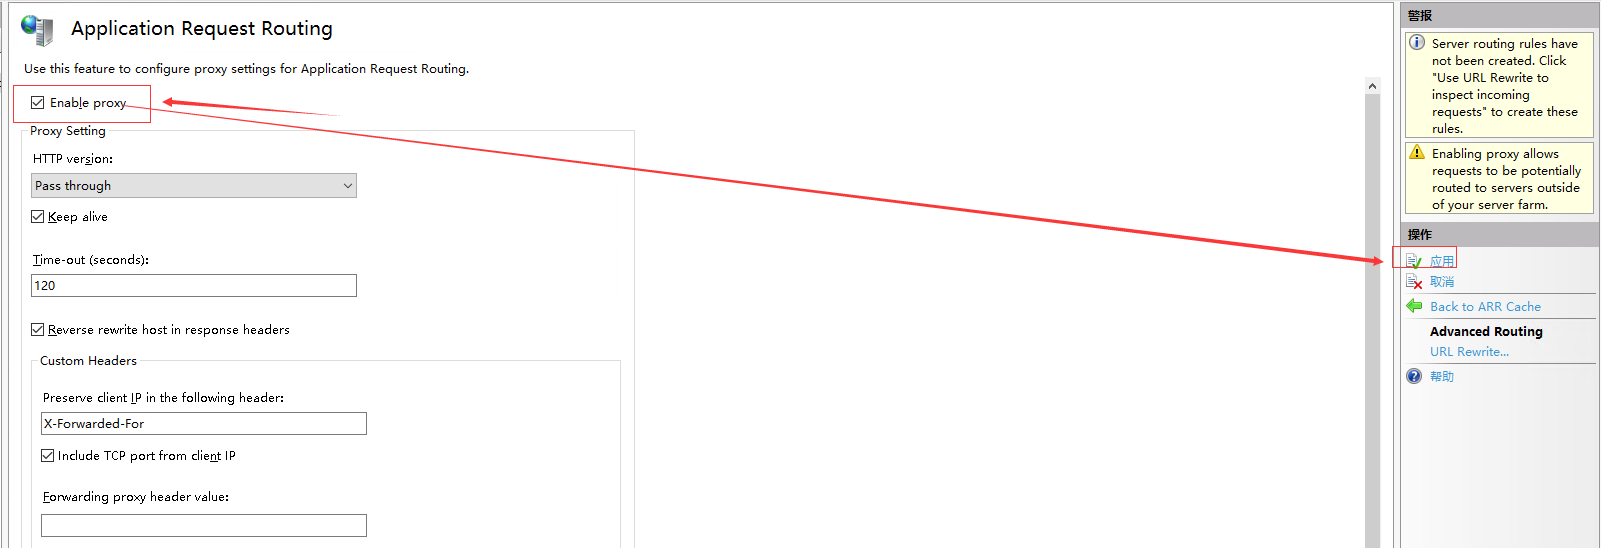
(3)雙擊【 Application Request Routing Cache 】圖標,然後點擊【Server Proxy Settings】。

(4)勾選【Enable Setting】,然後點擊【應用】。
二、添加站點
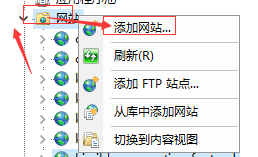
(1)右擊【網站】,點擊【添加網站】。
(2)填寫基本信息。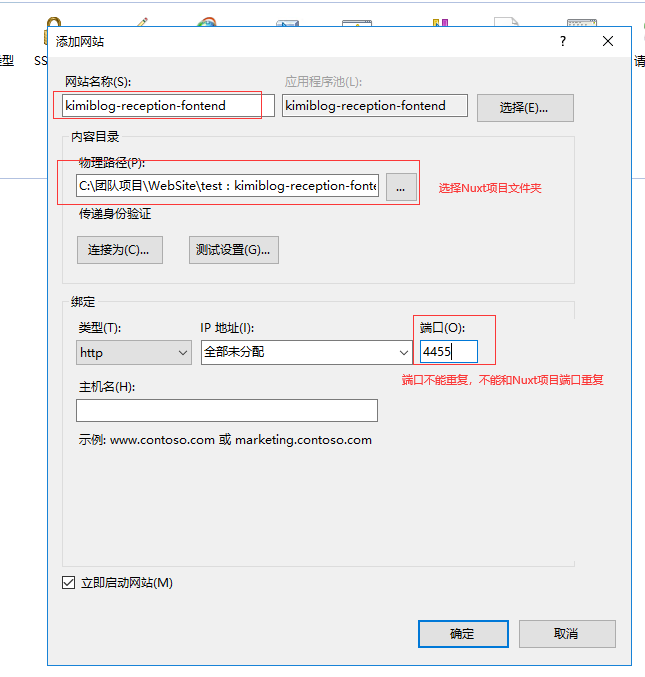
(3)然後點擊剛剛創建的項目,再雙擊【URL 重寫】,點擊【添加規則】。
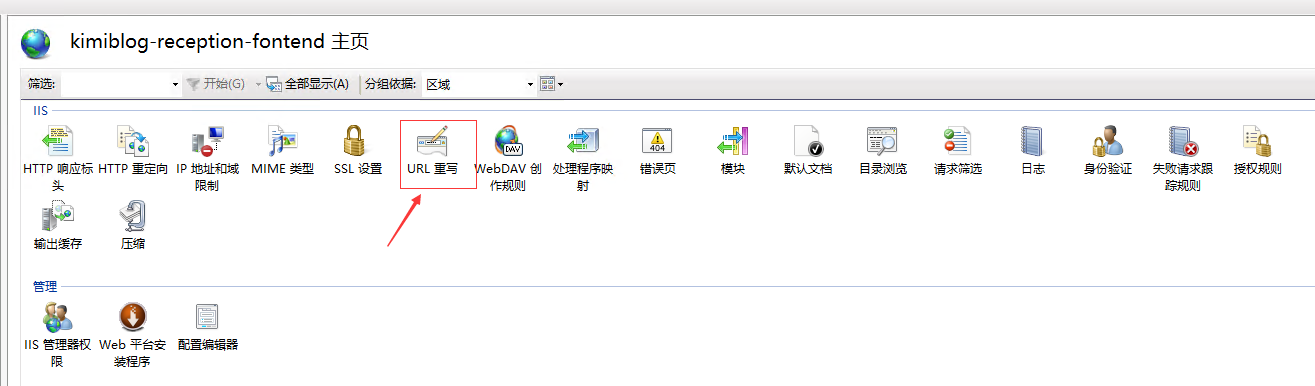
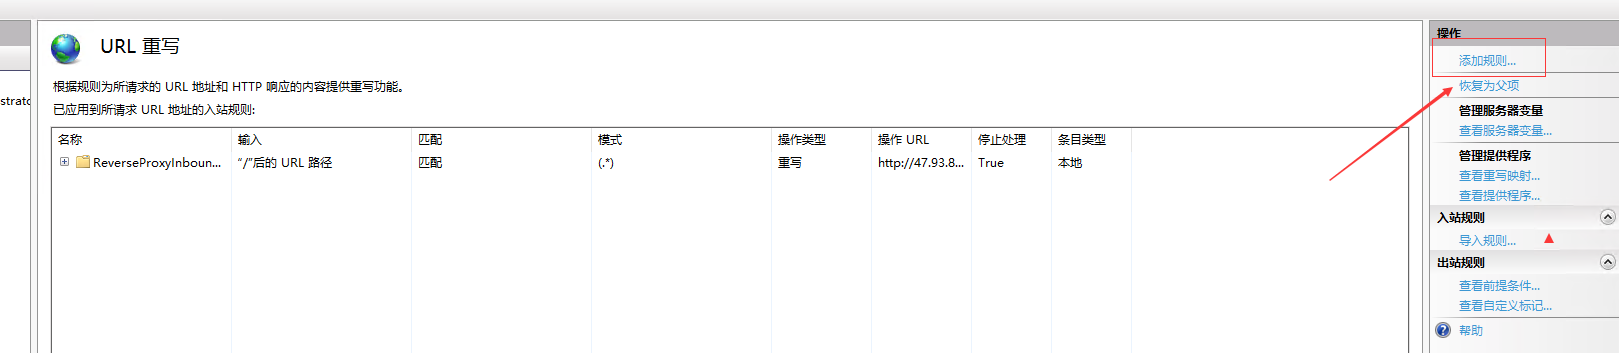
選擇【反向代理】
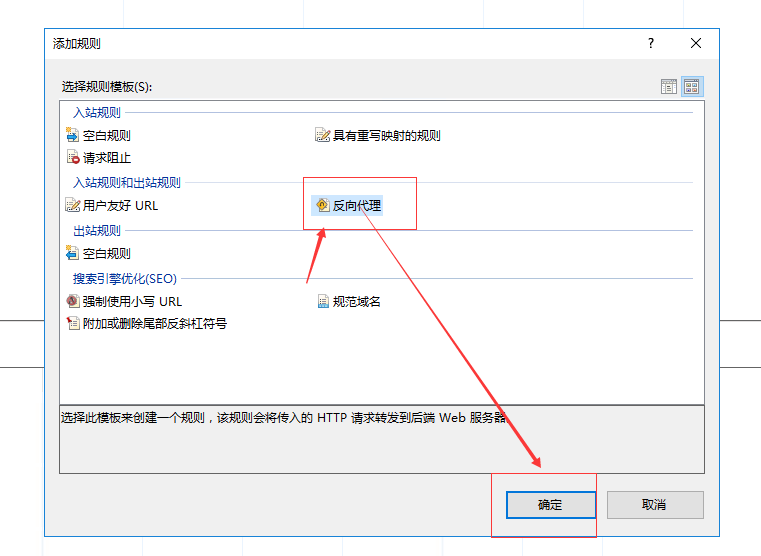
填寫你原本用Node發佈的Nuxt項目IP+埠即可,然後點擊確定。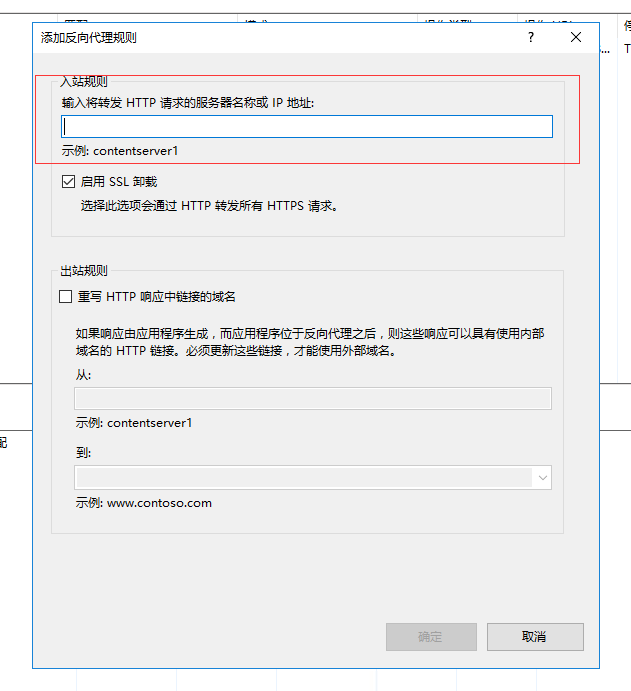
七、其他相關知識點
7.1-nuxt中使用cross-env配置環境變數
(1)使用命令安裝依賴
npm i cross-env
(2)新建一個【env.js】文件,填寫相關不同環境的配置信息。
export default {
  // 開發環境
  dev: {
    NODE_ENV : 'development',
    // Base URL
    BASE_URL: 'http://xx.xx.xx.xxx:8081',
    // Base API
    VUE_APP_BASE_API: 'http://xx.xx.xx.xxx:8081'
  },

  // 測試環境
  test: {
    NODE_ENV : 'test',
    // Base URL
    BASE_URL: 'http://xx.xx.xx.xxx:8081',
    // Base API
    VUE_APP_BASE_API: 'http://xx.xx.xx.xxx:8081'
  },

  // 生產環境
  prod: {
    NODE_ENV : 'production',
    // Base URL
    BASE_URL: 'http://xx.xx.xx.xxx:8081',
    // Base API
    VUE_APP_BASE_API: 'http://xx.xx.xx.xxx:8081'
  }
}
(3)在【package.json】中配置。
    "dev": "npm run dev:dev",
    "build": "npm run build:dev",
    "start": "npm run start:dev",
    "dev:dev": "cross-env MODE=dev nuxt",
    "build:dev": "cross-env MODE=dev nuxt build",
    "start:dev": "cross-env MODE=dev nuxt start",
    "dev:test": "cross-env MODE=test nuxt",
    "build:test": "cross-env MODE=test nuxt build",
    "start:test": "cross-env MODE=test nuxt start",
    "dev:prop": "cross-env MODE=prod nuxt",
    "build:prop": "cross-env MODE=prod nuxt build",
    "start:prop": "cross-env MODE=prod nuxt start",
(4)在【nuxt.config.js】中配置。
 import env from './config/env';


 // 配置環境變數
  env: {
    MODE: process.env.MODE
  },


 // 代理
  proxy:{
    "/api":{
      target:"http://xx.xx.xx.xxx:8081",//配置介面地址
      target:env[process.env.MODE].VUE_APP_BASE_API,//配置介面地址
      changeOrigin: true
    }
  },
7.2-nuxt中使用svg-icon
(1)安裝相關依賴
npm i svg-sprite-loader -D
npm i nuxt-svg-sprite-loader
(2)新建如下相關文件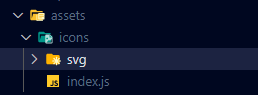
【icon】放置svg文件
【index.js】
import Vue from 'vue';
import SvgIcon from '@/components/common/svg-icon'; // 導入SVG組件

// 全局註冊
Vue.component('svg-icon', SvgIcon);

// 三個參數:引入資源的目錄 是否需要便利子目錄 匹配文件的規則
const req = require.context('./svg', false, /\.svg$/);
const requireAll = requireContext => requireContext.keys().map(requireContext);
requireAll(req);
(3)在【nuxt.config.js】中進行配置。
  plugins: [
    '@/assets/icons'
  ],

  modules: [
    ['nuxt-svg-sprite-loader', {
      symbolId: 'icon-[name]'
    }]
  ],
7.3-nuxt中使用cookie
(1)安裝依賴
npm i --save cookie-universal-nuxt
(2)在【nuxt.config.js】中進行配置。
 modules: [
    'cookie-universal-nuxt'
  ],
(3)使用
const cookieValObject = { param1: 'value1', param2: 'value2' }

// nuxt middleware——中間件
export default ({ app }) => {
  app.$cookies.set('cookie-name', 'cookie-value', {
    path: '/',
    maxAge: 60 * 60 * 24 * 7
  })
  app.$cookies.set('cookie-name', cookieValObject, {
    path: '/',
    maxAge: 60 * 60 * 24 * 7
  })
}

// client——客戶端
this.$cookies.set('cookie-name', 'cookie-value', {
  path: '/',
  maxAge: 60 * 60 * 24 * 7
})
this.$cookies.set('cookie-name', cookieValObject, {
  path: '/',
  maxAge: 60 * 60 * 24 * 7
})
7.4-nuxt中使用代碼高亮highlight.js插件
參考文獻:
(1)https://blog.csdn.net/qq2754289818/article/details/126396101
(2)https://blog.csdn.net/weixin_41897680/article/details/124925222
(1)安裝
npm install highlight.js
(2)在【plugins】文件下添加一個【highlight.js】文件。
import Vue from 'vue';
import hljs from 'highlight.js';
// 樣式文件(我選的是atom-one-dark-reasonable樣式 可以通過highlight.js/styles 選擇其他css)
import 'highlight.js/styles/atom-one-dark-reasonable.css';

// 掛載highlight
Vue.directive('highlight', function (el) {
  let element = el.querySelectorAll('pre');
  element.forEach((block) => {
    hljs.highlightBlock(block);
  });
});
(3)在【nuxt.config.js】中引入。
  plugins: [
    '@/plugins/highlight'
  ],
(4)在代碼中使用
<div v-html='BlogArticleDetail.articleContent' v-highlight></div>
7.5-nuxt中使用全局水印
參考文獻:
(1)實現水印:https://www.h5w3.com/239642.html
(2)nuxt自定義全局方法:https://blog.csdn.net/xuelang532777032/article/details/78414187
(1) 在【plugins】文件夾里新增一個【watermark.js】文件(文件名可以自己取)。
import Vue from 'vue';
let watermarkObj = {};

/**
 *  設置全局水印
 *  @text == 水印內容
 *  @sourceBody == 水印添加在哪裡,不傳就是body
 * */
let idGlocal = 'watermark_id';
let setWatermarkGlocal = (text, sourceBody) => {
  if (document.getElementById(idGlocal) !== null) {
    document.body.removeChild(document.getElementById(idGlocal));
  }

  let can = document.createElement('canvas');
  can.width = 500;
  can.height = 200;

  let cans = can.getContext('2d');
  cans.rotate((-20 * Math.PI) / 180);
  cans.font = '15px Vedana';
  cans.fillStyle = 'rgba(0, 0, 0, 0.05)';
  cans.textAlign = 'left';
  cans.textBaseline = 'Middle';
  cans.fillText(text, can.width / 20, can.height);

  let water_div = document.createElement('div');
  water_div.id = idGlocal;
  water_div.style.pointerEvents = 'none';
  water_div.style.background = 'url(' + can.toDataURL('image/png') + ') left top repeat';
  if (sourceBody) {
    water_div.style.width = '100%';
    water_div.style.height = '100%';
    sourceBody.appendChild(water_div);
  } else {
    water_div.style.top = '3px';
    water_div.style.left = '0px';
    water_div.style.position = 'fixed';
    water_div.style.zIndex = '100000';
    water_div.style.width = document.documentElement.clientWidth + 'px';
    water_div.style.height = document.documentElement.clientHeight + 'px';
    document.body.appendChild(water_div);
  }
};

/**
 *  添加全局水印
 *  @text == 水印內容
 *  @sourceBody == 水印添加在哪裡,不傳就是body
 * */
watermarkObj.setGlocal = (text, sourceBody) => {
  setWatermarkGlocal(text, sourceBody);
  window.onresize = () => {
    setWatermarkGlocal(text, sourceBody);
  };
};

/**
 *  刪除全局水印
 * */
watermarkObj.removeGlocal = () => {
  if (document.getElementById(idGlocal) !== null) {
    document.body.removeChild(document.getElementById(idGlocal));
  }
};

// 設置全局方法
var watermark = {
  install(Vue) {
    Vue.prototype.$watermark = {
      // 設置全局水印
      setGlocal: function (test, sourceBody) {
        watermarkObj.setGlocal(test, sourceBody);
      },
      //  刪除全局水印
      removeGlocal: function () {
        watermarkObj.removeGlocal();
      },
    };
  },
};

Vue.use(watermark);
(2)在【nuxt.config.js】中進行配置。
  plugins: [
    { src: '@/plugins/watermark', ssr: false }
  ],
(3)在xx.vue文件中使用。
【全局使用】
  mounted() {
    // 添加水印
    this.$watermark.setGlocal('©滔滔程式猿');

  },
  beforeDestroy() {
    // 刪除水印
    this.$watermark.removeGlocal();
  },
【局部使用】(註意:局部使用記得外外層div設置寬高)
<template>
<div ref="content" style="width: 500px;height: 500px;border: 1px solid #ccc;">
</template>

<script>
 export default {
     mounted() {
      // 添加水印
      this.$watermark.setGlocal('©滔滔程式猿',this.$refs.content);
    },
    beforeDestroy() {
      // 刪除水印
      this.$watermark.removeGlocal();
    },
 }
</script>
7.6-nuxt中實現圖片放大預覽功能
(1)安裝
npm install v-viewer
(2)在【plugins】文件夾里新增一個【viewer.js】文件(文件名可以自己取)。
import Vue from 'vue';
import Viewer from 'v-viewer'
import 'viewerjs/dist/viewer.css'

Vue.use(Viewer);
Viewer.setDefaults({
  Options: {
    'inline': true,
    'button': true,
    'navbar': true,
    'title': true,
    'toolbar': true,
    'tooltip': true,
    'movable': true,
    'zoomable': true,
    'rotatable': true,
    'scalable': true,
    'transition': true,
    'fullscreen': true,
    'keyboard': true,
    'url': 'data-source'
  }
});
(3)在【nuxt.config.js】中進行配置。
  plugins: [
    { src: '@/plugins/viewer', ssr: false }
  ],
(4)在xx.vue文件中使用。
<div class="markdown-body-box" v-viewer>
<!-- 頁面內容、圖片等等 -->
</div>
效果:
7.7-nuxt中使用windiCSS
(1)安裝
npm i nuxt-windicss -D
(2)在【nuxt.config.js】文件中配置
  buildModules: [
    'nuxt-windicss'
  ],
(3)如果使用了TS可以進行配置。
    "types": [
      "nuxt-windicss"
    ]
原文鏈接:https://www.cnblogs.com/kimiliucn/p/17602783.html


