1、四層結構 viewer --> datasources(DataSourceCollection類型) --> datasource --> entities(EntityCollection類型) --> entity 需要學習的方向是:只需要註意每個層與層之間的關係和entity實例如何創建 ...
1、四層結構
viewer --> datasources(DataSourceCollection類型) --> datasource --> entities(EntityCollection類型) --> entity
需要學習的方向是:只需要註意每個層與層之間的關係和entity實例如何創建即可
2、DataSourceCollection
增:
add(dataSource) → Promise.<DataSource>
刪:(destroy一般為boolean,指是否需要直接銷毀該datasource)
remove(dataSource, destroy) → boolean
removeAll(destroy)
查:
indexOf(dataSource) → number
getByName(name) → Array.<DataSource>
get(index) → DataSource
contains(dataSource) → boolean
改:
該類型數據一般是指向型,直接調出屬性直接修改即可
改變層級關係(特殊):
lower(dataSource)
lowerToBottom(dataSource)
raise(dataSource)
raiseToTop(dataSource)
3、datasource
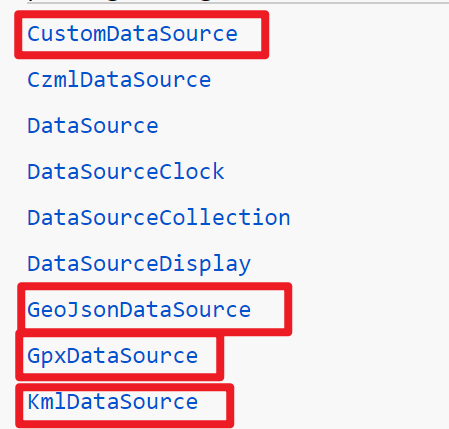
這是一個抽象類,有各種實現方式

一般只會用到他的三個屬性:entities、name和show
4、entities(EntityCollection類型)
增:
add(entity) → Entity
getOrCreateEntity(id) → Entity
刪:
removeAll()
removeById(id) → boolean
remove(entity) → boolean
查:
contains(entity) → boolean
getById(id) → Entity|undefined
改:
重要屬性:
id : string
owner : DataSource|CompositeEntityCollection
show : boolean
values : Array.<Entity>  // 全部的entity
5、創建新的entity
一些實例:
https://www.jianshu.com/p/4250e822c9c8
6、代碼
需要註意的是這裡的add()方法得到的是<promise.類型>,後面需要使用.then(成功函數,失敗函數)來得到類型
add(dataSource) → Promise.<DataSource>
這種類怎麼創建和怎麼用見:
https://blog.csdn.net/ABCFF12333/article/details/118188018
  // 註意add()方法得到的是<promise.類型>,後面需要使用.then(成功函數,失敗函數)來得到類型
  // 註意這是非同步方法
  viewer.dataSources.add(new Cesium.CustomDataSource("pointDataSource1")).then(function(value){
    var pointDataSource = value;
    pointDataSource.show = true;
    var point1 = pointDataSource.entities.add({
      id: "point1",
      name: "point1",
      position: Cesium.Cartesian3.fromDegrees(109, 34, 0),
      point: {
        pixelsize: 10,
        color: Cesium.Color.YELLOW,
        outlineWidth: 2,
        outlineColor: Cesium.Color.RED
      }
    });
    var point2 = pointDataSource.entities.add({
      id: "point2",
      name: "point2",
      position: Cesium.Cartesian3.fromDegrees(110, 35, 0),
      point: {
        pixelsize: 10,
        color: Cesium.Color.YELLOW,
        outlineWidth: 2,
        outlineColor: Cesium.Color.RED
      }
    })
  },function(error){})

  viewer.dataSources.add(new Cesium.CustomDataSource("polygonDatasource")).then(function(value){
    var polygonDatasource = value;
    polygonDatasource.show = true;
    polygonDatasource.entities.add({
      id: "polygon1",
      name: "polygon1",
      polygon: {
        hierarchy: Cesium.Cartesian3.fromDegreesArray([
          109.080842, 45.002073,
          105.91517, 45.002073,
          104.058488, 44.996596,
          104.053011, 43.002989,
          104.053011, 41.003906,
          105.728954, 40.998429,
          107.919731, 41.003906,
          109.04798, 40.998429,
          111.047063, 40.998429,
          111.047063, 42.000709,
          111.047063, 44.476286,
          111.05254, 45.002073,
          109.080842, 45.002073
        ]),
        height: 10,  // 必須要有高度,否則沒有邊框
        material: Cesium.Color.GREEN,
        outline: true,
        outlineColor: Cesium.Color.RED,
        outlineWidth: 2,
        fill: true
      }
    })
  },function(error){})
})
7、載入gltf
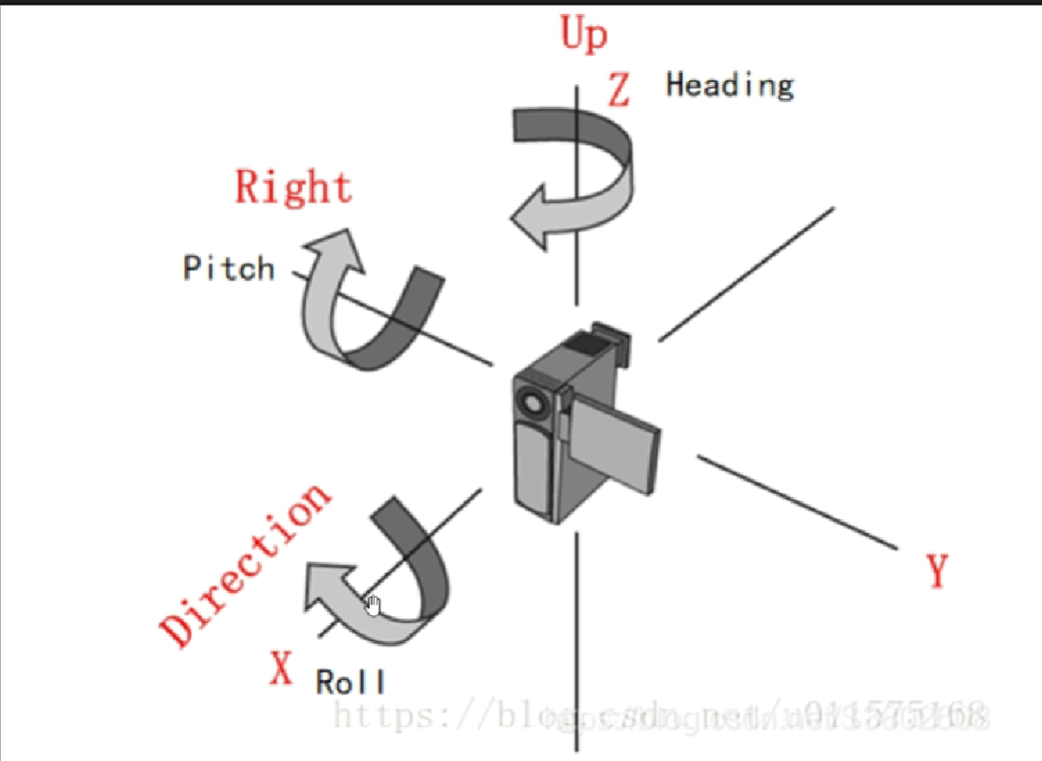
先瞭解一下heading、pitch、roll

因為原始數據的x、y、z軸可能與這個不同,所以當修改了pitch沒有發生俯仰而是看起來是roll發生了變化,就需要去查看原始數據的基準
gltfDatasource.entities.add({
    id: "model",
    position: position1,
    orientation: Cesium.Transforms.headingPitchRollQuaternion(position1, ori),
    model: {
      uri: "../SampleData/models/CesiumMan/Cesium_Man.glb",
      minimumPixelSize: 32, // 放到最小時的像素大小
      distanceDisplayCondition: new Cesium.DistanceDisplayCondition(10, 10000), // 只有相機與這個模型在這個距離區間才能顯示
      shadows: Cesium.ShadowMode.CAST_ONLY, // 陰影方式
      silhouetteColor: Cesium.Color.RED, // 模型邊框的顏色
      silhouetteSize: 5, //模型邊框的寬度
      colorBlendMode: Cesium.ColorBlendMode.MIX, // 修改模型顏色的方式,3種
      color: Cesium.Color.YELLOW, // 修改模型顏色
    },
    description: "飛機模型",
  });
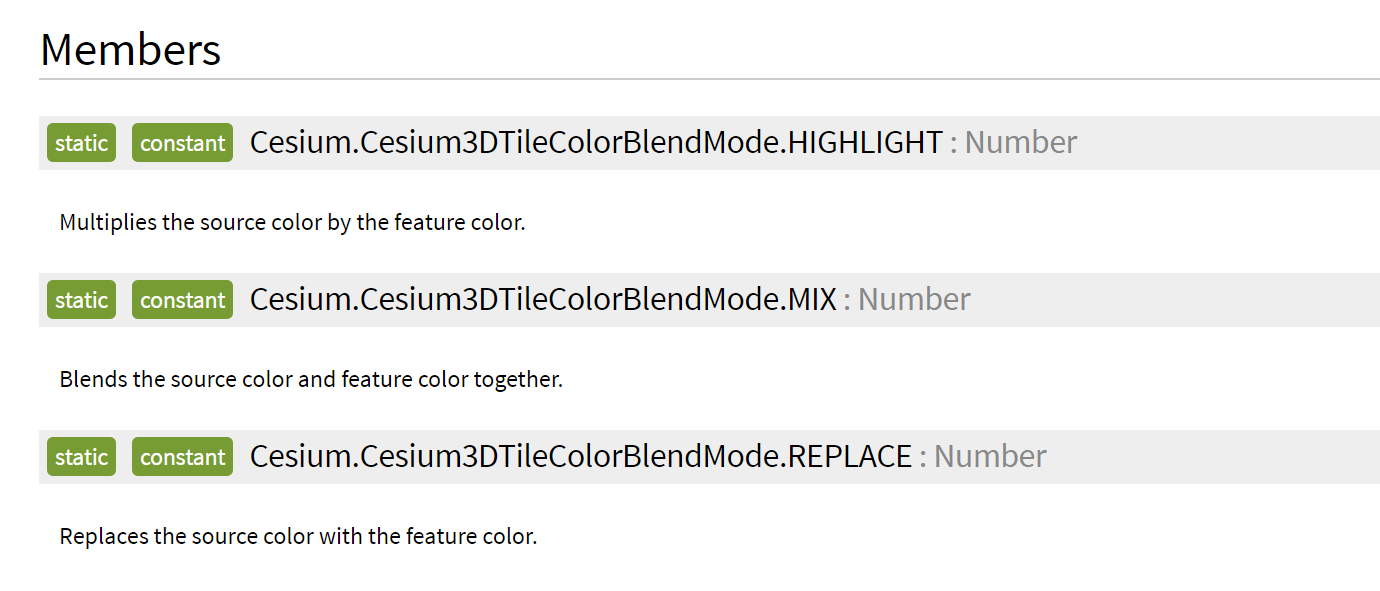
混合顏色的模式:

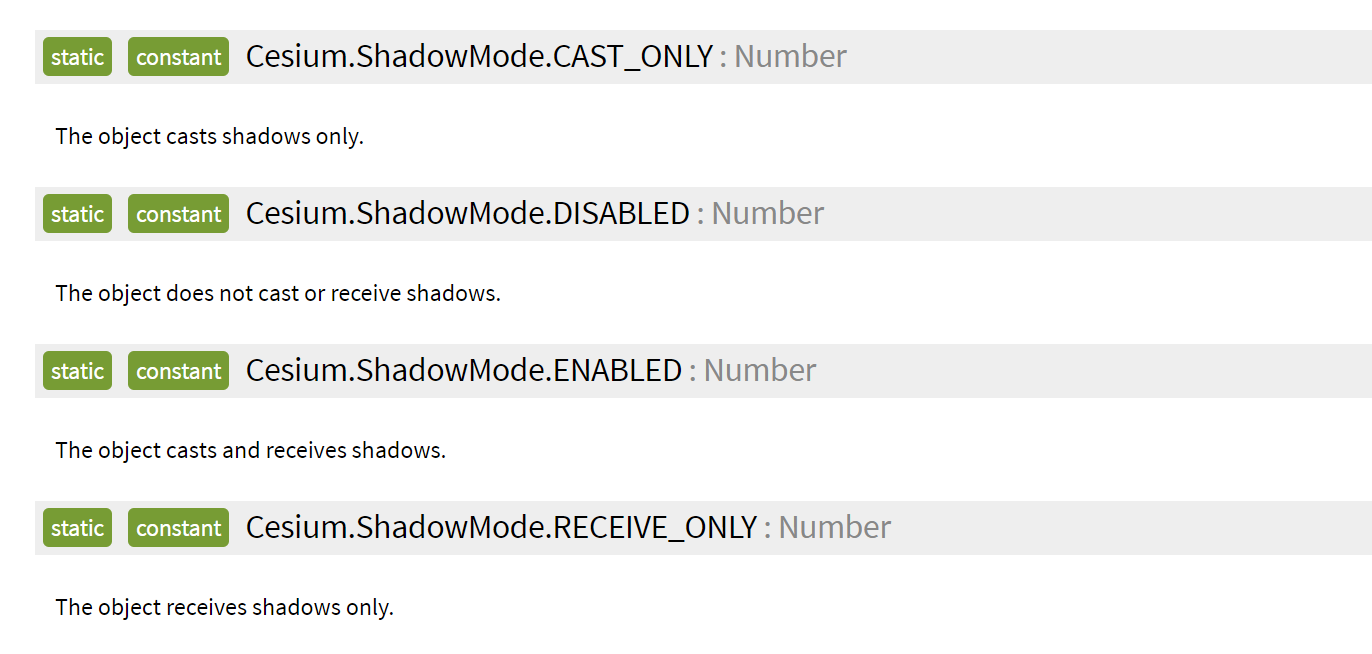
陰影模式:


