ansible分離部署LNMP 環境說明: | 系統 | 主機名 | IP | 服務 | | | | | | | centos8 | ansible | 192.168.111.141 | ansible主控機 | | centos8 | nginx | 192.168.111.142 | ngin ...
ansible分離部署LNMP
環境說明:
| 系統 | 主機名 | IP | 服務 |
|---|---|---|---|
| centos8 | ansible | 192.168.111.141 | ansible主控機 |
| centos8 | nginx | 192.168.111.142 | nginx受控機 |
| centos8 | mysql | 192.168.111.143 | mysql受控機 |
| centos8 | php | 192.168.111.144 | php受控機 |
1.準備工作
修改預設清單文件位置,構建清單
[root@ansible ~]# vim /etc/ansible/ansible.cfg
inventory = /etc/ansible/inventory
[root@ansible ~]# cd /etc/ansible/
[root@ansible ansible]# touch inventory
[root@ansible ansible]# vim inventory
[lnmp]
nginx ansible_user=root ansible_password=123456
mysql ansible_user=root ansible_password=123456
php ansible_user=root ansible_password=123456

[root@ansible ~]# vim /etc/hosts
192.168.111.142 nginx
192.168.111.143 mysql
192.168.111.144 php

//列出主機
[root@ansible ~]# ansible lnmp --list-hosts
  hosts (3):
    nginx
    mysql
    php

//設置密鑰連接
[root@ansible ~]# ssh nginx
[root@nginx ~]# exit
logout
[root@ansible ~]# ssh mysql
[root@mysql ~]# exit
logout
[root@ansible ~]# ssh php
[root@php ~]# exit
logout
[root@ansible ~]#

//測試連通性
[root@ansible ~]# ansible lnmp -m ping
nginx | SUCCESS => {
    "ansible_facts": {
        "discovered_interpreter_python": "/usr/libexec/platform-python"
    },
    "changed": false,
    "ping": "pong"
}
php | SUCCESS => {
    "ansible_facts": {
        "discovered_interpreter_python": "/usr/libexec/platform-python"
    },
    "changed": false,
    "ping": "pong"
}
mysql | SUCCESS => {
    "ansible_facts": {
        "discovered_interpreter_python": "/usr/libexec/platform-python"
    },
    "changed": false,
    "ping": "pong"
}
2.部署nginx
//關閉selinux和防火牆
[root@ansible ~]# ansible nginx -m service -a 'name=firewalld state=stopped enabled=no'
[root@ansible ~]# ansible nginx -a 'setenforce 0'
[root@ansible ~]# ansible nginx -a "sed -ri 's/^(SELINUX=).*/\1disabled/g'/etc/selinux/config"

//創建用戶
[root@ansible ~]# ansible nginx -m user -a 'name=nginx system=yes create_home=no shell=/sbin/nologin state=present'

//安裝依賴包
[root@ansible ~]# ansible nginx -m yum -a 'name=pcre-devel,openssl,openssl-devel,gd-devel,gcc,gcc-c++,make state=present'

//下載軟體包並解壓
[root@ansible ~]# ansible nginx -a 'wget http://nginx.org/download/nginx-1.20.2.tar.gz'
[root@ansible ~]# ansible nginx -a 'tar -xf nginx-1.20.2.tar.gz'

//進入目錄編譯安裝
[root@ansible ~]# mkdir -p /etc/ansible/scripts/
[root@ansible ~]# cd /etc/ansible/scripts/
[root@ansible scripts]# vim configure.sh
#!/bin/bash

cd nginx-1.20.2

./configure \
--prefix=/usr/local/nginx \
--user=nginx \
--group=nginx \
--with-debug \
--with-http_ssl_module \
--with-http_realip_module \
--with-http_image_filter_module \
--with-http_gunzip_module \
--with-http_gzip_static_module \
--with-http_stub_status_module && \

make -j $(grep 'processor' /proc/cpuinfo | wc -l) && make install

root@ansible scripts]# ll
total 4
-rw-r--r-- 1 root root 470 Oct 23 22:04 configure.sh
[root@ansible scripts]# ansible nginx -m script -a '/etc/ansible/scripts/configure.sh'

//安裝完成
[root@ansible ~]# ansible nginx -a 'ls /usr/local/nginx'
nginx | CHANGED | rc=0 >>
conf
html
logs
sbin

//配置環境變數
[root@ansible ~]# ansible nginx -m shell -a 'echo "export PATH=$PATH:/usr/local/nginx/sbin" > /etc/profile.d/nginx.sh'
[root@ansible ~]# ansible nginx -a 'which nginx'
nginx | CHANGED | rc=0 >>
/usr/local/nginx/sbin/nginx

//啟動服務
[root@ansible ~]# vim /etc/ansible/scripts/nginx_service.sh
#!/bin/bash

cat > /usr/lib/systemd/system/nginx.service << EOF
[Unit]
Description=nginx server daemon
After=network.target

[Service]
Type=forking
ExecStart=/usr/local/nginx/sbin/nginx
ExecStop=/usr/local/nginx/sbin/nginx -s stop
ExecReload=/bin/kill -HUP \$MAINPID

[Install]
WantedBy=multi-user.target
EOF

systemctl daemon-reload
systemctl enable --now nginx

[root@ansible ~]# ansible nginx -m script -a '/etc/ansible/scripts/nginx_service.sh'
[root@ansible ~]# ansible nginx -a 'ss -antl'
nginx | CHANGED | rc=0 >>
State  Recv-Q Send-Q Local Address:Port Peer Address:PortProcess
LISTEN 0      128          0.0.0.0:80        0.0.0.0:*
LISTEN 0      128          0.0.0.0:22        0.0.0.0:*
LISTEN 0      128             [::]:22           [::]:*
3.部署mysql
//關閉防火牆和selinux
[root@ansible ~]# ansible mysql -m service -a 'name=firewalld state=stopped enabled=no'
[root@ansible ~]# ansible mysql -a 'setenforce 0'
[root@ansible ~]# ansible mysql -a "sed -ri 's/^(SELINUX=).*/\1disabled/g' /etc/selinux/config"

//創建用戶
[root@ansible ~]# ansible mysql -m user -a 'name=mysql system=yes create_home=no shell=/sbin/nologin state=present'

//安裝依賴包
[root@ansible ~]# ansible mysql -m yum -a 'name=ncurses-devel,openssl-devel,openssl,cmake,mariadb-devel,ncurses-compat-libs state=present'

//下載軟體包解壓重命名
[root@ansible ~]# ansible mysql -a 'wget https://downloads.mysql.com/archives/get/p/23/file/mysql-5.7.38-linux-glibc2.12-x86_64.tar.gz'
[root@ansible ~]# ansible mysql -a 'tar xf mysql-5.7.38-linux-glibc2.12-x86_64.tar.gz -C /usr/local/'
[root@ansible ~]# ansible mysql -a 'mv /usr/local/mysql-5.7.38-linux-glibc2.12-x86_64 /usr/local/mysql'

//修改屬主屬組
[root@ansible ~]# ansible mysql -a 'chown -R mysql.mysql /usr/local/mysql'

//配置環境
[root@ansible ~]# ansible mysql -a 'ln -s /usr/local/mysql/include /usr/include/mysql'
[root@ansible ~]# ansible mysql -m shell -a "echo '/usr/local/mysql/lib' > /etc/ld.so.conf.d/mysql.conf"
[root@ansible ~]# ansible mysql -a "sed -i '22a MANDATORY_MANPATH    /usr/local/mysql/man' /etc/man_db.conf"
[root@ansible ~]# ansible mysql -m shell -a "echo 'export PATH=/usr/local/mysql/bin:$PATH' > /etc/profile.d/mysql.sh"
[root@ansible ~]# ansible mysql -a 'which mysql'
[root@ansible ~]# ansible mysql -a 'which mysql'
mysql | CHANGED | rc=0 >>
/usr/local/mysql/bin/mysql

//建立數據存放目錄
[root@ansible ~]# ansible mysql -a 'mkdir /opt/data'
[root@ansible ~]# ansible mysql -a 'chown -R mysql.mysql /opt/data'

//初始化資料庫
[root@ansible ~]# ansible mysql -a 'mysqld --initialize --user mysql --datadir /opt/data'
mysql | CHANGED | rc=0 >>
2022-10-23T14:24:07.127784Z 0 [Warning] TIMESTAMP with implicit DEFAULT value is deprecated. Please use --explicit_defaults_for_timestamp server option (see documentation for more details).
2022-10-23T14:24:07.286100Z 0 [Warning] InnoDB: New log files created, LSN=45790
2022-10-23T14:24:07.314541Z 0 [Warning] InnoDB: Creating foreign key constraint system tables.
2022-10-23T14:24:07.383098Z 0 [Warning] No existing UUID has been found, so we assume that this is the first time that this server has been started. Generating a new UUID: 5a8e11ea-52de-11ed-b270-000c29c34b3e.
2022-10-23T14:24:07.383794Z 0 [Warning] Gtid table is not ready to be used. Table 'mysql.gtid_executed' cannot be opened.
2022-10-23T14:24:07.600947Z 0 [Warning] A deprecated TLS version TLSv1 is enabled. Please use TLSv1.2 or higher.
2022-10-23T14:24:07.600960Z 0 [Warning] A deprecated TLS version TLSv1.1 is enabled. Please use TLSv1.2 or higher.
2022-10-23T14:24:07.601238Z 0 [Warning] CA certificate ca.pem is self signed.
2022-10-23T14:24:07.640229Z 1 [Note] A temporary password is generated for root@localhost: y*rou<U9Om.c
[root@ansible ~]# ansible mysql -m shell -a "echo 'y*rou<U9Om.c' > pass"

//生成配置文件啟動服務
[root@ansible ~]# vim /etc/ansible/scripts/mysql_service.sh
#!/bin/bash

cat >> /etc/my.cnf <<EOF
[mysqld]
basedir = /usr/local/mysql
datadir = /opt/data
socket = /tmp/mysql.sock
port = 3306
pid-file = /opt/data/mysql.pid
user = mysql
skip-name-resolve
EOF

cp -a /usr/local/mysql/support-files/mysql.server /etc/init.d/mysqld
sed -ri 's#^(basedir=).*#\1/usr/local/mysql#g' /etc/init.d/mysqld
sed -ri 's#^(datadir=).*#\1/opt/data#g' /etc/init.d/mysqld
chmod +x /etc/init.d/mysqld

cat > /usr/lib/systemd/system/mysqld.service <<EOF
[Unit]
Description=mysqld server daemon
After=network.target

[Service]
Type=forking
ExecStart=/etc/init.d/mysqld start
ExecStop=/etc/init.d/mysqld stop
ExecReload=/bin/kill -HUP \$MAINPID

[Install]
WantedBy=multi-user.target
EOF

systemctl daemon-reload
systemctl enable --now mysqld

[root@ansible ~]# ansible mysql -m script -a '/etc/ansible/scripts/mysql_service.sh'
[root@ansible ~]# ansible mysql -a 'ss -antl'
mysql | CHANGED | rc=0 >>
State  Recv-Q Send-Q Local Address:Port Peer Address:PortProcess
LISTEN 0      128          0.0.0.0:22        0.0.0.0:*
LISTEN 0      80                 *:3306            *:*
LISTEN 0      128             [::]:22           [::]:*
4.部署php
//安裝依賴包
[root@ansible ~]# ansible php -m yum -a 'name=epel-release state=present'
[root@ansible ~]# ansible php -m yum -a 'name=libxml2,libxml2-devel,openssl,openssl-devel,bzip2,bzip2-devel,libcurl,libcurl-devel,libicu-devel,libjpeg,libjpeg-devel,libpng,libpng-devel,openldap-devel,pcre-devel,freetype,freetype-devel,gmp,gmp-devel,libmcrypt,libmcrypt-devel,readline,readline-devel,libxslt,libxslt-devel,mhash,mhash-devel,php-mysqlnd,libsqlite3x-devel,libzip-devel,wget,gcc,gcc-c++,make state=present'
[root@ansible ~]# ansible php -a 'yum -y install http://mirror.centos.org/centos/8-stream/PowerTools/x86_64/os/Packages/oniguruma-devel-6.8.2-2.el8.x86_64.rpm'

//下載PHP並解壓
[root@ansible ~]# ansible php -a 'wget https://www.php.net/distributions/php-8.1.11.tar.gz'
[root@ansible ~]# ansible php -a 'tar xf php-8.1.11.tar.gz -C /usr/src'

//編譯安裝php
[root@ansible ~]# vim /etc/ansible/scripts/php.sh
#!/bin/bash

cd /usr/src/php-8.1.11/
./configure --prefix=/usr/local/php \
--with-config-file-path=/etc \
--enable-fpm \
--disable-debug \
--disable-rpath \
--enable-shared \
--enable-soap \
--with-openssl \
--enable-bcmath \
--with-iconv \
--with-bz2 \
--enable-calendar \
--with-curl \
--enable-exif  \
--enable-ftp \
--enable-gd \
--with-jpeg \
--with-zlib-dir \
--with-freetype \
--with-gettext \
--enable-mbstring \
--enable-pdo \
--with-mysqli=mysqlnd \
--with-pdo-mysql=mysqlnd \
--with-readline \
--enable-shmop \
--enable-simplexml \
--enable-sockets \
--with-zip \
--enable-mysqlnd-compression-support \
--with-pear \
--enable-pcntl \
--enable-posix

[root@ansible ~]# ansible php -m script -a '/etc/ansible/scripts/php.sh'
[root@ansible ~]# ansible php -m shell -a 'cd /usr/src/php-8.1.11/ && make && make install'

//配置文件
[root@ansible ~]# ansible php -a 'cp /usr/local/php/etc/php-fpm.conf.default  /usr/local/php/etc/php-fpm.conf'
[root@ansible ~]# ansible php -a 'cp /usr/local/php/etc/php-fpm.d/www.conf.default /usr/local/php/etc/php-fpm.d/www.conf'

//頭文件
[root@ansible ~]# ansible php -a 'ln -sv /usr/local/php /usr/include/php'

//編寫service文件
[root@ansible ~]# vim /etc/ansible/scripts/php_service.sh
#!/bin/bash

cat > /usr/lib/systemd/system/php.service << EOF
[Unit]
Description=php server daemon
After=network.target

[Service]
Type=forking
ExecStart=/usr/local/php/sbin/php-fpm
ExecStop=ps -ef |grep php |grep -v grep|awk '{print$2}'|xargs kill
ExecReload=/bin/kill -HUP $MAINPID

[Install]
WantedBy=multi-user.target
EOF
[root@ansible ~]# ansible php -m script -a '/etc/ansible/scripts/php_service.sh'
[root@ansible ~]# ansible php -a 'systemctl daemon-reload'

//開啟服務並開機自啟
[root@ansible ~]# ansible php -m service -a 'name=php state=started enabled=yes'
[root@ansible ~]# ansible php -a 'ss -antl'
php | CHANGED | rc=0 >>
State  Recv-Q Send-Q Local Address:Port Peer Address:PortProcess
LISTEN 0      128        127.0.0.1:9000      0.0.0.0:*
LISTEN 0      128          0.0.0.0:22        0.0.0.0:*
LISTEN 0      128             [::]:22           [::]:*
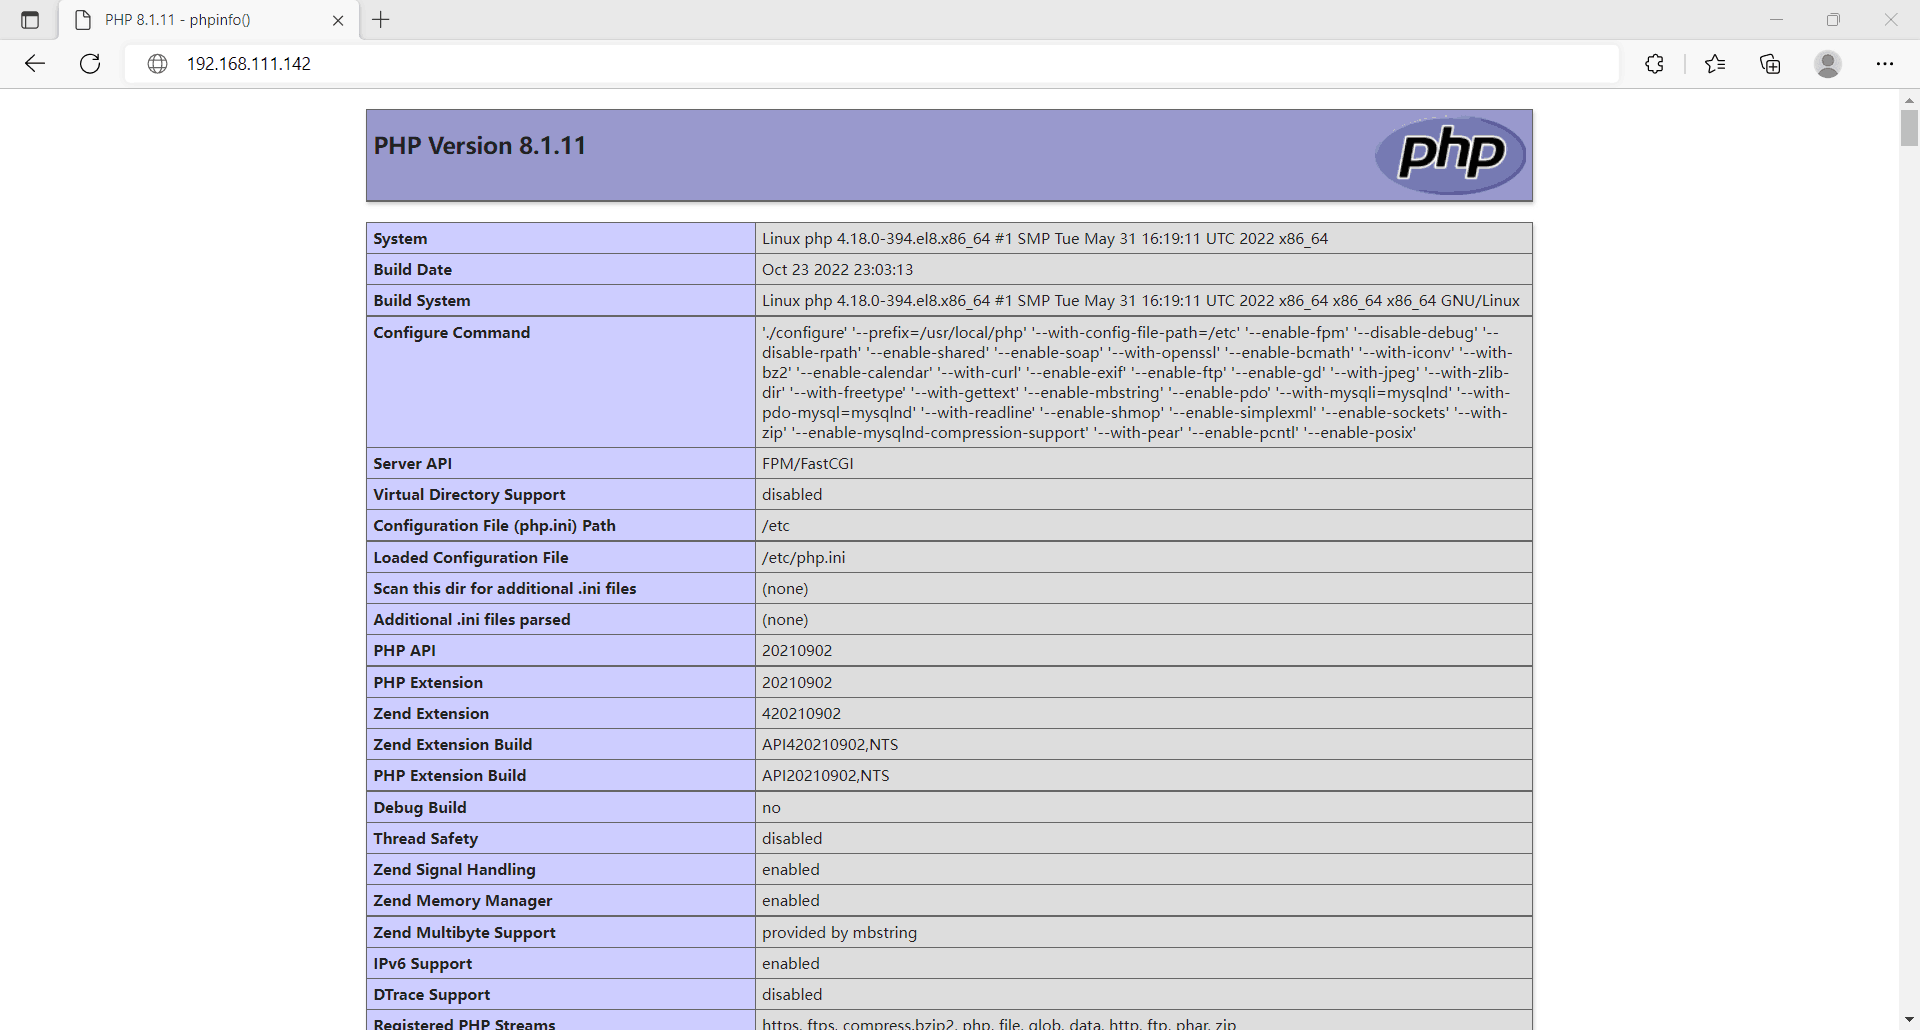
5.配置LNMP界面
//修改nginx配置文件
[root@ansible ~]# vim /etc/ansible/scripts/nginxconf.sh
#!/bin/bash

sed -i "45c                   index  index.php index.html index.htm;" /usr/local/nginx/conf/nginx.conf
sed -i "65c     location ~ \.php$ {" /usr/local/nginx/conf/nginx.conf
sed -i "66c     root      /var/www/html;" /usr/local/nginx/conf/nginx.conf
sed -i "67c     fastcgi_pass   192.168.111.144:9000;" /usr/local/nginx/conf/nginx.conf
sed -i "68c     fastcgi_index  index.php;" /usr/local/nginx/conf/nginx.conf
sed -i "69c     fastcgi_param  SCRIPT_FILENAME  \$document_root\$fastcgi_script_name;" /usr/local/nginx/conf/nginx.conf
sed -i "70c      include        fastcgi_params;" /usr/local/nginx/conf/nginx.conf
sed -i "71c      }" /usr/local/nginx/conf/nginx.conf

[root@ansible ~]# ansible nginx -m script -a '/etc/ansible/scripts/nginxconf.sh'
[root@ansible ~]# ansible nginx -a 'touch /usr/local/nginx/html/index.php'

//在php端上配置網站
[root@ansible ~]# vim /etc/ansible/scripts/phpindex.sh
#!/bin/bash

mkdir -p /var/www/html
cat > /var/www/html/index.php << EOF
<?php
    phpinfo();
?>
EOF
[root@ansible ~]# ansible php -m script -a '/etc/ansible/scripts/phpindex.sh'

//修改php配置文件
[root@ansible ~]# ansible php -a 'sed -i "36c listen = 192.168.111.144:9000" /usr/local/php/etc/php-fpm.d/www.conf'
[root@ansible ~]# ansible php -a 'sed -i "63c listen.allowed_clients = 192.168.111.142" /usr/local/php/etc/php-fpm.d/www.conf'


//重啟nginx服務和php服務
[root@ansible ~]# ansible nginx -m service -a 'name=nginx state=restarted'
[root@ansible ~]# ansible php -m service -a 'name=php state=restarted'