上一篇文章我們介紹了 Vue2模版編譯原理,這一章我們的目標是弄清楚模版 template和響應式數據是如何渲染成最終的DOM。數據更新驅動視圖變化這部分後期會單獨講解 我們先看一下模版和響應式數據是如何渲染成最終DOM 的流程 Vue初始化 new Vue發生了什麼 Vue入口構造函數 funct ...
上一篇文章我們介紹了 Vue2模版編譯原理,這一章我們的目標是弄清楚模版 template和響應式數據是如何渲染成最終的DOM。數據更新驅動視圖變化這部分後期會單獨講解
我們先看一下模版和響應式數據是如何渲染成最終DOM 的流程
Vue初始化
new Vue發生了什麼
Vue入口構造函數
function Vue(options) {
  this._init(options) // options就是用戶的選項
  ...
}

initMixin(Vue) // 在Vue原型上擴展初始化相關的方法,_init、$mount 等
initLifeCycle(Vue) // 在Vue原型上擴展渲染相關的方法,_render、_c、_v、_s、_update 等

export default Vue
initMixin、initLifeCycle方法
export function initMixin(Vue) {
  Vue.prototype._init = function (options) {
    const vm = this
    vm.$options = options // 將用戶的選項掛載到實例上

    // 初始化數據
    initState(vm)

    if (options.el) {
      vm.$mount(options.el)
    }
  }

  Vue.prototype.$mount = function (el) {
    const vm = this
    el = document.querySelector(el)
    let ops = vm.$options

    // 這裡需要對模板進行編譯
    const render = compileToFunction(template)
    ops.render = render

    // 實例掛載
    mountComponent(vm, el)
  }
}

export function initLifeCycle(Vue) {
  Vue.prototype._render = function () {} // 渲染方法
  Vue.prototype._c = function () {} // 創建節點虛擬節點
  Vue.prototype._v = function () {} // 創建文本虛擬節點
  Vue.prototype._s = function () {} // 處理變數
  Vue.prototype._update = function () {} // 初始化元素 和 更新元素
}
在 initMixin 方法中,我們重點關註 compileToFunction模版編譯 和 mountComponent實例掛載 2個方法。我們已經在上一篇文章詳細介紹過 compileToFunction 編譯過程,接下來我們就把重心放在 mountComponent 方法上,它會用到在 initLifeCycle 方法給Vue原型上擴展的方法,在 render 和 update章節會做詳細講解
實例掛載
mountComponent 方法主要是 實例化了一個渲染 watcher,updateComponent 作為回調會立即執行一次。watcher 還有一個其他作用,就是當響應式數據發生變化時,也會通過內部的 update方法執行updateComponent 回調。
現在我們先無需瞭解 watcher 的內部實現及其原理,後面會作詳細介紹
vm._render 方法會創建一個虛擬DOM(即以 VNode節點作為基礎的樹),vm._update 方法則是把這個虛擬DOM 渲染成一個真實的 DOM 並渲染出來
export function mountComponent(vm, el) {
  // 這裡的el 是通過querySelector獲取的
  vm.$el = el

  const updateComponent = () => {
    // 1.調用render方法創建虛擬DOM,即以 VNode節點作為基礎的樹
    const vnode = vm._render() // 內部調用 vm.$options.render()

    // 2.根據虛擬DOM 產生真實DOM,插入到el元素中
    vm._update(vnode)
  }

  // 實例化一個渲染watcher,true用於標識是一個渲染watche
  const watcher = new Watcher(vm, updateComponent, true)
}
接下來我們會重點分析最核心的 2 個方法:vm._render 和 vm._update
render
我們需要在Vue原型上擴展 _render 方法
Vue.prototype._render = function () {
  // 當渲染的時候會去實例中取值,我們就可以將屬性和視圖綁定在一起
  const vm = this
  return vm.$options.render.call(vm) // 模版編譯後生成的render方法
}
在之前的 Vue $mount過程中,我們已通過 compileToFunction方法將模版template 編譯成 render方法,其返回一個 虛擬DOM。template轉化成render函數的結果如下
<div id="app" style="color: red; background: yellow">
   hello {{name}} world
   <span></span>
</div>

ƒ anonymous(
) {
  with(this){
    return _c('div',{id:"app",style:{"color":"red","background":"yellow"}},
              _v("hello"+_s(name)+"world"),
              _c('span',null))
  }
}
render 方法內部使用了 _c、_v、_s 方法,我們也需要在Vue原型上擴展它們
- _c: 創建節點虛擬節點(VNode)
- _v: 創建文本虛擬節點(VNode)
- _s: 處理變數
// _c('div',{},...children)
// _c('div',{id:"app",style:{"color":"red"," background":"yellow"}},_v("hello"+_s(name)+"world"),_c('span',null))
Vue.prototype._c = function () {
  return createElementVNode(this, ...arguments)
}

// _v(text)
Vue.prototype._v = function () {
  return createTextVNode(this, ...arguments)
}

Vue.prototype._s = function (value) {
  if (typeof value !== 'object') return value
  return JSON.stringify(value)
}
接下來我們看一下 createElementVNode 和 createTextVNode 是如何創建 VNode 的
createElement
每個 VNode 有 children,children 每個元素也是一個 VNode,這樣就形成了一個虛擬樹結構,用於描述真實的DOM樹結構,即我們的虛擬DOM
// h()  _c() 創建元素的虛擬節點 VNode
export function createElementVNode(vm, tag, data, ...children) {
  if (data == null) {
    data = {}
  }
  let key = data.key
  if (key) {
    delete data.key
  }
  return vnode(vm, tag, key, data, children)
}

// _v() 創建文本虛擬節點
export function createTextVNode(vm, text) {
  return vnode(vm, undefined, undefined, undefined, undefined, text)
}

// 虛擬節點
function vnode(vm, tag, key, data, children, text) {
  return {
    vm,
    tag,
    key,
    data,
    children,
    text,
    // ....
  }
}
VNode 和 AST一樣嗎?
我們的 VNode 描述的是 DOM元素
AST 做的是語法層面的轉化,它描述的是語法本身 ,可以描述 js css html
虛擬DOM
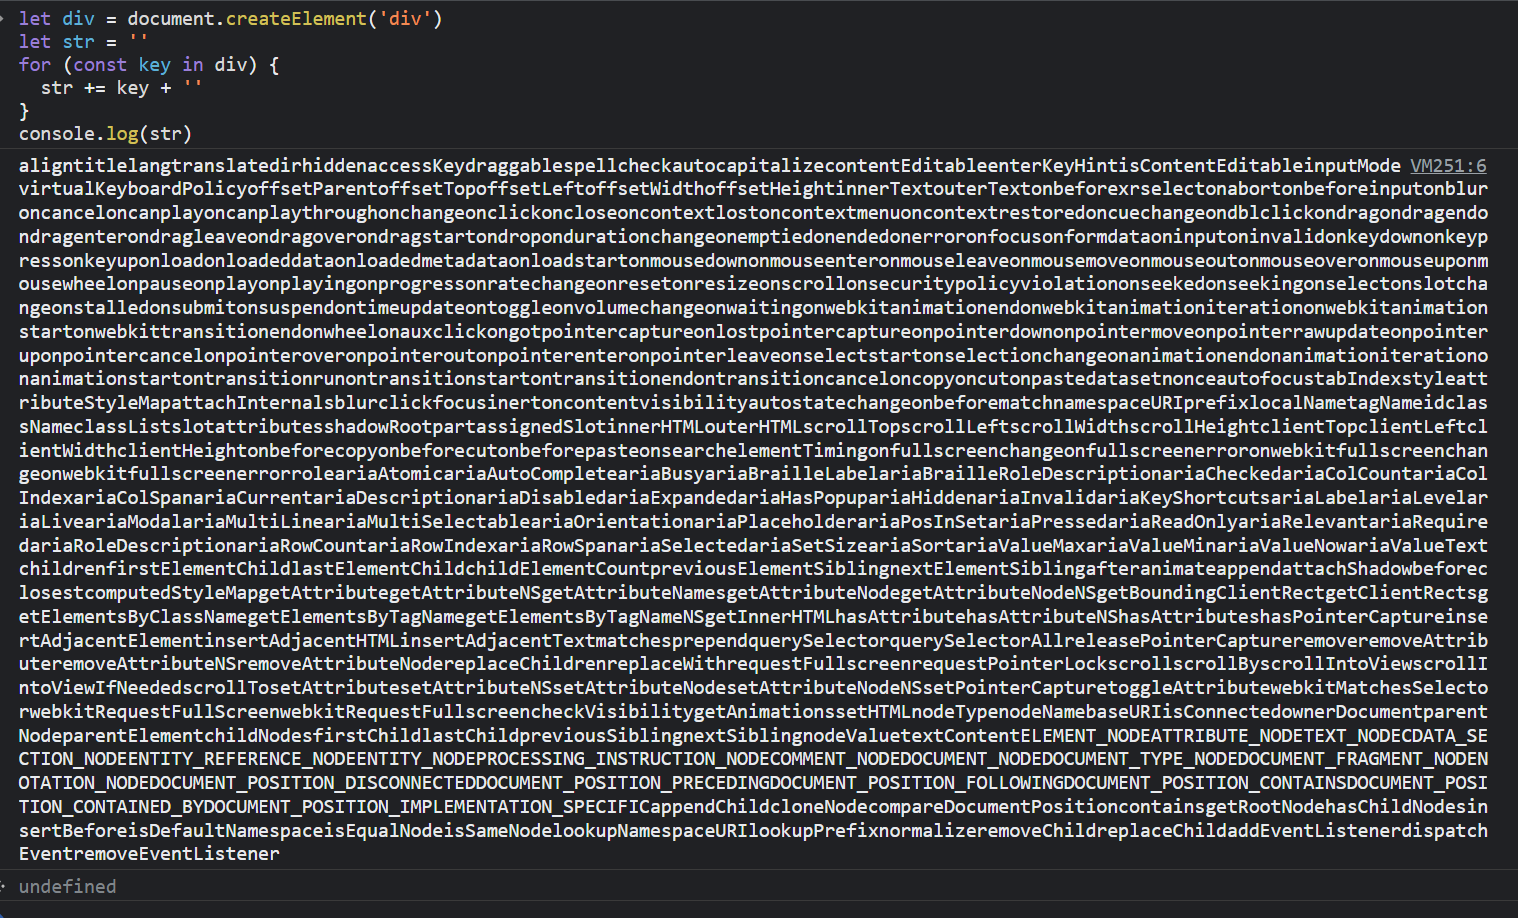
DOM是很慢的,其元素非常龐大,當我們頻繁的去做 DOM更新,會產生一定的性能問題,我們可以直觀感受一下div元素包含的海量屬性

在Javascript對象中,Virtual DOM 表現為一個 Object對象。並且最少包含標簽名 (tag)、屬性 (attrs) 和子元素對象 (children) 三個屬性,不同框架對這三個屬性的名命可能會有差別。
實際上它只是一層對真實DOM的抽象,以JavaScript 對象 (VNode 節點) 作為基礎的樹,用對象的屬性來描述節點,最終可以通過一系列操作使這棵樹映射到真實環境上
vue中 VNode結構如下
export default class VNode {
  tag: string | void;
  data: VNodeData | void;
  children: ?Array<VNode>;
  text: string | void;
  elm: Node | void;
  ns: string | void;
  context: Component | void; // rendered in this component's scope
  functionalContext: Component | void; // only for functional component root nodes
  key: string | number | void;
  componentOptions: VNodeComponentOptions | void;
  componentInstance: Component | void; // component instance
  parent: VNode | void; // component placeholder node
  raw: boolean; // contains raw HTML? (server only)
  isStatic: boolean; // hoisted static node
  isRootInsert: boolean; // necessary for enter transition check
  isComment: boolean; // empty comment placeholder?
  isCloned: boolean; // is a cloned node?
  isOnce: boolean; // is a v-once node?

  constructor (
    tag?: string,
    data?: VNodeData,
    children?: ?Array<VNode>,
    text?: string,
    elm?: Node,
    context?: Component,
    componentOptions?: VNodeComponentOptions
  ) {
    /*當前節點的標簽名*/
    this.tag = tag
    /*當前節點對應的對象,包含了具體的一些數據信息,是一個VNodeData類型,可以參考VNodeData類型中的數據信息*/
    this.data = data
    /*當前節點的子節點,是一個數組*/
    this.children = children
    /*當前節點的文本*/
    this.text = text
    /*當前虛擬節點對應的真實dom節點*/
    this.elm = elm
    /*當前節點的名字空間*/
    this.ns = undefined
    /*編譯作用域*/
    this.context = context
    /*函數化組件作用域*/
    this.functionalContext = undefined
    /*節點的key屬性,被當作節點的標誌,用以優化*/
    this.key = data && data.key
    /*組件的option選項*/
    this.componentOptions = componentOptions
    /*當前節點對應的組件的實例*/
    this.componentInstance = undefined
    /*當前節點的父節點*/
    this.parent = undefined
    /*簡而言之就是是否為原生HTML或只是普通文本,innerHTML的時候為true,textContent的時候為false*/
    this.raw = false
    /*靜態節點標誌*/
    this.isStatic = false
    /*是否作為跟節點插入*/
    this.isRootInsert = true
    /*是否為註釋節點*/
    this.isComment = false
    /*是否為克隆節點*/
    this.isCloned = false
    /*是否有v-once指令*/
    this.isOnce = false
  }

  // DEPRECATED: alias for componentInstance for backwards compat.
  /* istanbul ignore next https://github.com/answershuto/learnVue*/
  get child (): Component | void {
    return this.componentInstance
  }
}


