Blazor Server,即運行在伺服器上的 Blazor 應用程式,它的優點是應用程式在首次運行時,客戶端不需要下載運行時。但它的代碼是在伺服器上執行的,然後通過 SignalR 通信來更新客戶端的 UI,所以它要求必須建立 Web Socket 連接。 用於 Blazor 應用的 Signal ...
學習ASP.NET Core Blazor編程系列文章之目錄 學習ASP.NET Core Blazor編程系列一——綜述 學習ASP.NET Core Blazor編程系列二——第一個Blazor應用程式(上)
學習ASP.NET Core Blazor編程系列三——實體 學習ASP.NET Core Blazor編程系列五——列表頁面 學習ASP.NET Core Blazor編程系列七——新增圖書 學習ASP.NET Core Blazor編程系列八——數據校驗 學習ASP.NET Core Blazor編程系列十三——路由(完) 學習ASP.NET Core Blazor編程系列十五——查詢 學習ASP.NET Core Blazor編程系列十六——排序 學習ASP.NET Core Blazor編程系列二十——文件上傳(完) 學習ASP.NET Core Blazor編程系列二十一——數據刷新 學習ASP.NET Core Blazor編程系列二十二——登錄(1) 學習ASP.NET Core Blazor編程系列二十七——JWT登錄(1)
十二、實現登入
在學習ASP.NET Core Blazor編程系列二十二——登錄(1)至學習ASP.NET Core Blazor編程系列二十六——登錄(5)
系列文章中學習了使用AuthenticationStateProvider實現模擬登錄。今天的文章實現JWT登錄,使用WebAPI介面來實現通過JWT令牌登錄。
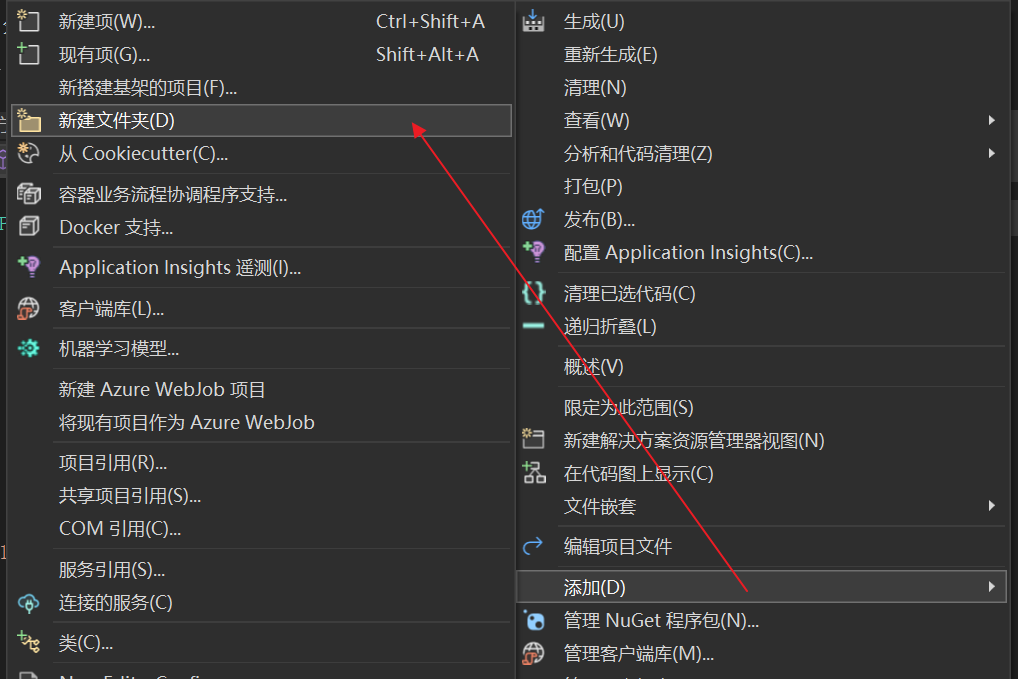
- 在Visual Studio 2022的解決方案資源管理器中,滑鼠右鍵單擊“BlazorAppDemo”項目名稱,在彈出菜單中選擇 “添加—>新建文件夾”,並將新建文件夾改為“Api”。如下圖。
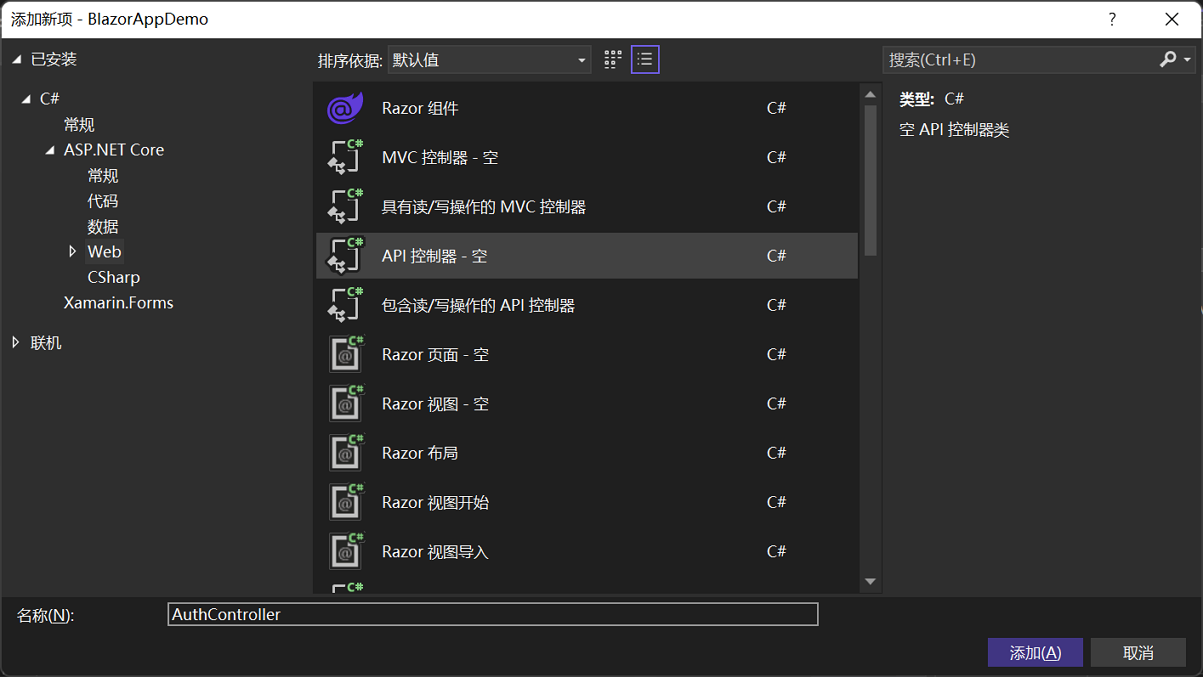
2.在Visual Studio 2022的解決方案資源管理器中,滑鼠左鍵選中“Api”文件夾,右鍵單擊,在彈出菜單中選擇“添加—>新建項”,在彈出對話框中,選擇“API控制器-空”,並將控制器命名為“AuthController”。如下圖。並添加如下代碼:
using BlazorAppDemo.Models;
using BlazorAppDemo.Utils;
using Microsoft.AspNetCore.Http;
using Microsoft.AspNetCore.Identity;
using Microsoft.AspNetCore.Mvc;
using Microsoft.Extensions.Configuration;
using Microsoft.IdentityModel.Tokens;
using Newtonsoft.Json.Linq;
using System.IdentityModel.Tokens.Jwt;
using System.Security.Claims;
using System.Text;

namespace BlazorAppDemo.Api
{
    [Route("api/[controller]")]
    [ApiController]
    public class AuthController : ControllerBase
    {
        private readonly IJWTHelper jwtHelper;


        public AuthController(IJWTHelper _IJWTHelper)
        {
            this.jwtHelper = _IJWTHelper;

            }

        [HttpPost("Login")]
            public async Task<ActionResult<UserToken>> Login(UserInfo userInfo)
        {
            //Demo用,更好的做法是查詢用戶表來實現
            if (userInfo.UserName == "admin" && userInfo.Password == "111111")
            {
                return BuildToken(userInfo);
            }
            else
            {
                UserToken userToken = new UserToken()
                {
                    StatusCode = System.Net.HttpStatusCode.Unauthorized,
                    IsSuccess = false

                };
                return userToken;
            }
        }


        /// <summary>
        /// 建立Token
        /// </summary>
        /// <param name="userInfo"></param>
        /// <returns></returns>
        private UserToken BuildToken(UserInfo userInfo)
        {

            string jwtToken = jwtHelper.CreateJwtToken<UserInfo>(userInfo);

            //建立UserToken,回傳客戶端
            UserToken userToken = new UserToken()
            {

                StatusCode = System.Net.HttpStatusCode.OK,
                Token = jwtToken,
                ExpireTime = DateTime.Now.AddMinutes(30),
                IsSuccess= true

            };

            return userToken;
        }
    }
}
3.在Visual Studio 2022的解決方案資源管理器中,滑鼠左鍵選中“Models”文件夾,右鍵單擊,在彈出菜單中選擇“添加—>類”,在彈出對話框中,將類命名為“UserToken”。並添加如下代碼:
using System.Net;
namespace BlazorAppDemo.Models
{
    public class UserToken
    {

        public bool IsSuccess { get ; set; }
        public HttpStatusCode StatusCode { get; set; }
        public string Token { get; set; }
        public DateTime ExpireTime { get; set; }
     }
}
4.在Visual Studio 2022的解決方案資源管理器中,滑鼠左鍵選中“Utils”文件夾,右鍵單擊,在彈出菜單中選擇“添加—>類”,在彈出對話框中,將類命名為“TokenManager”。並添加如下代碼:
using BlazorAppDemo.Models;
using System.Collections.Concurrent;

namespace BlazorAppDemo.Utils
{
    public class TokenManager
    {
        private const string TOKEN = "authToken";

        private static readonly ConcurrentDictionary<string, UserToken> tokenManager;

         static TokenManager()
        {

            tokenManager=new ConcurrentDictionary<string, UserToken>();
        }

        public static ConcurrentDictionary<string, UserToken> Instance { get { return tokenManager; } }

        public static string Token { get { return TOKEN; } }
    }
}
5.在Visual Studio 2022的解決方案資源管理器中,滑鼠左鍵選中“Auth”文件夾,右鍵單擊,在彈出菜單中選擇“添加—>新建項”,在彈出對話框中,選擇“介面”,並將介面命名為“IAuthService”。如下圖。並添加如下代碼:
using BlazorAppDemo.Models;

namespace BlazorAppDemo.Auth
{

    public interface IAuthService
    {

        Task<UserToken> LoginAsync(UserInfo userInfo);

        Task<UserToken> LogoutAsync();
    }
}
6.在Visual Studio 2022的解決方案資源管理器中,滑鼠左鍵選中“Auth”文件夾,右鍵單擊,在彈出菜單中選擇“添加—>類”,在彈出對話框中,將類命名為“AuthService”。並添加如下代碼:
using BlazorAppDemo.Models;
using BlazorAppDemo.Utils;
using Microsoft.AspNetCore.Components.Authorization;
using Microsoft.AspNetCore.Identity;
using Newtonsoft.Json;
using Newtonsoft.Json.Linq;
using System.Collections.Concurrent;
using System.Net.Http;
using System.Text;

namespace BlazorAppDemo.Auth
{

    public class AuthService : IAuthService
    {
        private readonly HttpClient httpClient;
        private readonly AuthenticationStateProvider authenticationStateProvider;
        private readonly IConfiguration configuration;
        private readonly Api.AuthController authController;
        private readonly string currentUserUrl, loginUrl, logoutUrl;


        public AuthService( HttpClient httpClient, AuthenticationStateProvider authenticationStateProvider, IConfiguration configuration,Api.AuthController authController)
        {
            this.authController = authController;
            this.httpClient = httpClient;
            this.authenticationStateProvider = authenticationStateProvider;
            this.configuration = configuration;
            currentUserUrl = configuration["AuthUrl:Current"] ?? "Auth/Current/";
            loginUrl = configuration["AuthUrl:Login"] ?? "api/Auth/Login";
            logoutUrl = configuration["AuthUrl:Logout"] ?? "/api/Auth/Logout/";
        }
        public async Task<UserToken> LoginAsync(UserInfo userInfo)
        {

            var result = authController.Login(userInfo);
            var loginResponse =  result.Result.Value;
            if (loginResponse != null && loginResponse.IsSuccess)
                {
                    TokenManager.Instance.TryAdd(TokenManager.Token, loginResponse);
                   ((ImitateAuthStateProvider)authenticationStateProvider).NotifyUserAuthentication(loginResponse.Token);

                    httpClient.DefaultRequestHeaders.Authorization = new System.Net.Http.Headers.AuthenticationHeaderValue("bearer", loginResponse.Token);
                     return loginResponse;
                }

            return new UserToken() { IsSuccess = false };
        }

        public Task<UserToken> LogoutAsync()
        {
            throw new NotImplementedException();
        }
    }
}
LoginAsync登錄方法的實現功能:
- 將賬號與密碼,發送到AuthController做驗證,驗證成功生成UserToken實例
- 將token寫到TokenManger實例中
- 通知前面頁面更新登錄狀態
- 每次request的header將bearer token都帶上。
7. 在Visual Studio 2022的解決方案管理器中,使用滑鼠左鍵,雙擊ImitateAuthStateProvider.cs文件,對代碼進行修改。具體代碼如下:
using BlazorAppDemo.Models;
using BlazorAppDemo.Utils;
using Microsoft.AspNetCore.Components.Authorization;
using System.Net.Http;
using System.Security.Claims;

namespace BlazorAppDemo.Auth
{
    public class ImitateAuthStateProvider : AuthenticationStateProvider
    {
        private readonly IJWTHelper jwt;
        private AuthenticationState anonymous;
        private readonly HttpClient httpClient;

        public ImitateAuthStateProvider(IJWTHelper _jwt, HttpClient httpClient)
        {

            anonymous = new AuthenticationState(new ClaimsPrincipal(new ClaimsIdentity()));
            jwt = _jwt;
            this.httpClient = httpClient;
        }

        bool isLogin = false;
        string token = string.Empty;
        public override Task<AuthenticationState> GetAuthenticationStateAsync()
        {
            //確認是否已經登錄
            UserToken userToken;
                TokenManager.Instance.TryGetValue(TokenManager.Token,out userToken);
            string tokenInLocalStorage=string.Empty;
            if (userToken != null)
            {
                tokenInLocalStorage = userToken.Token;
            }
            if (string.IsNullOrEmpty(tokenInLocalStorage))
            {
                //沒有登錄,則返回匿名登錄者
                return Task.FromResult(anonymous);
            }

            //將token取出轉換為claim
            var claims = jwt.ParseToken(tokenInLocalStorage);

            //在每次request的header中都將加入bearer token
            httpClient.DefaultRequestHeaders.Authorization = new System.Net.Http.Headers.AuthenticationHeaderValue("bearer",
tokenInLocalStorage);

            //回傳帶有user claim的AuthenticationState
            return Task.FromResult(new AuthenticationState(new ClaimsPrincipal(new ClaimsIdentity(claims, "jwt"))));

        }
        public void Login(UserInfo request)
        {
            //1.驗證用戶賬號密碼是否正確
            if (request == null)
            {
                isLogin=false;
            }
            if (request.UserName == "user" && request.Password == "111111")
            {
                isLogin = true;
               token= jwt.CreateJwtToken<UserInfo>(request);
                Console.WriteLine($"JWT Token={token}");
            }
            NotifyAuthenticationStateChanged(GetAuthenticationStateAsync());
        }

        public void NotifyUserAuthentication(string token)
        {
            var claims = jwt.ParseToken(token);
            var authenticatedUser = new ClaimsPrincipal(new ClaimsIdentity(claims, "jwt"));

            var authState = Task.FromResult(new AuthenticationState(authenticatedUser));
            NotifyAuthenticationStateChanged(authState);
       }

    }
}
8. 在Visual Studio 2022的解決方案管理器中,使用滑鼠左鍵,雙擊Program.cs文件,將之在文本編輯器中打開,將我們寫的AuthController和框架中的HttpClient,使用DI方式註入,添加Controller服務。具體代碼如下:
using BlazorAppDemo.Data;
using BlazorAppDemo.Models;
using Microsoft.AspNetCore.Components;
using Microsoft.AspNetCore.Components.Web;
using Microsoft.Extensions.Configuration;
using Microsoft.EntityFrameworkCore;
using Microsoft.Extensions.Hosting;
using Microsoft.AspNetCore.Components.Authorization;
using BlazorAppDemo.Auth;
using Microsoft.AspNetCore.Authentication.JwtBearer;
using Microsoft.IdentityModel.Tokens;
using System.Text;
using System.IdentityModel.Tokens.Jwt;
using BlazorAppDemo.Utils;
using BlazorAppDemo.Api;

var builder = WebApplication.CreateBuilder(args);


// Add services to the container.
builder.Services.AddRazorPages();
builder.Services.AddServerSideBlazor();
builder.Services.AddSingleton<WeatherForecastService>();
IConfiguration config = ConfigHelper.Configuration;
System.Console.WriteLine(config["ConnectionStrings:BookContext"]);
builder.Services.AddDbContextFactory<BookContext>(opt =>
   opt.UseSqlServer(ConfigHelper.Configuration["ConnectionStrings:BookContext"]));
builder.Services.AddScoped<ImitateAuthStateProvider>();
builder.Services.AddScoped<AuthenticationStateProvider>(implementationFactory =>
implementationFactory.GetRequiredService<ImitateAuthStateProvider>());
builder.Services.AddScoped<JwtSecurityTokenHandler>();
//此處的url地址改成自己實際的地址

builder.Services.AddScoped(sp => new HttpClient { BaseAddress = new Uri("http://localhost:7110") });

builder.Services.AddScoped<IAuthService, AuthService>();
builder.Services.AddScoped<AuthController>();
//JWT
//JWT認證

builder.Services.AddAuthentication(JwtBearerDefaults.AuthenticationScheme).AddJwtBearer(options =>
{
    //取出私鑰
    var secretByte = Encoding.UTF8.GetBytes(builder.Configuration["Authentication:SecretKey"]);
    options.TokenValidationParameters = new TokenValidationParameters()
    {
        //驗證發佈者
        ValidateIssuer = true,
        ValidIssuer = builder.Configuration["Authentication:Issuer"],
        //驗證接收者
        ValidateAudience = true,
        ValidAudience = builder.Configuration["Authentication:Audience"],
        //驗證是否過期
        ValidateLifetime = true,
        //驗證私鑰
        IssuerSigningKey = new SymmetricSecurityKey(secretByte)
    };
});
;
builder.Services.AddScoped<IJWTHelper,JWTHelper>();

var app = builder.Build();

// Configure the HTTP request pipeline.
if (!app.Environment.IsDevelopment())
{
    app.UseExceptionHandler("/Error");
    // The default HSTS value is 30 days. You may want to change this for production scenarios, see https://aka.ms/aspnetcore-hsts.
    app.UseHsts();
}


using (var scope = app.Services.CreateScope())
{
    var services = scope.ServiceProvider;
    try
    {
        Console.WriteLine("資料庫開始初始化。");
        var context = services.GetRequiredService<BookContext>();
        // requires using Microsoft.EntityFrameworkCore;
        context.Database.Migrate();
        // Requires using RazorPagesMovie.Models;
        SeedData.Initialize(services);
        Console.WriteLine("資料庫初始化結束。");
    }

    catch (Exception ex)
    {
        var logger = services.GetRequiredService<ILogger<Program>>();
        logger.LogError(ex, "資料庫數據初始化錯誤.");
    }
}


app.UseHttpsRedirection();

app.UseStaticFiles();


app.UseRouting();
app.MapControllers();


app.MapBlazorHub();
app.MapFallbackToPage("/_Host");
app.UseAuthentication();
app.UseAuthorization();


app.Run();
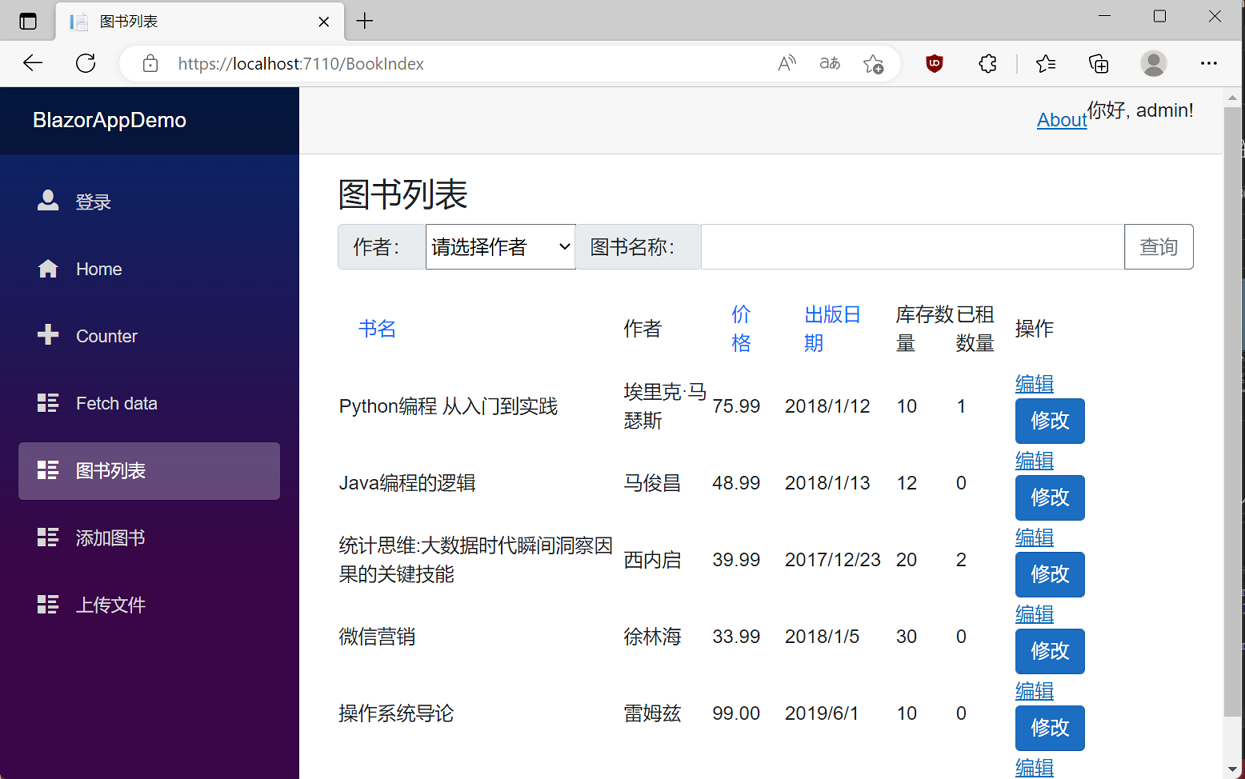
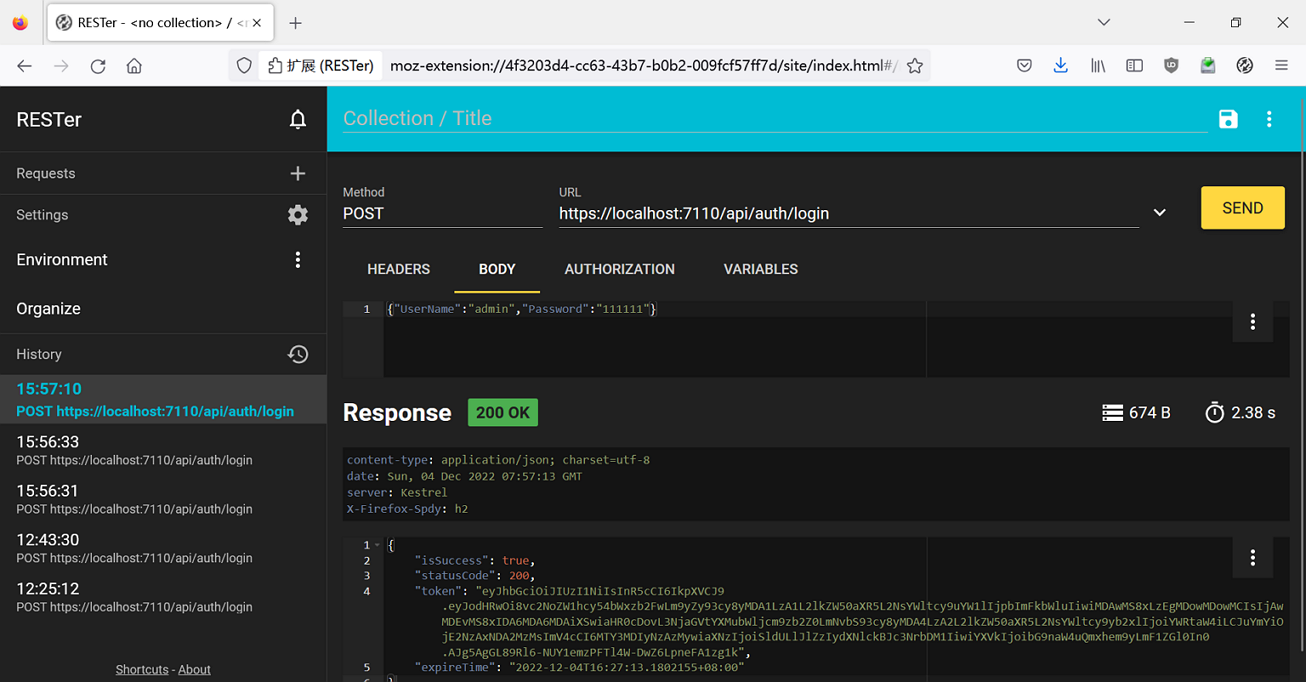
9. 在Visual Studio 2022的菜單欄上,找到“調試-->開始調試”或是按F5鍵,Visual Studio 2022會生成BlazorAppDemo應用程式,併在瀏覽器使用Rest調試插件,對api/auth/login介面進行調試,只要登入成功就可以取得token。如下圖。
10.我們在用戶名輸入框中輸入用戶名"admin",在密碼輸入框中輸入密碼"111111",點擊“登錄”按鈕,進行登錄。我們進入了系統。如下圖。