好家伙,本篇將繼續完善前端界面 效果展示: 1.註冊登陸 (後端已啟動) 2.註冊表單驗證 (前端實現的表單驗證) 在此之前: 我的第一個項目(二):使用Vue做一個登錄註冊界面 - 養肥胖虎 - 博客園 (cnblogs.com) 後端部分: 我的第一個項目(三):註冊登陸功能(後端) - 養肥胖 ...
好家伙,本篇將繼續完善前端界面
效果展示:
1.註冊登陸
(後端已啟動)

2.註冊表單驗證
(前端實現的表單驗證)
在此之前:
我的第一個項目(二):使用Vue做一個登錄註冊界面 - 養肥胖虎 - 博客園 (cnblogs.com)
後端部分:
我的第一個項目(三):註冊登陸功能(後端) - 養肥胖虎 - 博客園 (cnblogs.com)
1.前端發送網路請求(axios)
項目目錄:

Mylogin.vue文件:
<template>
  <div class="login-container">
    <div class="login-box">

      <!-- 頭像區域 -->
      <div class="text-center avatar-box">
        <img src="../assets/logo.png" class="img-thumbnail avatar" alt="">
      </div>

      <!-- 表單區域 -->
      <div class="form-login p-4">
        <!-- 登錄名稱 -->
        <div class="form-group form-inline">
          <label for="username">賬號:</label>
          <input type="text" class="form-control ml-2" id="username" placeholder="請輸入賬號" autocomplete="off" v-model.trim="loginForm.loginName"/>
        </div>
        <!-- 登錄密碼 -->
        <div class="form-group form-inline">
          <label for="password">密碼:</label>
          <input type="password" class="form-control ml-2" id="password" placeholder="請輸入密碼" v-model.trim="loginForm.password"/>
        </div>
        <!-- 登錄和重置按鈕 -->
        <div class="form-group form-inline d-flex justify-content-end">
          <button type="button" class="btn btn-secondary mr-2" @click="toregister">去註冊</button>
          <button type="button" class="btn btn-primary" @click="login">登錄</button>
        </div>
      </div>

    </div>
  </div>
</template>

<script>
export default {
  name: 'MyLogin',
  data() {
    return {
      loginForm: {
          loginName: '',
          password: ''
        }
    }
  },
  methods: {

    login() {
        // console.log('submit!',this.loginForm);

            this.axios.post('http://localhost:3312/sys-user/login',this.loginForm).then((resp)=>{
              console.log(resp);
                let data = resp.data;
                if(data.success){
                    this.loginForm= {};
                    this.$message({
                    message: '登陸成功!!!',
                    type: 'success'
                    });
                    this.$router.push({path:'/Home'})
                } else {

                  console.log(data)

                }
            })

      },
    toregister(){
      this.$router.push('/register')
    },
  }
}
</script>

<style lang="less" scoped>
.login-container {
  background-color: #35495e;
  height: 100%;
  .login-box {
    width: 400px;
    height: 250px;
    background-color: #fff;
    border-radius: 3px;
    position: absolute;
    left: 50%;
    top: 50%;
    transform: translate(-50%, -50%);
    box-shadow: 0 0 6px rgba(255, 255, 255, 0.5);
    .form-login {
      position: absolute;
      bottom: 0;
      left: 0;
      width: 100%;
      box-sizing: border-box;
    }
  }
}

.form-control {
  flex: 1;
}

.avatar-box {
  position: absolute;
  width: 100%;
  top: -65px;
  left: 0;
  .avatar {
    width: 120px;
    height: 120px;
    border-radius: 50% !important;
    box-shadow: 0 0 6px #efefef;
  }
}
</style>
MyRegister.vue文件:
<template>
    <div class="login-container">
        <div class="login-box">

            <!-- 頭像區域 -->
            <div class="text-center avatar-box">
                <img src="../assets/logo.png" class="img-thumbnail avatar" alt="">
            </div>

            <!-- 表單區域 -->
            <div class="form-login p-4">
                <!-- 登錄名稱 -->
                <!--.trim用於去除首位空格  -->
                <div class="form-group form-inline">
                    <label for="username">賬戶:</label>
                    <input type="text" class="form-control ml-2" id="username" placeholder="請輸入昵稱" autocomplete="off"
                        v-model.trim="ruleForm.loginName" />
                </div>

                <!-- 登錄昵稱 -->
                <div class="form-group form-inline">
                    <label for="password">昵稱:</label>
                    <input type="name" class="form-control ml-2" id="name" placeholder="請輸入手機號"
                        v-model.trim="ruleForm.name" />
                </div>
                <!-- 登錄密碼 -->
                <div class="form-group form-inline">
                    <label for="password">密碼:</label>
                    <input type="password" class="form-control ml-2" id="password" placeholder="請輸入登錄密碼"
                        v-model.trim="ruleForm.password" />
                </div>
                <!-- 確認密碼 -->
                <div class="form-group form-inline">
                    <label for="password">確認密碼:</label>
                    <input type="trypassword" class="form-control ml-2" id="password" placeholder="請再次輸入登錄密碼"
                        v-model.trim="ruleForm.checkPass" />
                </div>
                <!-- 登錄和重置按鈕 -->
                <div class="form-group form-inline d-flex justify-content-end">
                    <button type="button" class="btn btn-secondary mr-2" @click="backlogin">返回登陸界面</button>
                    <button type="button" class="btn btn-primary" @click="submitForm(ruleForm)">註冊</button>
                </div>
            </div>

        </div>
    </div>
</template>

<script>
export default {

    name: 'MyRegister',
    data() {
        return {
            ruleForm: {
                loginName: '',
                password: '',
                name: '',
                checkPass: ""
            },
        }
    },
    methods: {
        backlogin() {
            this.$router.push('/login')
            return
        },
        submitForm(ruleForm) {
            //校驗部分
            if (this.ruleForm.password != this.ruleForm.checkPass) {
                this.$message({
                    message: '兩次輸入密碼不一致!!!',
                    type: 'error'
                });
            }
            else if(this.ruleForm.loginName==""){
                this.$message({
                    message: '請輸入賬戶!!!',
                    type: 'error'
                });
            }
            else if(this.ruleForm.name==""){
                this.$message({
                    message: '請輸入昵稱!!!',
                    type: 'error'
                });
            }
            else if(this.ruleForm.password==""){
                this.$message({
                    message: '請輸入密碼!!!',
                    type: 'error'
                });
            }
            else {
                this.axios.post('http://localhost:3312/sys-user/register', this.ruleForm).then((resp) => {
                    console.log(resp);

                    let data = resp.data;
                    console.log(data);
                    if (data.success) {
                        this.ruleForm = {};
                        this.$message({
                            message: '恭喜你,註冊成功,點擊去登陸按鈕進行登陸吧!!!',
                            type: 'success'
                        });
                    }
                })
                this.$router.push({ path: '/login' })
            }

        },
    }
}
</script>

<style lang="less" scoped>
.login-container {
    background-color: #35495e;
    height: 100%;

    .login-box {
        width: 400px;
        height: 320px;
        background-color: #fff;
        border-radius: 3px;
        position: absolute;
        left: 50%;
        top: 50%;
        transform: translate(-50%, -50%);
        box-shadow: 0 0 6px rgba(255, 255, 255, 0.5);

        .form-login {
            position: absolute;
            bottom: 0;
            left: 0;
            width: 100%;
            box-sizing: border-box;
        }
    }
}

.form-control {
    flex: 1;
}

.avatar-box {
    position: absolute;
    width: 100%;
    top: -65px;
    left: 0;

    .avatar {
        width: 120px;
        height: 120px;
        border-radius: 50% !important;
        box-shadow: 0 0 6px #efefef;
    }
}
</style>
請求部分:
{
                //發起網路請求,
                this.axios.post('http://localhost:3312/sys-user/register', this.ruleForm).then((resp) => {
                    console.log(resp);

                    let data = resp.data;
                    console.log(data);
                    //檢驗註冊是否成功
                    if (data.success) {
                        //清空表單數據
                        this.ruleForm = {};
                        //發送成功通知
                        this.$message({
                            message: '恭喜你,註冊成功,點擊去登陸按鈕進行登陸吧!!!',
                            type: 'success'
                        });
                    }
                })
                this.$router.push({ path: '/login' })
            }
2.表單驗證:
if (this.ruleForm.password != this.ruleForm.checkPass) {
                this.$message({
                    message: '兩次輸入密碼不一致!!!',
                    type: 'error'
                });
            }
            else if(this.ruleForm.loginName==""){
                this.$message({
                    message: '請輸入賬戶!!!',
                    type: 'error'
                });
            }
            else if(this.ruleForm.name==""){
                this.$message({
                    message: '請輸入昵稱!!!',
                    type: 'error'
                });
            }
            else if(this.ruleForm.password==""){
                this.$message({
                    message: '請輸入密碼!!!',
                    type: 'error'
                });
            }
這個沒什麼好解釋的,就是很簡單的驗證
如果使用的是組件的表單(比如:element之類的)也可以編輯相應的表單驗證方法(規則)
當然,自己手寫也沒什麼問題
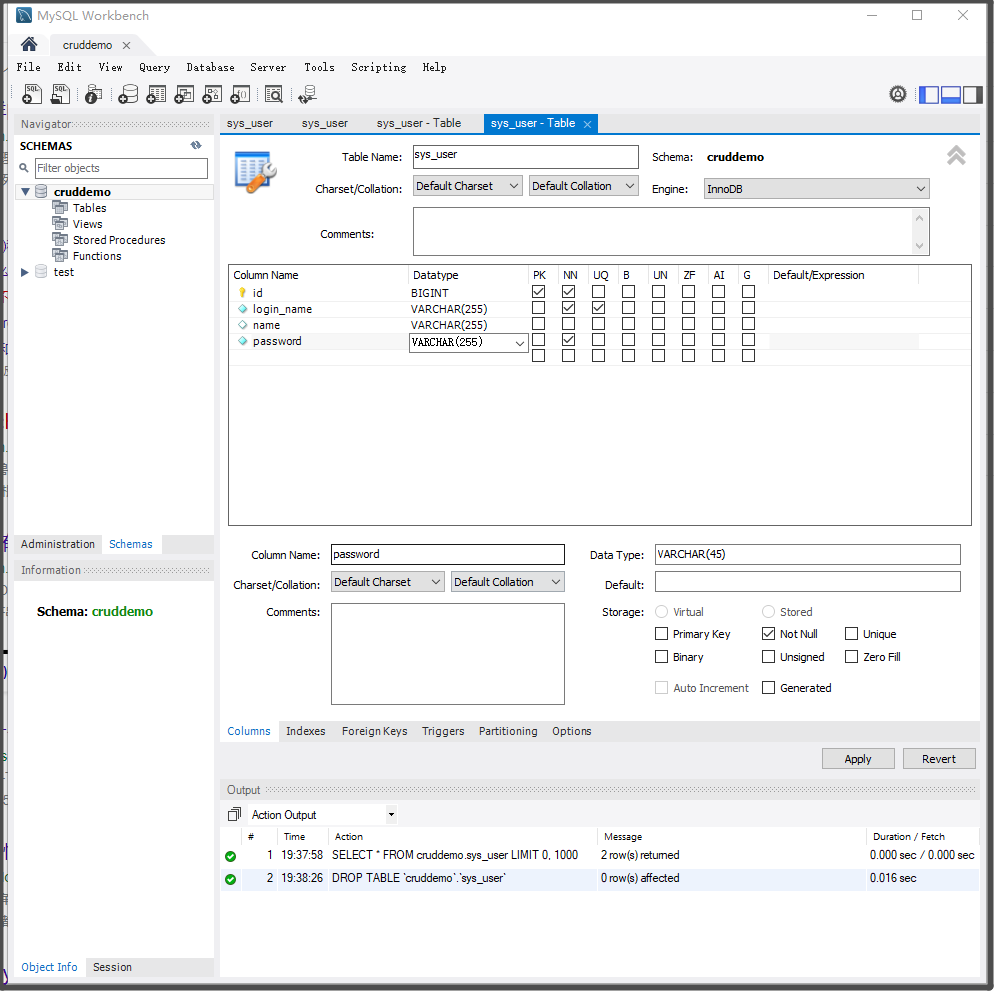
補充:資料庫建表
(前面好像一直都忘了)