一、CentOS 7.9 安裝 mysql-5.7.35 1 下載地址:https://downloads.mysql.com/archives/community/ 2 mysql-5.7.35 安裝包上傳到linux伺服器 使用Xftp 或者 wget 在伺服器上下載 # 推薦使用wget yu ...
一、CentOS 7.9 安裝 mysql-5.7.35
1 下載地址:https://downloads.mysql.com/archives/community/

2 mysql-5.7.35 安裝包上傳到linux伺服器
使用Xftp 或者 wget 在伺服器上下載
# 推薦使用wget
yum install -y wget
wget https://downloads.mysql.com/archives/get/p/23/file/mysql-5.7.35-linux-glibc2.12-x86_64.tar.gz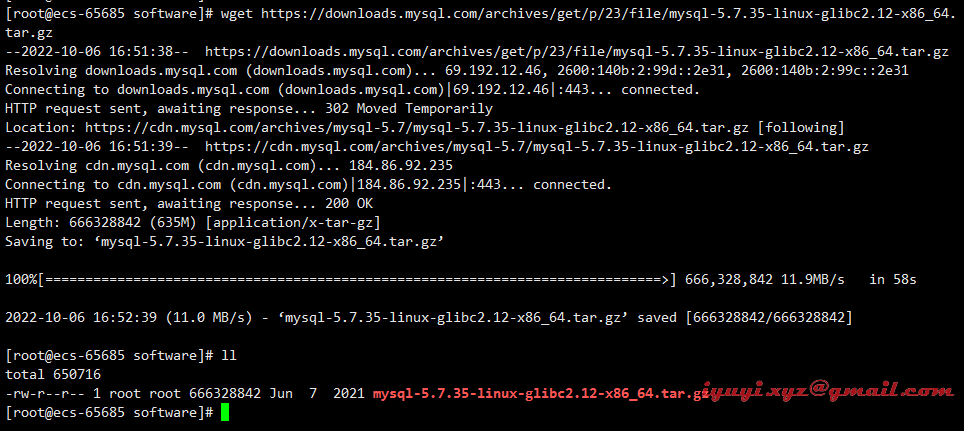
3 檢查系統是否安裝過mysql,如果沒有略過此步驟
[root@ecs-65685 ~]# rpm -qa|grep mysql
沒有任何輸出說明沒有安裝過mysql!
如果系統自帶mysql,查詢所有mysql 對應的文件夾,全部刪除,使用命令:
whereis mysql
find / -name mysql
rpm -qa| grep mysql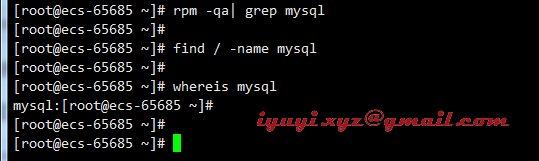
4 卸載CentOS7系統自帶mariadb
查看系統自帶的Mariadb,沒有略過此步驟
rpm -qa|grep mariadb卸載系統自帶的Mariadb
因為centos7自帶的mariadb 與mysql衝突,所以需要先卸載
yum remove mariadb-libs -y
5 刪除etc目錄下的my.cnf
查看 /etc 目錄下有沒有 my.cnf 文件,如果有,刪除:

6 創建用戶和組
useradd mysqlxyz -s /sbin/nologin
id mysqlxyz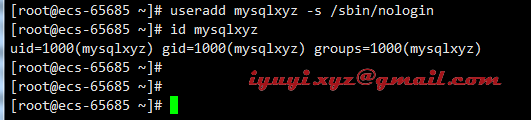
二、創建目錄,並解壓
1 創建軟體目錄
mkdir -p /opt/mysqlxyz/databasemkdir -p /opt/mysqlxyz/datamkdir -p /opt/mysqlxyz/binlogchown -R mysqlxyz.mysqlxyz /opt/mysqlxyz/database /opt/mysqlxyz/data /opt/mysqlxyz/binlog
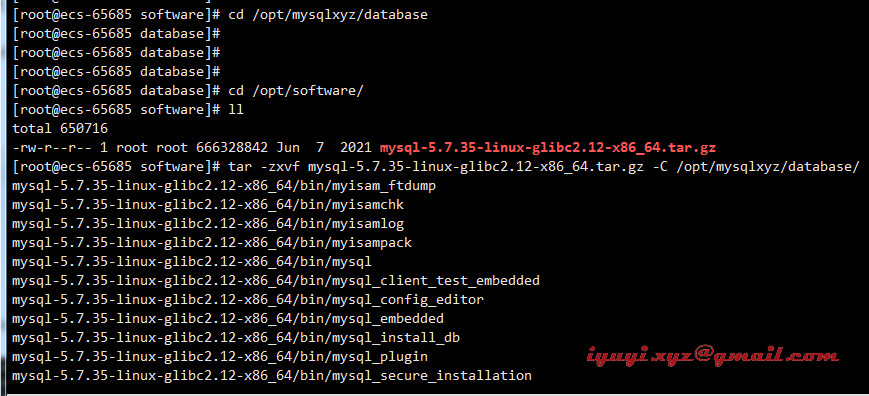
5 解壓安裝mysql安裝包到 /opt/mysqlxyz/database/ 目錄下
tar -zxvf mysql-5.7.35-linux-glibc2.12-x86_64.tar.gz -C /opt/mysqlxyz/database/
 6 名字太長,修改為 mysql-5.7.35
cd /opt/mysqlxyz/database
mv mysql-5.7.35-linux-glibc2.12-x86_64/ mysql-5.7.35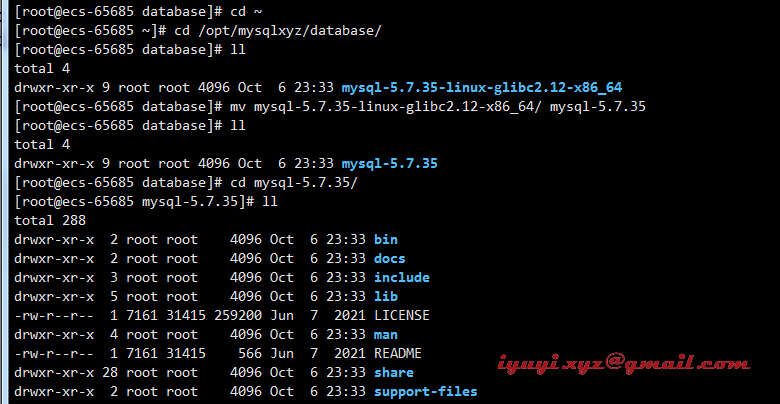 7 更改 mysql-5.7.35 目錄下所有文件夾所屬的用戶組、用戶以及許可權
cd /opt/mysqlxyz/database/mysql-5.7.35
chown -R mysqlxyz. *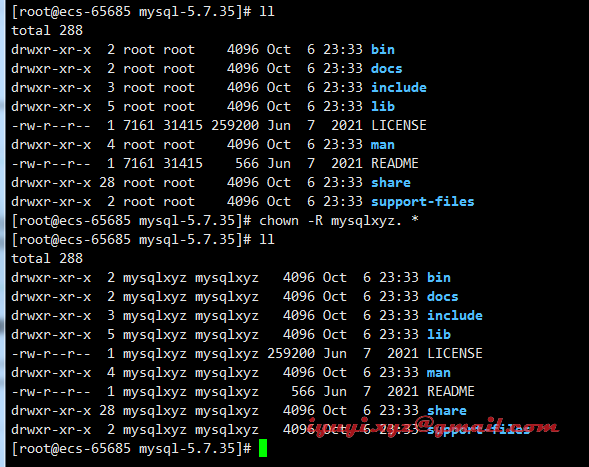
三、設置環境變數
vim /etc/profile
export PATH=$PATH:/opt/mysqlxyz/database/mysql-5.7.35/bin
source /etc/profilemysql -V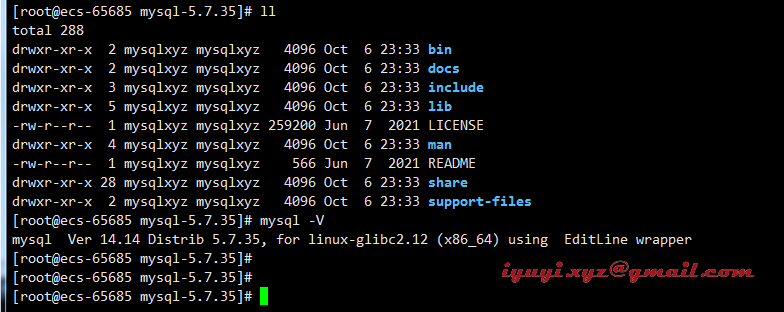
四、安裝 mysql-5.7.35
1 初始化系統庫表(帶有臨時密碼)
mysqld --initialize --user=mysqlxyz --basedir=/opt/mysqlxyz/database/mysql-5.7.35 --datadir=/opt/mysqlxyz/data
2 初始化系統庫表(密碼為空)
mysqld --initialize-insecure --user=mysqlxyz --basedir=/opt/mysqlxyz/database/mysql-5.7.35 --datadir=/opt/mysqlxyz/data
yum install libncurses* -ycd /opt/mysqlxyz/data
mysqld --initialize-insecure --user=mysqlxyz --basedir=/opt/mysqlxyz/database/mysql-5.7.35 --datadir=/opt/mysqlxyz/data
# 安裝多個mysql 把 --datadir 修改下即可,還有埠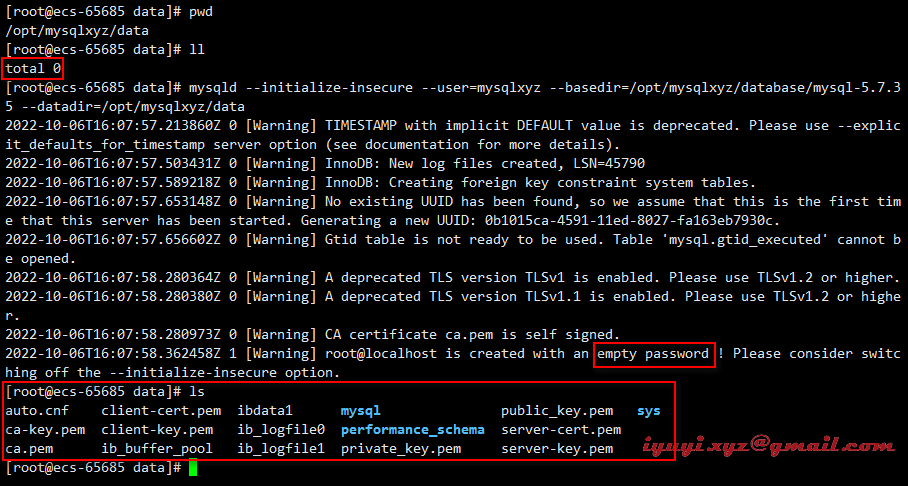 3 配置文件設置 /etc/my.cnf
cat>/etc/my.cnf<<EOF
[mysqld]
user=mysqlxyz
basedir=/opt/mysqlxyz/database/mysql-5.7.35
datadir=/opt/mysqlxyz/data
port=3306
socket=/tmp/mysql57.sock
server_id=6
[mysql]
socket=/tmp/mysql57.sock
[client]
socket=/tmp/mysql57.sock
EOF
4 啟動腳本
cd /opt/mysqlxyz/database/mysql-5.7.35/support-files/
# 將服務文件拷貝到init.d下,並重命名為mysql
cp mysql.server /etc/init.d/mysqld
# 賦予可執行許可權 可省略
chmod +x /etc/init.d/mysqld
# 添加服務
chkconfig --add mysqld
# 顯示服務列表
chkconfig --list
# 啟動mysql
systemctl start mysqld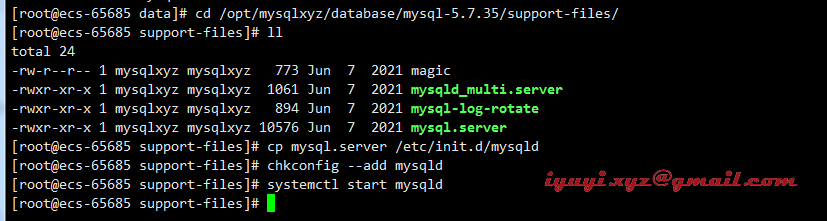 5 使用 mysqladmin 修改密碼
mysqladmin -uroot -p password [email protected]
mysql -uroot -p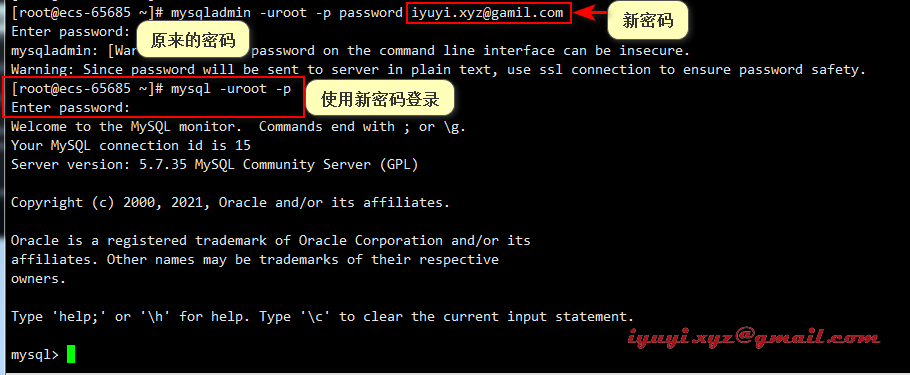
五、開放遠程連接
localhost修改為%,使用遠程連接
use mysql;
select user, host from user;
update user set host = '%' where user = 'root';
flush privileges;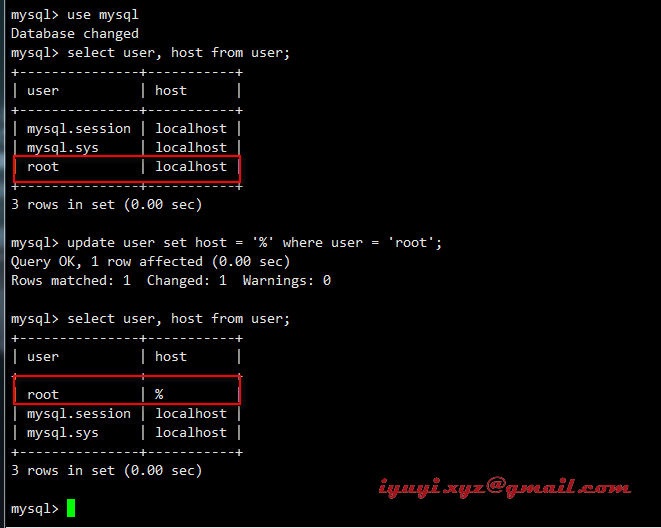
允許遠程連接 授權
use mysql;
GRANT ALL PRIVILEGES ON *.* TO 'root'@'%' IDENTIFIED BY '[email protected]' WITH GRANT OPTION;flush privileges;
六、防火牆
# 關閉防火牆
systemctl stop firewalld

# 開放3306埠命令
firewall-cmd --zone=public --add-port=3306/tcp --permanent
# 配置立即生效
firewall-cmd --reload
雲主機需配置安全組
在入方向規則,允許3306放行
![]()
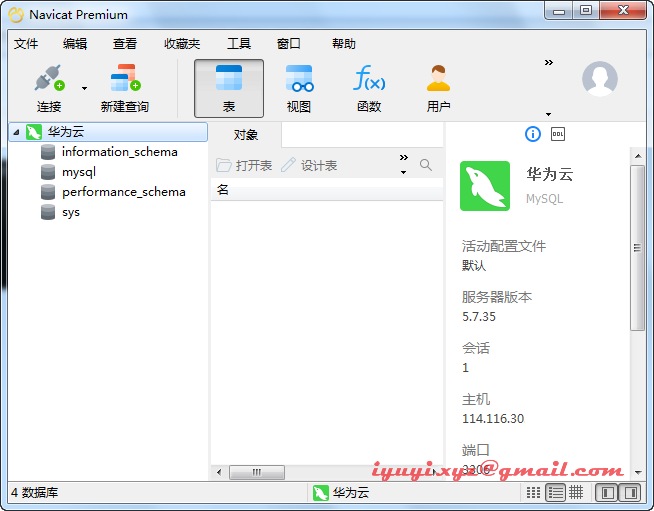
navicat連接