一、為什麼使用JWT 1.跨語言使用。 2.伺服器端無需再保存任何東西,只需要客戶端保存token就可以。 3.實現簡單。 4.統一認證方式,如果是移動端也要驗證的話,jwt也支持就無需修改,否則客戶端 伺服器一套,移動端 伺服器又是一套 當然缺陷也是很明顯,就是退出登錄後,已發放的token無法銷 ...
一、為什麼使用JWT
1.跨語言使用。
2.伺服器端無需再保存任何東西,只需要客戶端保存token就可以。
3.實現簡單。
4.統一認證方式,如果是移動端也要驗證的話,jwt也支持就無需修改,否則客戶端 伺服器一套,移動端 伺服器又是一套
當然缺陷也是很明顯,就是退出登錄後,已發放的token無法銷毀,可以繼續訪問。就是令牌給你了,如果別人盜取了你的令牌,我也是認的,我只認令牌不認人。也可以設置令牌有效期,假如設置過期有效時間為10分鐘,就算你拿到了令牌想用也已經過期了,但是這就要求客戶端每次想要做什麼,先去申請令牌,然後在去操作,這就很麻煩。內部系統的話是可以用這種模式的,如果對外的不建議使用。對外的可以使用傳統的簽名認證方法。
二、在.net core webApi 搭建jwt並且使用
第一步:首先要在程式中讀取appSettings配置文件信息
創建一個AppSettings.cs類,存放讀取配置信息的函數 代碼如下,使用Nuget 安裝Microsoft.Extensions.Configuration和Microsoft.Extensions.Configuration.Json,Microsoft.Extensions.Configuration.Binder
using Microsoft.Extensions.Configuration;
using Microsoft.Extensions.Configuration.Json;
using System;
using System.Collections.Generic;
using System.Linq;

namespace WebApi.Core.Common
{
    public class AppSettings
    {
        static IConfiguration Configuration { get; set; }
        static string contentPath { get; set; }

        public AppSettings(string contentPath)
        {
            string Path = "appsettings.json";

            //如果你把配置文件 是 根據環境變數來分開了,可以這樣寫
            //Path = $"appsettings.{Environment.GetEnvironmentVariable("ASPNETCORE_ENVIRONMENT")}.json";

            Configuration = new ConfigurationBuilder()
               .SetBasePath(contentPath)
               .Add(new JsonConfigurationSource { Path = Path, Optional = false, ReloadOnChange = true })//這樣的話,可以直接讀目錄里的json文件,而不是 bin 文件夾下的,所以不用修改複製屬性
               .Build();
        }

        public AppSettings(IConfiguration configuration)
        {
            Configuration = configuration;
        }

        /// <summary>
        /// 封裝要操作的字元
        /// </summary>
        /// <param name="sections">節點配置</param>
        /// <returns></returns>
        public static string app(params string[] sections)
        {
            try
            {

                if (sections.Any())
                {
                    return Configuration[string.Join(":", sections)];
                }
            }
            catch (Exception)
            {

            }

            return "";
        }

        /// <summary>
        /// 遞歸獲取配置信息數組
        /// </summary>
        /// <typeparam name="T"></typeparam>
        /// <param name="sections"></param>
        /// <returns></returns>
        public static List<T> app<T>(params string[] sections)
        {
            List<T> list = new List<T>();
            Configuration.Bind(string.Join(":", sections), list);
            return list;
        }
    }
}
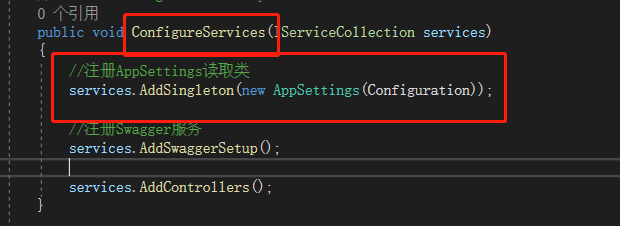
找到webApi項目,打開Startup類,在ConfigureService函數 註冊AppSettings
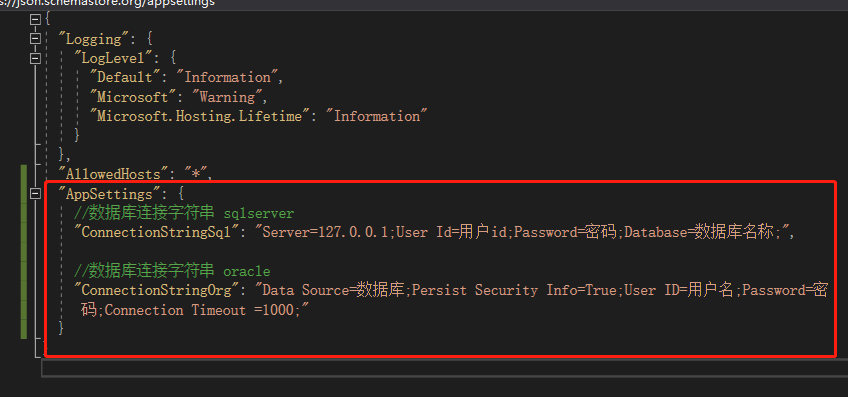
編輯appsettings.json,新增紅色框子的內容。
獲取調試一下
            //註冊appsettings讀取類
            services.AddSingleton(new Appsettings(Configuration));
            var text = Appsettings.app(new string[] { "AppSettings", "ConnectionStringSql" });
            Console.WriteLine($"ConnectionString:{text}");
            Console.ReadLine();
運行後的結果
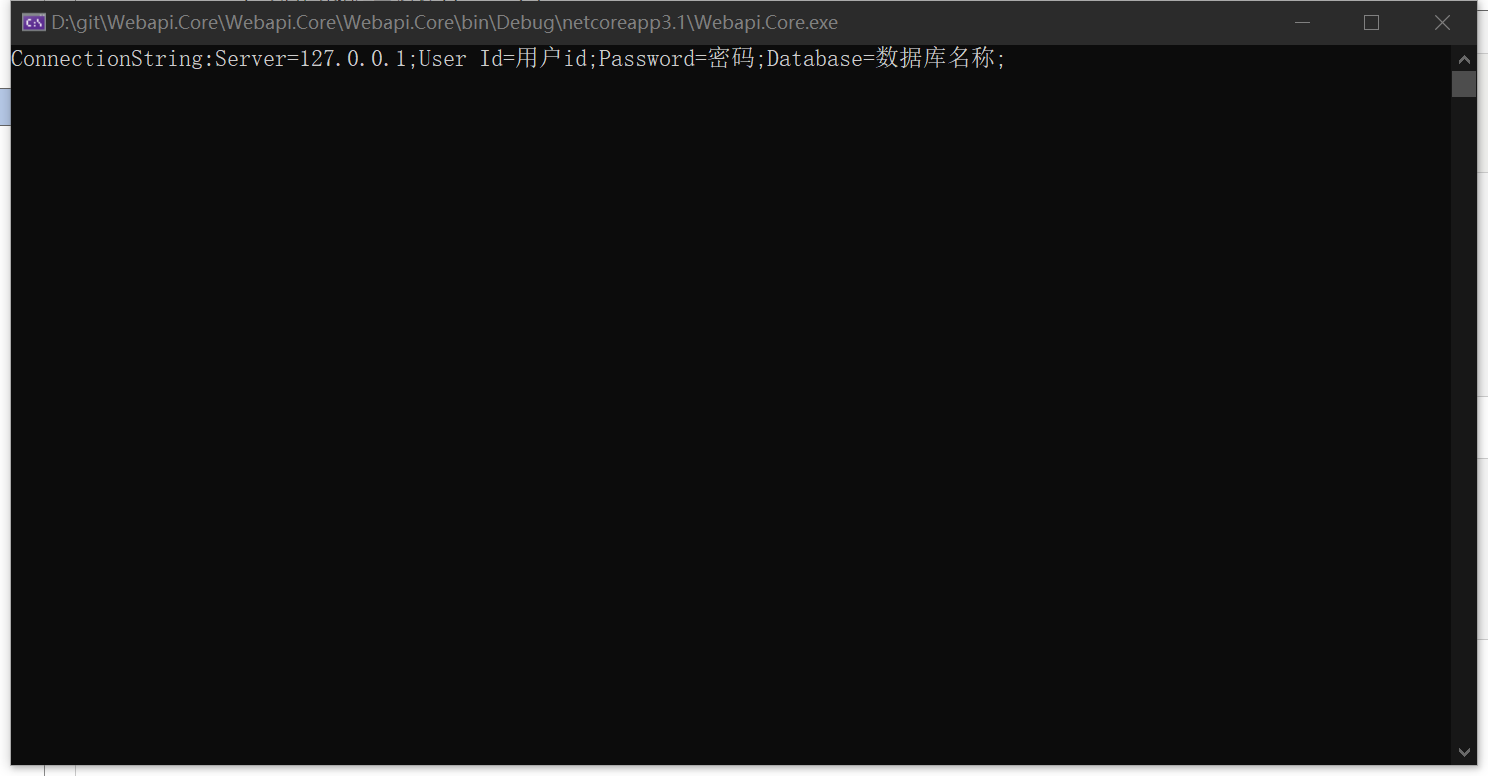
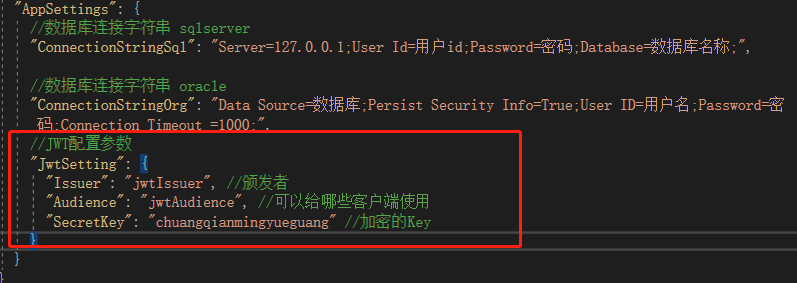
接下來,我們開始正式的在項目中,註冊和使用JWT,首先配置一下jwt需要的參數,在appsettings.json中,SecretKey必須大於16個,是大於,不是大於等於
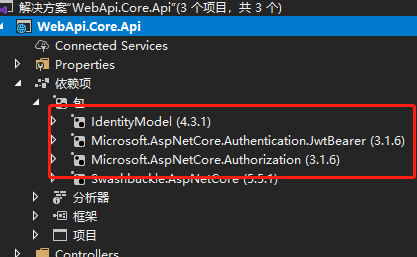
在Api項目中 添加Nuget 包 IdentityModel,Microsoft.AspNetCore.Authentication.JwtBearer,Microsoft.AspNetCore.Authorization
在model項目中添加一個tokenModel
using System;
using System.Collections.Generic;
using System.Text;

namespace WebApi.Core.Model
{
    /// <summary>
    /// 令牌
    /// </summary>
    public class TokenModel
    {
        /// <summary>
        /// Id
        /// </summary>
        public string Uid { get; set; }
        /// <summary>
        /// 角色
        /// </summary>
        public string Role { get; set; }

    }
}
在Api項目中新建一個文件夾 Authorization,新建一個JwtHelper 裡面有生成token 和解析token 兩個方法
using System.Linq;
using System.Security.Claims;
using System.Text;
using System.Threading.Tasks;
using WebApi.Core.Common;
using WebApi.Core.Model;

namespace WebApi.Core.Api.Authorization
{
    public class JwtHelper
    {
        /// <summary>
        /// 獲取token信息
        /// </summary>
        /// <param name="tokenModel"></param>
        /// <returns></returns>
        public static string issueJwt(TokenModel tokenModel)
        {
            //獲取Appsetting配置信息
            string iss = AppSettings.app(new string[] { "AppSettings", "JwtSetting", "Issuer" });
            string aud = AppSettings.app(new string[] { "AppSettings", "JwtSetting", "Audience" });
            string secret = AppSettings.app(new string[] { "AppSettings", "JwtSetting", "SecretKey" });

            var claims = new List<Claim>
                {
                 /*
                 * 特別重要:
                   1、這裡將用戶的部分信息,比如 uid 存到了Claim 中,如果你想知道如何在其他地方將這個 uid從 Token 中取出來,
              請看下邊的SerializeJwt() 方法,或者在整個解決方案,搜索這個方法,看哪裡使用了!
                   2、你也可以研究下 HttpContext.User.Claims ,具體的你可以看看 Policys/PermissionHandler.cs 類中是如何使用的。
                 */

          //nbf 生效時間 、Jti 編號、iat 簽發時間、aud 受眾、exp 過期時間
                new Claim(JwtRegisteredClaimNames.Jti, tokenModel.Uid.ToString()),
                new Claim(JwtRegisteredClaimNames.Iat, $"{new DateTimeOffset(DateTime.Now).ToUnixTimeSeconds()}"),
                new Claim(JwtRegisteredClaimNames.Nbf,$"{new DateTimeOffset(DateTime.Now).ToUnixTimeSeconds()}") ,
                //這個就是過期時間,目前是過期1000秒,可自定義,註意JWT有自己的緩衝過期時間
                new Claim (JwtRegisteredClaimNames.Exp,$"{new DateTimeOffset(DateTime.Now.AddSeconds(1000)).ToUnixTimeSeconds()}"),
                new Claim(ClaimTypes.Expiration, DateTime.Now.AddSeconds(1000).ToString()),
                new Claim(JwtRegisteredClaimNames.Iss,iss),
                new Claim(JwtRegisteredClaimNames.Aud,aud),
               };

            // 可以將一個用戶的多個角色全部賦予;
            claims.AddRange(tokenModel.Role.Split(',').Select(s => new Claim(ClaimTypes.Role, s)));

            //秘鑰 (SymmetricSecurityKey 對安全性的要求,密鑰的長度太短會報出異常)
            var key = new SymmetricSecurityKey(Encoding.UTF8.GetBytes(secret));
            var creds = new SigningCredentials(key, SecurityAlgorithms.HmacSha256);

            var jwt = new JwtSecurityToken(
                issuer: iss,
                claims: claims,
                signingCredentials: creds);

            var jwtHandler = new JwtSecurityTokenHandler();
            var encodedJwt = jwtHandler.WriteToken(jwt);

            return encodedJwt;
        }

        /// <summary>
        /// 解析
        /// </summary>
        /// <param name="jwtStr"></param>
        /// <returns></returns>
        public static TokenModel SerializeJwt(string jwtStr)
        {
            var jwtHandler = new JwtSecurityTokenHandler();
            JwtSecurityToken jwtToken = jwtHandler.ReadJwtToken(jwtStr);
            object role;
            try
            {
                jwtToken.Payload.TryGetValue(ClaimTypes.Role, out role);
            }
            catch (Exception e)
            {
                Console.WriteLine(e);
                throw;
            }
            var tm = new TokenModel
            {
                Uid = jwtToken.Id.ToString(),
                Role = role != null ? role.ToString() : "",
            };
            return tm;
        }
    }
}
在UserController 新建一個login介面,獲取token
        /// <summary>
        /// 登錄驗證並且獲取token
        /// </summary>
        /// <param name="loginModel"></param>
        /// <returns></returns>
        [HttpPost]
        public IActionResult LoginValidate(LoginModel loginModel)
        {
            string jwtStr = string.Empty;
            bool suc = false;

            if (loginModel != null)
            {
                //加登錄驗證
                if (loginModel.UserName == "admin" && loginModel.PassWord == "123456")
                {
                    TokenModel tokenModel = new TokenModel { Uid = loginModel.UserName, Role = loginModel.Role };
                    jwtStr = JwtHelper.issueJwt(tokenModel);
                    suc = true;
                }
            }

            return Ok(new {
                success=suc,
                token = jwtStr
            });
        }
按F5啟動,可以看到token已經生成,客戶端也已經獲取到。
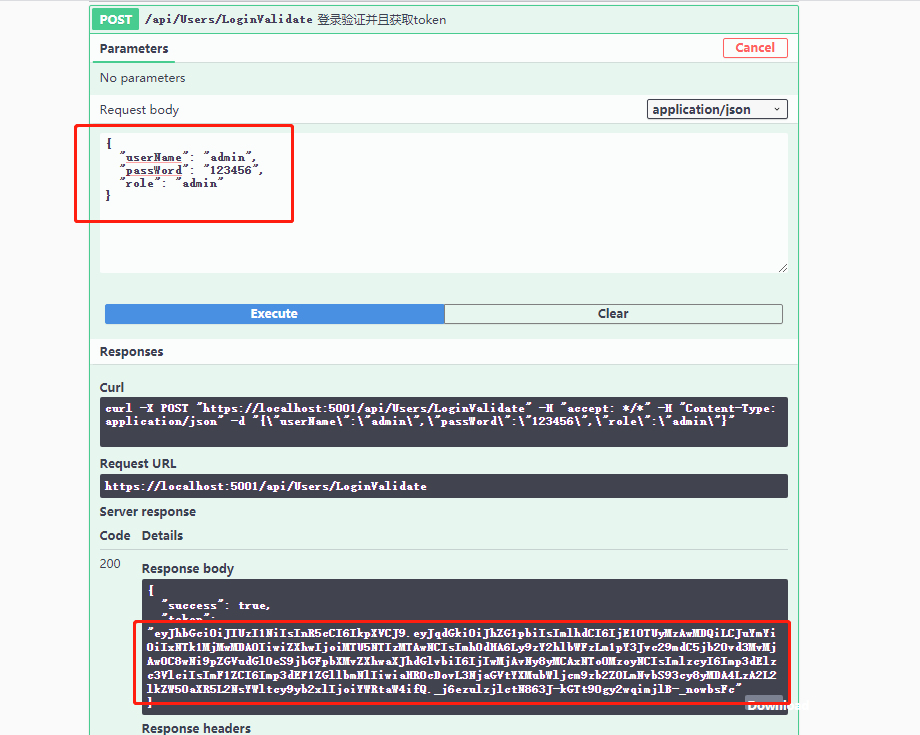
獲取到了token我們怎麼使用呢? 下一步 我們要在Swagger中開啟 JWT服務,先安裝包 Swashbuckle.AspNetCore.Filters
然後找到SwaggerSetUp.cs的AddSwaggerSetUp方法中增加以下代碼
 public static void AddSwaggerSetup(this IServiceCollection services)
        {
            if (services == null) throw new ArgumentNullException(nameof(services));

            var ApiName = "Webapi.Core";

            services.AddSwaggerGen(c =>
            {
                c.SwaggerDoc("V1", new OpenApiInfo
                {
                    // {ApiName} 定義成全局變數,方便修改
                    Version = "V1",
                    Title = $"{ApiName} 介面文檔——Netcore 3.0",
                    Description = $"{ApiName} HTTP API V1",

                });
                c.OrderActionsBy(o => o.RelativePath);

                // 獲取xml註釋文件的目錄
                var xmlPath = Path.Combine(AppContext.BaseDirectory, "WebApi.Core.Api.xml");
                c.IncludeXmlComments(xmlPath, true);//預設的第二個參數是false,這個是controller的註釋,記得修改

                // 獲取xml註釋文件的目錄
                var xmlPathModel = Path.Combine(AppContext.BaseDirectory, "WebApi.Core.Model.xml");
                c.IncludeXmlComments(xmlPathModel, true);//預設的第二個參數是false,這個是controller的註釋,記得修改

                //在 header中添加token,傳遞到後臺
                c.OperationFilter<SecurityRequirementsOperationFilter>();

                #region Token綁定到configureServices

                c.AddSecurityDefinition("oauth2", new OpenApiSecurityScheme
                {
                    Description = "JWT授權(數據將在請求頭中進行傳輸) 直接在下框中輸入Bearer {token}(註意兩者之間是一個空格)\"",
                    Name = "Authorization",//jwt預設的參數名稱
                    In = ParameterLocation.Header,//jwt預設存放Authorization信息的位置(請求頭中)
                    Type = SecuritySchemeType.ApiKey
                });
                #endregion

            });

        }
按F5運行 可以看到 token入口了,按要求的格式在 value中輸入 token 以後的請求head 就會一直加入token了。
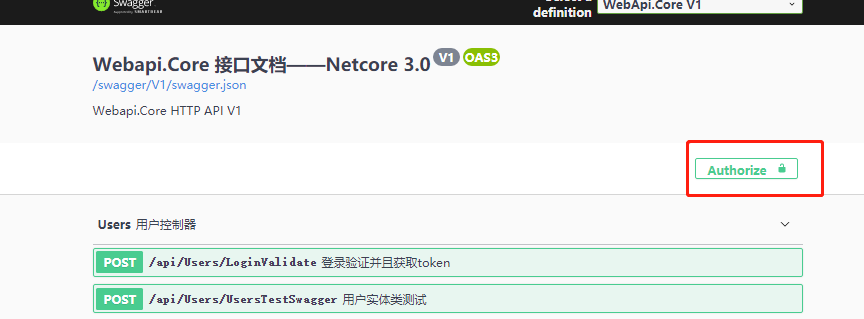
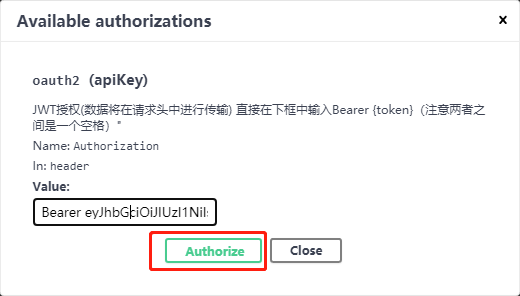
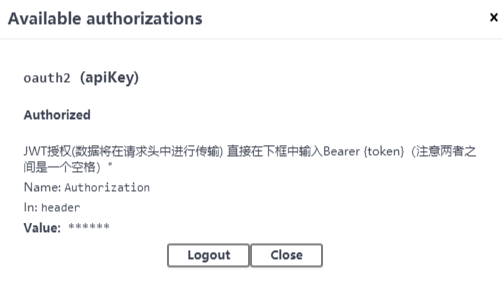
下麵該授權token 的認證了,在SetupService 文件夾下 新建一個AuthJwtSetup.cs 類 如下
using Microsoft.AspNetCore.Authentication.JwtBearer;
using Microsoft.Extensions.DependencyInjection;
using Microsoft.IdentityModel.Tokens;
using System;
using System.Collections.Generic;
using System.Linq;
using System.Text;
using System.Threading.Tasks;
using WebApi.Core.Common;

namespace WebApi.Core.Api.SetUpService
{
    public static class AuthJwtSetup
    {
        public static void AddAuthorizationJwtSetUp(this IServiceCollection services)
        {
            if (services == null) throw new ArgumentNullException(nameof(services));

            //讀取配置文件
            var symmetricKeyAsBase64 = AppSettings.app(new string[] { "AppSettings", "JwtSetting", "SecretKey" });
            var keyByteArray = Encoding.ASCII.GetBytes(symmetricKeyAsBase64);
            var signingKey = new SymmetricSecurityKey(keyByteArray);
            var Issuer = AppSettings.app(new string[] { "AppSettings", "JwtSetting", "Issuer" });
            var Audience = AppSettings.app(new string[] { "AppSettings", "JwtSetting", "Audience" });


            // 令牌驗證參數
            var tokenValidationParameters = new TokenValidationParameters
            {
                ValidateIssuerSigningKey = true,
                IssuerSigningKey = signingKey,
                ValidateIssuer = true,
                ValidIssuer = Issuer,//發行人
                ValidateAudience = true,
                ValidAudience = Audience,//訂閱人
                ValidateLifetime = true,
                ClockSkew = TimeSpan.FromSeconds(30), //token過期後 還可以繼續多訪問30秒
                RequireExpirationTime = true,
            };

            //2.1【認證】、core自帶官方JWT認證
            // 開啟Bearer認證
            services.AddAuthentication("Bearer")
             // 添加JwtBearer服務
             .AddJwtBearer(o =>
             {
                 o.TokenValidationParameters = tokenValidationParameters;
                 o.Events = new JwtBearerEvents
                 {
                     OnAuthenticationFailed = context =>
                     {
                         // 如果過期,則把<是否過期>添加到,返回頭信息中
                         if (context.Exception.GetType() == typeof(SecurityTokenExpiredException))
                         {
                             context.Response.Headers.Add("Token-Expired", "true");
                         }
                         return Task.CompletedTask;
                     }
                 };
             });
        }
    }
}
startup.cs的ConfigureServices 方法添加 服務註入
//jwt授權驗證
services.AddAuthorizationSetup();
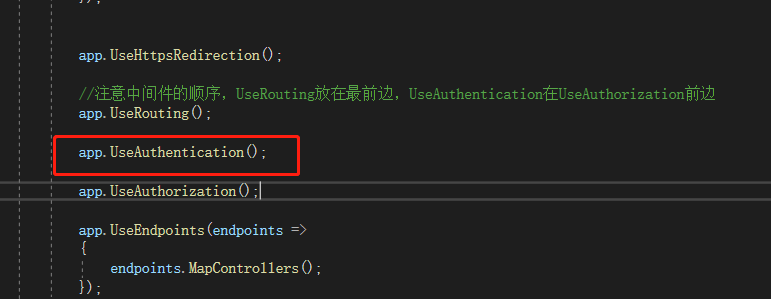
Configure方法添加 下麵的代碼
介面授權策略驗證,在UserController裡面添加一個方法
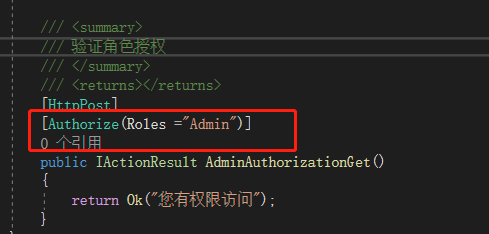
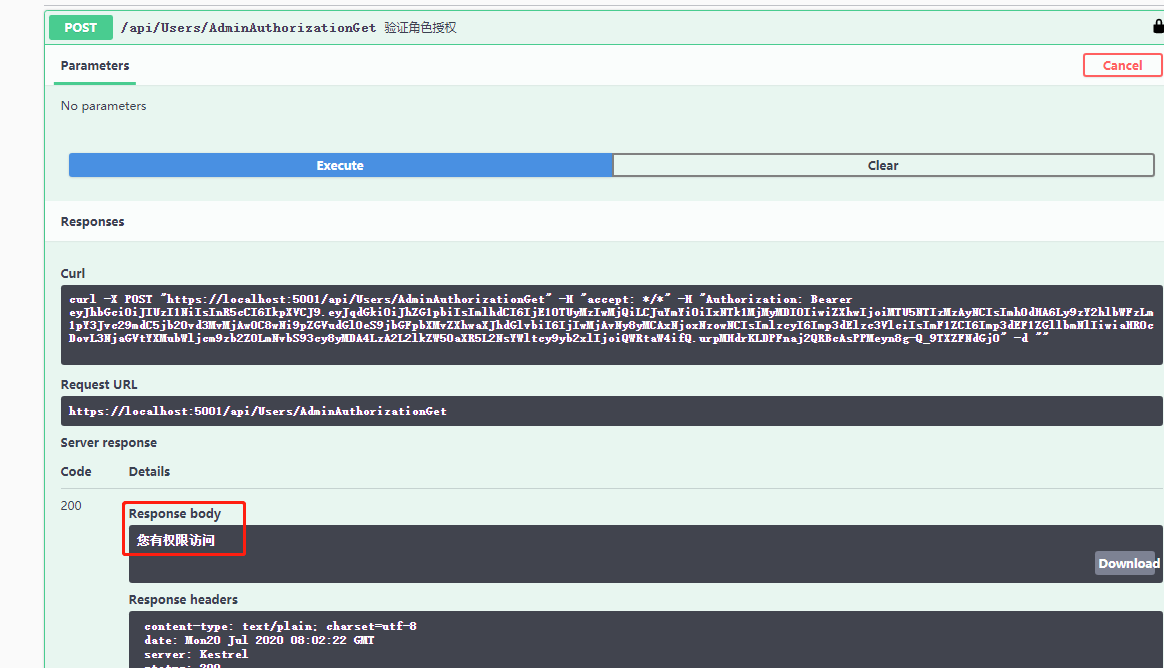
按F5啟動調試,先獲取Admin角色許可權的token,添加token到header中,然後請求 驗證角色許可權那個介面,驗證成功。


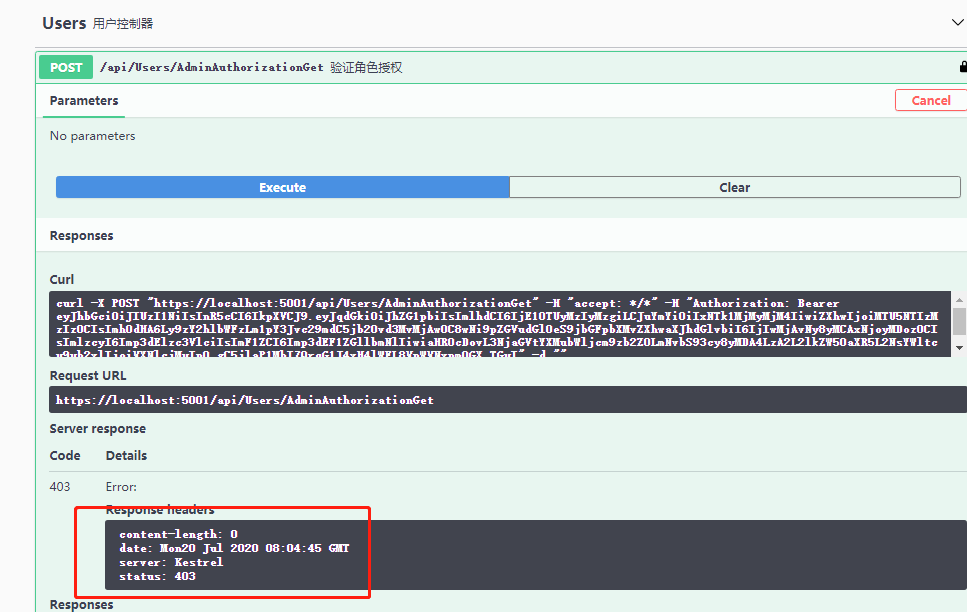
如果獲取的token 不是Admin 角色許可權我們再來試一下,看看是什麼結果,結果就是沒有訪問許可權。

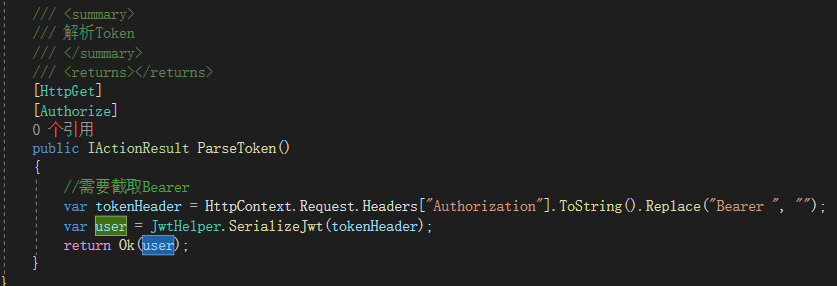
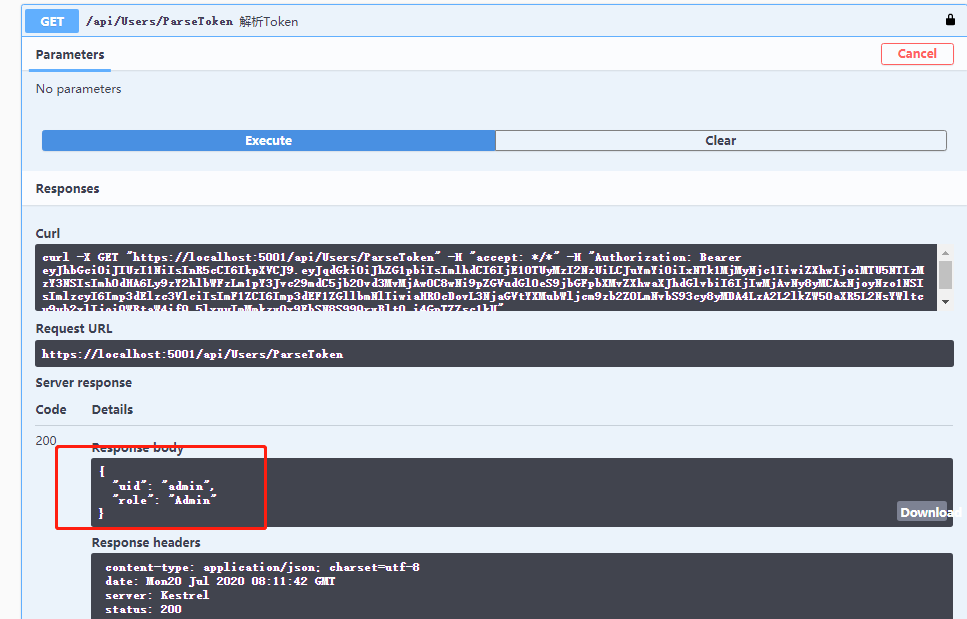
下麵該解析Token 了,試一下,添加一個介面,步驟同上,先獲取token,然後綁定token,最後調用一下解析介面,看結果我們已經解析成功了。
