一、環境搭建 1、新建項目 (1)在” main”目錄下新建” java”與” resources”目錄 (2)將” java”設置為”Sources Root” (3)將” resources”設置為”Resources Root” (4)在”java”目錄下新建”StudyProject.Con ...
一、環境搭建
1、新建項目
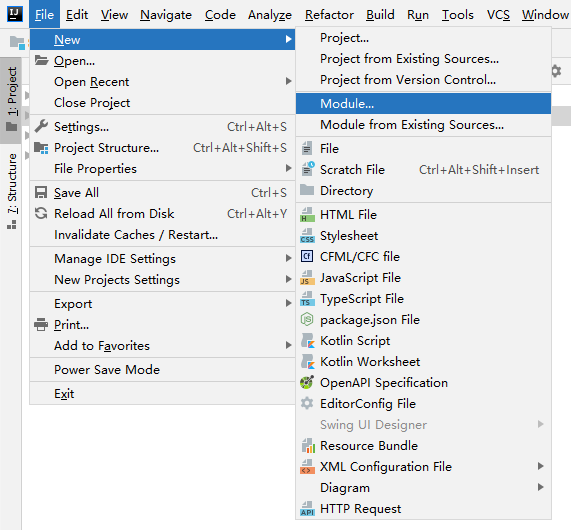
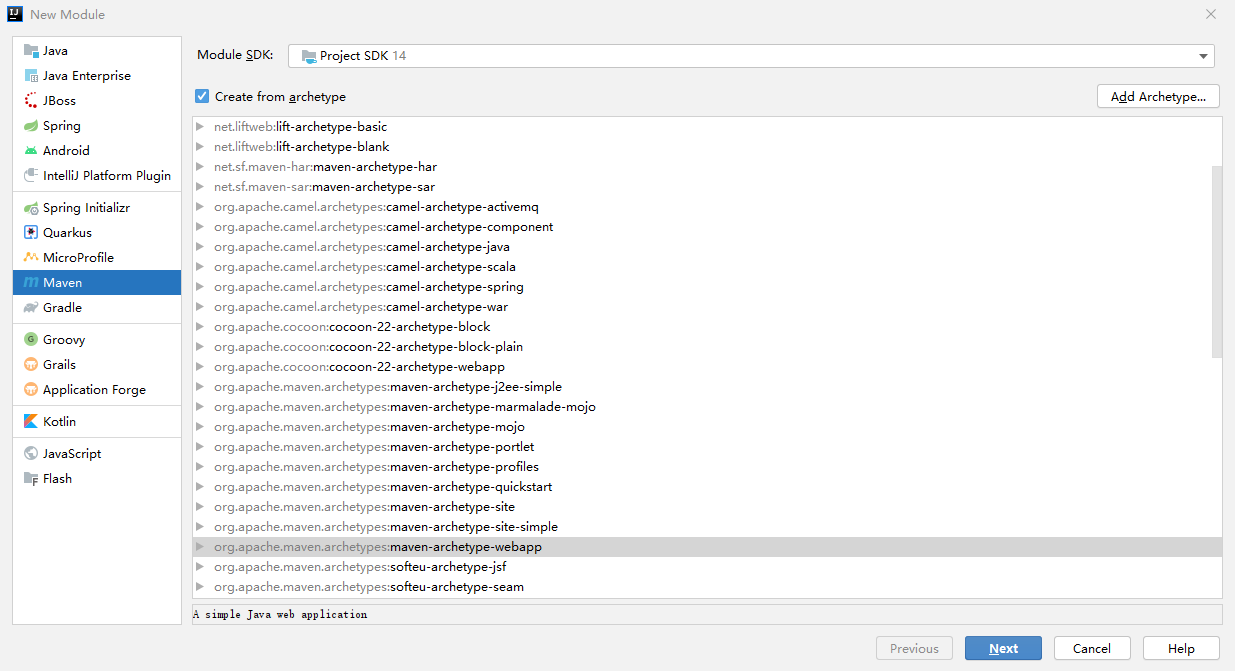


(1)在” main”目錄下新建” java”與” resources”目錄
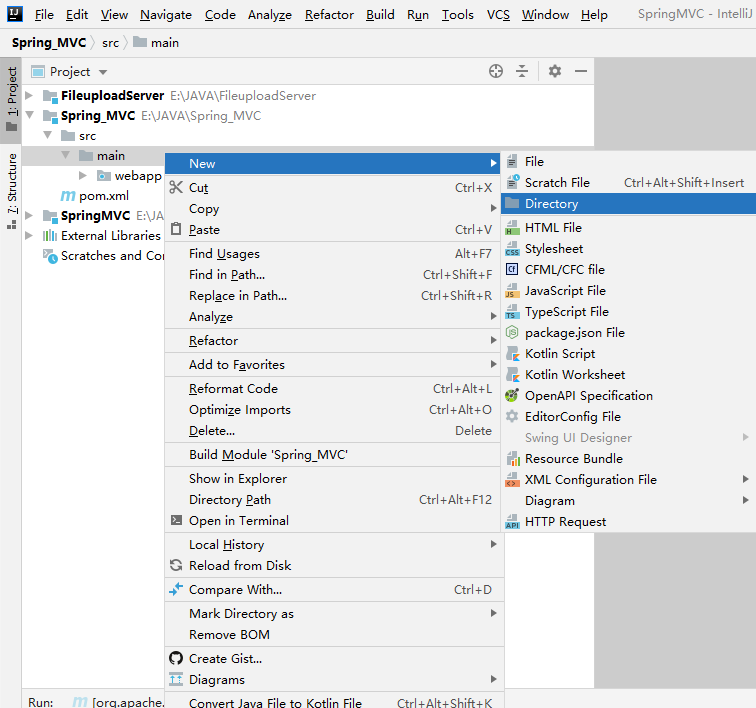
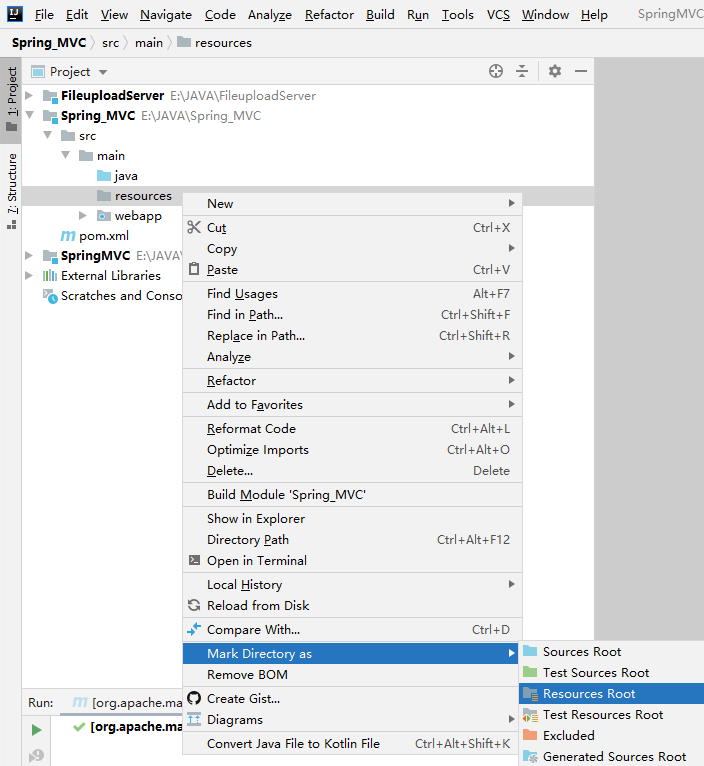
(2)將” java”設置為”Sources Root”
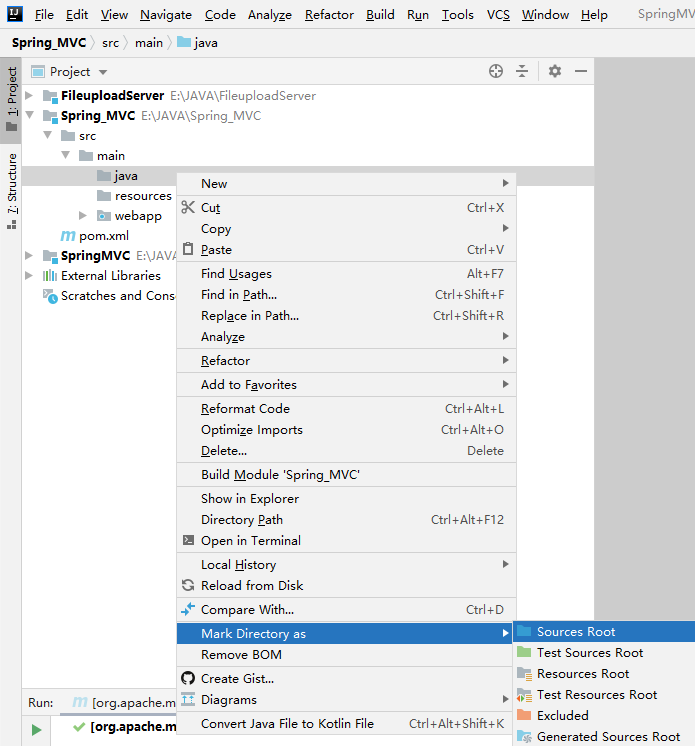
(3)將” resources”設置為”Resources Root”
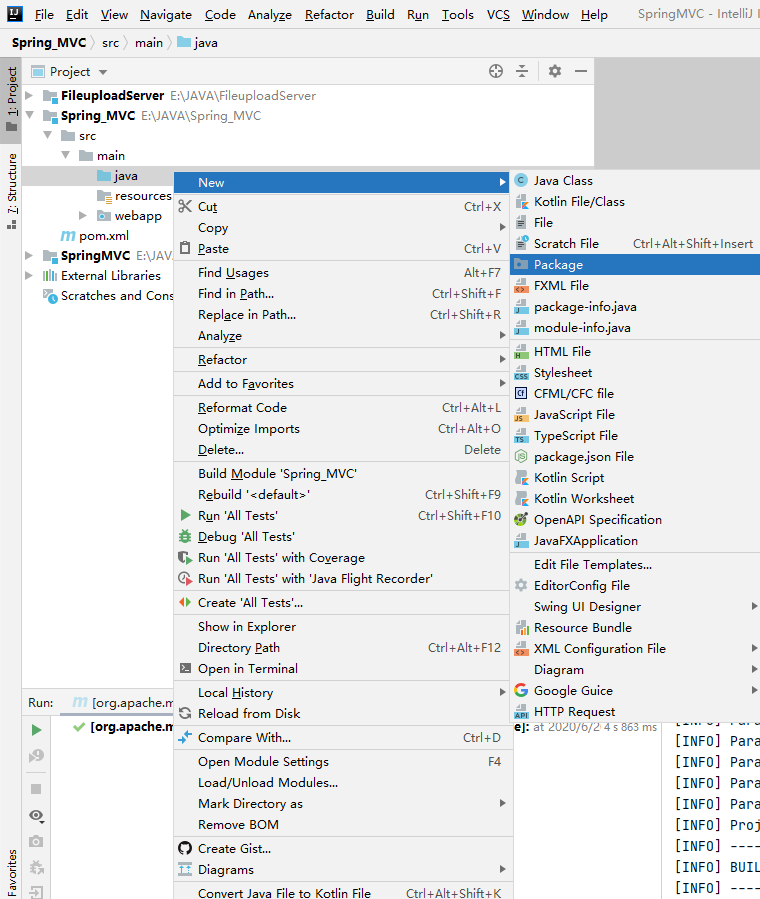
(4)在”java”目錄下新建”StudyProject.Controller”包
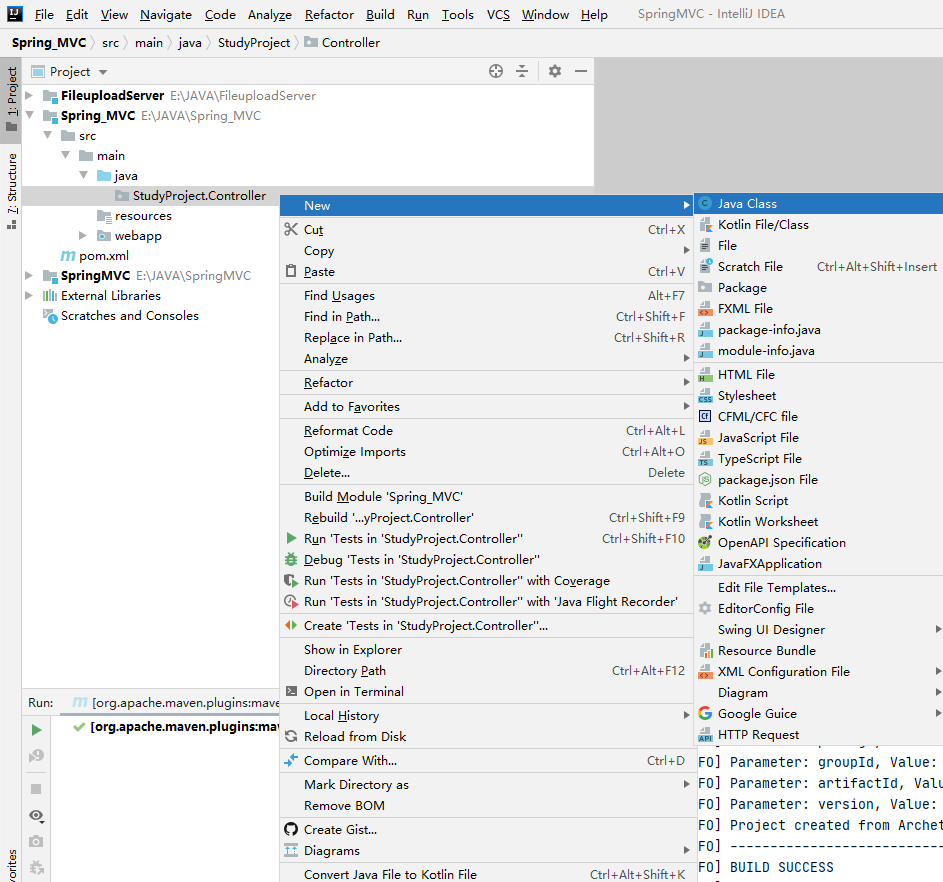
(5)在”StudyProject.Controller”包下新建”TestController”類
(6)在”resources”目錄下新建”Spring.xml”

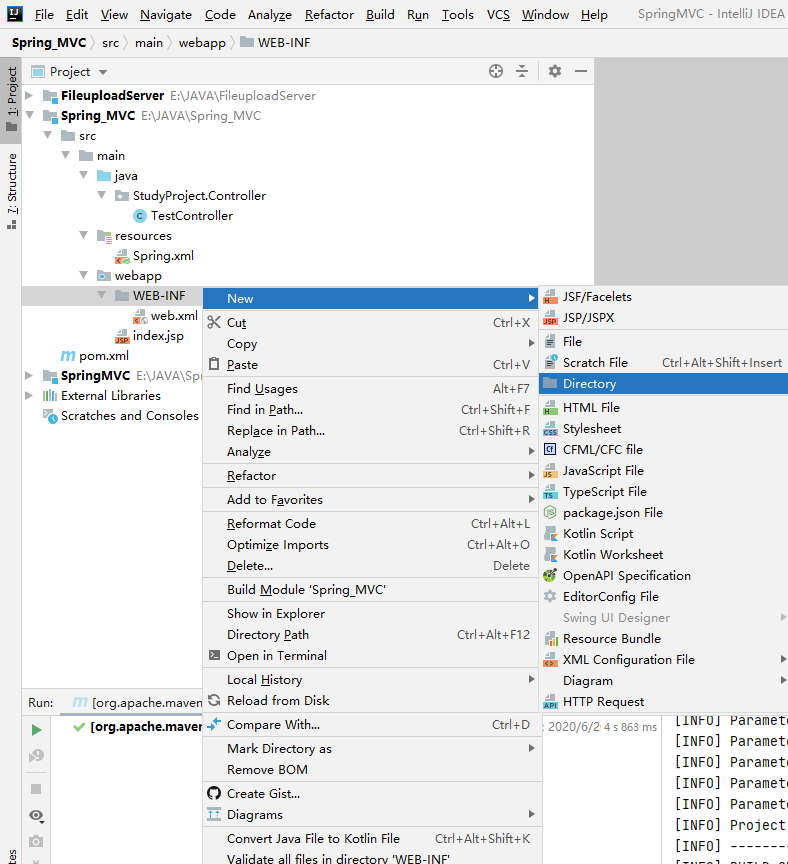
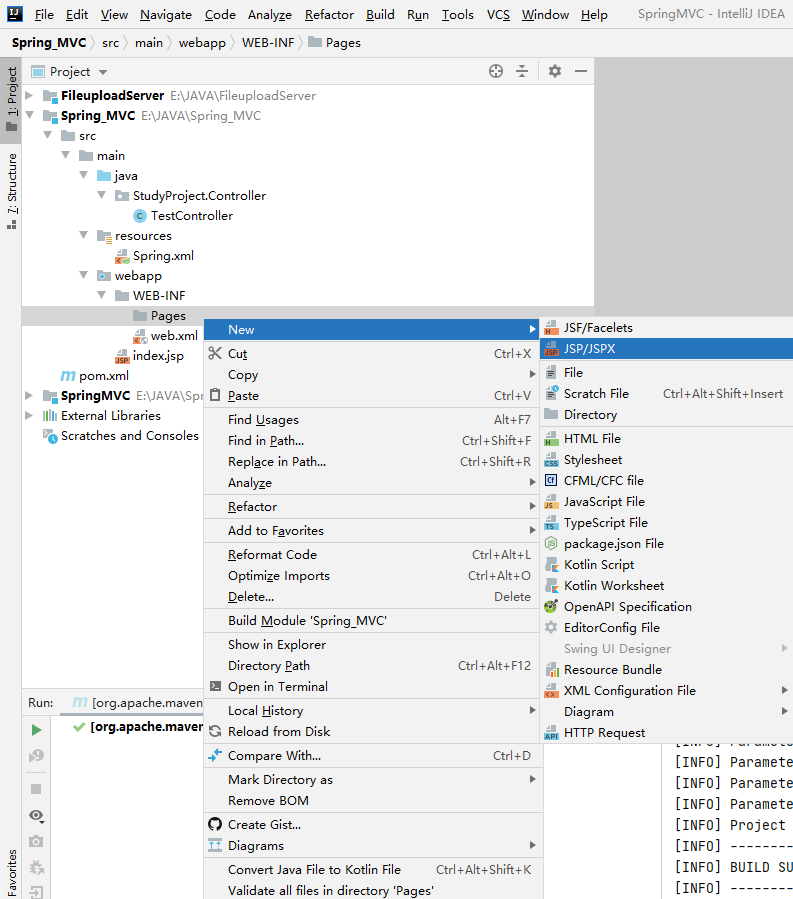
(7)在”WEB-INF”目錄下新建文件夾”Pages”
(8)在“Pages”目錄下新建”success.jsp”
2、整體框架
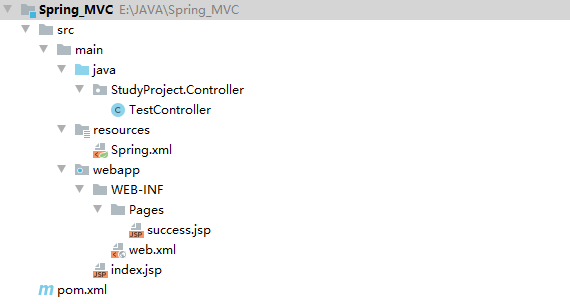
3、TestController類和success.jsp
(1)TestController類
原代碼
1 package StudyProject.Controller;
2
3 public class TestController {
4 }
編寫前端控制器及路徑
修改後
1 package StudyProject.Controller;
2
3 import org.springframework.stereotype.Controller;
4 import org.springframework.web.bind.annotation.RequestMapping;
5
6 @Controller
7 @RequestMapping(path="/testController")
8 public class TestController {
9 }
(2)success.jsp
原代碼
1 <%@ page contentType="text/html;charset=UTF-8" language="java" %>
2 <html>
3 <head>
4     <title>Title</title>
5 </head>
6 <body>
7
8 </body>
9 </html>
添加一個跳轉成功提示
修改後
 1 <%@ page contentType="text/html;charset=UTF-8" language="java" isELIgnored="false" %>
 2 <html>
 3 <head>
 4     <title>Title</title>
 5 </head>
 6 <body>
 7
 8     <h3>跳轉成功</h3>
 9
10 </body>
11 </html>
4、配置文件
(1)pom.xml
原代碼
1   <properties>
2     <project.build.sourceEncoding>UTF-8</project.build.sourceEncoding>
3     <maven.compiler.source>1.7</maven.compiler.source>
4     <maven.compiler.target>1.7</maven.compiler.target>
5   </properties>
修改版本,並且加上spring.version
修改後
1   <properties>
2     <project.build.sourceEncoding>UTF-8</project.build.sourceEncoding>
3     <maven.compiler.source>14.0.1</maven.compiler.source>
4     <maven.compiler.target>14.0.1</maven.compiler.target>
5     <spring.version>5.0.2.RELEASE</spring.version>
6   </properties>
原代碼
1   <dependencies>
2     <dependency>
3       <groupId>junit</groupId>
4       <artifactId>junit</artifactId>
5       <version>4.11</version>
6       <scope>test</scope>
7     </dependency>
8   </dependencies>
在<dependencies></dependency>裡加入坐標依賴,原有的可以刪去
修改後
 1   <!-- 導入坐標依賴 -->
 2   <dependencies>
 3     <dependency>
 4       <groupId>org.springframework</groupId>
 5       <artifactId>spring-context</artifactId>
 6       <version>${spring.version}</version>
 7     </dependency>
 8     <dependency>
 9       <groupId>org.springframework</groupId>
10       <artifactId>spring-web</artifactId>
11       <version>${spring.version}</version>
12     </dependency>
13     <dependency>
14       <groupId>org.springframework</groupId>
15       <artifactId>spring-webmvc</artifactId>
16       <version>${spring.version}</version>
17     </dependency>
18     <dependency>
19       <groupId>javax.servlet</groupId>
20       <artifactId>servlet-api</artifactId>
21       <version>2.5</version>
22       <scope>provided</scope>
23     </dependency>
24     <dependency>
25       <groupId>javax.servlet.jsp</groupId>
26       <artifactId>jsp-api</artifactId>
27       <version>2.0</version>
28       <scope>provided</scope>
29     </dependency>
30   </dependencies>
(2)web.xml
原代碼
1 <!DOCTYPE web-app PUBLIC
2  "-//Sun Microsystems, Inc.//DTD Web Application 2.3//EN"
3  "http://java.sun.com/dtd/web-app_2_3.dtd" >
4
5 <web-app>
6   <display-name>Archetype Created Web Application</display-name>
7 </web-app>
配置前段控制器與解決中文亂碼的過濾器
修改後
 1 <!DOCTYPE web-app PUBLIC
 2  "-//Sun Microsystems, Inc.//DTD Web Application 2.3//EN"
 3  "http://java.sun.com/dtd/web-app_2_3.dtd" >
 4
 5 <web-app>
 6   <display-name>Archetype Created Web Application</display-name>
 7
 8   <!--配置解決中文亂碼的過濾器-->
 9   <filter>
10     <filter-name>characterEncodingFilter</filter-name>
11     <filter-class>org.springframework.web.filter.CharacterEncodingFilter</filter-class>
12     <init-param>
13       <param-name>encoding</param-name>
14       <param-value>UTF-8</param-value>
15     </init-param>
16   </filter>
17   <filter-mapping>
18   <filter-name>characterEncodingFilter</filter-name>
19   <url-pattern>/*</url-pattern>
20   </filter-mapping>
21
22   <!-- 配置前端控制器 -->
23   <servlet>
24     <servlet-name>dispatcherServlet</servlet-name>
25     <!-- 創建前端控制器DispatcherServlet對象 -->
26     <servlet-class>org.springframework.web.servlet.DispatcherServlet</servlet-class>
27     <!-- 使前端控制器初始化時讀取Spring.xml文件創建Spring核心容器 -->
28     <init-param>
29       <param-name>contextConfigLocation</param-name>
30       <param-value>classpath*:Spring.xml</param-value>
31     </init-param>
32     <!-- 設置該Servlet的優先順序別為最高,使之最早創建(在應用啟動時就載入並初始化這個servlet -->
33     <load-on-startup>1</load-on-startup>
34   </servlet>
35   <servlet-mapping>
36     <servlet-name>dispatcherServlet</servlet-name>
37     <url-pattern>/</url-pattern>
38   </servlet-mapping>
39
40 </web-app>
(3)Spring.xml
原代碼
1 <?xml version="1.0" encoding="UTF-8"?>
2 <beans xmlns="http://www.springframework.org/schema/beans"
3        xmlns:xsi="http://www.w3.org/2001/XMLSchema-instance"
4        xsi:schemaLocation="http://www.springframework.org/schema/beans http://www.springframework.org/schema/beans/spring-beans.xsd">
5
6 </beans>
配置spring創建容器時掃描的包、視圖解析器、開啟spring註解支持等
修改後
 1 <?xml version="1.0" encoding="UTF-8"?>
 2 <beans xmlns="http://www.springframework.org/schema/beans"
 3        xmlns:mvc="http://www.springframework.org/schema/mvc"
 4        xmlns:context="http://www.springframework.org/schema/context"
 5        xmlns:xsi="http://www.w3.org/2001/XMLSchema-instance"
 6        xsi:schemaLocation="
 7         http://www.springframework.org/schema/beans
 8         http://www.springframework.org/schema/beans/spring-beans.xsd
 9         http://www.springframework.org/schema/mvc
10         http://www.springframework.org/schema/mvc/spring-mvc.xsd
11         http://www.springframework.org/schema/context
12         http://www.springframework.org/schema/context/spring-context.xsd">
13
14     <!-- 配置spring創建容器時掃描的包 -->
15     <context:component-scan base-package="StudyProject.Controller"></context:component-scan>
16
17     <!-- 配置視圖解析器,用於解析項目跳轉到的文件的位置 -->
18     <bean id="viewResolver" class="org.springframework.web.servlet.view.InternalResourceViewResolver">
19         <!-- 尋找包的路徑 -->
20         <property name="prefix" value="/WEB-INF/pages/"></property>
21         <!-- 尋找文件的尾碼名 -->
22         <property name="suffix" value=".jsp"></property>
23     </bean>
24
25     <!-- 配置spring開啟註解mvc的支持 -->
26     <mvc:annotation-driven></mvc:annotation-driven>
27 </beans>
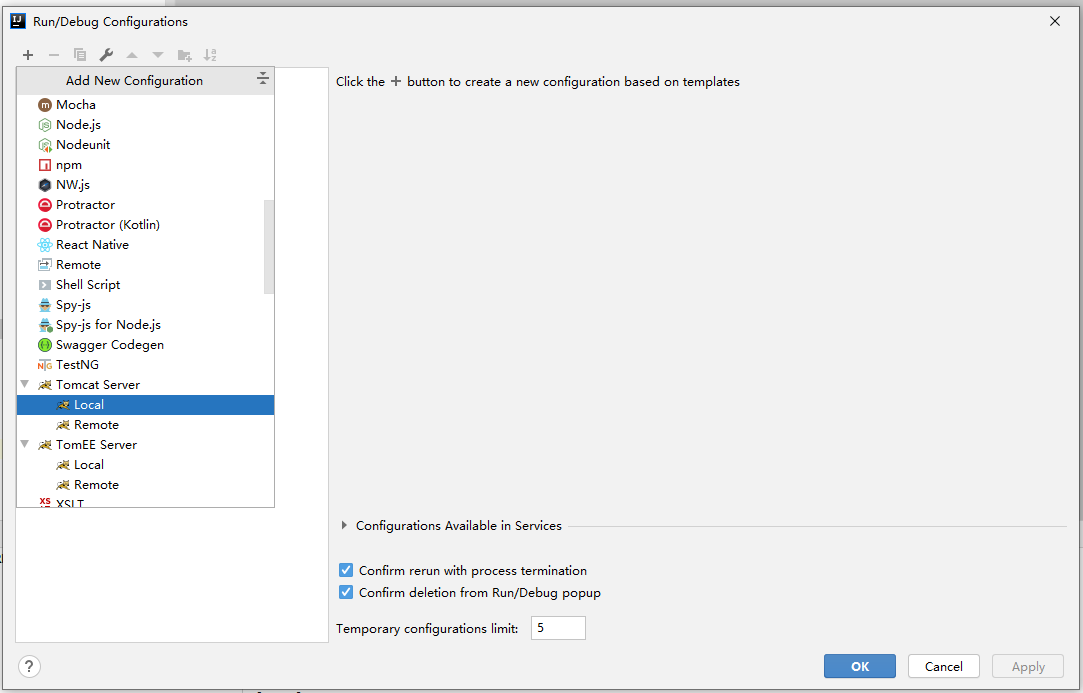
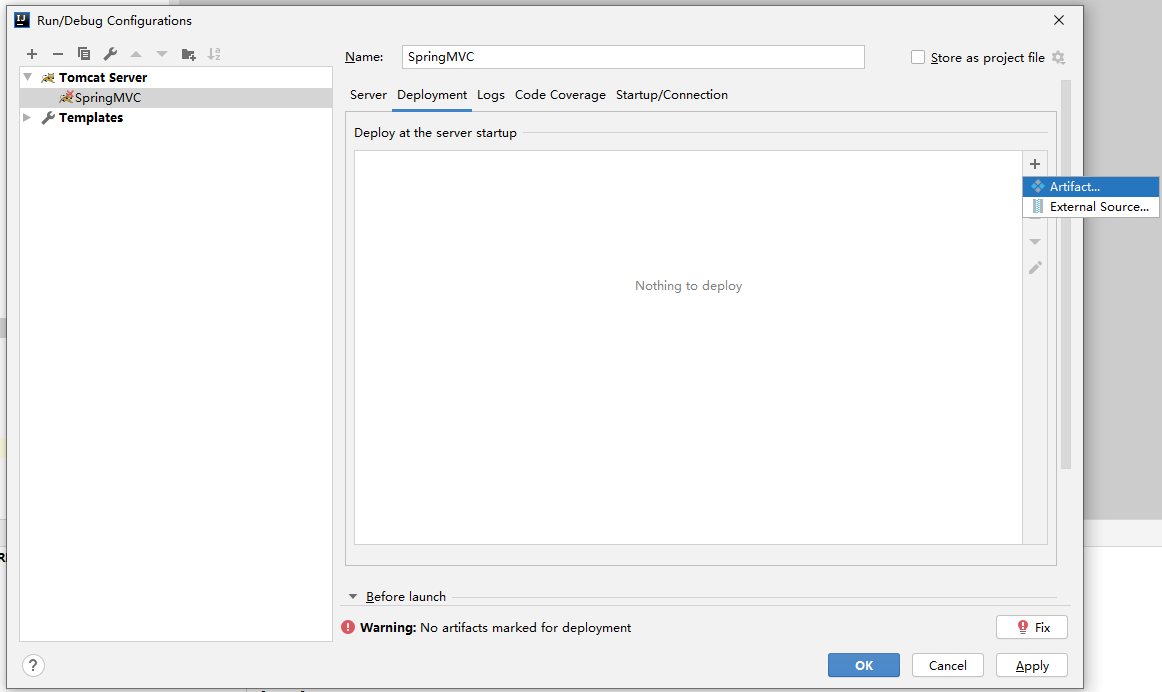
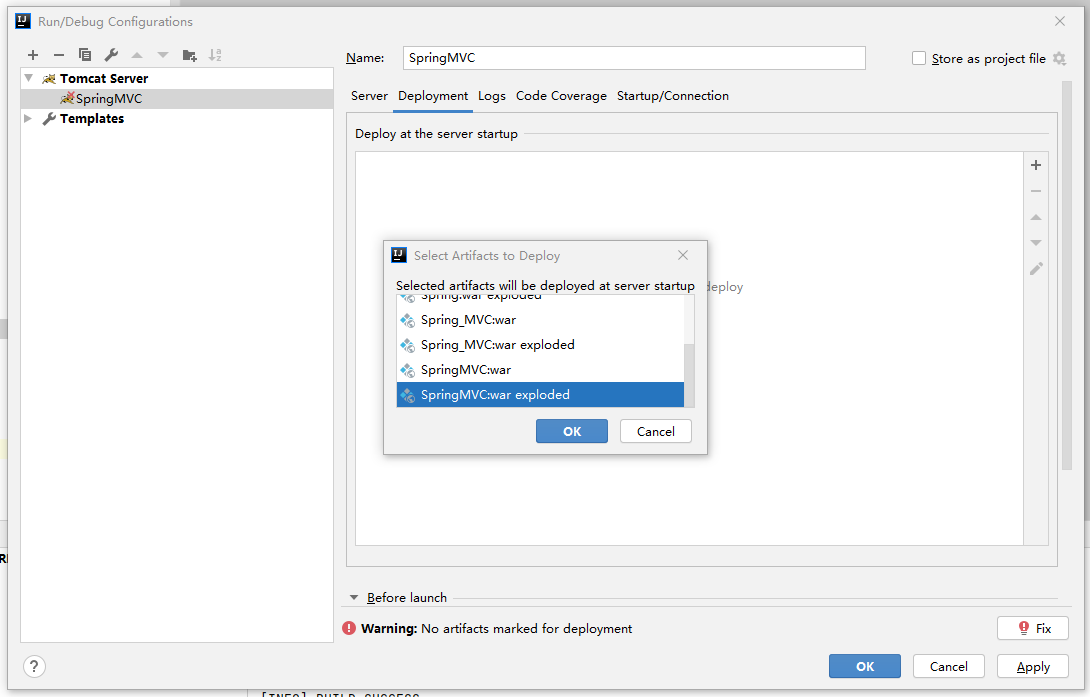
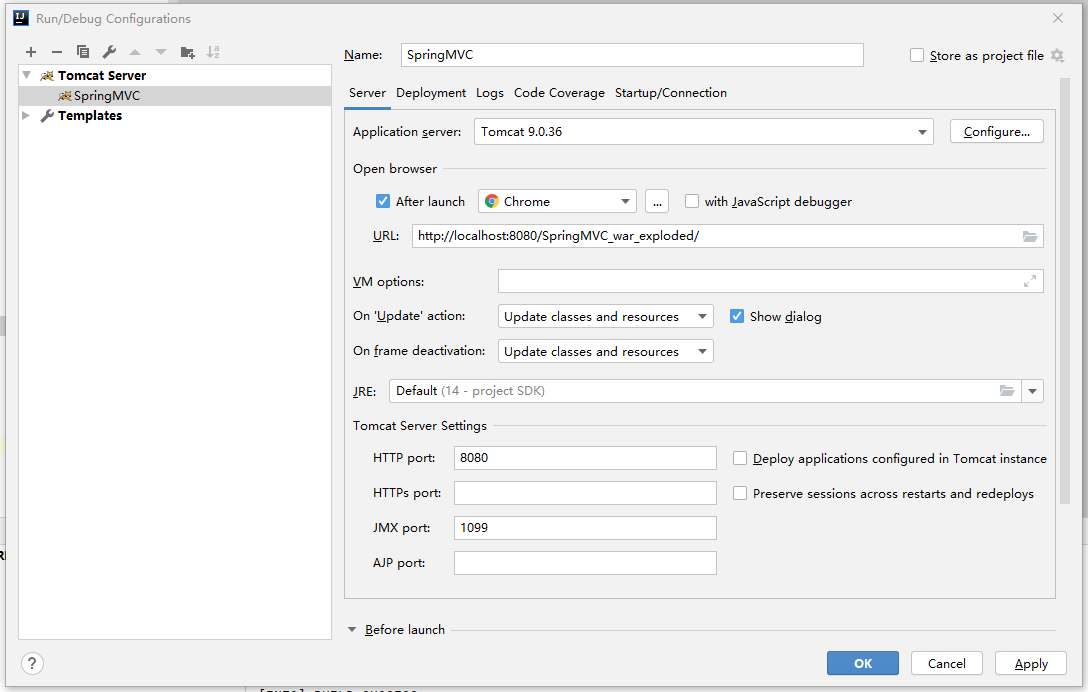
5、Tomcat伺服器(本地已建SpringMVC項目,Spring_MVC項目僅做示範)
點擊”Add Configurations”配置Tomcat伺服器

二、文件上傳
1、傳統方式上傳文件
(1)TestController類
在控制器內部新增"testMethod_Traditional"方法
 1 @Controller
 2 @RequestMapping(path="/testController")
 3 public class TestController {
 4
 5     @RequestMapping(path="/testMethod_Traditional")
 6     public String testMethod_Traditional(HttpServletRequest request) throws Exception {
 7         System.out.println("執行了testMethod_Traditional方法");
 8
 9         //獲取文件上傳目錄
10         String path = request.getSession().getServletContext().getRealPath("/uploads");
11         //創建file對象
12         File file = new File(path);
13         //判斷路徑是否存在,若不存在,創建該路徑
14         if (!file.exists()) {
15             file.mkdir();
16         }
17
18         //創建磁碟文件項工廠
19         DiskFileItemFactory factory = new DiskFileItemFactory();
20         ServletFileUpload fileUpload = new ServletFileUpload(factory);
21         //解析request對象
22         List<FileItem> list = fileUpload.parseRequest(request);
23         //遍歷
24         for (FileItem fileItem:list) {
25             // 判斷文件項是普通欄位,還是上傳的文件
26             if (fileItem.isFormField()) {
27                 //普通欄位
28             } else {
29                 //上傳文件項
30                 //獲取上傳文件項的名稱
31                 String filename = fileItem.getName();
32                 String uuid = UUID.randomUUID().toString().replaceAll("-","").toUpperCase();
33                 filename = uuid+"_"+filename;
34                 //上傳文件
35                 fileItem.write(new File(file,filename));
36                 //刪除臨時文件
37                 fileItem.delete();
38             }
39         }
40
41         System.out.println("上傳路徑:"+path);
42         System.out.println("上傳成功");
43         return "success";
44     }
45
46 }
(2)index.jsp
添加form表單
1     <form action="testController/testMethod_Traditional" method="post" enctype="multipart/form-data">
2         圖片 <input type="file" name="uploadfile_Traditional"> <br>
3         <input type="submit" value="傳統方式上傳文件">
4     </form>
(3)結果演示
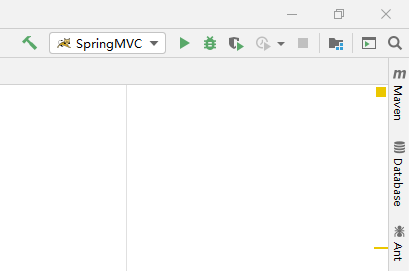
點擊伺服器"SpringMVC"右側的運行按鈕
選擇文件然後進行上傳

點擊上傳按鈕後,執行成功,跳到"success.jsp"界面顯示跳轉成功

在IDEA輸出台查看文件路徑

按照路徑查看文件是否上傳成功

2、SpringMVC方式上傳文件
(1)pom.xml添加文件上傳坐標依賴
在pom.xml文件<dependencies></dependencies>內添加文件上傳坐標依賴
 1     <!-- 文件上傳 -->
 2     <dependency>
 3       <groupId>commons-fileupload</groupId>
 4       <artifactId>commons-fileupload</artifactId>
 5       <version>1.3.1</version>
 6     </dependency>
 7     <dependency>
 8       <groupId>commons-io</groupId>
 9       <artifactId>commons-io</artifactId>
10       <version>2.4</version>
11     </dependency>
(2)Spring.xml配置文件解析器對象
在Spring.xml文件<beans></beans>內配置文件解析器對象
1     <!-- 配置文件解析器對象 -->
2     <bean id="multipartResolver"
3           class="org.springframework.web.multipart.commons.CommonsMultipartResolver">
4         <property name="defaultEncoding" value="utf-8"></property>
5         <property name="maxUploadSize" value="10485760"></property>
6     </bean>
(3)TestController類
在控制器內部新增"testMethod_SpringMVC"方法
 1 @Controller
 2 @RequestMapping(path="/testController")
 3 public class TestController {
 4
 5     @RequestMapping(path="/testMethod_SpringMVC")
 6     public String testMethod_SpringMVC(HttpServletRequest request,MultipartFile uploadfile_SpringMVC) throws Exception {
 7         System.out.println("執行了testMethod_SpringMVC方法");
 8
 9         //獲取文件上傳目錄
10         String path = request.getSession().getServletContext().getRealPath("/uploads");
11         //創建file對象
12         File file = new File(path);
13         //判斷路徑是否存在,若不存在,創建該路徑
14         if (!file.exists()) {
15             file.mkdir();
16         }
17
18         //獲取到上傳文件的名稱
19         String filename = uploadfile_SpringMVC.getOriginalFilename();
20         String uuid = UUID.randomUUID().toString().replaceAll("-","").toUpperCase();
21         filename = uuid+"_"+filename;
22         //上傳文件
23         uploadfile_SpringMVC.transferTo(new File(file,filename));
24
25         System.out.println("上傳路徑:"+path);
26         System.out.println("上傳成功");
27         return "success";
28     }
29
30 }
(4)index.jsp
添加form表單
1     <form action="testController/testMethod_SpringMVC" method="post" enctype="multipart/form-data">
2         圖片 <input type="file" name="uploadfile_SpringMVC"> <br>
3         <input type="submit" value="SpringMVC上傳文件">
4     </form>
(5)結果演示
點擊伺服器"SpringMVC"右側的運行按鈕

選擇文件然後進行上傳

點擊上傳按鈕後,執行成功,跳到"success.jsp"界面顯示跳轉成功

在IDEA輸出台查看文件路徑
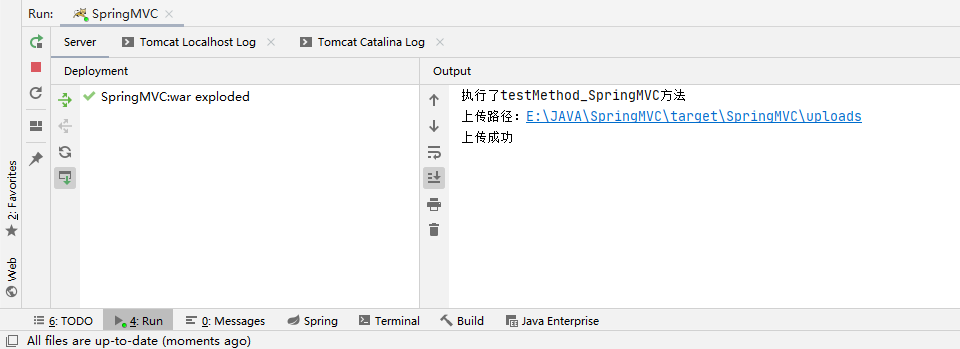
按照路徑查看文件是否上傳成功
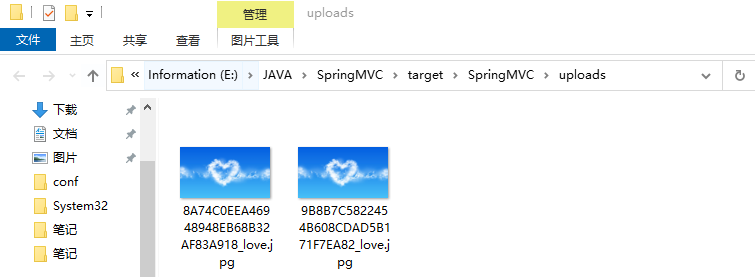
3、跨伺服器上傳文件
(1)新建”FileuploadServer”項目(過程不再演示)
不需要建立”java””resources”等文件夾,只需要”index.jsp”顯示界面即可

“index.jsp”代碼
1 <html>
2 <body>
3 <h2>Hello! FileuploadServer</h2>
4 </body>
5 </html>
(2)配置伺服器
點擊”Edit Configurations”配置Tomcat伺服器
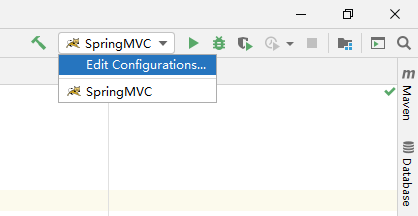
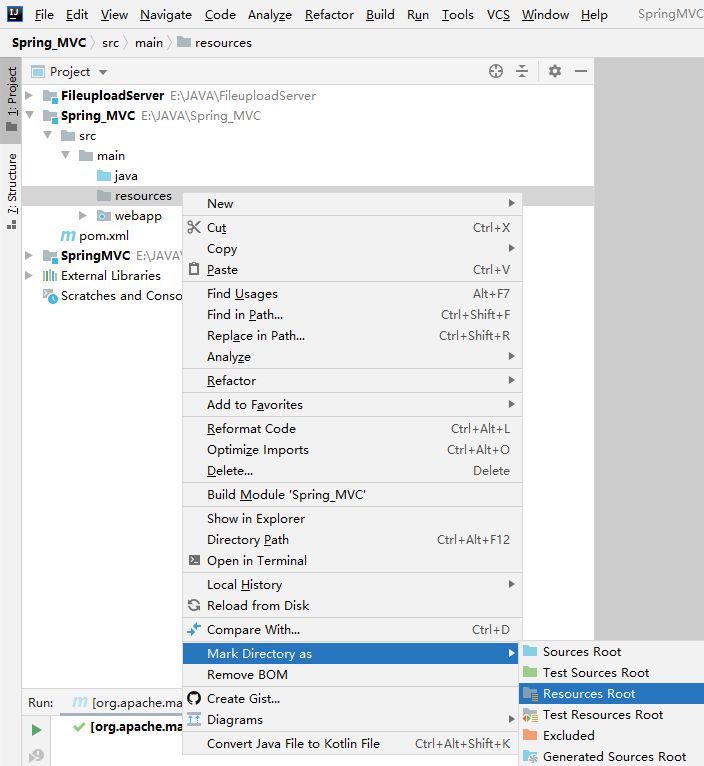
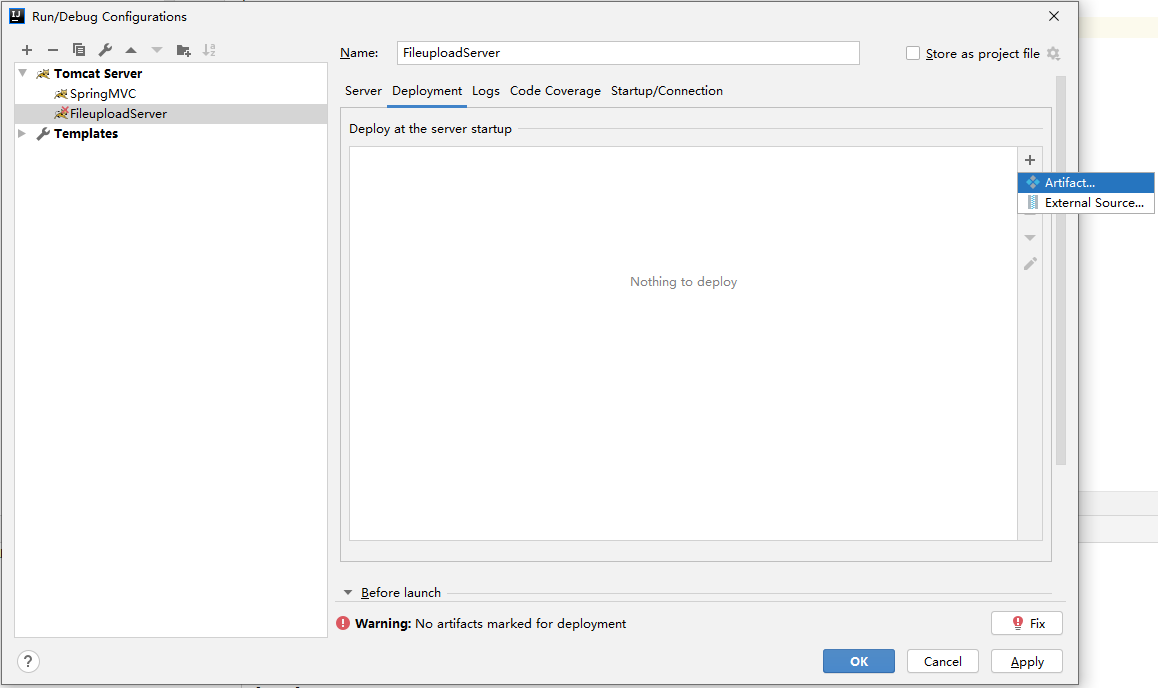
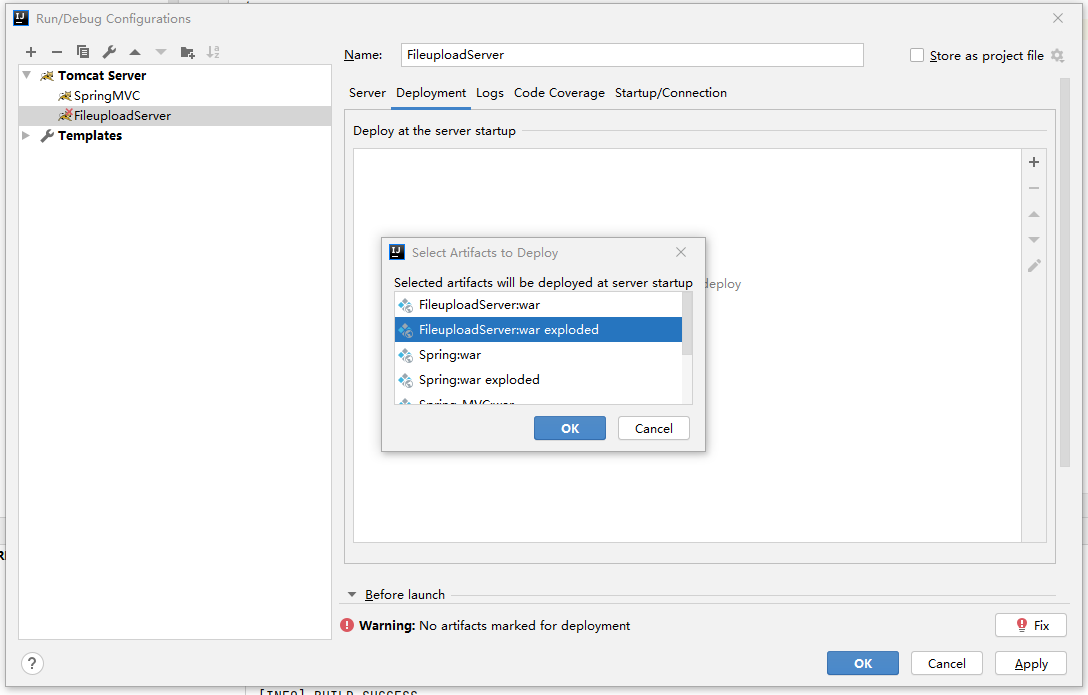
為與”SpringMVC”伺服器區分,修改”HTTP port”為”9090”,修改”JMX port”為”1090”
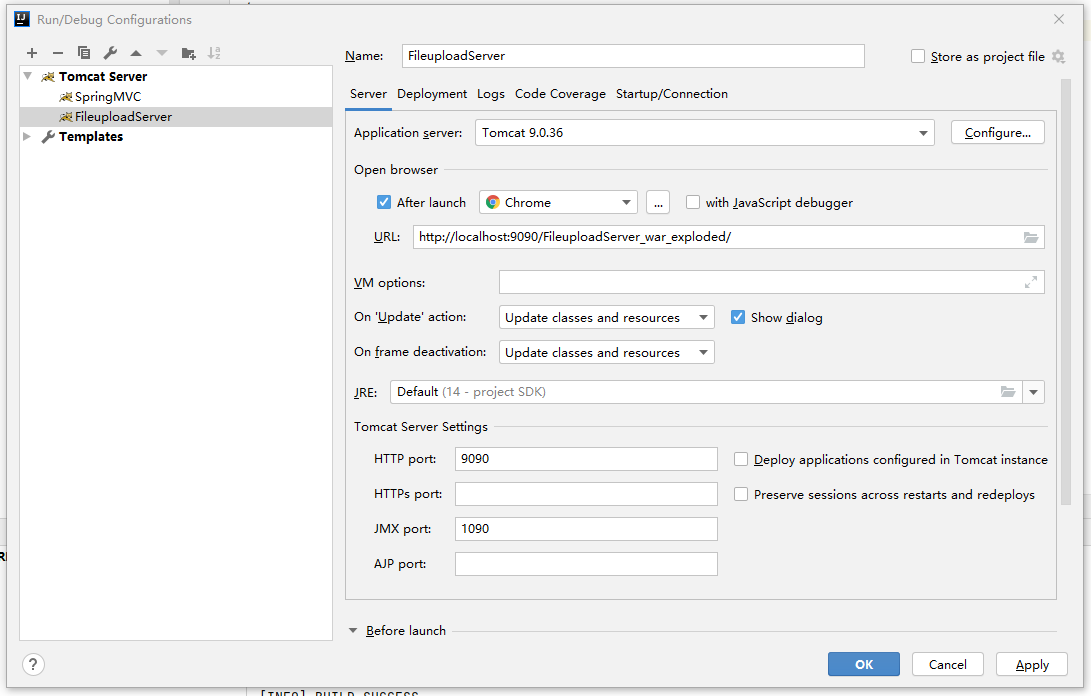
(3)pom.xml添加跨伺服器文件上傳坐標依賴
 1     <!-- 跨伺服器文件上傳 -->
 2     <dependency>
 3       <groupId>com.sun.jersey</groupId>
 4       <artifactId>jersey-core</artifactId>
 5       <version>1.18.1</version>
 6     </dependency>
 7     <dependency>
 8       <groupId>com.sun.jersey</groupId>
 9       <artifactId>jersey-client</artifactId>
10       <version>1.18.1</version>
11     </dependency>
(4)TestController類
在控制器內部新增"testMethod_AcrossServer"方法
 1 @Controller
 2 @RequestMapping(path="/testController")
 3 public class TestController {
 4
 5     @RequestMapping(path="/testMethod_AcrossServer")
 6     public String testMethod_AcrossServer(MultipartFile uploadfile_AcrossServer) throws Exception {
 7         System.out.println("執行了testMethod_AcrossServer方法");
 8
 9         //定義上傳文件伺服器路徑
10         String path = "http://localhost:9090/FileuploadServer_war_exploded/uploads/";
11
12         //獲取到上傳文件的名稱
13         String filename = uploadfile_AcrossServer.getOriginalFilename();
14         String uuid = UUID.randomUUID().toString().replaceAll("-","").toUpperCase();
15         filename = uuid+"_"+filename;
16
17         //創建客戶端對象
18         Client client = Client.create();
19         //連接圖片伺服器
20         WebResource webResourcer = client.resource(path+filename);
21         //向圖片伺服器上傳文件
22         webResourcer.put(uploadfile_AcrossServer.getBytes());
23
24         System.out.println("上傳路徑:"+path);
25         System.out.println("上傳成功");
26         return "success";
27     }
28
29 }
(5)index.jsp
添加form表單
1     <form action="testController/testMethod_AcrossServer" method="post" enctype="multipart/form-data">
2         圖片 <input type="file" name="uploadfile_AcrossServer"> <br>
3         <input type="submit" value="跨伺服器上傳文件">
4     </form>
(6)結果演示
運行"FileuploadServer"伺服器


運行"SpringMVC"伺服器


<


