
HTML+CSS+JS模仿win10亮度調節效果 代碼 <!doctype html> <html> <head> <meta charset="utf-8"> <title>模仿win10的亮度調節</title> <style> .control_bar{ height:200px; width ...
HTML+CSS+JS模仿win10亮度調節效果
代碼
<!doctype html>
<html>
	<head>
		<meta charset="utf-8">
		<title>模仿win10的亮度調節</title>
		<style>
			.control_bar{
				height:200px;
				width:500px;
				border-bottom:3px solid #888888;

			}
			.control_bar_cursor{
				height:25px;
				width:8px;
				background: #505151;
				border-radius:5px;
				margin-top:-12.5px;
				position:relative;
				top:0;
				left:0;
			}
			.control_bar_cursor:hover{
				background:white;
			}
			#control_bar_mask{
				margin-top:-203px;
				width:0px;
			}
			.mask{
				position:fixed;
				bottom:0;
				top:0;
				left:0;
				right:0;
				background:black;
				z-index:-1;
			}
		</style>
	</head>
	<body>
		<div class="mask"></div>
		<div class="control_bar"></div>
		<div class="control_bar" style="border-bottom:3px solid #505151;" id="control_bar_mask"></div>
		<div class="control_bar_cursor"></div>
	</body>
	<script>
		window.onload = function(){
			var control_bar = document.getElementsByClassName("control_bar")[0];
			var control_bar_mask = document.getElementById("control_bar_mask");
			var control_bar_cursor = document.getElementsByClassName("control_bar_cursor")[0];
			var def_left = control_bar_cursor.offsetLeft;
			var mask = document.getElementsByClassName("mask")[0];
			document.body.onmousedown = function(){
				window.onmousemove = function(){
					var cursor_X = event.clientX;
					var cursor_Y = event.clientY;
					if(cursor_X < def_left){
						control_bar_cursor.style.left = 0;
					}else if(cursor_X > control_bar.offsetWidth + def_left){
						control_bar_cursor.style.left = control_bar.offsetWidth;
					}else{
						control_bar_cursor.style.left = cursor_X - def_left + "px";
					}
					//亮度比
					var proportion = parseInt(control_bar_cursor.offsetLeft - def_left) / parseInt(control_bar.offsetWidth - 1);
					control_bar_mask.style.width = proportion * control_bar.offsetWidth + "px";
					mask.style.opacity = 1 - proportion;
					};
				window.onmouseup = function(){
					window.onmousemove = null;
				};
			};
		};
	</script>
</html>
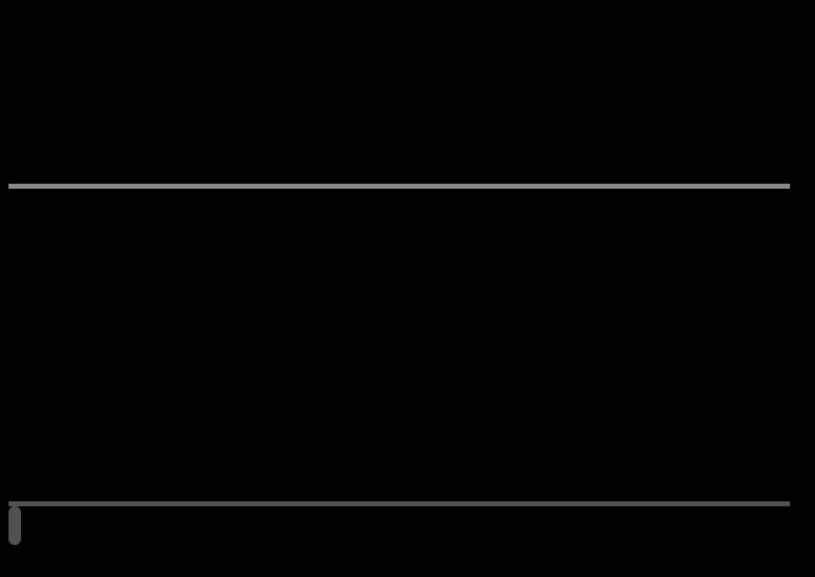
1.將各個元素的樣子寫出來
這裡為了方便好觀察給body添加了一個背景顏色
-
html
<div class="control_bar"></div> <div class="control_bar" style="border-bottom:3px solid #505151;" id="control_bar_mask></div> <div class="control_bar_cursor"></div> -
css
body{ background:back; } .control_bar{ height:200px; width:500px; border-bottom:3px solid #888888; } .control_bar_cursor{ height:25px; width:8px; background: #505151; border-radius:5px; } -
效果圖
2. 將各個元素疊到一起
-
css
body{
    background:black;
}
.control_bar{
    height:200px;
    width:500px;
    border-bottom:3px solid #888888;

}
.control_bar_cursor{
    height:25px;
    width:8px;
    background: #505151;
    border-radius:5px;
    margin-top:-12.5px;
    position:relative;
    top:0;
    left:0;
}
.control_bar_cursor:hover{
    background:white;
}
#control_bar_mask{
    margin-top:-203px;
    width:100px;
}
這裡為了顯示遮罩效果把遮罩層的div寬度設小了

3. 添加js
-
js
window.onload = function(){
    var control_bar = document.getElementsByClassName("control_bar")[0];
    var control_bar_mask = document.getElementById("control_bar_mask");
    var control_bar_cursor = document.getElementsByClassName("control_bar_cursor")[0];
    var def_left = control_bar_cursor.offsetLeft;
    document.body.onmousedown = function(){
        window.onmousemove = function(){
            var cursor_X = event.clientX;
            var cursor_Y = event.clientY;
            if(cursor_X < def_left){
                control_bar_cursor.style.left = 0;
            }else if(cursor_X > control_bar.offsetWidth + def_left){
                control_bar_cursor.style.left = control_bar.offsetWidth;
            }else{
                control_bar_cursor.style.left = cursor_X - def_left + "px";
            }
            var proportion = parseInt(control_bar_cursor.offsetLeft - def_left) / parseInt(control_bar.offsetWidth - 1);
            control_bar_mask.style.width = proportion * control_bar.offsetWidth + "px";
        };
        window.onmouseup = function(){
            window.onmousemove = null;
        };
    };
};
4. 添加一個mask用控制條來控制其透明度達到亮度調節效果
<div class="mask"></div>.mask{ position:fixed; bottom:0; top:0; left:0; right:0; background:black; z-index:-1; }window.onload = function(){ var control_bar = document.getElementsByClassName("control_bar")[0]; var control_bar_mask = document.getElementById("control_bar_mask"); var control_bar_cursor = document.getElementsByClassName("control_bar_cursor")[0]; var def_left = control_bar_cursor.offsetLeft; var mask = document.getElementsByClassName("mask")[0]; document.body.onmousedown = function(){ window.onmousemove = function(){ var cursor_X = event.clientX; var cursor_Y = event.clientY; if(cursor_X < def_left){ control_bar_cursor.style.left = 0; }else if(cursor_X > control_bar.offsetWidth + def_left){ control_bar_cursor.style.left = control_bar.offsetWidth; }else{ control_bar_cursor.style.left = cursor_X - def_left + "px"; } //亮度比 var proportion = parseInt(control_bar_cursor.offsetLeft - def_left) / parseInt(control_bar.offsetWidth - 1); control_bar_mask.style.width = proportion * control_bar.offsetWidth + "px"; mask.style.opacity = 1 - proportion; }; window.onmouseup = function(){ window.onmousemove = null; }; }; };


