一、LNMP搭建,基於nginx伺服器搭建wordpress個人博客 準備環境:centos7.6環境下web伺服器(nginx+php):主機名:web01,ip:192.168.248.172mysql伺服器(mariadb):主機名:db01,ip:192.168.248.177 關閉seli ...
一、LNMP搭建,基於nginx伺服器搭建wordpress個人博客
準備環境:
centos7.6環境下
web伺服器(nginx+php):主機名:web01,ip:192.168.248.172
mysql伺服器(mariadb):主機名:db01,ip:192.168.248.177
關閉selinux安全插件
關閉防火牆
----------------------------------------------------------------------------------------------------------------------------------------------------------
web01伺服器上:
1.安裝nginx,安裝能夠解析php文件的相關軟體包
註意:這裡nginx預設是靜態伺服器,要想處理php動態文件必須要安裝php相關的軟體。
安裝nginx需要先配置nginx的yum倉庫,配置方法在nginx.org官網查看到:
http://nginx.org/en/linux_packages.html#RHEL-CentOS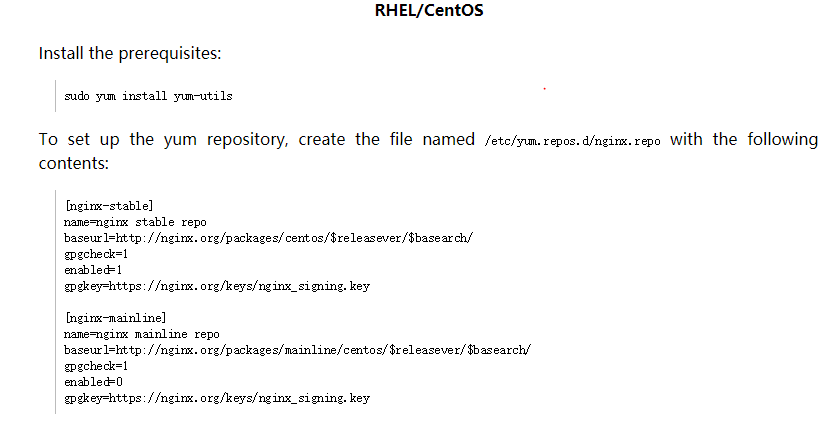
按照以上方法,搭建一個穩定版的nginx的yum源,:
[root@web01 html]# cat /etc/yum.repos.d/nginx-stable.repo
[nginx-stable]
name = Add a nginx_stable repository                                        #只是描述,不重要
baseurl = http://nginx.org/packages/centos/$releasever/$basearch/          #聯網情況下,下載
gpgcheck = 1                                                                 #是否開啟檢查,0關閉
gpgkey = https://nginx.org/keys/nginx_signing.key                           #基於此地址檢查
搭建好yum倉庫後
1 [root@web01 html]# yum install nginx -y                #開始安裝
2 [root@web01 html]# systemctl start  nginx
3 [root@web01 html]# systemctl enable nginx            #把nginx執行為開機自啟動
4 [root@web01 html]# systemctl status nginx            #檢查nginx狀態
web01伺服器上:
#執行yum install安裝以下軟體包,我用的是阿裡雲的base源和epel源
#檢查軟體包安裝情況
[root@web01 html]# rpm -qa |grep php        #列出相關的php軟體包
php-common-5.4.16-46.el7.x86_64
php-fpm-5.4.16-46.el7.x86_64
php-mysql-5.4.16-46.el7.x86_64
php-pdo-5.4.16-46.el7.x86_64
[root@web01 html]# systemctl start php-fpm
#這裡可以選擇啟動php-fpm服務,這個服務是幫助nginx解析動態php文件的。
-----------------------------------------------------------------------------------------------------------------------------------------
db01伺服器上:
#安裝mysql服務,註意:centos7里mysql服務的軟體包名為mariadb,而非mysql
#安裝以下軟體包
[root@db01 ~]# rpm -qa |grep mariadb
mariadb-libs-5.5.60-1.el7_5.x86_64
mariadb-5.5.60-1.el7_5.x86_64
mariadb-server-5.5.60-1.el7_5.x86_64

[root@db01 ~]# systemctl start mariadb.service    #啟動mariadb服務
[root@db01 ~]# systemctl enable mariadb.service
[root@db01 ~]# systemctl status mariadb.service
2.配置nginx+php+mysql,(wordpress博客的搭建),如果出現404錯誤可參考對照下麵代碼改進
[root@web01 html]# cat /etc/nginx/nginx.conf
    ...
 include /etc/nginx/conf.d/*.conf;

[root@web01 html]# cat /etc/nginx/conf.d/web.test.com.conf   #主配置文件包含了以.conf結尾的文件
server {
    listen 80;                                               #nginx服務被監聽在的埠,可修改
    server_name www.dark.com;                                #定義的功能變數名稱,windows使用功能變數名稱訪問時要在windows下hosts定義
    access_log /var/log/nginx/dark.com.log tt;               #定義的日誌格式,tt為定義的日誌格式變數
                                                  #以下才是重點
    location / {
        root /usr/share/nginx/html;                         #這裡定義預設的/目錄為/usr/share/nginx/html,即php文件所在的目錄
        index index.html index.php;                         #設置預設的訪問頁面,註意:index.php不能少
    }

                                                           #以下的php動態的編寫格式在default.conf文件里有例句格式

    location ~ \.php$ {                                    #匹配以php結尾的文件
        root        html;
        fastcgi_pass   127.0.0.1:9000;                     #匹配到的php文件讓php-fpm服務幫忙解析,檢查進程埠是否開啟
        fastcgi_index  index.php;
        fastcgi_param  SCRIPT_FILENAME  /usr/share/nginx/html$fastcgi_script_name; #指定了存放php文件的位置,也可以在root那行定義
        include        fastcgi_params;
    }
}

[root@web01 html]# nginx -t                                    #檢查nginx配置文件語法是否有誤
[root@web01 html]# systemctl restart nginx
3.準備好wordpress壓縮包,網上自行下載,註意:wordpress5.2以上版本要求的php版本為5.6以上的。
[root@web01 html]# pwd
/usr/share/nginx/html
[root@web01 html]# unzip wordpress5.0.zip
#解壓wordpress壓縮包至 /usr/share/nginx/html下,即前面nginx配置文件定義的路徑,註意:解壓後要有index.php文件,而不是wordpress5.0目錄。
[root@web01 html]# ll #這裡搭建的是php網站,最好把解壓之前已經存在的無關的html,php和其他文件都註釋了
-----------------------------------------------------------------------------------------------------------------------------------------
#註意:瀏覽器有一定時間的緩存,如果頁面打不開或與配置的不一致也很有可能是緩存的原因,
這時候可在命令行配合curl 命令來檢查。
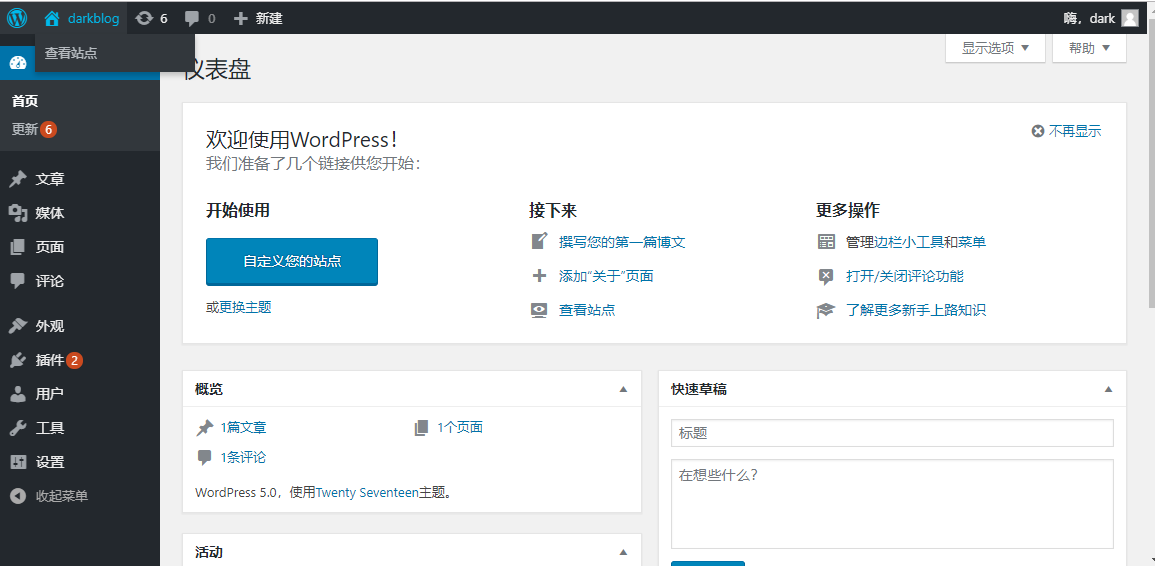
#完成上述步驟後,就可以通過瀏覽器開始wordpress初始化安裝了
初始頁:http://192.168.248.172/index.php 例如:http://ip/index.php
初始化時要求輸入:
資料庫名稱為wordpress
資料庫用戶名為wordpress
資料庫密碼為123
表首碼wp_
#完成上面頁面的輸入信息後,會提示只能手動輸入,則
[root@web01 html]# vim wp-config.php #把框中的信息複製到 wp-config.php里
#信息輸入完成完成
----------------------------------------------------------------------------------------------------------------------------------------
#db01上創建資料庫,用戶和密碼要與web頁面輸入的對應一致:
[root@db01 ~]# mysql           #進入mysql,執行以下幾行

create database wordpress;       #創建wordpress表
grant all privileges on wordpress.* to wordpress@'localhost' identified by '123';        #創建用戶名和密碼,即初始化添加的用戶密碼
grant all privileges on wordpress.* to    wordpress@'192.168.248.%' identified by '123';    #允許此網段內使用此用戶名密碼登錄資料庫

[root@web01 html]# mysql -uwordpress -p123 -h192.168.248.177        #在web01上驗證是否能遠程登錄資料庫

重啟所有服務
[root@web01 html]# systemctl restart nginx
[root@web01 html]# systemctl restart php-fpm
[root@web01 html]# ss -lntup |grep 9000
[root@db01 ~]# systemctl restart mariadb.service
###############博客文章為原創,僅供參考學習使用########################
--------------------------------------------------------------------------------------------------------------------------------------------
大功告成,搭建完成