Spring Security(三) 個性化用戶認證流程 自定義登錄頁面 在配置類中指定登錄頁面和接收登錄的 url 在項目中新建登錄頁面 啟動項目時再訪問 Security 就會跳轉到你自已定義的登陸頁面讓你登錄。 深入定義(判斷是PC端還是移動端,PC端跳轉頁面,移動端響應 json) 創建一個 ...
Spring Security(三)
個性化用戶認證流程
自定義登錄頁面
在配置類中指定登錄頁面和接收登錄的 url
@Configuration
public class BrowserSecurityConfig extends WebSecurityConfigurerAdapter {

    @Bean
    public PasswordEncoder passwordEncoder() {
        return new MyPasswordEncoder();
    }

    @Override
    protected void configure(HttpSecurity http) throws Exception {
        // 啟用表單登陸
        http.formLogin()
                // 指定登錄頁面
                .loginPage("/imooc-signIn.html")
                // 登錄頁面表單提交的 action
                .loginProcessingUrl("/authentication/form")
                .and()
                // 對請求做授權
                .authorizeRequests()
                // 訪問指定url時不需要身份認證(放行)
                .antMatchers("/imooc-signIn.html").permitAll()
                // 任何請求
                .anyRequest()
                // 都需要身份認證
                .authenticated()
                .and()
                .csrf().disable();
    }
}- 在項目中新建登錄頁面
<!DOCTYPE html>
<html lang="en">
<head>
    <meta charset="UTF-8">
    <title>登錄</title>
</head>
<body>
    <h2>標準登錄頁面</h2>
    <h3>表單登錄</h3>
    <form action="/authentication/form" method="post">
        <table>
            <tr>
                <td>用戶名:</td>
                <td><label>
                    <input type="text" name="username" />
                </label></td>
            </tr>
            <tr>
                <td>密碼:</td>
                <td><label>
                    <input type="password" name="password" />
                </label>
                </td>
            </tr>
            <tr>
                <td colspan="2">
                    <button type="submit">登錄</button>
                </td>
            </tr>
        </table>
    </form>
</body>
</html>
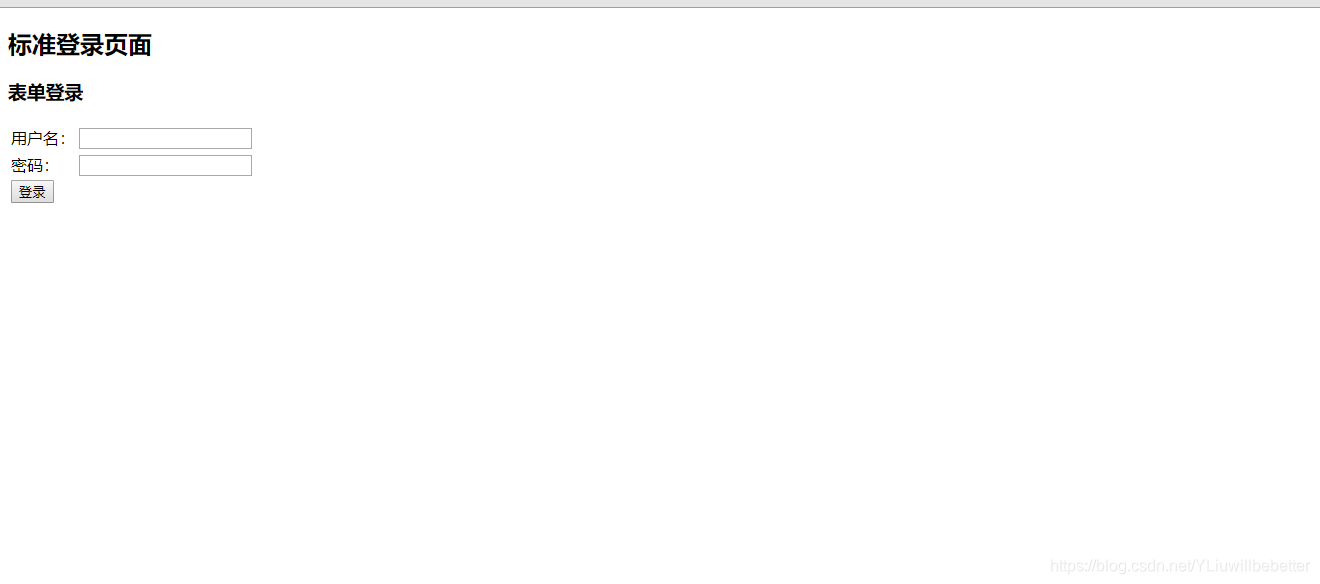
啟動項目時再訪問 Security 就會跳轉到你自已定義的登陸頁面讓你登錄。

- 深入定義(判斷是PC端還是移動端,PC端跳轉頁面,移動端響應 json)
創建一個控制器,用來處理操作
@RestController
public class BrowserSecurityController {

    private static final Logger log = LoggerFactory.getLogger(BrowserSecurityController.class);

    private RequestCache requestCache = new HttpSessionRequestCache();

    private RedirectStrategy redirectStrategy = new DefaultRedirectStrategy();

    /**
     * 當需要身份驗證時跳轉到這裡處理
     */
    @RequestMapping("/authentication/require")
    @ResponseStatus(code = HttpStatus.UNAUTHORIZED)
    public Map<String, String> requireAuthentication(final HttpServletRequest request,
                                                final HttpServletResponse response) throws IOException {
        SavedRequest savedRequest = requestCache.getRequest(request, response);
        if (null != savedRequest) {
            String target = savedRequest.getRedirectUrl();
            log.info("引發跳轉的請求是 ={}", target);
            if (StringUtils.endsWithIgnoreCase(target, ".html")) {
                redirectStrategy.sendRedirect(request, response, "/imooc-signIn.html");
            }
        }
        Map<String, String> map = new HashMap<>();
        map.put("status", "401");
        map.put("msg", "error");
        map.put("content","訪問的服務需要身份認證,請引導用戶到登錄頁!" );
        return map;
    }
}
自定義登錄成功處理
要做自定義登錄成功處理需要實現一下 Security 的 AuthenticationSuccessHandler 介面
/**
 * 自定義登錄成功處理
 */
@Configuration
public class ImoocAuthenticationSuccessHandler implements AuthenticationSuccessHandler {
    private static final Logger log = LoggerFactory.getLogger(ImoocAuthenticationSuccessHandler.class);

    private final ObjectMapper objectMapper;

    @Autowired
    public ImoocAuthenticationSuccessHandler(ObjectMapper objectMapper) {
        this.objectMapper = objectMapper;
    }
    // 參數 Authentication 是Security的核心介面之一,封裝了用戶登錄認證信息
    // UserDetails 介面就包裝到了此介面中
    @Override
    public void onAuthenticationSuccess(HttpServletRequest request,
                                        HttpServletResponse response,
                                        Authentication authentication) throws IOException, ServletException {
        log.info("登錄成功");
        // 響應 json 信息
        response.setContentType("application/json;charset=utf-8");
        PrintWriter out = response.getWriter();
        out.write(objectMapper.writeValueAsString(authentication));
        out.flush();
        out.close();
    }

}- 啟動項目,訪問跳轉登錄頁面後,輸入正確用戶名,密碼後響應信息如下:
{
  "authorities": [
    {
      "authority": "admin"
    }
  ],
  // 包含了認證請求的信息
  "details": {
    "remoteAddress": "127.0.0.1",
    "sessionId": "1126C43793FD600CA6DC74169A38F64E"
  },
  // 這裡代表當前用戶是否經過了身份認證,boolean表示
  "authenticated": true,
  // 這裡是 我們自定義UserDetailsService介面實現類 返回的數據
  "principal": {
    "password": null,
    "username": "user",
    // 用戶許可權
    "authorities": [
      {
        "authority": "admin"
      }
    ],
    "accountNonExpired": true,
    "accountNonLocked": true,
    "credentialsNonExpired": true,
    "enabled": true
  },
  // 這裡一般代表用戶輸入的密碼,Security 做了處理,前臺不會響應
  "credentials": null,
  // 用戶名
  "name": "user"
}
自定義登錄錯誤處理
要做自定義登錄成功處理需要實現一下 Security 的 AuthenticationFailureHandler 介面
/**
 * 自定義登錄失敗處理
 */
@Configuration
public class ImoocAuthenticationFailureHandler implements AuthenticationFailureHandler {
    // 參數 AuthenticationException 是 Security 的一個抽象異常類
    @Override
    public void onAuthenticationFailure(HttpServletRequest request,
                                        HttpServletResponse response,
                                        AuthenticationException exception) throws IOException, ServletException {

    }

}- 啟動項目,訪問跳轉登錄頁面後,輸入錯誤用戶名,密碼後響應信息如下:
{**省略堆棧信息**"localizedMessage":"壞的憑證","message":"壞的憑證","suppressed":[]}註意:以上兩個自定義登錄/失敗的處理,一定要在 自定義Security配置類中加入,不然不會生效!!!
加入自定義登錄成功/失敗處理
/**
 * Security 配置
 */
@Configuration
public class BrowserSecurityConfig extends WebSecurityConfigurerAdapter {

    @Autowired
    private SecurityProperties securityProperties;

    @Autowired
    private ImoocAuthenticationSuccessHandler imoocAuthenticationSuccessHandler;

    @Autowired
    private ImoocAuthenticationFailureHandler imoocAuthenticationFailureHandler;

    @Bean
    public PasswordEncoder passwordEncoder() {
        return new MyPasswordEncoder();
    }

    @Override
    protected void configure(HttpSecurity http) throws Exception {
        BrowserProperties browser = securityProperties.getBrowser();
        // 啟用表單登陸
        http.formLogin()
                // 指定登錄頁面
                .loginPage("/authentication/require")
                // 登錄頁面表單提交的 action
                .loginProcessingUrl("/authentication/form")
                // 引入自己定義的登錄成功處理配置類
                .successHandler(imoocAuthenticationSuccessHandler)
                // 引入自己定義的登錄失敗處理配置類
                .failureHandler(imoocAuthenticationFailureHandler)
                .and()
                // 對請求做授權
                .authorizeRequests()
                // 訪問指定url時不需要身份認證(放行)
                .antMatchers("/authentication/require",
                        browser.getLoginPage()).permitAll()
                // 任何請求
                .anyRequest()
                // 都需要身份認證
                .authenticated()
                .and()
                .csrf().disable();

    }
}
以上實現了自定義成功/失敗響應,但是要想PC/移動端通用,需要深化配置一下
- 改造 自定義成功處理
創建一個枚舉類,用來區分 重定向,還是響應 json
public enum LoginType {

    REDIRECT, JSON;

}
讓此枚舉類成為 BrowserProperties 類的一個屬性
public class BrowserProperties {

    /**
     * 指定預設值(如果配置了用配置的頁面,沒配置用預設的。)
     */
    private String loginPage = "/imooc-signIn.html";

    /**
     * 指定登錄成功/失敗後的響應方式
     */
    private LoginType loginType = LoginType.JSON;

    // 省略 GET/SET/toString 方法
}
改造自定義成功處理類
/**
 * 自定義登錄成功處理
 */
@Configuration
// 讓自定義的成功處理類 繼承 Security 預設的成功處理類 SavedRequestAwareAuthenticationSuccessHandler
public class ImoocAuthenticationSuccessHandler extends SavedRequestAwareAuthenticationSuccessHandler {

    private static final Logger log = LoggerFactory.getLogger(ImoocAuthenticationSuccessHandler.class);

    private final ObjectMapper objectMapper;

    private final SecurityProperties securityProperties;

    @Autowired
    public ImoocAuthenticationSuccessHandler(ObjectMapper om, SecurityProperties sp) {
        this.objectMapper = om;
        this.securityProperties = sp;
    }

    @Override
    public void onAuthenticationSuccess(HttpServletRequest request,
                                        HttpServletResponse response,
                                        Authentication authentication) throws IOException, ServletException {
        log.info("登錄成功。。。");
        // 響應 json 信息
        response.setContentType("application/json;charset=utf-8");
        PrintWriter out = response.getWriter();
        out.write(objectMapper.writeValueAsString(authentication));
        out.flush();
        out.close();
    }

}
改造自定義失敗處理類
/**
 * 自定義登錄失敗處理
 */
@Configuration
// SimpleUrlAuthenticationFailureHandler 為 Security 預設的登錄失敗處理類
public class ImoocAuthenticationFailureHandler extends SimpleUrlAuthenticationFailureHandler {

    private static final Logger log = LoggerFactory.getLogger(ImoocAuthenticationSuccessHandler.class);

    private final ObjectMapper objectMapper;

    private final SecurityProperties securityProperties;

    @Autowired
    public ImoocAuthenticationFailureHandler(ObjectMapper om, SecurityProperties sp) {
        this.objectMapper = om;
        this.securityProperties = sp;
    }

    @Override
    public void onAuthenticationFailure(HttpServletRequest request,
                                        HttpServletResponse response,
                                        AuthenticationException exception) throws IOException, ServletException {
        log.info("登錄失敗。。。");
        // 如果配置了用 Json 響應
        if (LoginType.JSON.equals(securityProperties.getBrowser().getLoginType())) {
            // 響應狀態碼為 500
            response.setStatus(HttpStatus.INTERNAL_SERVER_ERROR.value());
            // 響應 json 信息
            response.setContentType("application/json;charset=utf-8");
            PrintWriter out = response.getWriter();
            out.write(objectMapper.writeValueAsString(exception));
            out.flush();
            out.close();
        } else {
            // 調用父類方法
            super.onAuthenticationFailure(request, response, exception);
        }
    }
}
由於 BrowserProperties 類中的loginType屬性預設為 Json ,你可以在具體的 properties 文件中,定義一下屬性。如:
imooc.security.browser.login-type=REDIRECT這樣可以測試一下是否配置成功。
測試圖就不貼上了,自已耐心測試一下~ :-)


