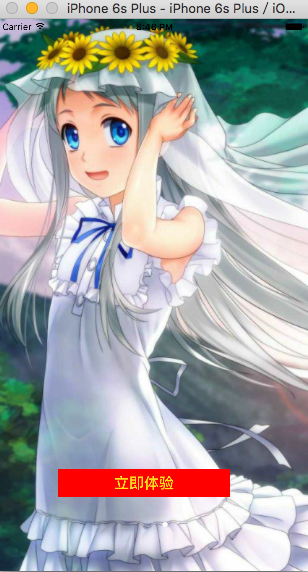
首先創建一個引導圖的控制器類 正文頁firstViewController.h和firstViewController.m AppDelegate.mAppDelegate.h文件 運行效果 第一次運行 第二次運行
首先創建一個引導圖的控制器類
UserGuideViewController.h和UserGuideViewController.m
#import <UIKit/UIKit.h>
#import "firstViewController.h"
#define WIDTH self.view.frame.size.width
#define HEIGHT self.view.frame.size.height
@interface UserGuideViewController : UIViewController<UIScrollViewDelegate>

@end
#import "UserGuideViewController.h"

@interface UserGuideViewController ()
@property(strong,nonatomic)UIScrollView *scrollView;
@property(strong,nonatomic)UIPageControl *page;
@property(strong,nonatomic)UIImageView *image1;
@property(strong,nonatomic)UIImageView *image2;
@property(strong,nonatomic)UIImageView *image3;
@property(strong,nonatomic)UIButton *btn;
@end

@implementation UserGuideViewController

- (void)viewDidLoad {
    [super viewDidLoad];
    //載入用戶引導圖
    [self initScroll];

}
-(void)initScroll{
    self.image1=[[UIImageView alloc]initWithFrame:CGRectMake(0, 0, WIDTH, HEIGHT)];
    self.image1.image=[UIImage imageNamed:@"1"];

    self.image2=[[UIImageView alloc]initWithFrame:CGRectMake(WIDTH, 0, WIDTH, HEIGHT)];
    self.image2.image=[UIImage imageNamed:@"2"];

    self.image3=[[UIImageView alloc]initWithFrame:CGRectMake(WIDTH*2, 0, WIDTH, HEIGHT)];
    self.image3.image=[UIImage imageNamed:@"3"];

    self.scrollView=[[UIScrollView alloc]initWithFrame:self.view.frame];
    self.scrollView.backgroundColor=[UIColor redColor];
    self.scrollView.contentSize=CGSizeMake(WIDTH*3, HEIGHT);

    //鎖定滾動方向
    self.scrollView.directionalLockEnabled=YES;
    //設置分頁
    self.scrollView.pagingEnabled=YES;
    //隱藏滾動條
    self.scrollView.showsHorizontalScrollIndicator=NO;
    //設置是否回彈
    self.scrollView.bounces=NO;

    //添加按鈕
    self.btn=[[UIButton alloc]initWithFrame:CGRectMake(80, 600, 230, 37)];
        [self.btn setTitle:@"立即體驗" forState:0];
    self.btn.titleLabel.font=[UIFont boldSystemFontOfSize:20];
    [self.btn setTitleColor:[UIColor colorWithRed:1.000 green:0.886 blue:0.107 alpha:1.000] forState:0];
    self.btn.backgroundColor=[UIColor redColor];
    [self.btn addTarget:self action:@selector(firstpressed) forControlEvents:UIControlEventTouchUpInside];

    [self.image3 addSubview:self.btn];

    //設置分頁各個屬性
    self.page=[[UIPageControl alloc]init];
    CGSize pageSize=CGSizeMake(120, 44);
    self.page.frame=CGRectMake((WIDTH-pageSize.width)*0.5, HEIGHT-pageSize.height-40, pageSize.width, pageSize.height);


    self.page.backgroundColor=[UIColor clearColor];
    //設置分頁頁數
    self.page.numberOfPages=3;
    self.page.currentPage=0;


    self.scrollView.delegate=self;

    [self.scrollView addSubview:self.image1];
    [self.scrollView addSubview:self.image2];
    [self.scrollView addSubview:self.image3];

    [self.view addSubview:self.scrollView];
    [self.view addSubview:self.page];
    //打開用戶交互,否則下麵的button無法響應
    self.image3.userInteractionEnabled=YES;

}
//按鈕的處罰時間
-(void)firstpressed{
    //跳轉至正文

    [self presentViewController:[firstViewController new] animated:YES completion:^{

    }];
}

-(void)scrollViewDidScroll:(UIScrollView *)scrollView{
    //設置分頁

    self.page.currentPage=(int)(scrollView.contentOffset.x/WIDTH);
}

- (void)didReceiveMemoryWarning {
    [super didReceiveMemoryWarning];
    // Dispose of any resources that can be recreated.
}

/*
#pragma mark - Navigation

// In a storyboard-based application, you will often want to do a little preparation before navigation
- (void)prepareForSegue:(UIStoryboardSegue *)segue sender:(id)sender {
    // Get the new view controller using [segue destinationViewController].
    // Pass the selected object to the new view controller.
}
*/

@end
正文頁firstViewController.h和firstViewController.m
#import <UIKit/UIKit.h>

@interface firstViewController : UIViewController

@end
#import "firstViewController.h"
@interface firstViewController ()

@end

@implementation firstViewController

- (void)viewDidLoad {
    [super viewDidLoad];
    self.view.backgroundColor=[UIColor redColor];
}

- (void)didReceiveMemoryWarning {
    [super didReceiveMemoryWarning];
    // Dispose of any resources that can be recreated.
}

/*
#pragma mark - Navigation

// In a storyboard-based application, you will often want to do a little preparation before navigation
- (void)prepareForSegue:(UIStoryboardSegue *)segue sender:(id)sender {
    // Get the new view controller using [segue destinationViewController].
    // Pass the selected object to the new view controller.
}
*/

@end
AppDelegate.mAppDelegate.h文件
#import <UIKit/UIKit.h>
#import "firstViewController.h"
#import "UserGuideViewController.h"
@interface AppDelegate : UIResponder <UIApplicationDelegate>
@property(strong,nonatomic)firstViewController *firstVc;
@property (strong, nonatomic) UIWindow *window;


@end
#import "AppDelegate.h"

@interface AppDelegate ()

@end

@implementation AppDelegate


- (BOOL)application:(UIApplication *)application didFinishLaunchingWithOptions:(NSDictionary *)launchOptions {
    self.firstVc=[[firstViewController alloc]init];

    //判斷應用是否是第一次啟動
    if (![[NSUserDefaults standardUserDefaults] boolForKey:@"firstLaunch"]) {
        [[NSUserDefaults standardUserDefaults]setBool:YES forKey:@"firstLaunch"];
        NSLog(@"第一次啟動");
        //如果是第一次啟動的話,使用UserGuideViewController(用戶引導頁面) 作為根視圖
        UserGuideViewController *userViewController=[[UserGuideViewController alloc]init];
        self.window.rootViewController=userViewController;
    }else{
        NSLog(@"不是第一次啟動");
        //如果不是第一次啟動的話,使用first作為根視圖
        firstViewController *first=[[firstViewController alloc]init];
        self.window.rootViewController=first;


    }
    self.window.backgroundColor=[UIColor whiteColor];
    [self.window makeKeyAndVisible];


    return YES;
}

- (void)applicationWillResignActive:(UIApplication *)application {
    // Sent when the application is about to move from active to inactive state. This can occur for certain types of temporary interruptions (such as an incoming phone call or SMS message) or when the user quits the application and it begins the transition to the background state.
    // Use this method to pause ongoing tasks, disable timers, and throttle down OpenGL ES frame rates. Games should use this method to pause the game.
}

- (void)applicationDidEnterBackground:(UIApplication *)application {
    // Use this method to release shared resources, save user data, invalidate timers, and store enough application state information to restore your application to its current state in case it is terminated later.
    // If your application supports background execution, this method is called instead of applicationWillTerminate: when the user quits.
}

- (void)applicationWillEnterForeground:(UIApplication *)application {
    // Called as part of the transition from the background to the inactive state; here you can undo many of the changes made on entering the background.
}

- (void)applicationDidBecomeActive:(UIApplication *)application {
    // Restart any tasks that were paused (or not yet started) while the application was inactive. If the application was previously in the background, optionally refresh the user interface.
}

- (void)applicationWillTerminate:(UIApplication *)application {
    // Called when the application is about to terminate. Save data if appropriate. See also applicationDidEnterBackground:.
}

@end
運行效果
第一次運行

第二次運行


