前言 眾所周知,在vue2的時候使用一個vue組件要麼全局註冊,要麼局部註冊。但是在setup語法糖中直接將組件import導入無需註冊就可以使用,你知道這是為什麼呢?註:本文中使用的vue版本為3.4.19。 關註公眾號:【前端歐陽】,給自己一個進階vue的機會 看個demo 我們先來看個簡單的d ...
前言
眾所周知,在vue2的時候使用一個vue組件要麼全局註冊,要麼局部註冊。但是在setup語法糖中直接將組件import導入無需註冊就可以使用,你知道這是為什麼呢?註:本文中使用的vue版本為3.4.19。
關註公眾號:【前端歐陽】,給自己一個進階vue的機會
看個demo
我們先來看個簡單的demo,代碼如下:
<template>
  <Child />
</template>

<script lang="ts" setup>
import Child from "./child.vue";
</script>
上面這個demo在setup語法糖中import導入了Child子組件,然後在template中就可以直接使用了。
我們先來看看上面的代碼編譯後的樣子,在之前的文章中已經講過很多次如何在瀏覽器中查看編譯後的vue文件,這篇文章就不贅述了。編譯後的代碼如下:
import {
  createBlock as _createBlock,
  defineComponent as _defineComponent,
  openBlock as _openBlock,
} from "/node_modules/.vite/deps/vue.js?v=23bfe016";
import Child from "/src/components/setupComponentsDemo/child.vue";

const _sfc_main = _defineComponent({
  __name: "index",
  setup(__props, { expose: __expose }) {
    __expose();
    const __returned__ = { Child };
    return __returned__;
  },
});

function _sfc_render(_ctx, _cache, $props, $setup, $data, $options) {
  return _openBlock(), _createBlock($setup["Child"]);
}

_sfc_main.render = _sfc_render;
export default _sfc_main;
從上面的代碼可以看到,編譯後setup語法糖已經沒有了,取而代之的是一個setup函數。在setup函數中會return一個對象,對象中就包含了Child子組件。
有一點需要註意的是,我們原本是在setup語法糖中import導入的Child子組件,但是經過編譯後import導入的代碼已經被提升到setup函數外面去了。
在render函數中使用$setup["Child"]就可以拿到Child子組件,並且通過_createBlock($setup["Child"]);就可以將子組件渲染到頁面上去。從命名上我想你應該猜到了$setup對象和上面的setup函數的return對象有關,其實這裡的$setup["Child"]就是setup函數的return對象中的Child組件。至於在render函數中是怎麼拿到setup函數返回的對象可以看我的另外一篇文章: Vue 3 的 setup語法糖到底是什麼東西?
接下來我將通過debug的方式帶你瞭解編譯時是如何將Child塞到setup函數的return對象中,以及怎麼將import導入Child子組件的語句提升到setup函數外面去的。
compileScript函數
在上一篇 有點東西,template可以直接使用setup語法糖中的變數原來是因為這個 文章中我們已經詳細講過了setup語法糖是如何編譯成setup函數,以及如何根據將頂層綁定生成setup函數的return對象。所以這篇文章的重點是setup語法糖如何處理裡面的import導入語句。
還是一樣的套路啟動一個debug終端。這裡以vscode舉例,打開終端然後點擊終端中的+號旁邊的下拉箭頭,在下拉中點擊Javascript Debug Terminal就可以啟動一個debug終端。

然後在node_modules中找到vue/compiler-sfc包的compileScript函數打上斷點,compileScript函數位置在/node_modules/@vue/compiler-sfc/dist/compiler-sfc.cjs.js。接下來我們來看看簡化後的compileScript函數源碼,代碼如下:
function compileScript(sfc, options) {
  const ctx = new ScriptCompileContext(sfc, options);
  const setupBindings = Object.create(null);
  const scriptSetupAst = ctx.scriptSetupAst;

  for (const node of scriptSetupAst.body) {
    if (node.type === "ImportDeclaration") {
      // 。。。省略
    }
  }

  for (const node of scriptSetupAst.body) {
    // 。。。省略
  }

  let returned;
  const allBindings = {
    ...setupBindings,
  };
  for (const key in ctx.userImports) {
    if (!ctx.userImports[key].isType && ctx.userImports[key].isUsedInTemplate) {
      allBindings[key] = true;
    }
  }
  returned = `{ `;
  for (const key in allBindings) {
    // ...遍歷allBindings對象生成setup函數的返回對象
  }

  return {
    // ...省略
    content: ctx.s.toString(),
  };
}
我們先來看看簡化後的compileScript函數。
在compileScript函數中首先使用ScriptCompileContext類new了一個ctx上下文對象,在new的過程中將compileScript函數的入參sfc傳了過去,sfc中包含了<script setup>模塊的位置信息以及源代碼。
ctx.scriptSetupAst是<script setup>模塊中的code代碼字元串對應的AST抽象語法樹。
接著就是遍歷AST抽象語法樹的內容,如果發現當前節點是一個import語句,就會將該import收集起來放到ctx.userImports對象中(具體如何收集接下來會講)。
然後會再次遍歷AST抽象語法樹的內容,如果發現當前節點上頂層聲明的變數、函數、類、枚舉聲明,就將其收集到setupBindings對象中。
最後就是使用擴展運算符...setupBindings將setupBindings對象中的屬性合併到allBindings對象中。
對於ctx.userImports的處理就不一樣了,不會將其全部合併到allBindings對象中。而是遍歷ctx.userImports對象,如果當前import導入不是ts的類型導入,並且導入的東西在template模版中使用了,才會將其合併到allBindings對象中。
經過前面的處理allBindings對象中已經收集了setup語法糖中的所有頂層綁定,然後遍歷allBindings對象生成setup函數中的return對象。
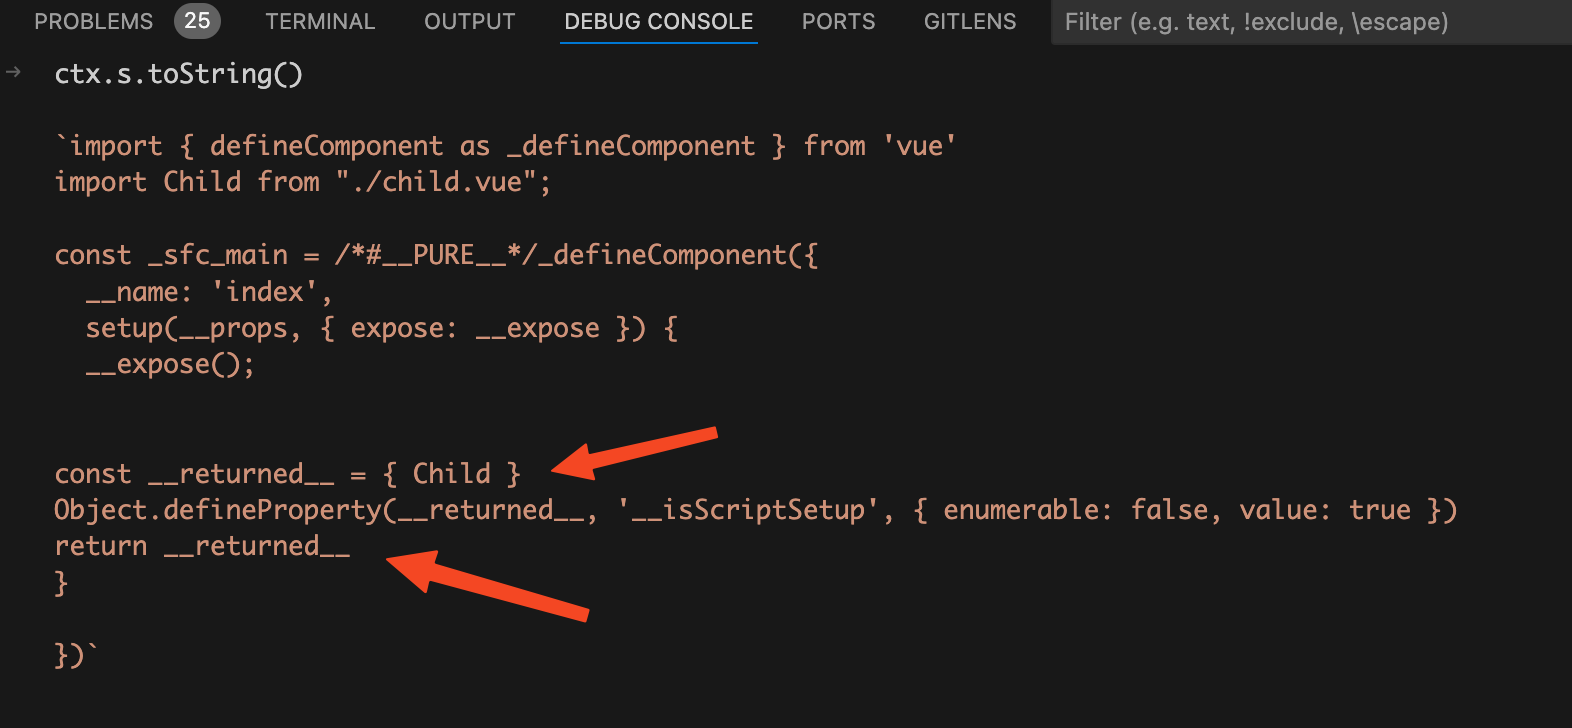
我們在debug終端來看看生成的return對象,如下圖:

從上圖中可以看到setup函數中已經有了一個return對象了,return對象的Child屬性值就是Child子組件的引用。
收集import導入
接下來我們來詳細看看如何將setup語法糖中的全部import導入收集到ctx.userImports對象中,代碼如下:
function compileScript(sfc, options) {
  // 。。。省略
  for (const node of scriptSetupAst.body) {
    if (node.type === "ImportDeclaration") {
      hoistNode(node);
      for (let i = 0; i < node.specifiers.length; i++) {
        // 。。。省略
      }
    }
  }
  // 。。。省略
}
遍歷scriptSetupAst.body也就是<script setup>模塊中的code代碼字元串對應的AST抽象語法樹,如果當前節點類型是import導入,就會執行hoistNode函數將當前import導入提升到setup函數外面去。
hoistNode函數
將斷點走進hoistNode函數,代碼如下:
function hoistNode(node) {
  const start = node.start + startOffset;
  let end = node.end + startOffset;
  while (end <= source.length) {
    if (!/\s/.test(source.charAt(end))) {
      break;
    }
    end++;
  }
  ctx.s.move(start, end, 0);
}
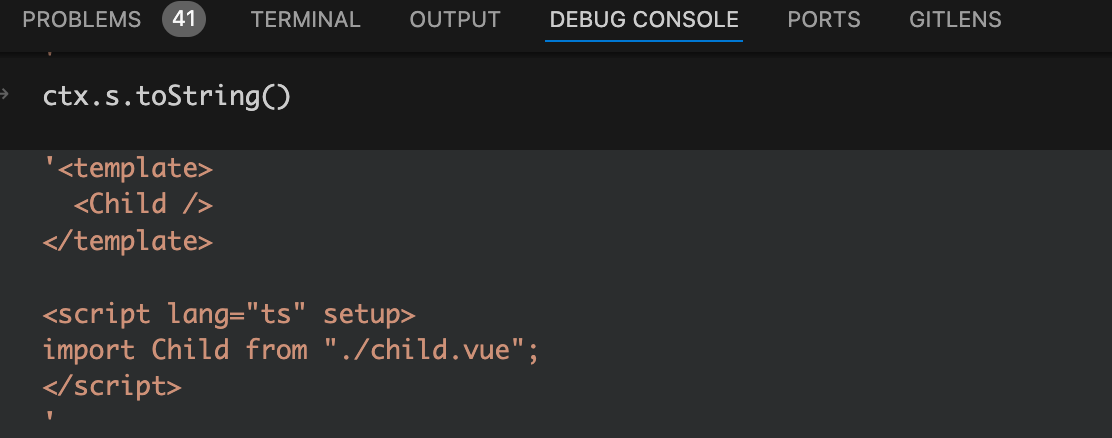
編譯階段生成新的code字元串是基於整個vue源代碼去生成的,而不是僅僅基於<script setup>模塊中的js代碼去生成的。我們來看看此時的code代碼字元串是什麼樣的,如下圖:

從上圖中可以看到此時的code代碼字元串還是和初始的源代碼差不多,沒什麼變化。
首先要找到當前import語句在整個vue源代碼中開始位置和結束位置在哪裡。node.start為當前import語句在<script setup>模塊中的開始位置,startOffset為<script setup>模塊中的內容在整個vue源碼中的開始位置。所以node.start + startOffset就是當前import語句在整個vue源代碼中開始位置,將其賦值給start變數。
同理node.end + startOffset就是當前import語句在整個vue源代碼中結束位置,將其賦值給end變數。由於import語句後面可能會有空格,所以需要使用while迴圈將end指向import語句後面非空格前的位置,下一步move的時候將空格一起給move過去。
最後就是調用ctx.s.move方法,這個方法接收三個參數。第一個參數是要移動的字元串開始位置,第二個參數是要移動的字元串結束位置,第三個參數為將字元串移動到的位置。
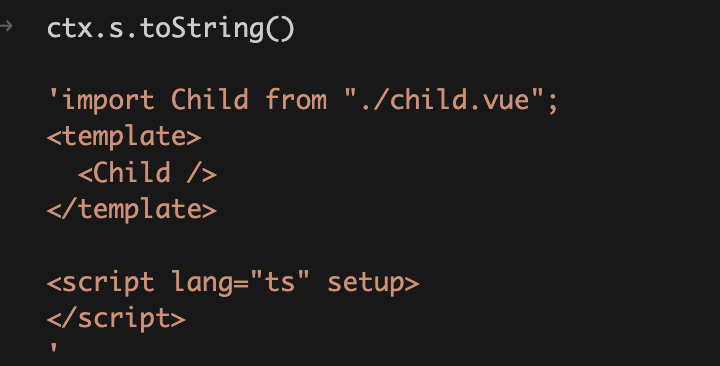
所以這裡的ctx.s.move(start, end, 0)就是將import語句移動到最前面的位置,執行完ctx.s.move方法後,我們在debug終端來看看此時的code代碼字元串,如下圖:

從上圖中可以看到import語句已經被提升到了最前面去了。
遍歷import導入說明符
我們接著來看前面省略的遍歷node.specifiers的代碼,如下:
function compileScript(sfc, options) {
  // 。。。省略

  for (const node of scriptSetupAst.body) {
    if (node.type === "ImportDeclaration") {
      hoistNode(node);
      for (let i = 0; i < node.specifiers.length; i++) {
        const specifier = node.specifiers[i];
        const local = specifier.local.name;
        const imported = getImportedName(specifier);
        const source2 = node.source.value;
        registerUserImport(
          source2,
          local,
          imported,
          node.importKind === "type" ||
            (specifier.type === "ImportSpecifier" &&
              specifier.importKind === "type"),
          true,
          !options.inlineTemplate
        );
      }
    }
  }

  // 。。。省略
}
我們先在debug終端看看node.specifiers數組是什麼樣的,如下圖:

從上圖中可以看到node.specifiers數組是一個導入說明符,那麼為什麼他是一個數組呢?原因是import導入的時候可以一次導入 多個變數進來,比如import {format, parse} from "./util.js"
node.source.value是當前import導入的路徑,在我們這裡是./child.vue。
specifier.local.name是將import導入進來後賦值的變數,這裡是賦值為Child變數。
specifier.type是導入的類型,這裡是ImportDefaultSpecifier,說明是default導入。
接著調用getImportedName函數,根據導入說明符獲取當前導入的name。代碼如下:
function getImportedName(specifier) {
  if (specifier.type === "ImportSpecifier")
    return specifier.imported.type === "Identifier"
      ? specifier.imported.name
      : specifier.imported.value;
  else if (specifier.type === "ImportNamespaceSpecifier") return "*";
  return "default";
}
大家都知道import導入有三種寫法,分別對應的就是getImportedName函數中的三種情況。如下:
import { format } from "./util.js";	// 命名導入
import * as foo from 'module';	// 命名空間導入
import Child from "./child.vue";	// default導入的方式
如果是命名導入,也就是specifier.type === "ImportSpecifier",就會返回導入的名稱。
如果是命名空間導入,也就是specifier.type === "ImportNamespaceSpecifier",就會返回字元串*。
否則就是default導入,返回字元串default。
最後就是拿著這些import導入相關的信息去調用registerUserImport函數。
registerUserImport函數
將斷點走進registerUserImport函數,代碼如下:
function registerUserImport(
  source2,
  local,
  imported,
  isType,
  isFromSetup,
  needTemplateUsageCheck
) {
  let isUsedInTemplate = needTemplateUsageCheck;
  if (
    needTemplateUsageCheck &&
    ctx.isTS &&
    sfc.template &&
    !sfc.template.src &&
    !sfc.template.lang
  ) {
    isUsedInTemplate = isImportUsed(local, sfc);
  }
  ctx.userImports[local] = {
    isType,
    imported,
    local,
    source: source2,
    isFromSetup,
    isUsedInTemplate,
  };
}
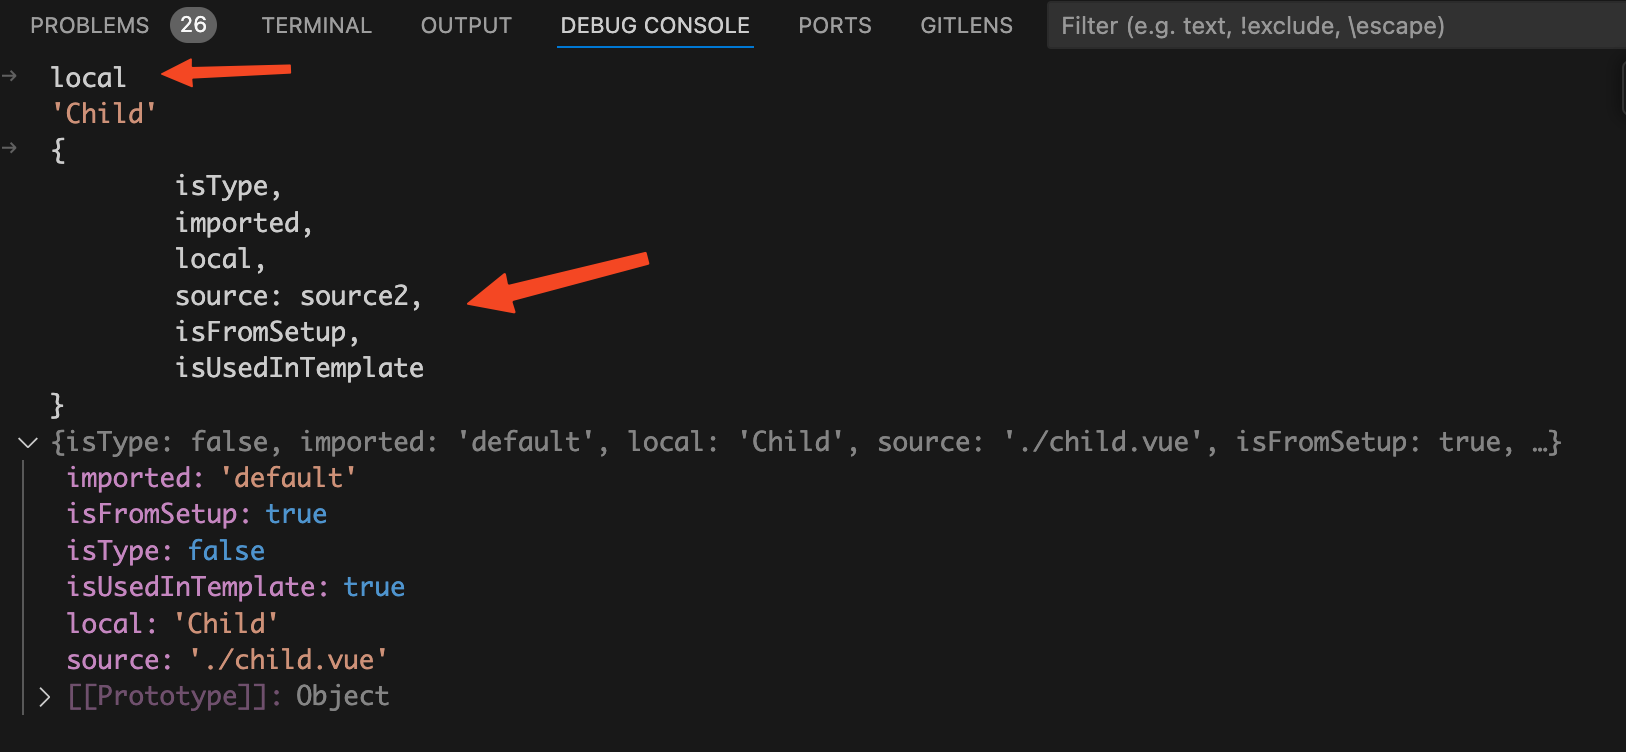
registerUserImport函數就是將當前import導入收集到ctx.userImports對象中的地方,我們先不看裡面的那塊if語句,先來在debug終端中來看看ctx.userImports對象中收集了哪些import導入的信息。如下圖:

從上圖中可以看到收集到ctx.userImports對象中的key就是import導入進來的變數名稱,在這裡就是Child變數。
-
imported: 'default':表示當前import導入是個default導入的方式。 -
isFromSetup: true:表示當前import導入是從setup函數中導入的。 -
isType: false:表示當前import導入不是一個ts的類型導入,後面生成return對象時判斷是否要將當前import導入加到return對象中,會去讀取ctx.userImports[key].isType屬性,其實就是這裡的isType。 -
local: 'Child':表示當前import導入進來的變數名稱。 -
source: './child.vue':表示當前import導入進來的路徑。 -
isUsedInTemplate: true:表示當前import導入的變數是不是在template中使用。
上面的一堆變數大部分都是在上一步"遍歷import導入說明符"時拿到的,除了isUsedInTemplate以外。這個變數是調用isImportUsed函數返回的。
isImportUsed函數
將斷點走進isImportUsed函數,代碼如下:
function isImportUsed(local, sfc) {
  return resolveTemplateUsedIdentifiers(sfc).has(local);
}
這個local你應該還記得,他的值是Child變數。resolveTemplateUsedIdentifiers(sfc)函數會返回一個set集合,所以has(local)就是返回的set集合中是否有Child變數,也就是template中是否有使用Child組件。
resolveTemplateUsedIdentifiers函數
接著將斷點走進resolveTemplateUsedIdentifiers函數,代碼如下:
function resolveTemplateUsedIdentifiers(sfc): Set<string> {
  const { ast } = sfc.template!;
  const ids = new Set<string>();
  ast.children.forEach(walk);

  function walk(node) {
    switch (node.type) {
      case NodeTypes.ELEMENT:
        let tag = node.tag;
        if (
          !CompilerDOM.parserOptions.isNativeTag(tag) &&
          !CompilerDOM.parserOptions.isBuiltInComponent(tag)
        ) {
          ids.add(camelize(tag));
          ids.add(capitalize(camelize(tag)));
        }
        node.children.forEach(walk);
        break;
      case NodeTypes.INTERPOLATION:
      // ...省略
    }
  }
  return ids;
}
sfc.template.ast就是vue文件中的template模塊對應的AST抽象語法樹。遍歷AST抽象語法樹,如果當前節點類型是一個element元素節點,比如div節點、又或者<Child />這種節點。
node.tag就是當前節點的名稱,如果是普通div節點,他的值就是div。如果是<Child />節點,他的值就是Child。
然後調用isNativeTag方法和isBuiltInComponent方法,如果當前節點標簽既不是原生html標簽,也不是vue內置的組件,那麼就會執行兩行ids.add方法,將當前自定義組件變數收集到名為ids的set集合中。
我們先來看第一個ids.add(camelize(tag))方法,camelize代碼如下:
const camelizeRE = /-(\w)/g;
const camelize = (str) => {
  return str.replace(camelizeRE, (_, c) => (c ? c.toUpperCase() : ""));
};
camelize函數使用正則表達式將kebab-case命名法,轉換為首字母為小寫的駝峰命名法。比如my-component經過camelize函數的處理後就變成了myComponent。這也就是為什麼以 myComponent 為名註冊的組件,在模板中可以通過 <myComponent> 或 <my-component> 引用。
再來看第二個ids.add(capitalize(camelize(tag)))方法,經過camelize函數的處理後已經變成了首字母為小寫的小駝峰命名法,然後執行capitalize函數。代碼如下:
const capitalize = (str) => {
  return str.charAt(0).toUpperCase() + str.slice(1);
};
capitalize函數的作用就是將首字母為小寫的駝峰命名法轉換成首字母為大寫的駝峰命名法。這也就是為什麼以 MyComponent 為名註冊的組件,在模板中可以通過 <myComponent>、<my-component>或者是 <myComponent> 引用。
我們這個場景中是使用<Child />引用子組件,所以set集合中就會收集Child。再回到isImportUsed函數,代碼如下:
function isImportUsed(local, sfc) {
  return resolveTemplateUsedIdentifiers(sfc).has(local);
}
前面講過了local變數的值是Child,resolveTemplateUsedIdentifiers(sfc)返回的是包含Child的set集合,所以resolveTemplateUsedIdentifiers(sfc).has(local)的值是true。也就是isUsedInTemplate變數的值是true,表示當前import導入變數是在template中使用。後面生成return對象時判斷是否要將當前import導入加到return對象中,會去讀取ctx.userImports[key].isUsedInTemplate屬性,其實就是這個isUsedInTemplate變數。
總結
執行compileScript函數會將setup語法糖編譯成setup函數,在compileScript函數中會去遍歷<script setup>對應的AST抽象語法樹。
如果是頂層變數、函數、類、枚舉聲明,就會將其收集到setupBindings對象中。
如果是import語句,就會將其收集到ctx.userImports對象中。還會根據import導入的信息判斷當前import導入是否是ts的類型導入,並且賦值給isType屬性。然後再去遞歸遍歷template模塊對應的AST抽象語法樹,看import導入的變數是否在template中使用,並且賦值給isUsedInTemplate屬性。
遍歷setupBindings對象和ctx.userImports對象中收集的所有頂層綁定,生成setup函數中的return對象。在遍歷ctx.userImports對象的時候有點不同,會去判斷當前import導入不是ts的類型導入並且在還在template中使用了,才會將其加到setup函數的return對象中。在我們這個場景中setup函數會返回{ Child }對象。
在render函數中使用$setup["Child"]將子組件渲染到頁面上去,而這個$setup["Child"]就是在setup函數中返回的Child屬性,也就是Child子組件的引用。
關註公眾號:【前端歐陽】,給自己一個進階vue的機會


