
一、ES6的Set、Map數據結構 Map、Set都是ES6新的數據結構,都是新的內置構造函數,也就是說typeof的結果,多了兩個: Set 是不能重覆的數組 Map 是可以任何東西當做鍵的對象 ES6 提供了新的數據結構 Set。它類似於數組,但是成員的值都是唯一的,沒有重覆的值。 let s ...
一、ES6的Set、Map數據結構
Map、Set都是ES6新的數據結構,都是新的內置構造函數,也就是說typeof的結果,多了兩個:
Set 是不能重覆的數組
Map 是可以任何東西當做鍵的對象
ES6 提供了新的數據結構 Set。它類似於數組,但是成員的值都是唯一的,沒有重覆的值。


let s = new Set();
s.add(1);
s.add(2);
s.add(3);
s.add(3);
s.add(3);
s.add(4);
s.add(5);
console.log(s)
示例代碼

集合中添加數據用add()方法,會自動過濾已經有的元素。
最快的數組去重方法:
let s = new Set([1,2,3,3,3,4,5]);
console.log([...s])

let s = new Set([1,2,3,4,5]);
console.log(s.size)
console.log(s.has(5))
console.log(s.delete(5))
console.log(s)
示例代碼

集合的關註點是在元素裡面,而不關註順序,所以不提供s[0]來枚舉某項API,但是可以轉為數組[...s]
JavaScript 的對象(Object),本質上是鍵值對的集合(Hash 結構),但是傳統上只能用字元串當作鍵。這給它的使用帶來了很大的限制。
為瞭解決這個問題,ES6 提供了 Map 數據結構。它類似於對象,也是鍵值對的集合,但是“鍵”的範圍不限於字元串,各種類型的值(包括對象)都可以當作鍵。也就是說,Object 結構提供了“字元串—值”的對應,Map 結構提供了“值—值”的對應,是一種更完善的 Hash 結構實現。如果你需要“鍵值對”的數據結構,Map 比 Object 更合適。
let m = new Map();
const o = {a:1,b:2};
m.set("haha", 123);
m.set(o, 456)
m.set(888,789)
console.log(m)
console.log(m.get(o))
示例代碼

使用get()來得到元素的值,key是區分類型的。
二、函數式編程庫
所謂的“函數式編程”指的是程式中的函數的是“純函數”,就表示一個函數不改變傳入的參數。
我們之前大量使用...、filter、map等等操作,略微麻煩,就有3個特別好用的函數式編程庫應運而生。
2.1 immutable.js庫
2.1.1概述
來自Facebook,是官方推薦的庫,immutable表示不可變。immutable總是返回新的對象,不會修改原對象。
immutable不是深拷貝對象,創造性的使用DIFF演算法,有一個結構共用機制,它所做的是智能分析改變,讓改變後的元素可以共用改變之前的一些結構。
Immutable 使用了 Structural Sharing(結構共用),即如果對象樹中一個節點發生變化,只修改這個節點和受它影響的父節點,其它節點則進行共用。
{
    a:{"x":1 , "y":2},
    b:{
        c:{"x":3, "y":4},
        d:{"x":5},
    }
}
{
    a:{"x":1 , "y":2},
    b:{
        c:{"x":8, "y":4},
        d:{"x":5},
    }
}
上面代碼中,顏色相同部分,還是記憶體中同一個對象。
2.1.2基本講解
官方:http://facebook.github.io/immutable-js/docs/#/
安裝依賴:
npm install immutable --save
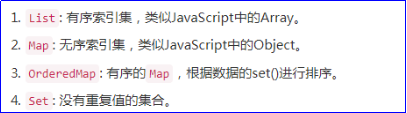
immutable提供了兩個數據類型:
List和Map是immutable自己封裝的一個類,List是不可變的數組,Map是不可變的對象。
fromJS() 將一個原生js數據類型轉換為immutable類型的數據
toJS() 將一個immutable類型的數據轉換為JS類型的數據。
List()和Map() 用來創建新的List和Map對象(將原生JS對象和數組轉換到不可變的Map和List)
immutable思維:
先用fromJS()或List()或Map()將原生JS的數組、對象、變為List、Map對象
然後再操作,比如對數組的push操作
最後.toJS()將immutable對象變為原生JS的數組、對象
在Nodejs環境中引包:
var immutable = require("immutable");
var List = immutable.List

const list1 = List(["白板","么雞","三條","三萬"])
const list2 = list1.push("四條")
console.log(list1.toJS())
console.log(list2.toJS())
會發現push之後,原數組沒有改變,只返回了新數組。
上面案例是用List(原數組)將數組變為List對象,也可以用fromJS。
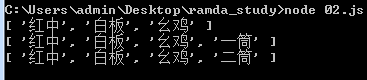
var immutable = require("immutable");
var fromJS = immutable.fromJS

const list1 = fromJS(["白板","么雞","三條","三萬"])
const list2 = list1.push("四條")
console.log(list1.toJS())
console.log(list2.toJS())

數組的頭尾操作,也不會改變原數組,都是返回新數組:
var immutable = require("immutable");
var fromJS = immutable.fromJS

const list1 = fromJS(["白板","么雞","三條","三萬"])
const list2 = list1.push("四條")
const list3 = list1.pop()
const list4 = list1.unshift("東風")
const list5 = list1.shift()

console.log(list1.toJS())
console.log(list2.toJS())
console.log(list3.toJS())
console.log(list4.toJS())
console.log(list5.toJS())
示例代碼

更改set
set表示更改下標為2的項為“二筒”,註意不會真的改變原數組,而是返回新數組:
const list1 = fromJS(["白板","么雞","三條","三萬"])
const list2 = list1.set(2,"二筒");

對象也有set
const obj1 = fromJS({"a" : 1, "b" : 2 ,"c" : 3})
const obj2 = obj1.set("b",888)

console.log(obj1.toJS())
console.log(obj2.toJS())

在數組中查找某一項,使用find(),尋找某一項下標用findIndex()
得到Map對象的某一個鍵的值,要用get()方法
var immutable = require("immutable");
var fromJS = immutable.fromJS

const data = fromJS([
    {"id" : 1, "name" : "小明", "age" : 12},
    {"id" : 2, "name" : "小紅", "age" : 12},
    {"id" : 3, "name" : "小強", "age" : 13},
])

const item = data.find(item=>item.get("id") == 2);
console.log(item.toJS())

刪除用delete,刪除下標為2的項
const list1 = fromJS([111,222,333,888,999]);
const list2 = list1.delete(2);
console.log(list1.toJS());
console.log(list2.toJS());

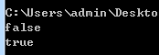
is()函數驗證是否相等
var {is , Map} = require("immutable");
let o1 = Map({a : 1, b : 2, c : 3});
let o2 = Map({a : 1, b : 2, c : 3});

console.log(o1 == o2);  //在記憶體中不相等
console.log(is(o1,o2)); //在immutable世界中是相等
2.1.3真實項目場景
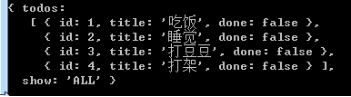
真實項目場景 - 增加todo,用set設置,用get獲取
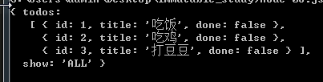
var immutable = require("immutable");
var fromJS = immutable.fromJS

const data = fromJS({
    "todos" : [
        {"id" : 1,"title" : "吃飯", "done" : false },
        {"id" : 2,"title" : "睡覺", "done" : false },
        {"id" : 3,"title" : "打豆豆", "done" : false },
    ],
    "show" : "ALL"
})

const newData = data.set(
    "todos",
    data.get("todos").push({"id" : 4,"title" : "打架", "done" : false})
)
console.log(newData.toJS())
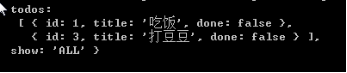
真實項目場景 - 刪除id為2的todo,使用delete(2)
//刪除id為2的項
const newdata = data.set(
"todos",
data.get("todos").delete(data.get("todos").findIndex(item=>item.get("id")== 2)
));

console.log(newdata.toJS());
方法2:
const newData = data.set(
    "todos",
    data.get("todos").filter(item=>item.get("id") != 2)
)
真實項目場景 - 改變id為2的項title為“吃雞”
方法1
var index = data.get("todos").findIndex(item=>item.get("id") == 2);
var item = data.get("todos").get(index)
const newData = data.set("todos",data.get("todos").set(index, item.set("title","吃雞")));

console.log(newData.toJS())
方法2
const newData = data.set("todos",data.get("todos").map(item=>{
    return item.get("id") == 2 ? item.set("title" , "吃雞") : item;
}))
2.1.4和redux結合
改造TodoList項目:
只改變reducers中的文件夾的寫法,其它地方一律不改。
state的數據依然是原生JS的數組和對象,只不過在reducer函數運行中,瞬間變成為immutable的List和Map了,但是出去的時候就toJS了,裡外里,state還是原生數組、對象。
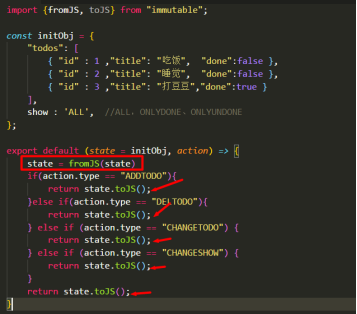
import {fromJS , toJS} from "immutable";
const initObj = {
    "todos" : [
        {"id" : 1 , "title" : "吃飯" , "done" : false},
        {"id" : 2 , "title" : "睡覺" , "done" : true},
        {"id" : 3 , "title" : "打豆豆" , "done" : true}
    ],
    "show" : "ALL"
}

export default (state = initObj, action) => {
    //下麵的語句很重要,變為immutable對象
    state = fromJS(state);

    if(action.type == "ADDTODO"){
         return state.set("todos", state.get("todos").push(
             {
                 "id" : state.get("todos").reduce((a,b)=>{
          return b.get("id") > a ? b.get("id") : a
          }, 0) + 1,
                 "title" : action.title,
                 "done" : false
             }
         )).toJS();
    }else if(action.type == "DELTODO"){
        return state.set(
"todos",
state.get("todos").filter(item=>item.get("id") != action.id)
).toJS();
    }else if(action.type == "CHANGETODO"){
        return state.set(
"todos",
state.get("todos").map(
item => item.get("id") == action.id ? item.set(action.k, action.v) : item
)
).toJS();
    }else if(action.type == "CHANGESHOW"){
        return state.set("show", action.show).toJS();
    }
    return state.toJS();
}
2.2 Ramda.js庫
純函數,也叫作“蘭姆達函數”,就是ramda這個詞。http://ramda.cn/
2.2.1函數柯里化基礎
函數柯里化(Currying),是把接受多個參數的函數變換成接受一個單一參數的函數,並且返回接受餘下的參數,而且返回結果的新函數。柯里化函數就是逐步傳參,逐步縮小函數的適用範圍,逐步求解的過程。
簡單的加法函數:
function add(x,y){
    return x + y;
}
add(2,3);//5
如果用函數柯里化接受兩個參數的函數變成單一參數,如下:
function add(x) {
    return function (y){
        return x + y
    }
}

console.log(add(2)(3))
示例代碼
2.2.2基本講解
npm install ramda --save
數組尾插一項:
var R = require("ramda");

var arr1 = ["紅中","白板","么雞"];
var arr2 = R.append("一筒", arr1)
var arr3 = R.append("二筒")(arr1)

console.log(arr1)
console.log(arr2)
console.log(arr3)
被操作的元素放到最後一個參數。
數組頭插一項:
var R = require("ramda");

var arr1 = ["紅中","白板","么雞"];
var arr4 = R.prepend("發財",arr1)

console.log(arr4)
示例代碼

2.2.3真實項目場景
改變對象的b屬性為8
這裡使用了非常重要的方法R.lensProp()聚焦到某屬性,功能就是讓改變的值從原基礎上進行修改
var R = require("ramda");

const obj1 = {"a" : 1,"b" : 2,"c" : 3}
const obj2 = R.set(R.lensProp("b") , 8, obj1)
console.log(obj2)

刪除id為2的項:
const state = {
    "todos": [
       {"id" : 1, "title" : "吃飯",  "done" : false},
       {"id" : 2, "title" : "睡覺",  "done" : false},
       {"id" : 3, "title" : "打豆豆","done" : false}
    ],
    "show":"ALL"
}

//刪除id為2的項
const newstate = R.set(R.lensProp("todos"), R.filter(item=>item.id != 2, state.todos) , state);
console.log(newdata)

修改id為2的項title為吃雞
const newstate = R.set(R.lensProp("todos"),R.map(item => item.id == 2 ?
R.set(R.lensProp("title"),"吃雞",item) : item , state.todos), state);

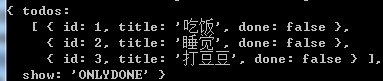
修改show為ONLYDONE
const newstate = R.set(R.lensProp("show") , "ONLYDONE", state);
基本上一條語句能夠解決問題,不再寫...了,並且相比如immutable,沒有Map、List和對象、數組的轉換。
2.2.4和redux結合
還是用todolist舉例,在reducers/index.js中修改,下麵標黃色的語句的R.__是占位符:
var R = require("ramda");

const initObj = {
    "todos" : [
        {"id" : 1 , "title" : "吃飯" , "done" : false},
        {"id" : 2 , "title" : "睡覺" , "done" : true},
        {"id" : 3 , "title" : "打豆豆", "done" : true}
    ],
    "show" : "ALL"
}

export default (state = initObj, action) => {
//R.__表示占位符,下麵調用setTodos時,就等於傳入了要更改成為的值
    const setTodos = R.set(R.lensProp("todos"), R.__ , state);
    const setShow  = R.set(R.lensProp("show") , R.__ , state);

    if(action.type == "ADDTODO"){
        return setTodos(R.append({
            "id" : state.todos.reduce((a,b) => b.id > a ? b.id : a, 0) + 1,
            "title" : action.title,
            "done" : false
        },state.todos));
    }else if(action.type == "DELTODO"){
        return setTodos(state.todos.filter(item=>item.id != action.id));
    }else if(action.type == "CHANGETODO"){
        return setTodos(state.todos.map(item=>item.id == action.id ? R.set(R.lensProp(action.k), action.v, item) : item))
    }else if(action.type == "CHANGESHOW"){
        return setShow(action.show);
    }
    return state;
}
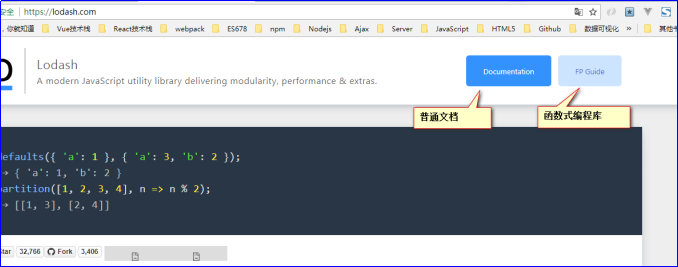
2.3 lodash.js庫
2.3.1基本講解
實際上underscore.js已經在“函數庫工具”輸給了lodash,lodash完全可以替代underscore。
中文:http://www.css88.com/doc/lodash/
npm install --save lodash
underscore有的函數,lodash全有,比如數組去重和最大最小值:
var _ = require("lodash");

var arr1 = [3,3,3,3,4,4,4,4,5,5,5,5,3];
var arr2 = _.uniq(arr1);

console.log(arr1);
console.log(arr2);

console.log(_.max(arr1));
console.log(_.min(arr1));

lodash中有子包,叫做fp。fp是functional programing函數式編程的意思。
需要引入這個包
var fp = require("lodash/fp");
更改b屬性為8:
var fp = require("lodash/fp");

var obj1 = {"a" : 1 , "b" : 2 , "c" : 3};
var obj2 = fp.set("b" , 8 , obj1);

console.log(obj1);
console.log(obj2);
示例代碼
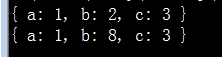
和ramda一樣,被操作對象寫最後一個參數。
2.3.2真實項目場景
刪除
var fp = require("lodash/fp");

const state = {
    "todos" : [
        {"id" : 1 , "title" : "吃1飯" , "done" : false},
        {"id" : 2 , "title" : "吃2飯" , "done" : false},
        {"id" : 3 , "title" : "吃3飯" , "done" : false}
    ],
    "show" : "ALL"
};

//刪除id為2的項
const newstate = fp.set("todos", state.todos.filter(item => item.id != 2), state);

console.log(state);
console.log(newstate);
增加:
const newstate = fp.set("todos", fp.concat(
    state.todos,
    {
        "id" : state.todos.reduce((a,b) => b.id > a ? b.id : a, 0) + 1,
        "title": "吃雞",
        "done" : false
    }
) , state);
修改id為2的項的title為“吃雞”
const newstate = fp.set("todos",state.todos.map(item=>item.id == 2 ? fp.set("title", "吃雞", item) : item), state);
如果遇見比較難的場景,此時可以用克隆方法,比如在第2項之間插入一項
const _todos = fp.clone(state.todos)

//更改克隆之後的數組
_todos.splice(2,0,{"id": 4,"title":"游泳","done":false})

//更改state
const newstate = fp.set("todos", _todos, state)
console.log(state)
console.log(newstate)
示例代碼
const car = {
    "cars" : {
        "a" : [
            {
                "name" : "奧迪" ,
                "series" : [
                    {
                        "name" : "A6",
                        "type" : "豪華轎車"
                    },
                    {
                        "name" : "A4",
                        "type" : "豪華轎車"
                    }
                ]
            },
            {
                "name" : "奧拓",
                "series" : [{"奧拓1號" : 2}]
            }
        ],
        "b" : [
            {"賓士" : 1}
        ]
    }
}

//改變A6的車係為普通轎車
var newstate = fp.cloneDeep(car);
newstate.cars.a[0].series[0].type = '普通轎車';

console.log(JSON.stringify(newstate))
示例代碼
2.3.3 和redux結合
import fp from "lodash/fp";

const initObj = {
    "todos" : [
        {"id" : 1 , "title" : "吃飯" , "done" : false},
        {"id" : 2 , "title" : "睡覺" , "done" : true},
        {"id" : 3 , "title" : "打豆豆" , "done" : true}
    ],
    "show" : "ALL"
}

export default (state = initObj, action) => {
    if(action.type == "ADDTODO"){
        return fp.set("todos" , fp.concat(state.todos , {
            "id" : state.todos.reduce((a,b) => b.id > a ? b.id : a , 0) + 1,
            "title" : action.title,
            "done" : false
        }), state);
    }else if(action.type == "DELTODO"){
        return fp.set("todos" , state.todos.filter(item => item.id != action.id) , state);
    }else if(action.type == "CHANGETODO"){
        return fp.set("todos", state.todos.map(item=>item.id == action.id ? fp.set(action.k,action.v,item) : item) , state);
    }else if(action.type == "CHANGESHOW"){
        return fp.set("show" , action.show , state);
    }
    return state;
}
三、非同步
3.1搭建伺服器
我們將所有前端的東西都放入www文件夾中。
Node.js寫app.js實現數據介面:
var express = require("express");
var app = express();
app.use(express.static("www"))

app.get("/api",(req,res)=>{
    res.json({"result":8})
})
app.listen(3000);
示例代碼
3.2 redux-thunk解決非同步
我們現在有四個文件都沒有地方適合寫非同步:components、actions、constants、reducer。
所以React提供了react-thunk包,thunk是中間件,所謂的中間件就是在發出action和reducer進行改變的中間,要做的事。
https://www.npmjs.com/package/redux-thunk
安裝依賴:
npm install --save redux-thunk
main.js
import React from "react";
import ReactDOM from "react-dom";
import { createStore, applyMiddleware} from "redux";
import { Provider } from 'react-redux'
import thunk from 'redux-thunk'
import reducers from "./reducers/index";
import logger from "redux-logger";
//引入父組件
import App from "./containers/App";

//創建Redux store 倉庫用來存放狀態
const store = createStore(reducers, applyMiddleware(logger, thunk))

ReactDOM.render(
    <Provider store={store}>
        <App></App>
    </Provider>,
    document.getElementById('app')
)
components/counter/index.js組件,按鈕點擊之後做addServer:
<button onClick={()=>{this.props.counterActions.addServer()}}>加伺服器那麼多</button>
此時actions/counterActions.js文件中,就可以寫非同步函數了:
兩步:第一步請求伺服器數據,第二步發出action。將伺服器的返回結果,當做載荷發給reducer。
import {ADD , MINUS , ADDSERVER} from "../constants/COUNTER.js";

//同步陣營,直接返回一個Action
export const add = () => ({"type" : ADD});
export const minus = () => ({"type" : MINUS});

//非同步有兩個(),第一個()接受按鈕傳的參數,第二個()是系統給你的dispatch和getState
//export const addServer = (n)=> (dispatch, getState)=>{
//    alert(n)
//    alert(dispatch)
//    alert(getState().counter.v)
//}

export const addServer = ()=> async (dispatch , getState) => {
    //發出Ajax請求,實際上是fetch請求,fetch不是Ajax
    const {result} = await fetch("/api").then(data=>data.json());
    //發action,因為唯一能改變reducer的方法就是dispath一個action
    dispatch({"type" : ADDSERVER , result})
}
constants/COUNTER.js
export const ADDSERVER = "ADDSERVER_COUNTER";
reducers/counter.js
import {ADD , MINUS , ADDSERVER} from "../constants/COUNTER.js";
export default (state = {"v" : 0} , action) => {
    if(action.type == ADD){
        ...
    }else if(action.type == MINUS){
        ...
    }else if(action.type == ADDSERVER){


