
準備做一個禁言自動解除的功能,立馬想到了訂單的超時自動解除,剛好最近在看RabbitMQ的實現,於是想用它實現,查詢了相關文檔發現確實可以實現,動手編寫了這篇短文。 準備工作 1、Erlang安裝請參考 "windows下安裝Erlang" 2、mq安裝晴參考 "RabbitMQ安裝" 3、延遲消息 ...
準備做一個禁言自動解除的功能,立馬想到了訂單的超時自動解除,剛好最近在看RabbitMQ的實現,於是想用它實現,查詢了相關文檔發現確實可以實現,動手編寫了這篇短文。
準備工作
1、Erlang安裝請參考windows下安裝Erlang
2、mq安裝晴參考RabbitMQ安裝
3、延遲消息插件安裝rabbitmq_delayed_message_exchange
#插件下載地址(選擇與mq版本匹配的插件版本)
http://www.rabbitmq.com/community-plugins.html
#安裝命令如下(在安裝目錄sbin下執行如下命令)
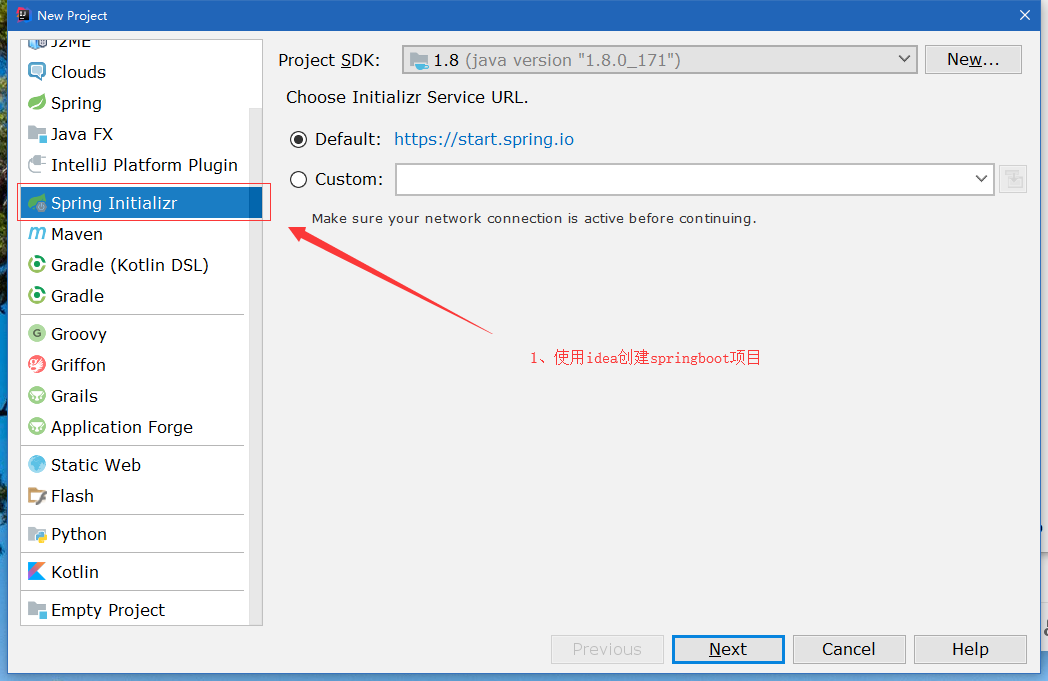
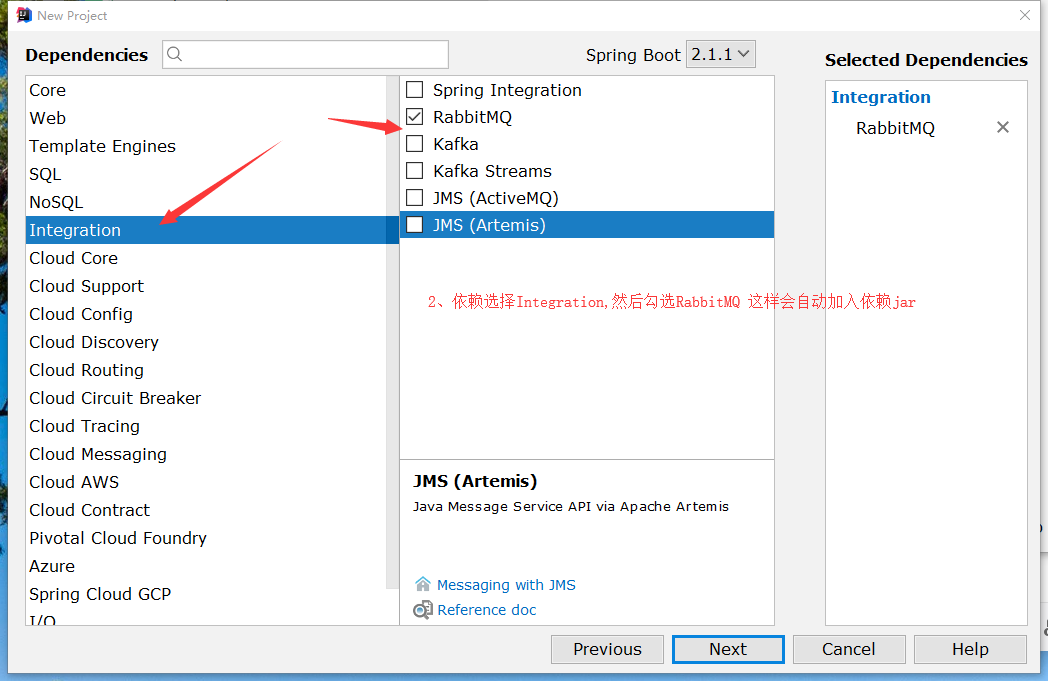
rabbitmq-plugins enable rabbitmq_delayed_message_exchange創建項目
我選擇的是在springboot中集成RabbitMQ,配置相對簡單很多。
項目創建好後,在application.properties中加入RabbitMQ參數:
#RabbitMQ config
spring.rabbitmq.host=127.0.0.1
spring.rabbitmq.port=5672
spring.rabbitmq.username=guest
spring.rabbitmq.password=guest
#Custom config
rabbitmq.exchange=test_exchange
rabbitmq.queue=test_queue_1
定義ConnectionFactory和RabbitTemplate
    package com.xsh.mq.config;

import org.springframework.amqp.rabbit.connection.CachingConnectionFactory;
import org.springframework.amqp.rabbit.connection.ConnectionFactory;
import org.springframework.amqp.rabbit.core.RabbitTemplate;
import org.springframework.boot.context.properties.ConfigurationProperties;
import org.springframework.context.annotation.Bean;
import org.springframework.context.annotation.Configuration;

@Configuration
@ConfigurationProperties(prefix = "spring.rabbitmq")
public class RabbitMqConfig {
    private String host;
    private int port;
    private String userName;
    private String password;

    @Bean
    public ConnectionFactory connectionFactory() {
        CachingConnectionFactory cachingConnectionFactory = new CachingConnectionFactory(host,port);
        cachingConnectionFactory.setUsername(userName);
        cachingConnectionFactory.setPassword(password);
        cachingConnectionFactory.setVirtualHost("/");
        cachingConnectionFactory.setPublisherConfirms(true);
        return cachingConnectionFactory;
    }

    @Bean
    public RabbitTemplate rabbitTemplate() {
        RabbitTemplate rabbitTemplate = new RabbitTemplate(connectionFactory());
        return rabbitTemplate;
    }

    public String getHost() {
        return host;
    }

    public void setHost(String host) {
        this.host = host;
    }

    public int getPort() {
        return port;
    }

    public void setPort(int port) {
        this.port = port;
    }

    public String getUserName() {
        return userName;
    }

    public void setUserName(String userName) {
        this.userName = userName;
    }

    public String getPassword() {
        return password;
    }

    public void setPassword(String password) {
        this.password = password;
    }
}
Exchange和Queue配置
    package com.xsh.mq.config;

import org.springframework.amqp.core.Binding;
import org.springframework.amqp.core.BindingBuilder;
import org.springframework.amqp.core.CustomExchange;
import org.springframework.amqp.core.Queue;
import org.springframework.beans.factory.annotation.Value;
import org.springframework.context.annotation.Bean;
import org.springframework.context.annotation.Configuration;

import java.util.HashMap;
import java.util.Map;

/**
 * 配置隊列
 */
@Configuration
public class QueueConfig {

    @Value("${rabbitmq.exchange}")
    private String exchangeName;

    @Value("${rabbitmq.queue}")
    private String queueName;

    @Bean
    public CustomExchange delayExchange() {
        Map<String, Object> args = new HashMap<>();
        args.put("x-delayed-type", "direct");
       //使用的是CustomExchange,不是DirectExchange,另外CustomExchange的類型必須是x-delayed-message
        return new CustomExchange(exchangeName, "x-delayed-message",true, false,args);
    }

    @Bean
    public Queue queue() {
        Queue queue = new Queue(queueName, true);
        return queue;
    }

    @Bean
    public Binding binding() {
        return BindingBuilder.bind(queue()).to(delayExchange()).with(queueName).noargs();
    }
}
消息發送
    package com.xsh.mq.service;

import org.slf4j.Logger;
import org.slf4j.LoggerFactory;
import org.springframework.amqp.rabbit.core.RabbitTemplate;
import org.springframework.beans.factory.annotation.Autowired;
import org.springframework.beans.factory.annotation.Value;
import org.springframework.stereotype.Service;

@Service
public class MessageServiceImpl {

    /**
     * 日誌
     */
    private static final Logger logger = LoggerFactory.getLogger(MessageServiceImpl.class);
    /**
     * rabbitMQ模板
     */
    @Autowired
    private RabbitTemplate rabbitTemplate;

    @Value("${rabbitmq.exchange}")
    private String exchangeName;

    /**
     * 發送消息
     * @param queueName 隊列名稱
     * @param msg 消息內容
     * @param delay 延遲時長 預設3秒
     */
    public void sendMsg(String queueName,String msg,Integer delay) {
        if(null == delay){
            delay = 3000;
        }
        logger.info("》》》》發送消息");
        Integer finalDelay = delay;
        rabbitTemplate.convertAndSend(exchangeName, queueName, msg, message -> {
            //必須添加header x-delay
            message.getMessageProperties().setHeader("x-delay", finalDelay);
            return message;
        });
    }
}
這裡發送消息我定義了一個延遲參數,傳入的延遲是多少,消息就延遲多少,方便消息延遲不一樣
消費消息
    package com.xsh.mq.service;

import org.slf4j.Logger;
import org.slf4j.LoggerFactory;
import org.springframework.amqp.rabbit.annotation.RabbitListener;
import org.springframework.stereotype.Component;

@Component
public class MessageReceiver {
    /**
     * 日誌
     */
    private static final Logger logger = LoggerFactory.getLogger(MessageReceiver.class);

    @RabbitListener(queues = "${rabbitmq.queue}")
    public void receive(String msg) {
        logger.info("收到消息:{}", msg);
    }
}
測試發送接收
先運行springboot項目,然後編寫單元測試用例
      package com.xsh.mq;

  import com.xsh.mq.service.MessageServiceImpl;
  import org.junit.Test;
  import org.junit.runner.RunWith;
  import org.springframework.beans.factory.annotation.Autowired;
  import org.springframework.beans.factory.annotation.Value;
  import org.springframework.boot.test.context.SpringBootTest;
  import org.springframework.test.context.junit4.SpringRunner;

  @RunWith(SpringRunner.class)
  @SpringBootTest
  public class MqApplicationTests {

      @Test
      public void contextLoads() {
      }

      @Autowired
      private MessageServiceImpl messageService;

      @Value("${rabbitmq.queue}")
      private String queueName;

      @Test
      public void send() {
          messageService.sendMsg(queueName, "delayMsg2", 1000 * 60 * 2);
          messageService.sendMsg(queueName, "delayMsg1", 1000 * 60);
          messageService.sendMsg(queueName, "delayMsg3", 1000 * 60*3);
      }

  }
這裡我發送了三條延遲消息,控制台結果如圖:

消費者接收到的消息為:

從執行結果來看,demo基本實現,RabbitMQ其他細節還有待繼續看。
參考文章:Scheduling Messages with RabbitMQ


