基礎環境配置 功能變數名稱和伺服器請先自行購買 基於 雲伺服器ECS 創建一個應用實例,選擇系統鏡像為 Ubuntu 16.04 ,在本機通過 SSH 進行遠程連接,併進行相關配置 安裝並配置 Nginx 配置 default 文件,在文件末尾配置如下節點信息 檢測配置並更新 安裝 DotNetCore 請 ...
基礎環境配置
功能變數名稱和伺服器請先自行購買
基於 雲伺服器ECS 創建一個應用實例,選擇系統鏡像為 Ubuntu 16.04,在本機通過 SSH 進行遠程連接,併進行相關配置
ssh root@http://39.108.48.203/

...

sudo apt-get update
sudp apt-get upgrade
sudo apt-get autoremove
sudo apt-get clean
安裝並配置 Nginx
sudo apt-get install nginx
sudo service nginx start

sudo gedit /etc/nginx/sites-available/default
配置 default 文件,在文件末尾配置如下節點信息
# Virtual Host configuration for example.com
#
# You can move that to a different file under sites-available/ and symlink that
# to sites-enabled/ to enable it.
#
server {
    listen        80;
    # 網站文件的目標位置
    root /home/hippie/website/wwwroot;
    # 網站功能變數名稱
    server_name your website name;
        location / {
            proxy_pass         http://localhost:5000;
            proxy_http_version 1.1;
            proxy_set_header   Upgrade $http_upgrade;
            proxy_set_header   Connection keep-alive;
            proxy_set_header   Host $host;
            proxy_cache_bypass $http_upgrade;
            proxy_set_header   X-Forwarded-For $proxy_add_x_forwarded_for;
            proxy_set_header   X-Forwarded-Proto $scheme;
    }
}
檢測配置並更新
sudo nginx -t
sudo nginx -s reload
安裝 DotNetCore
請參考官網最新安裝說明:.NetCore Download
部署流程
打開 VisualStudio2017 右鍵要發佈的項目,點擊 publish,並參考下圖進行相關配置。
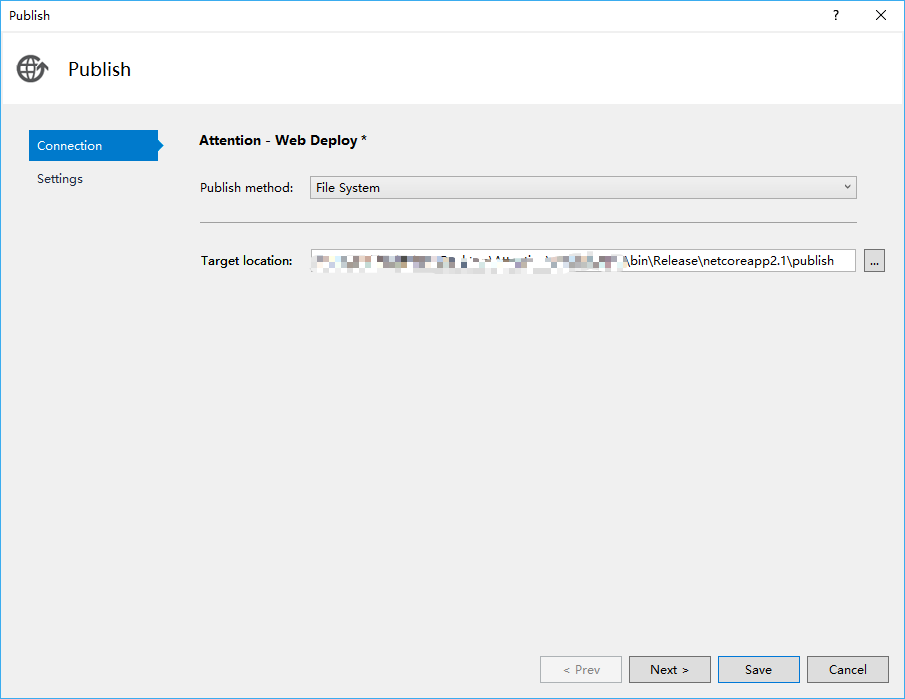
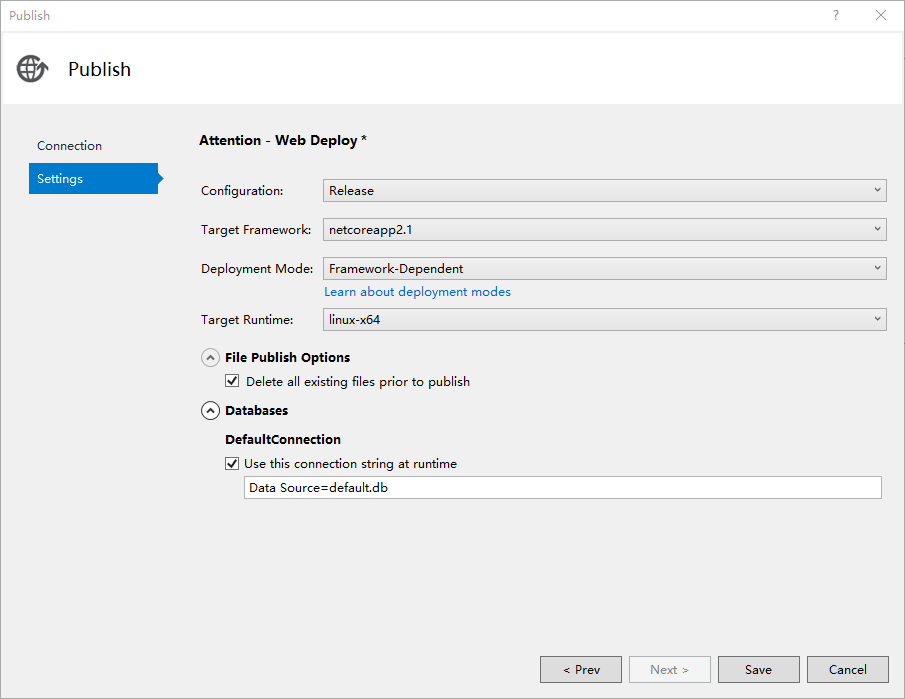
點擊 Save 按鈕並執行發佈操作。然後將 publish 文件夾上傳至伺服器相應位置,上傳成功後執行
dotnet run app.dll如果不出意外的,這個時候,你就可以通過 IP 或者 你的網站功能變數名稱來進行訪問了。
創建守護進程
執行上述操作之後,我們的程式還是不能正在長時間運行,因此我們需要通過守護進程來管理我們的網站
sudo apt-get install supervisor
sudo vim /ect/supervisor/conf.d/website.conf
配置 website.conf 文件
[program:website]

#要執行的命令
command=/usr/bin/dotnet Attention.dll

#命令執行的目錄
directory=/home/hippie/website

#環境變數
environment=ASPNETCORE__ENVIRONMENT=Production

 #進程執行的用戶身份
user=www-data
stopsignal=INT

#是否自動啟動
autostart=true

#是否自動重啟
autorestart=true

#自動重啟間隔
startsecs=1

#標準錯誤日誌
stderr_logfile=/var/log/website.err.log

#標準輸出日誌
stdout_logfile=/var/log/website.out.log
這個時候,我們執行下述命令啟動守護進程
sudo supervisorctl shutdown && sudo supervisord -c /etc/supervisor/supervisord.conf

supervisorctl shutdown

sudo service supervisor start
好了,這個時候你可以嘗試關閉遠程連接進行網站訪問,如果能正常訪問的話,說明你的配置已經起作用了.
補充
在正常的生產環境中,我們還需要配置 HTTPS,關於這一部分,小伙伴們可以參考博客園中其餘大神的博客。
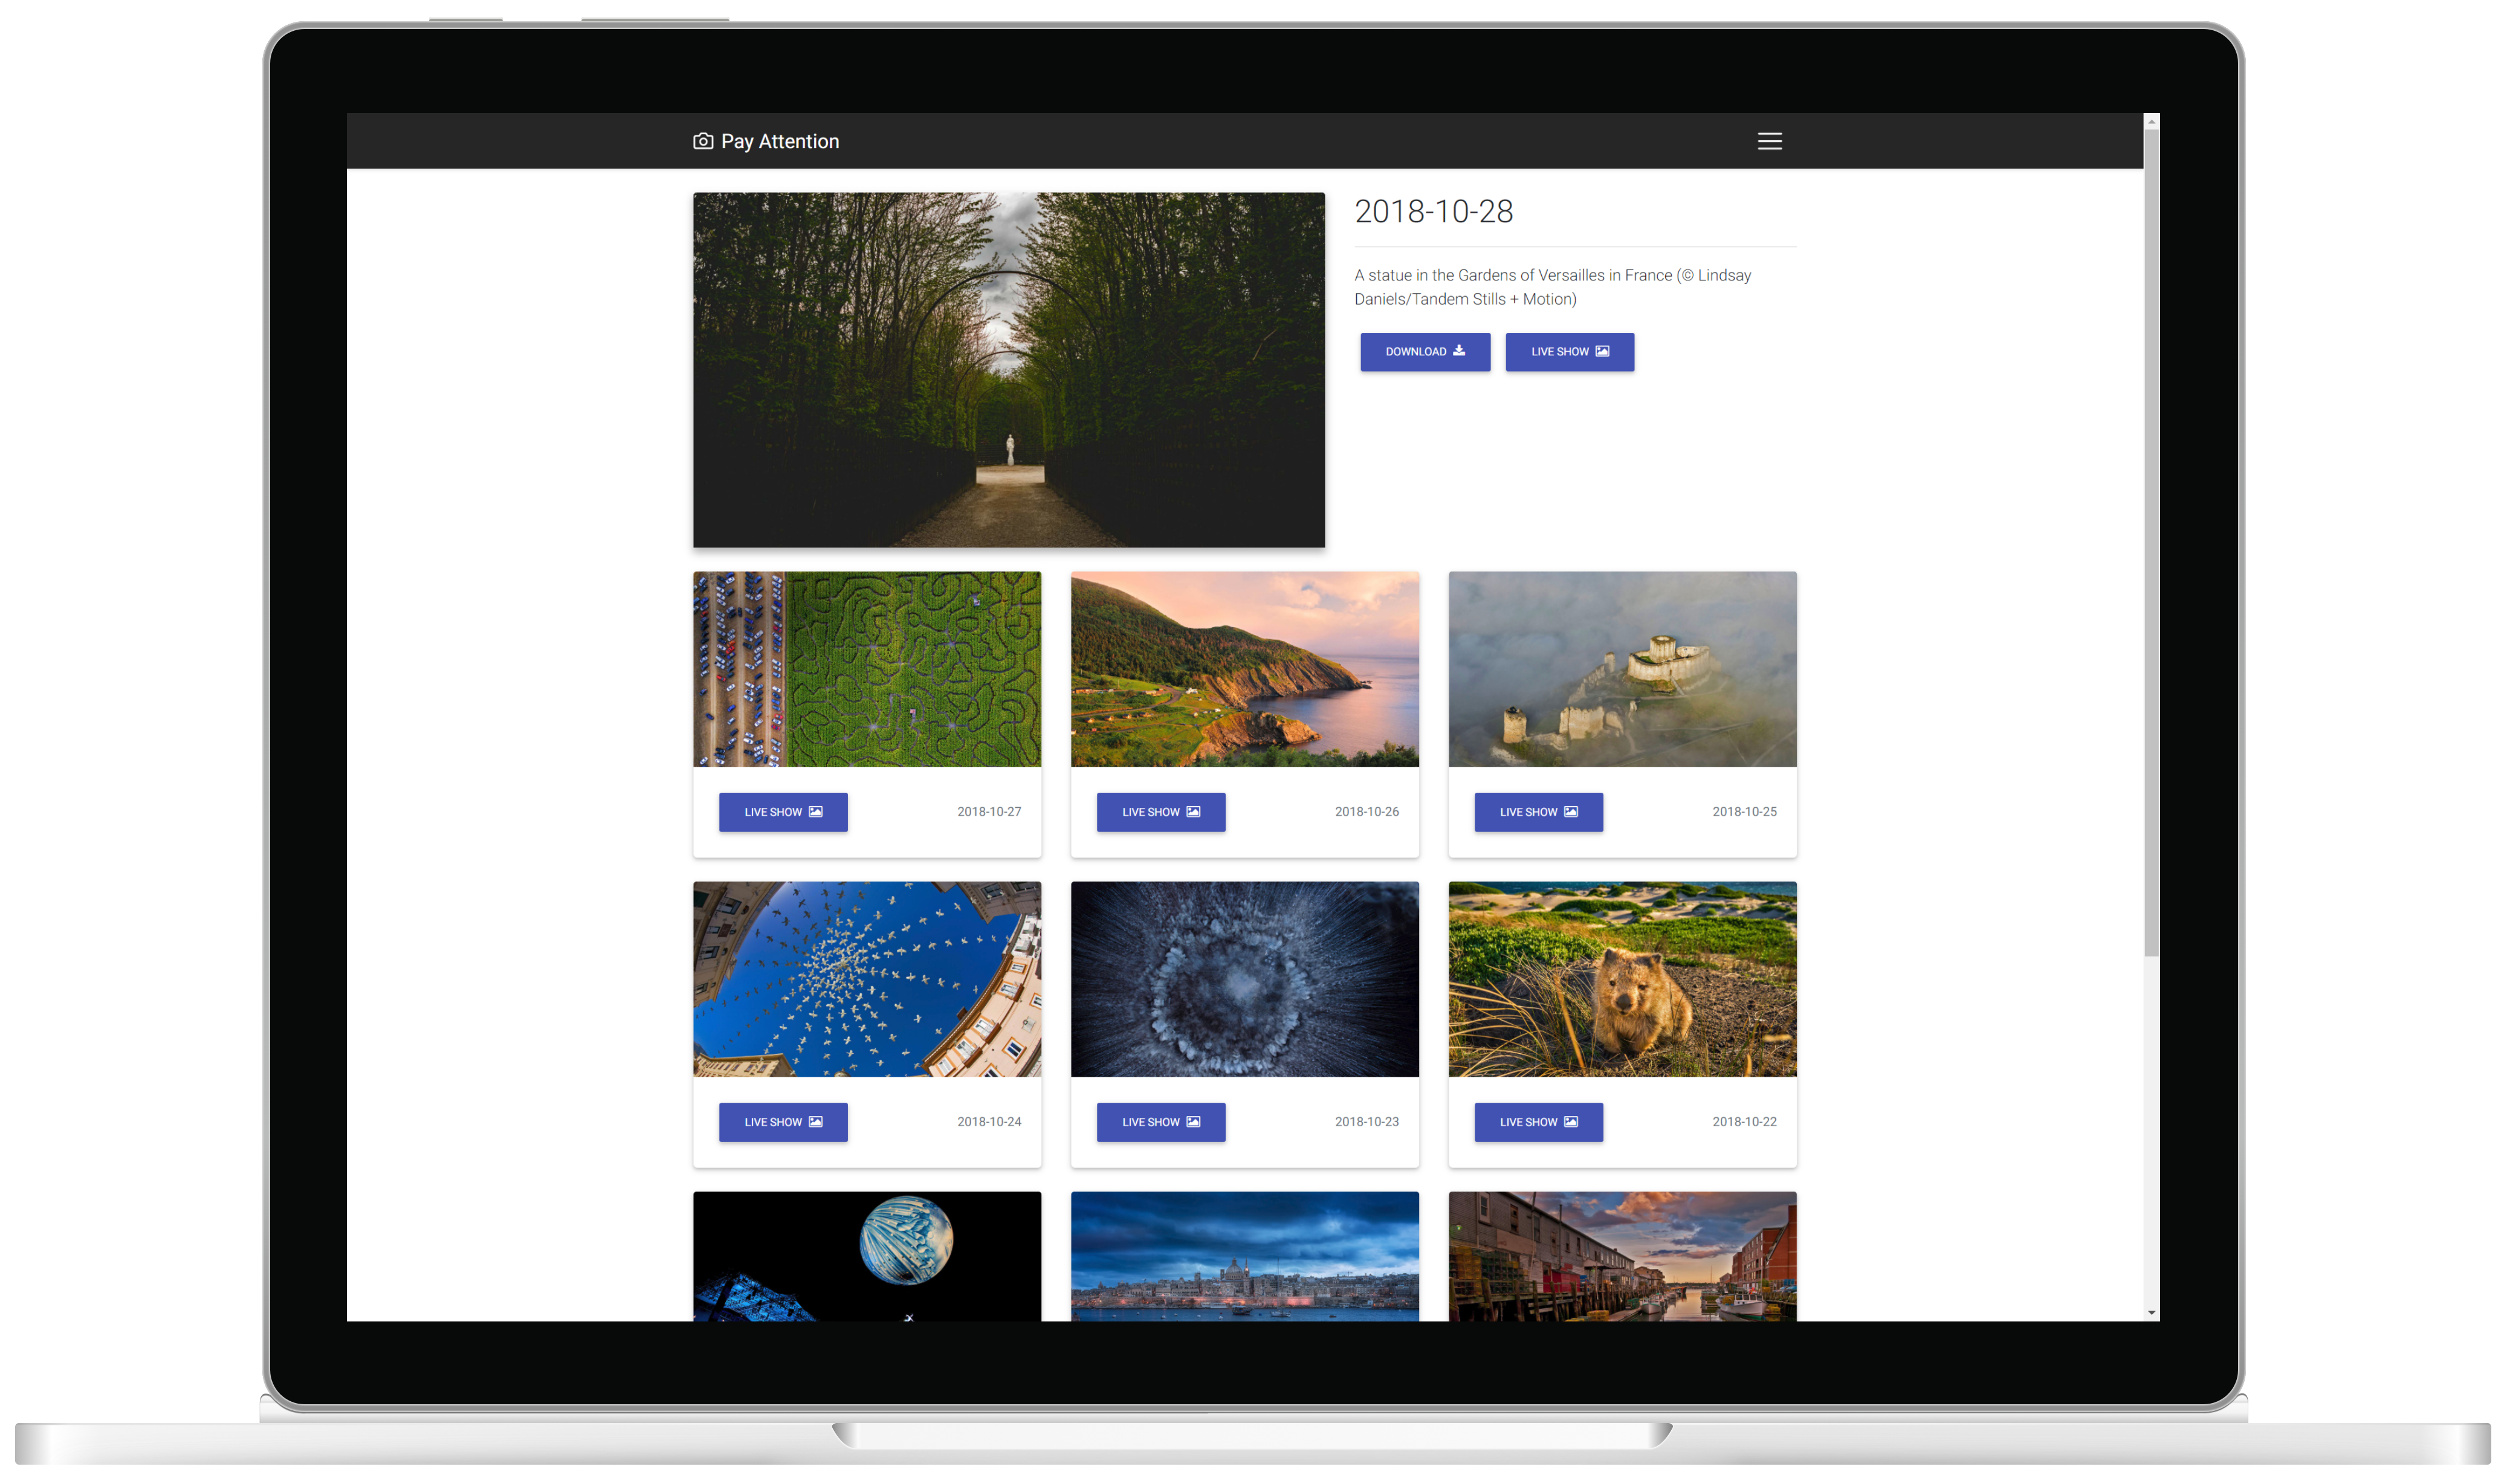
彩蛋
安利一個我的個人圖片網站,圖片資源來自於必應,感興趣的小伙伴歡迎體驗: