
引言 - 一切才剛剛開始 structc 是 C 結構基礎庫. 簡單有態度. structc - https://github.com/wangzhione/structc 之前推過幾次 structc, 沒什麼效果. 這次乘著最近加班不多, 來詳細解說哈 structc 的思考初衷. 0.0 整體 ...
引言 - 一切才剛剛開始
structc 是 C 結構基礎庫. 簡單可復用.
structc - https://github.com/wangzhione/structc
之前也描述過幾次 structc, 文字多代碼風格少. 最近加班不多, 準備詳細解說哈其思考初衷.
0.0 整體結構
structc
├── extern
├── LICENSE
├── Makefile
├── README.md
├── structc
└── structc.sln
structc.sln : winds 項目管理文件 visual studio
structc : 項目整體源碼和素材文件目錄
README.md : 項目介紹 Markdown
Makefile : linux 編譯文件 make
LICENSE : MIT 開源協議
extern : 項目引入的外部庫目錄
extern
├── jemalloc
├── jemalloc-vc141-Release-static.lib
├── libuv.lib
├── pthread.h
├── pthread_lib.lib
├── sched.h
├── semaphore.h
├── strings.h
├── uv
└── uv.h
以上就是我們看到 structc 項目整體結構.
0.1 外部庫
當前很謹慎的引入兩個半外部庫. 最大程度會靜態庫編譯鏈接運行. 榮我慢慢細說.
1. jemalloc - https://github.com/jemalloc/jemalloc
jemalloc 是 c 構建底層高性能 malloc 庫. 也被稱為系統編程末期最後免費午餐. 整個 structc
malloc 全權交給 je_malloc 抗壓. 其中 winds 編譯靜態庫部分, 項目本身也有細說 -
https://github.com/jemalloc/jemalloc/tree/dev/msvc
How to build jemalloc for Windows
=================================

1. Install Cygwin with at least the following packages:
   * autoconf
   * autogen
   * gawk
   * grep
   * sed

2. Install Visual Studio 2015 or 2017 with Visual C++

3. Add Cygwin\bin to the PATH environment variable

4. Open "x64 Native Tools Command Prompt for VS 2017"
   (note: x86/x64 doesn't matter at this point)

5. Generate header files:
   sh -c "CC=cl ./autogen.sh"

6. Now the project can be opened and built in Visual Studio:
   msvc\jemalloc_vc2017.sln
( 註: vs 使用最新版本. 網址打不開那就FQ. 後面其也一樣, 時刻保證最新 2018/10/10 ~ )
對於 linux 編譯安裝參照下麵腳本
# 開發環境安裝
sudo apt install gcc gdb autogen autoconf

# jemalloc 安裝
cd
wget https://github.com/jemalloc/jemalloc/releases/download/5.1.0/jemalloc-5.1.0.tar.bz2
tar -jxvf jemalloc-5.1.0.tar.bz2
cd jemalloc-5.1.0

sh autogen.sh
make -j4
sudo make install
sudo ldconfig

cd
rm -rf jemalloc-5.1.0 jemalloc-5.1.0.tar.bz2
當 jemalloc 構建好了. 設計 alloc 層引入到 structc 框架中, 用戶取代系統 malloc...
alloc.h - https://github.com/wangzhione/structc/blob/master/structc/system/alloc.h
#ifndef _H_ALLOC
#define _H_ALLOC

#include <stdlib.h>
#include <string.h>

// :) 高效記憶體分配, 莫名傷感 ~
// _MSC_VER -> Winds CL
// __GNUC__ -> Linux GCC
//
#ifdef _MSC_VER
//
// CPU 檢測 x64 or x86
// ISX64 defined 表示 x64 否則 x86
//
#   if defined(_M_ARM64) || defined(_M_X64)
#       define ISX64
#   endif
//
// _M_PPC 為 PowerPC 平臺定義, 現在已不支持
// so winds 可以認為都是小端平臺
//
#   if defined(_M_PPC)
#       define ISBENIAN
#   endif

#elif  __GNUC__

#   if defined(__x86_64__)
#       define ISX64
#   endif
//
// 大小端檢測 : ISBENIAN defined 表示大端
//
#   if defined(__BIG_ENDIAN__) || defined(__BIG_ENDIAN_BITFIELD)
#       define ISBENIAN
#   endif

#else
#   error BUILD ( ̄︶ ̄) S
#endif

// OFF_ALLOC - 關閉全局 free / malloc 配置
#ifndef OFF_ALLOC

#   undef  free
#   define free    free_

#   undef  strdup
#   define strdup  strdup_

#   undef  malloc
#   define malloc  malloc_
#   undef  calloc
#   define calloc  calloc_
#   undef  realloc
#   define realloc realloc_

#endif//OFF_ALLOC

//
// free_ - free 包裝函數
// ptr      : 記憶體首地址
// return   : void
//
extern void free_(void * ptr);

//
// malloc_ - malloc 包裝, 封裝一些特殊業務
// size     : 分配的記憶體位元組
// return   : 返回可使用的記憶體地址.
//
extern void * malloc_(size_t size);

//
// strdup_ - strdup 包裝函數
// s        : '\0' 結尾 C 字元串
// return   : 拷貝後新的 C 字元串
//
extern char * strdup_(const char * s);

//
// calloc_ - calloc 包裝, 封裝一些特殊業務
// num      : 數量
// size     : 大小
// return   : 返回可用記憶體地址, 並且置0
//
extern void * calloc_(size_t num, size_t size);

//
// realloc_ - realoc 包裝函數, 封裝一些特殊業務
// ptr      : 記憶體首地址, NULL 等同於 malloc
// size     : 重新分配的記憶體大小
// return   : 返回重新分配好的新地址內容
//
extern void * realloc_(void * ptr, size_t size);

#endif//_H_STDEXIT
alloc.c - https://github.com/wangzhione/structc/blob/master/structc/system/alloc.c
#include <stdio.h>

#define OFF_ALLOC
#include "alloc.h"

#define JEMALLOC_NO_DEMANGLE
#include <jemalloc/jemalloc.h>

//
// free_ - free 包裝函數
// ptr      : 記憶體首地址
// return   : void
//
inline void free_(void * ptr) {
    je_free(ptr);
}

// 簡單記憶體不足檢測處理
static inline void * mcheck(void * ptr, size_t size) {
    if (NULL == ptr) {
        fprintf(stderr, "out of memory trying to allocate %zu\n", size);
        fflush(stderr);
        abort();
    }
    return ptr;
}

//
// malloc_ - malloc 包裝, 封裝一些特殊業務
// size     : 分配的記憶體位元組
// return   : 返回可使用的記憶體地址.
//
inline void * malloc_(size_t size) {
    void * ptr = je_malloc(size);
    return mcheck(ptr, size);
}

//
// strdup_ - strdup 包裝函數
// s        : '\0' 結尾 C 字元串
// return   : 拷貝後新的 C 字元串
//
inline char * strdup_(const char * s) {
    if (s) {
        size_t n = strlen(s) + 1;
        char * ptr = malloc_(n);
        return memcpy(ptr, s, n);
    }
    return NULL;
}

//
// calloc_ - calloc 包裝, 封裝一些特殊業務
// num      : 數量
// size     : 大小
// return   : 返回可用記憶體地址, 並且置0
//
inline void * calloc_(size_t num, size_t size) {
    void * ptr = je_calloc(num, size);
    return mcheck(ptr, size);
}

//
// realloc_ - realoc 包裝函數, 封裝一些特殊業務
// ptr      : 記憶體首地址, NULL 等同於 malloc
// size     : 重新分配的記憶體大小
// return   : 返回重新分配好的新地址內容
//
inline void * realloc_(void * ptr, size_t size) {
    void * ntr = je_realloc(ptr, size);
    return mcheck(ntr, size);
}
包裝了一層. 從 alloc.h 中 OFF_ALLOC 巨集可以看出, 具備支持插拔能力 ~
2. libuv - https://github.com/libuv/libuv
libuv 用 c 寫的高性能單線程網路 io 庫. 希望通過它來支撐網路層. winds 編譯靜態庫
參照 libuv 項目首頁燥起來就行. 其中 gyp 安裝了這個版本, 其它隨波逐流 ~
gyp - https://github.com/adblockplus/gyp
linux 編譯安裝腳本
# libuv 安裝
cd
wget https://github.com/libuv/libuv/archive/v1.23.1.zip
unzip v1.23.1.zip
cd libuv-1.23.1

sh autogen.sh
./configure
make -j4
sudo make install
sudo ldconfig

cd
#
# 註意 uv 頭文件, 全部導入到系統 include 目錄下麵
#
rm -rf libuv-1.23.1 v1.23.1.zip
註意要將編譯後 include 完整拷貝到安裝目錄 include下. 這樣 uv 頭文件全, 日後會用到.
libuv 開箱即用, 不太需要什麼基礎封裝.
3. pthread - https://github.com/GerHobbelt/pthread-win32
這是最後那半個, 為 winds 引入 POSIX thread 模型. 編譯起來很簡單(前提咱們 VS 玩的熟).
扯點閑篇. linux 和 winds 相輔相成, 對立而統一. 一個是一切從頭碼, 一個開始就已經註冊未來.
描述比較粗, 但大概這意思. (兩個都不 eary, 玩很久才敢入門見岳父岳母) . 這裡包裝了一層
thread.h - https://github.com/wangzhione/structc/blob/master/structc/system/thread.h
#ifndef _H_THREAD
#define _H_THREAD

#include "struct.h"
#include <pthread.h>
#include <semaphore.h>

//
// pthread_end - 等待啟動線程結束
// tid      : 線程id
// return   : void
//
inline void pthread_end(pthread_t tid) {
    pthread_join(tid, NULL);
}

//
// pthread_run - 非同步啟動線程
// id       : &tid 線程id地址
// frun     : 運行的主體
// arg      : 運行參數
// return   : 返回線程構建結果, 0 is success
//
#define pthread_run(id, frun, arg)                                  \
pthread_run_(&(id), (node_f)(frun), (void *)(intptr_t)(arg))
inline int pthread_run_(pthread_t * id, node_f frun, void * arg) {
    return pthread_create(id, NULL, (start_f)frun, arg);
}

//
// pthread_async - 非同步啟動分離線程
// frun     : 運行的主體
// arg      : 運行參數
// return   : 返回 0 is success
//
#define pthread_async(frun, arg)                                    \
pthread_async_((node_f)(frun), (void *)(intptr_t)(arg))
inline int pthread_async_(node_f frun, void * arg) {
    int ret;
    pthread_t tid;
    pthread_attr_t attr;

    pthread_attr_init(&attr);
    pthread_attr_setdetachstate(&attr, PTHREAD_CREATE_DETACHED);
    ret = pthread_create(&tid, &attr, (start_f)frun, arg);
    pthread_attr_destroy(&attr);

    return ret;
}

#endif//_H_THREAD
利用現代編譯器相容性構建了 pthread 兩種啟動巨集, 後續寫 pthread create 相關代碼會得心應手!
到此我們大一統治線程模型就定下來了. 還順帶引出了一個很重要輔助頭文件.
struct.h - https://github.com/wangzhione/structc/blob/master/structc/struct/struct.h
#ifndef _H_STRUCT
#define _H_STRUCT

#include <math.h>
#include "alloc.h"
#include <ctype.h>
#include <float.h>
#include <stdio.h>
#include <errno.h>
#include <assert.h>
#include <stdarg.h>
#include <stdint.h>
#include <stddef.h>
#include <limits.h>
#include <stdbool.h>
#include <inttypes.h>

//
// enum Flag int - 函數返回值全局狀態碼
// >= 0 標識 Success 狀態, < 0 標識 Error 狀態
//
enum {
    SBase       =  +0, // 正確基礎類型

    EBase       =  -1, // 錯誤基礎類型
    EParam      =  -2, // 輸入參數錯誤
    EFd         =  -3, // 文件打開失敗
    EClose      =  -4, // 文件操作關閉
    EAccess     =  -5, // 沒有操作許可權
    EAlloc      =  -6, // 記憶體操作錯誤
    EParse      =  -7, // 協議解析錯誤
    ESmall      =  -8, // 過小基礎錯誤
    EBig        =  -9, // 過大基礎錯誤
    ETimeout    = -10, // 操作超時錯誤
};

//
// DCODE - DEBUG 模式下的測試巨集
// DCODE({
//     puts("debug start...");
// });
//
#ifndef DCODE
#   ifdef _DEBUG
#       define DCODE(code)  do code while(0)
#   else
#       define DCODE(code)
#   endif //  ! _DEBUG
#endif  //  ! DCODE

//
// icmp_f - 比較行為的類型
//  : int add_cmp(const void * now, const void * node)
//
typedef int (* icmp_f)();

//
// vnew_f - 根據規則構建對象
//  : void * rtree_new(void * node)
//
typedef void * (* vnew_f)();

//
// node_f - 銷毀當前對象節點
//  : void list_die(void * node);
//
typedef void (* node_f)(void * node);

//
// start_f - pthread create func
//  : int * run(int * arg)
//
typedef void * (* start_f)(void * arg);

//
// each_f - each 迴圈操作, arg 外部參數, node 是內部結點
//  : int dict_echo(struct dict * node, void * arg) { return 0; }
//
typedef int (* each_f)(void * node, void * arg);

//
// CERR - 列印錯誤信息
// EXIT - 列印錯誤信息, 並 exit
// IF   - 條件判斷異常退出的輔助巨集
//
#define CERR(fmt, ...)                                                   \
fprintf(stderr, "[%s:%s:%d][%d:%s]" fmt "\n",                            \
    __FILE__, __func__, __LINE__, errno, strerror(errno), ##__VA_ARGS__)

#define EXIT(fmt, ...)                                                   \
do {                                                                     \
    CERR(fmt, ##__VA_ARGS__);                                            \
    exit(EXIT_FAILURE);                                                  \
} while(0)

#define IF(cond)                                                         \
if ((cond)) EXIT(#cond)

//
// RETURN - 列印錯誤信息, 並 return 返回指定結果
// val      : return的東西, 當需要 return void; 時候填 ',' 就過 or NIL
// fmt      : 雙引號包裹的格式化字元串
// ...      : fmt中對應的參數
// return   : val
//
#define RETURN(val, fmt, ...)                                           \
do {                                                                    \
    CERR(fmt, ##__VA_ARGS__);                                           \
    return val;                                                         \
} while(0)

#define NIL
#define RETNIL(fmt, ...)                                                \
RETURN(NIL , fmt, ##__VA_ARGS__)

#define RETNUL(fmt, ...)                                                \
RETURN(NULL, fmt, ##__VA_ARGS__)

#endif//_H_STRUCT
作者嘗試寫 structc 項目時第一個源文件 : )
0.2 IDE 弱議
winds 沒得選, 最新最全的 visual studio best version 有才能統治一切. 這裡主要說
的是 linux 上面我們的選擇. 最開始我是 vi + make + gcc + gdb 開發和編譯的.
Makefile - https://github.com/wangzhione/structc/blob/master/Makefile
# 編譯的目錄結構
# Release : make
# Debug   : make D=-D_DEBUG
# Clean   : make clean
make 是編譯發佈, make D=-D_DEBUG 是編譯 Debug, make clean 項目清理. 手工操作.
這樣搞對我都還好, 什麼都行.
但不妨更精進一步 [vi + make + gcc + gdb] -> [code + F5 + F10 + F11] 是不是更妙.
微軟作為桌面軟體霸主, code(VSCode 簡稱)不用我多說, 不得不服. 那開搞
1. 安裝軟體
ubuntu best version
vscode
安裝好 vscode 後, 在其內部安裝插件 Microsoft C/C++ for Visual Studio Code
2. F1 -> Edit Configurations -> c_cpp_properties.json
設置如下內容和VS配置很相似
{
    "configurations": [
        {
            "name": "Linux",
            "includePath": [
                "/usr/include/c++/7",
                "/usr/include/x86_64-linux-gnu/c++/7",
                "/usr/include/c++/7/backward",
                "/usr/lib/gcc/x86_64-linux-gnu/7/include",
                "/usr/local/include",
                "/usr/lib/gcc/x86_64-linux-gnu/7/include-fixed",
                "/usr/include/x86_64-linux-gnu",
                "/usr/include",
                "${workspaceRoot}",
                "${workspaceRoot}/structc/base",
                "${workspaceRoot}/structc/struct",
                "${workspaceRoot}/structc/system"
            ],
            "defines": [
                "_DEBUG",
                "__GNUC__"
            ],
            "intelliSenseMode": "clang-x64",
            "browse": {
                "path": [
                    "/usr/include/c++/7",
                    "/usr/include/x86_64-linux-gnu/c++/7",
                    "/usr/include/c++/7/backward",
                    "/usr/lib/gcc/x86_64-linux-gnu/7/include",
                    "/usr/local/include",
                    "/usr/lib/gcc/x86_64-linux-gnu/7/include-fixed",
                    "/usr/include/x86_64-linux-gnu",
                    "/usr/include",
                    "${workspaceRoot}"
                ],
                "limitSymbolsToIncludedHeaders": true,
                "databaseFilename": ""
            },
            "compilerPath": "/usr/bin/clang",
            "cStandard": "c11",
            "cppStandard": "c++17"
        }
    ],
    "version": 4
}
3. F5 -> launch.json
按照規律改 program 項目生成 和 preLaunchTask 前置任務{ // 使用 IntelliSense 瞭解相關屬性。 // 懸停以查看現有屬性的描述。 // 欲瞭解更多信息,請訪問: https://go.microsoft.com/fwlink/?linkid=830387 "version": "0.2.0", "configurations": [ { "name": "(gdb) Launch", "type": "cppdbg", "request": "launch", "program": "${workspaceFolder}/Out/main.exe", "args": [], "stopAtEntry": false, "cwd": "${workspaceFolder}", "environment": [], "externalConsole": true, "preLaunchTask": "Debug", "MIMode": "gdb", "setupCommands": [ { "description": "Enable pretty-printing for gdb", "text": "-enable-pretty-printing", "ignoreFailures": true } ] } ] }
4. F5 -> tasks.json
建立下麵任務, 目前只使用了 Debug{ // See https://go.microsoft.com/fwlink/?LinkId=733558 // for the documentation about the tasks.json format "version": "2.0.0", "tasks": [ { "type" : "shell", "label" : "Debug", "command" : "make D=-D_DEBUG" } ] }
此刻我們就可以 F5 搞起來 ~
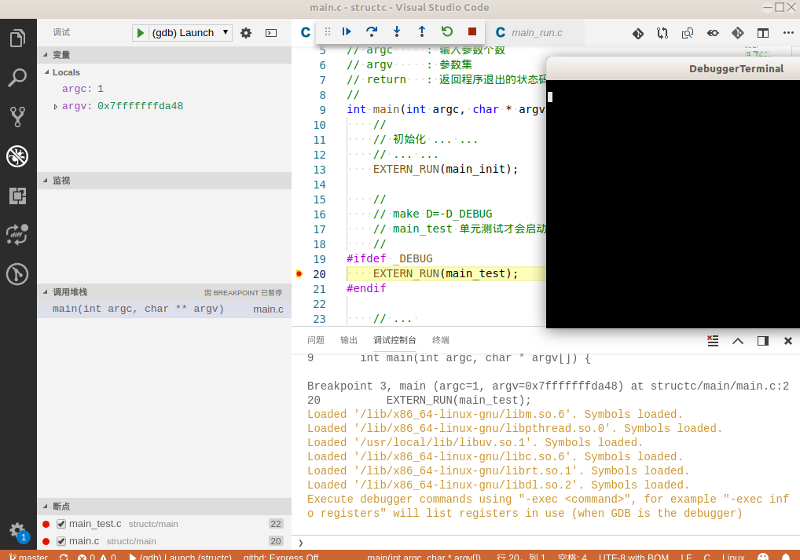
兄弟們是不是很親切, 這麼複雜定製化項目都可以可視化調試. 還有誰 ~ 當然 IDE 有沒有
都好說, 難說的是你是否耐的下心去感悟技術的脈絡, 可不能學京東技術, 對開源缺失敬畏
之心, 技術不見得多厲害, 節操提前貸款沒了 ~ 最終成為奧義之梗 : )
前言 - 不妨說點設計
進入 structc/structc 看到以下項目結構
wzhi@wzc:~/structc/structc$ tree -L 1
.
├── base
├── conf
├── main
├── README.md
├── struct
├── structc.vcxproj
├── structc.vcxproj.filters
├── structc.vcxproj.user
├── system
└── test
base : 基礎介面封裝目錄
conf : 配置文件目錄
main : 主函數目錄
struct : 數據結構介面目錄
system : 系統庫包裝目錄
test : 單元測試目錄
1.0 main 主函數設計
wzhi@wzc:~/structc/structc/main$ tree
.
├── main.c
├── main_init.c
├── main_run.c
└── main_test.c
重點關註下入口 mian 主函數設計 main.c
#include "head.h"

//
// main - 程式的總入口, 從扯開始
// argc     : 輸入參數個數
// argv     : 參數集
// return   : 返回程式退出的狀態碼
//
int main(int argc, char * argv[]) {
    //
    // 初始化 ... ...
    // ... ...
    EXTERN_RUN(main_init);

    //
    // make D=-D_DEBUG
    // main_test 單元測試才會啟動
    //
#ifdef _DEBUG
    EXTERN_RUN(main_test);
#endif

    // ...
    // ... 啟動當前項目運行的主函數
    //
    EXTERN_RUN(main_run, argc, argv);

    return EXIT_SUCCESS;
}
其中 EXTERN_RUN 也很奇巧
//
// EXTERN_RUN - 簡單的聲明, 並立即使用的巨集
// ftest    : 需要執行的函數名稱
// ...      : 可變參數, 保留
//
#define EXTERN_RUN(ftest, ...)                                  \
do {                                                            \
    extern void ftest();                                        \
    ftest (__VA_ARGS__);                                        \
} while(0)
越過聲明直接使用的巨集聲明. structc 中 main 函數一共做了二件半事情.
main_init 初始化函數, main_run 業務運行函數, 還有半個 main_test 運行單元測試.
隨後我們好好看看這個單元測試套路.
1.1 test 單元測試套路設計
先看看 main_test.c
#include "head.h"

//
// TEST - 用於單元測試函數, 執行並輸出運行時間
// ftest    : 需要執行的測試函數名稱
// ...      : 可變參數, 保留
//
#define TEST(ftest, ...)                                         \
do {                                                             \
    extern void ftest();                                         \
    clock_t $s = clock();                                        \
    ftest (##__VA_ARGS__);                                       \
    double $e = (double)clock();                                 \
    printf(STR(ftest)" run time:%lfs\n", ($e-$s)/CLOCKS_PER_SEC);\
} while(0)


//
// main_test - *_test is here run
// return   : void
//
void main_test(void) {
    //
    // 開始你的表演, 單元測試
    //

    EXTERN_RUN(uv_tty_test);
}
以上只給予了業務測試的能力. 其中 uv_tty_test 函數就是單元測試目錄下其中一個的單元測試函數體.
而我們每個業務測試函數, 順帶會創建一個同名的 .c 文件. 例如這裡是 uv_tty_test.c
#include <uv.h>
#include <stdio.h>
#include <stdlib.h>
#include <string.h>

//
// 測試 libuv tty 操作控制台
// 輸出一段有顏色的文字
//
void uv_tty_test(void) {
    uv_tty_t tty;
    uv_buf_t buf[3];
    unsigned i, len = sizeof buf / sizeof *buf;
    uv_loop_t * loop = uv_default_loop();

    // 目前只對 tty 控制台處理
    if (uv_guess_handle(1) != UV_TTY) {
        fprintf(stderr, "uv_guess_handle(1) != UV_TTY!\n");
        exit(EXIT_FAILURE);
    }

    uv_tty_init(loop, &tty, 1, 0);
    uv_tty_set_mode(&tty, UV_TTY_MODE_NORMAL);

    // 開始發送消息
    buf[0].base = "\033[46;37m";
    buf[1].base = u8"(✿◡‿◡) 喵醬 ((●'-'●)) 比 ♥ 里~ \n";
    buf[2].base = "\033[0m";
    for (i = 0; i < len; ++i)
        buf[i].len = (int)strlen(buf[i].base);
    uv_try_write((uv_stream_t *)&tty, buf, len);

    // 重置終端行為
    uv_tty_reset_mode();
    uv_run(loop, UV_RUN_DEFAULT);
}
思路很直白. 這些就是單元測試的真相... . 比較清晰的展示(業務是複雜中減負)
1.2 system 系統庫設計
這裡面設計東東不少, 只挑一些經典的供人看看. 代碼即註釋 ~
socket.h - https://github.com/wangzhione/structc/blob/master/structc/system/socket.h
#ifndef _H_SOCKET
#define _H_SOCKET

#include <time.h>
#include <fcntl.h>
#include "struct.h"
#include <signal.h>
#include <sys/types.h>

#ifdef __GNUC__

#include <netdb.h>
#include <unistd.h>
#include <sys/un.h>
#include <sys/uio.h>
#include <sys/time.h>
#include <arpa/inet.h>
#include <sys/socket.h>
#include <netinet/tcp.h>
#include <s


