
Mysql主從資料庫搭建流程 新手開始學習mysql主從庫,遇到一些問題,總結後寫出以下流程 下麵以5.7.23版本為例介紹 第一步:去官網下載5.7.23版本的免安裝壓縮包形式的mysql文件,貼上網址吧:https://dev.mysql.com/downloads/mysql/5.7.html ...
Mysql主從資料庫搭建流程
新手開始學習mysql主從庫,遇到一些問題,總結後寫出以下流程
下麵以5.7.23版本為例介紹
第一步:去官網下載5.7.23版本的免安裝壓縮包形式的mysql文件,貼上網址吧:https://dev.mysql.com/downloads/mysql/5.7.html#downloads
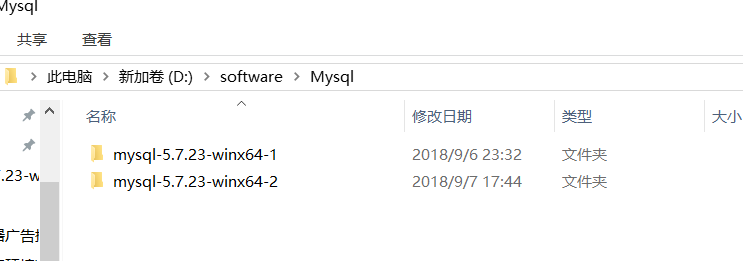
第二步:將下載好解壓後的mysql文件放到D盤任何一非中文目錄下(不是必須,避免出問題),併在mysql文件後面標註序號1和序號2
第三步:在mysql文件的根目錄下新建一個my.ini文件,將文件拷貝進去


# For advice on how to change settings please see
# http://dev.mysql.com/doc/refman/5.7/en/server-configuration-defaults.html
# *** DO NOT EDIT THIS FILE. It's a template which will be copied to the
# *** default location during install, and will be replaced if you
# *** upgrade to a newer version of MySQL.

[mysqld]

# Remove leading # and set to the amount of RAM for the most important data
# cache in MySQL. Start at 70% of total RAM for dedicated server, else 10%.
# innodb_buffer_pool_size = 128M

# Remove leading # to turn on a very important data integrity option: logging
# changes to the binary log between backups.
# log_bin

# These are commonly set, remove the # and set as required.
# basedir = .....
# datadir = .....
# port = .....
# server_id = .....


# Remove leading # to set options mainly useful for reporting servers.
# The server defaults are faster for transactions and fast SELECTs.
# Adjust sizes as needed, experiment to find the optimal values.
# join_buffer_size = 128M
# sort_buffer_size = 2M
# read_rnd_buffer_size = 2M

# 以下內容手動添加
[client]
port=3307
default-character-set=utf8
[mysqld]
#主庫配置
#skip_grant_tables
server_id=1
log_bin=master-bin
log_bin-index=master-bin.index


#埠
port=3306
character_set_server=utf8
#解壓目錄
basedir = D:\Software\Mysql\mysql-5.7.23-winx64-1
#解壓目錄下data目錄
datadir = D:\Software\Mysql\mysql-5.7.23-winx64-1\data

sql_mode=NO_ENGINE_SUBSTITUTION,STRICT_TRANS_TABLES
[WinMySQLAdmin]
 D:\Software\Mysql\mysql-5.7.23-winx64-1\bin\mysqld.exe
主庫的my.ini文件
第四步:管理員方式打開CMD,進入mysql的bin目錄下,執行以下語句,紅色的路徑記得改成自己的噢
mysqld --install slave --defaults-file="D:\software\Mysql\mysql-5.7.23-winx64-2\my.ini"
第五步:執行mysqld --initialize-insecure --user=root ,這句命令是為了初始化資料庫data
第六步:執行命令 net start mysql啟動服務
到此,mysql資料庫配置成功
接下來,開始修改mysql的許可權和修改root的密碼(前提是服務必須要打開噢)
第一步:輸入命令myslq -h localhost -P 3306 -u root 進入mysql資料庫(當時為瞭解決這個問題浪費了很多時間,還是因為對mysql不熟的原因)
後面依次輸入以下命令即可
mysql>use mysql;
mysql>update user set host='%' where user='root';
mysql>flush privileges;
mysql>GRANT ALL PRIVILEGES ON *.* TO 'root'@'%' IDENTIFIED BY '123456' WITH GRANT OPTION;
mysql>ALTER USER 'root'@'%' IDENTIFIED BY '123456';
mysql>exit;
到這裡,你的mysql主庫已經配置成功了,可以下載一個SQLyog等工具訪問你的資料庫吧
從庫的安裝流程參考主庫安裝流程,只是my.ini文件稍有不同,下麵是從庫的my.ini文件
從庫安裝完成後,至此主從庫已經安裝完成了
# For advice on how to change settings please see
# http://dev.mysql.com/doc/refman/5.7/en/server-configuration-defaults.html
# *** DO NOT EDIT THIS FILE. It's a template which will be copied to the
# *** default location during install, and will be replaced if you
# *** upgrade to a newer version of MySQL.

[mysqld]

# Remove leading # and set to the amount of RAM for the most important data
# cache in MySQL. Start at 70% of total RAM for dedicated server, else 10%.
# innodb_buffer_pool_size = 128M

# Remove leading # to turn on a very important data integrity option: logging
# changes to the binary log between backups.
# log_bin

# These are commonly set, remove the # and set as required.
# basedir = .....
# datadir = .....
# port = .....
# server_id = .....


# Remove leading # to set options mainly useful for reporting servers.
# The server defaults are faster for transactions and fast SELECTs.
# Adjust sizes as needed, experiment to find the optimal values.
# join_buffer_size = 128M
# sort_buffer_size = 2M
# read_rnd_buffer_size = 2M

# 以下內容手動添加
[client]
port=3307
default-character-set=utf8
[mysqld]
#從庫配置
server_id=2
relay-log-index=slave-relay-bin.index
relay-log=slave-relay-bin
#埠
port=3307
character_set_server=utf8
#解壓目錄
basedir=G:\Mysql\mysql-5.6.38-winx64
#解壓目錄下data目錄
datadir=G:\Mysql\mysql-5.6.38-winx64\data

sql_mode=NO_ENGINE_SUBSTITUTION,STRICT_TRANS_TABLES
[WinMySQLAdmin]
G:\Mysql\mysql-5.6.38-winx64\bin\mysqld.exe

my.ini
從庫的my.ini文件
剩下的配置就不再贅述了,請參考https://www.cnblogs.com/naruto123/p/8138708.html
感謝大神們無私分享經驗,
以上分享只是我在使用5.7.23版本搭建主從庫時參考了5.6的主從庫教程,搭建時出現了問題所以才總結出一篇
參考大神的經驗時一定要有自己的思考和總結


