
最近在學習redis,雖然現在還不是很熟練。不過可以進行簡單的框架整合開發。那麼我就把我的springmvc整合redis的過程分享給大家。 IDE:我使用的是IDEA。 首先看一下我的工程結構: 第一步:在pox.xml中引入jar 第二步:配置web.xml 第三步:配置springmvc.xm ...
最近在學習redis,雖然現在還不是很熟練。不過可以進行簡單的框架整合開發。那麼我就把我的springmvc整合redis的過程分享給大家。
IDE:我使用的是IDEA。
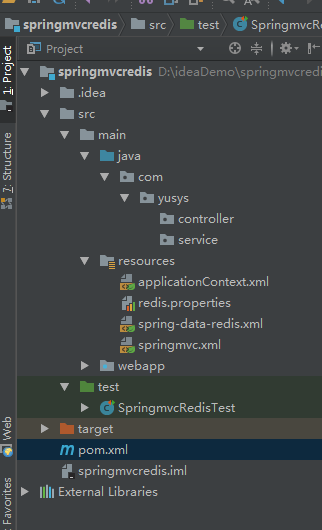
首先看一下我的工程結構:
第一步:在pox.xml中引入jar
<?xml version="1.0" encoding="UTF-8"?>

<project xmlns="http://maven.apache.org/POM/4.0.0" xmlns:xsi="http://www.w3.org/2001/XMLSchema-instance"
  xsi:schemaLocation="http://maven.apache.org/POM/4.0.0 http://maven.apache.org/xsd/maven-4.0.0.xsd">
  <modelVersion>4.0.0</modelVersion>

  <groupId>com.jiangfx</groupId>
  <artifactId>springmvc-redis</artifactId>
  <version>1.0-SNAPSHOT</version>
  <packaging>war</packaging>

  <name>springmvc-redis Maven Webapp</name>
  <!-- FIXME change it to the project's website -->
  <url>http://www.example.com</url>

  <properties>
    <project.build.sourceEncoding>UTF-8</project.build.sourceEncoding>
    <maven.compiler.source>1.7</maven.compiler.source>
    <maven.compiler.target>1.7</maven.compiler.target>
  </properties>

  <dependencies>
    <dependency>
      <groupId>junit</groupId>
      <artifactId>junit</artifactId>
      <version>4.11</version>
      <scope>test</scope>
    </dependency>
    <dependency>
      <groupId>org.springframework</groupId>
      <artifactId>spring-core</artifactId>
      <version>4.3.2.RELEASE</version>
    </dependency>
    <dependency>
      <groupId>org.springframework</groupId>
      <artifactId>spring-aop</artifactId>
      <version>4.3.2.RELEASE</version>
    </dependency>
    <dependency>
      <groupId>org.springframework</groupId>
      <artifactId>spring-aspects</artifactId>
      <version>4.3.2.RELEASE</version>
    </dependency>
    <dependency>
      <groupId>org.springframework</groupId>
      <artifactId>spring-beans</artifactId>
      <version>4.3.2.RELEASE</version>
    </dependency>
    <dependency>
      <groupId>org.springframework</groupId>
      <artifactId>spring-context</artifactId>
      <version>4.3.2.RELEASE</version>
    </dependency>
    <dependency>
      <groupId>org.springframework</groupId>
      <artifactId>spring-expression</artifactId>
      <version>4.3.2.RELEASE</version>
    </dependency>
    <dependency>
      <groupId>org.springframework</groupId>
      <artifactId>spring-jdbc</artifactId>
      <version>4.3.2.RELEASE</version>
    </dependency>
    <dependency>
      <groupId>org.springframework</groupId>
      <artifactId>spring-test</artifactId>
      <version>4.3.2.RELEASE</version>
    </dependency>
    <dependency>
      <groupId>org.springframework</groupId>
      <artifactId>spring-tx</artifactId>
      <version>4.3.2.RELEASE</version>
    </dependency>
    <dependency>
      <groupId>org.springframework</groupId>
      <artifactId>spring-web</artifactId>
      <version>4.3.2.RELEASE</version>
    </dependency>
    <dependency>
      <groupId>org.springframework</groupId>
      <artifactId>spring-webmvc</artifactId>
      <version>4.3.2.RELEASE</version>
    </dependency>
    <dependency>
      <groupId>org.mybatis</groupId>
      <artifactId>mybatis-spring</artifactId>
      <version>1.3.0</version>
    </dependency>
    <!-- https://mvnrepository.com/artifact/org.mybatis/mybatis -->
    <dependency>
      <groupId>org.mybatis</groupId>
      <artifactId>mybatis</artifactId>
      <version>3.4.4</version>
    </dependency>
    <!-- https://mvnrepository.com/artifact/commons-io/commons-io -->
    <dependency>
      <groupId>commons-io</groupId>
      <artifactId>commons-io</artifactId>
      <version>2.4</version>
    </dependency>
    <!-- https://mvnrepository.com/artifact/org.apache.commons/commons-lang3 -->
    <dependency>
      <groupId>org.apache.commons</groupId>
      <artifactId>commons-lang3</artifactId>
      <version>3.4</version>
    </dependency>
    <!-- https://mvnrepository.com/artifact/commons-logging/commons-logging -->
    <dependency>
      <groupId>commons-logging</groupId>
      <artifactId>commons-logging</artifactId>
      <version>1.1.1</version>
    </dependency>
    <!-- https://mvnrepository.com/artifact/org.apache.logging.log4j/log4j-core -->
    <dependency>
      <groupId>org.apache.logging.log4j</groupId>
      <artifactId>log4j-core</artifactId>
      <version>2.9.1</version>
    </dependency>
    <!-- https://mvnrepository.com/artifact/org.slf4j/slf4j-log4j12 -->
    <dependency>
      <groupId>org.slf4j</groupId>
      <artifactId>slf4j-log4j12</artifactId>
      <version>1.7.21</version>
      <scope>test</scope>
    </dependency>
    <!-- https://mvnrepository.com/artifact/aopalliance/aopalliance -->
    <dependency>
      <groupId>aopalliance</groupId>
      <artifactId>aopalliance</artifactId>
      <version>1.0</version>
    </dependency>
    <dependency>
      <groupId>mysql</groupId>
      <artifactId>mysql-connector-java</artifactId>
      <version>5.1.38</version>
    </dependency>
    <dependency>
      <groupId>com.mchange</groupId>
      <artifactId>c3p0</artifactId>
      <version>0.9.5.2</version>
    </dependency>
    <!-- https://mvnrepository.com/artifact/javax.servlet/jstl -->
    <dependency>
      <groupId>javax.servlet</groupId>
      <artifactId>jstl</artifactId>
      <version>1.2</version>
    </dependency>
    <!-- https://mvnrepository.com/artifact/javax.servlet/javax.servlet-api -->
    <dependency>
      <groupId>javax.servlet</groupId>
      <artifactId>javax.servlet-api</artifactId>
      <version>3.1.0</version>
      <scope>provided</scope>
    </dependency>

    <!-- https://mvnrepository.com/artifact/javax.servlet.jsp/javax.servlet.jsp-api -->
    <dependency>
      <groupId>javax.servlet.jsp</groupId>
      <artifactId>javax.servlet.jsp-api</artifactId>
      <version>2.2.1</version>
      <scope>provided</scope>
    </dependency>

    <!-- https://mvnrepository.com/artifact/taglibs/standard -->
    <dependency>
      <groupId>taglibs</groupId>
      <artifactId>standard</artifactId>
      <version>1.1.2</version>
    </dependency>
      <!-- jedis -->
      <dependency>
          <groupId>redis.clients</groupId>
          <artifactId>jedis</artifactId>
          <version>2.7.3</version>
      </dependency>
      <!-- spring-data-redis -->
      <dependency>
          <groupId>org.springframework.data</groupId>
          <artifactId>spring-data-redis</artifactId>
          <version>1.6.2.RELEASE</version>
      </dependency>
      <!-- barchart-wrap-jackson -->
      <dependency>
          <groupId>com.barchart.wrap</groupId>
          <artifactId>barchart-wrap-jackson</artifactId>
          <version>1.8.6-build001</version>
      </dependency>
  </dependencies>
  <build>
    <plugins>
      <plugin>
        <groupId>org.apache.maven.plugins</groupId>
        <artifactId>maven-compiler-plugin</artifactId>
        <version>3.6.1</version>
        <configuration>
          <!-- <source>1.8</source> 源代碼使用的開發版本 <target>1.8</target> 需要生成的目標class文件的編譯版本 -->
          <encoding>utf-8</encoding>
        </configuration>
      </plugin>

    </plugins>
  </build>
</project>
第二步:配置web.xml
<?xml version="1.0" encoding="UTF-8"?>
<web-app xmlns:xsi="http://www.w3.org/2001/XMLSchema-instance"
         xmlns="http://java.sun.com/xml/ns/javaee"
         xsi:schemaLocation="http://java.sun.com/xml/ns/javaee http://java.sun.com/xml/ns/javaee/web-app_3_0.xsd"
         id="WebApp_ID" version="3.0">

  <!-- 配置spring -->
  <context-param>
    <param-name>contextConfigLocation</param-name>
    <param-value>classpath:applicationContext.xml</param-value>
  </context-param>

  <listener>
    <listener-class>org.springframework.web.context.ContextLoaderListener</listener-class>
  </listener>
  <!-- 編碼過濾器 -->
  <filter>
    <filter-name>charsetEncodingFilter</filter-name>
    <filter-class>org.springframework.web.filter.CharacterEncodingFilter</filter-class>
    <init-param>
      <param-name>encoding</param-name>
      <param-value>UTF-8</param-value>
    </init-param>
    <init-param>
      <param-name>forceEncoding</param-name>
      <param-value>true</param-value>
    </init-param>
  </filter>

  <filter-mapping>
    <filter-name>charsetEncodingFilter</filter-name>
    <url-pattern>/*</url-pattern>
  </filter-mapping>

  <!-- 配置springmvc -->
  <servlet>
    <servlet-name>springDispatcherServlet</servlet-name>
    <servlet-class>org.springframework.web.servlet.DispatcherServlet</servlet-class>
    <init-param>
      <param-name>contextConfigLocation</param-name>
      <param-value>classpath:springmvc.xml</param-value>
    </init-param>
    <load-on-startup>1</load-on-startup>
  </servlet>
  <servlet-mapping>
    <servlet-name>springDispatcherServlet</servlet-name>
    <url-pattern>/</url-pattern><!-- 攔截所有請求 -->
  </servlet-mapping>

</web-app>
第三步:配置springmvc.xml
<?xml version="1.0" encoding="UTF-8"?>
<beans xmlns="http://www.springframework.org/schema/beans"
       xmlns:xsi="http://www.w3.org/2001/XMLSchema-instance"
       xmlns:context="http://www.springframework.org/schema/context"
       xmlns:mvc="http://www.springframework.org/schema/mvc"
       xsi:schemaLocation="http://www.springframework.org/schema/mvc http://www.springframework.org/schema/mvc/spring-mvc-4.0.xsd
        http://www.springframework.org/schema/beans http://www.springframework.org/schema/beans/spring-beans.xsd
        http://www.springframework.org/schema/context http://www.springframework.org/schema/context/spring-context-4.0.xsd">

    <!-- 配置自動掃描的包  -->
    <context:component-scan base-package="com.jiangfx.controller"/>

    <!-- 配置靜態資源文件 -->
    <mvc:default-servlet-handler/>

    <!-- 開啟註解模式 -->
    <mvc:annotation-driven/>
    <!-- 配置視圖解析器 -->
    <bean class="org.springframework.web.servlet.view.InternalResourceViewResolver">
        <property name="prefix" value="/WEB-INF/jsp"></property><!-- 視圖路徑 -->
        <property name="suffix" value=".jsp"></property><!-- 視圖尾碼名 -->
    </bean>
</beans>
第四步:配置applicationContext.xml
<?xml version="1.0" encoding="UTF-8"?>
<beans xmlns="http://www.springframework.org/schema/beans"
       xmlns:xsi="http://www.w3.org/2001/XMLSchema-instance"
       xmlns:context="http://www.springframework.org/schema/context"
       xmlns:tx="http://www.springframework.org/schema/tx"
       xsi:schemaLocation="http://www.springframework.org/schema/beans http://www.springframework.org/schema/beans/spring-beans.xsd
        http://www.springframework.org/schema/context http://www.springframework.org/schema/context/spring-context-4.0.xsd
        http://www.springframework.org/schema/tx http://www.springframework.org/schema/tx/spring-tx-4.0.xsd">

    <!-- 配置掃描的包 -->
    <context:component-scan base-package="com.jiangfx.service"/>

    <!-- 引入spring-data-redis.xml -->
    <import resource="spring-data-redis.xml"/>

</beans>
第五步:配置spring-data-redis.xml
redis.properties
# Redis Setting
# Redis預設有16個庫,序號是0-15,預設是選中的是0號資料庫
spring.redis.database=0
# Redis伺服器地址
spring.redis.host=(你的地址)
# Redis伺服器連接埠,預設是6379
spring.redis.port=6379
# Redis伺服器連接密碼(預設為空)
spring.redis.password=
# 連接池最大阻塞等待時間(使用負值表示沒有限制),根據實際情況修改
spring.redis.pool.maxWaitMillis=-1
# 連接池中的最大空閑連接,根據實際情況修改
spring.redis.pool.maxIdle=8
# 連接池中的最小空閑連接,根據實際情況修改
spring.redis.pool.minIdle=0
# 連接超時時間(毫秒),根據實際情況修改
spring.redis.timeout=2000
spring-data-redis.xml
<?xml version="1.0" encoding="UTF-8"?>
<beans xmlns="http://www.springframework.org/schema/beans"
       xmlns:xsi="http://www.w3.org/2001/XMLSchema-instance" xmlns:cache="http://www.springframework.org/schema/cache"
       xmlns:context="http://www.springframework.org/schema/context"
       xmlns:redis="http://www.springframework.org/schema/redis" xmlns:tx="http://www.springframework.org/schema/tx"
       xsi:schemaLocation="http://www.springframework.org/schema/cache http://www.springframework.org/schema/cache/spring-cache-4.0.xsd
        http://www.springframework.org/schema/beans http://www.springframework.org/schema/beans/spring-beans.xsd
        http://www.springframework.org/schema/context http://www.springframework.org/schema/context/spring-context-4.0.xsd
        http://www.springframework.org/schema/redis http://www.springframework.org/schema/redis/spring-redis-1.0.xsd
        http://www.springframework.org/schema/tx http://www.springframework.org/schema/tx/spring-tx-4.0.xsd">

    <!-- 載入redis.properties,這裡要特別註意,如果有多個properties文件,必須用逗號分開,不能寫成兩個 <context:property-placeholder/> -->
    <context:property-placeholder location="classpath:redis.properties" />

    <!-- 配置JedisPoolConfig相關參數 -->
    <bean id="poolConfig" class="redis.clients.jedis.JedisPoolConfig">
        <property name="maxIdle" value="${spring.redis.pool.maxIdle}"></property>
        <property name="minIdle" value="${spring.redis.pool.minIdle}"></property>
        <property name="maxWaitMillis" value="${spring.redis.pool.maxWaitMillis}"></property>
    </bean>

    <!-- 配置redis伺服器信息 -->
    <bean id="connectionFactory"
          class="org.springframework.data.redis.connection.jedis.JedisConnectionFactory">
        <property name="poolConfig" ref="poolConfig"></property>
        <property name="hostName" value="${spring.redis.host}"></property>
        <property name="port" value="${spring.redis.port}"></property>
        <!--<property name="password" value="${spring.redis.password}"></property>-->
        <property name="database" value="${spring.redis.database}"></property>
        <property name="timeout" value="${spring.redis.timeout}"></property>
    </bean>

    <


