
註:本文是【ASP.NET Identity系列教程】的第三篇。本系列教程詳細、完整、深入地介紹了微軟的ASP.NET Identity技術,描述瞭如何運用ASP.NET Identity實現應用程式的用戶管理,以及實現應用程式的認證與授權等相關技術,譯者希望本系列教程能成為掌握ASP.NET Id...
註:本文是【ASP.NET Identity系列教程】的第三篇。本系列教程詳細、完整、深入地介紹了微軟的ASP.NET Identity技術,描述瞭如何運用ASP.NET Identity實現應用程式的用戶管理,以及實現應用程式的認證與授權等相關技術,譯者希望本系列教程能成為掌握ASP.NET Identity技術的一份完整而有價值的資料。讀者若是能夠按照文章的描述,一邊閱讀、一邊實踐、一邊理解,定能有意想不到的巨大收穫!希望本系列博文能夠得到廣大園友的高度推薦。
15 Advanced ASP.NET Identity
15 ASP.NET Identity高級技術
In this chapter, I finish my description of ASP.NET Identity by showing you some of the advanced features it offers. I demonstrate how you can extend the database schema by defining custom properties on the user class and how to use database migrations to apply those properties without deleting the data in the ASP.NET Identity database. I also explain how ASP.NET Identity supports the concept of claims and demonstrates how they can be used to flexibly authorize access to action methods. I finish the chapter—and the book—by showing you how ASP.NET Identity makes it easy to authenticate users through third parties. I demonstrate authentication with Google accounts, but ASP.NET Identity has built-in support for Microsoft, Facebook, and Twitter accounts as well. Table 15-1 summarizes this chapter.
本章將完成對ASP.NET Identity的描述,向你展示它所提供的一些高級特性。我將演示,你可以擴展ASP.NET Identity的資料庫架構,其辦法是在用戶類上定義一些自定義屬性。也會演示如何使用資料庫遷移,這樣可以運用自定義屬性,而不必刪除ASP.NET Identity資料庫中的數據。還會解釋ASP.NET Identity如何支持聲明(Claims)概念,並演示如何將它們靈活地用來對動作方法進行授權訪問。最後向你展示ASP.NET Identity很容易通過第三方部件來認證用戶,以此結束本章以及本書。將要演示的是使用Google賬號認證,但ASP.NET Identity對於Microsoft、Facebook以及Twitter賬號,都有內建的支持。表15-1是本章概要。
| Problem 問題 |
Solution 解決方案 |
Listing 清單號 |
|---|---|---|
| Store additional information about users. 存儲用戶的附加信息 |
Define custom user properties. 定義自定義用戶屬性 |
1–3, 8–11 |
| Update the database schema without deleting user data. 更新資料庫架構而不刪除用戶數據 |
Perform a database migration. 執行資料庫遷移 |
4–7 |
| Perform fine-grained authorization. 執行細粒度授權 |
Use claims. 使用聲明(Claims) |
12–14 |
| Add claims about a user. 添加用戶的聲明(Claims) |
Use the ClaimsIdentity.AddClaims method. 使用ClaimsIdentity.AddClaims方法 |
15–19 |
| Authorize access based on claim values. 基於聲明(Claims)值授權訪問 |
Create a custom authorization filter attribute. 創建一個自定義的授權過濾器註解屬性 |
20–21 |
| Authenticate through a third party. 通過第三方認證 |
Install the NuGet package for the authentication provider, redirect requests to that provider, and specify a callback URL that creates the user account. 安裝認證提供器的NuGet包,將請求重定向到該提供器,並指定一個創建用戶賬號的回調URL。 |
22–25 |
15.1 Preparing the Example Project
15.1 準備示例項目
In this chapter, I am going to continue working on the Users project I created in Chapter 13 and enhanced in Chapter 14. No changes to the application are required, but start the application and make sure that there are users in the database. Figure 15-1 shows the state of my database, which contains the users Admin, Alice, Bob, and Joe from the previous chapter. To check the users, start the application and request the /Admin/Index URL and authenticate as the Admin user.
本章打算繼續使用第13章創建併在第14章增強的Users項目。對應用程式無需做什麼改變,但需要啟動應用程式,並確保資料庫中有一些用戶。圖15-1顯示了資料庫的狀態,它含有上一章的用戶Admin、Alice、Bob以及Joe。為了檢查用戶,請啟動應用程式,請求/Admin/Index URL,並以Admin用戶進行認證。
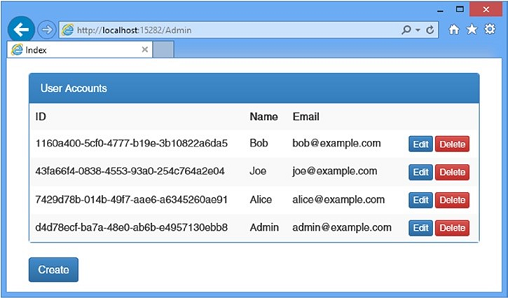
Figure 15-1. The initial users in the Identity database
圖15-1. Identity資料庫中的最初用戶
I also need some roles for this chapter. I used the RoleAdmin controller to create roles called Users and Employees and assigned the users to those roles, as described in Table 15-2.
本章還需要一些角色。我用RoleAdmin控制器創建了角色Users和Employees,併為這些角色指定了一些用戶,如表15-2所示。
| Role 角色 |
Members 成員 |
|---|---|
| Users | Alice, Joe |
| Employees | Alice, Bob |
Figure 15-2 shows the required role configuration displayed by the RoleAdmin controller.
圖15-2顯示了由RoleAdmin控制器所顯示出來的必要的角色配置。

Figure 15-2. Configuring the roles required for this chapter
圖15-2. 配置本章所需的角色
15.2 Adding Custom User Properties
15.2 添加自定義用戶屬性
When I created the AppUser class to represent users in Chapter 13, I noted that the base class defined a basic set of properties to describe the user, such as e-mail address and telephone number. Most applications need to store more information about users, including persistent application preferences and details such as addresses—in short, any data that is useful to running the application and that should last between sessions. In ASP.NET Membership, this was handled through the user profile system, but ASP.NET Identity takes a different approach.
我在第13章創建AppUser類來表示用戶時曾做過說明,基類定義了一組描述用戶的基本屬性,如E-mail地址、電話號碼等。大多數應用程式還需要存儲用戶的更多信息,包括持久化應用程式愛好以及地址等細節——簡言之,需要存儲對運行應用程式有用並且在各次會話之間應當保持的任何數據。在ASP.NET Membership中,這是通過用戶資料(User Profile)系統來處理的,但ASP.NET Identity採取了一種不同的辦法。
Because the ASP.NET Identity system uses Entity Framework to store its data by default, defining additional user information is just a matter of adding properties to the user class and letting the Code First feature create the database schema required to store them. Table 15-3 puts custom user properties in context.
因為ASP.NET Identity預設是使用Entity Framework來存儲其數據的,定義附加的用戶信息只不過是給用戶類添加屬性的事情,然後讓Code First特性去創建需要存儲它們的資料庫架構即可。表15-3描述了自定義用戶屬性的情形。
| Question 問題 |
Answer 回答 |
|---|---|
| What is it? 什麼是自定義用戶屬性? |
Custom user properties allow you to store additional information about your users, including their preferences and settings. 自定義用戶屬性讓你能夠存儲附加的用戶信息,包括他們的愛好和設置。 |
| Why should I care? 為何要關心它? |
A persistent store of settings means that the user doesn’t have to provide the same information each time they log in to the application. 設置的持久化存儲意味著,用戶不必每次登錄到應用程式時都提供同樣的信息。 |
| How is it used by the MVC framework? 在MVC框架中如何使用它? |
This feature isn’t used directly by the MVC framework, but it is available for use in action methods. 此特性不是由MVC框架直接使用的,但它在動作方法中使用是有效的。 |
15.2.1 Defining Custom Properties
15.2.1 定義自定義屬性
Listing 15-1 shows how I added a simple property to the AppUser class to represent the city in which the user lives.
清單15-1演示瞭如何給AppUser類添加一個簡單的屬性,用以表示用戶生活的城市。
Listing 15-1. Adding a Property in the AppUser.cs File
清單15-1. 在AppUser.cs文件中添加屬性
using System;
using Microsoft.AspNet.Identity.EntityFramework;

namespace Users.Models {
    public enum Cities {
        LONDON, PARIS, CHICAGO
    }

    public class AppUser : IdentityUser {
        public Cities City { get; set; }
    }
}
I have defined an enumeration called Cities that defines values for some large cities and added a property called City to the AppUser class. To allow the user to view and edit their City property, I added actions to the Home controller, as shown in Listing 15-2.
這裡定義了一個枚舉,名稱為Cities,它定義了一些大城市的值,另外給AppUser類添加了一個名稱為City的屬性。為了讓用戶能夠查看和編輯City屬性,給Home控制器添加了幾個動作方法,如清單15-2所示。
Listing 15-2. Adding Support for Custom User Properties in the HomeController.cs File
清單15-2. 在HomeController.cs文件中添加對自定義屬性的支持
using System.Web.Mvc;
using System.Collections.Generic;
using System.Web;
using System.Security.Principal;
using System.Threading.Tasks;
using Users.Infrastructure;
using Microsoft.AspNet.Identity;
using Microsoft.AspNet.Identity.Owin;
using Users.Models;

namespace Users.Controllers {

    public class HomeController : Controller {

        [Authorize]
        public ActionResult Index() {
             return View(GetData("Index"));
        }

        [Authorize(Roles = "Users")]
        public ActionResult OtherAction() {
            return View("Index", GetData("OtherAction"));
        }

        private Dictionary<string, object> GetData(string actionName) {
            Dictionary<string, object> dict
                = new Dictionary<string, object>();
            dict.Add("Action", actionName);
            dict.Add("User", HttpContext.User.Identity.Name);
            dict.Add("Authenticated", HttpContext.User.Identity.IsAuthenticated);
            dict.Add("Auth Type", HttpContext.User.Identity.AuthenticationType);
            dict.Add("In Users Role", HttpContext.User.IsInRole("Users"));
            return dict;
        }

        [Authorize]
        public ActionResult UserProps() {
             return View(CurrentUser);
        }

        [Authorize]
        [HttpPost]
        public async Task<ActionResult> UserProps(Cities city) {
            AppUser user = CurrentUser;
            user.City = city;
            await UserManager.UpdateAsync(user);
            return View(user);
        }

        private AppUser CurrentUser {
            get {
                return UserManager.FindByName(HttpContext.User.Identity.Name);
            }
        }

        private AppUserManager UserManager {
            get {
                return HttpContext.GetOwinContext().GetUserManager<AppUserManager>();
            }
        }
    }
}
I added a CurrentUser property that uses the AppUserManager class to retrieve an AppUser instance to represent the current user. I pass the AppUser object as the view model object in the GET version of the UserProps action method, and the POST method uses it to update the value of the new City property. Listing 15-3 shows the UserProps.cshtml view, which displays the City property value and contains a form to change it.
我添加了一個CurrentUser屬性,它使用AppUserManager類接收了表示當前用戶的AppUser實例。在GET版本的UserProps動作方法中,傳遞了這個AppUser對象作為視圖模型。而在POST版的方法中用它更新了City屬性的值。清單15-3顯示了UserProps.cshtml視圖,它顯示了City屬性的值,並包含一個修改它的表單。
Listing 15-3. The Contents of the UserProps.cshtml File in the Views/Home Folder
清單15-3. Views/Home文件夾中UserProps.cshtml文件的內容
@using Users.Models
@model AppUser
@{ ViewBag.Title = "UserProps";}

<div class="panel panel-primary">
    <div class="panel-heading">
        Custom User Properties
    </div>
    <table class="table table-striped">
        <tr><th>City</th><td>@Model.City</td></tr>
    </table>
</div>

@using (Html.BeginForm()) {
    <div class="form-group">
        <label>City</label>
        @Html.DropDownListFor(x => x.City, new SelectList(Enum.GetNames(typeof(Cities))))
    </div>
    <button class="btn btn-primary" type="submit">Save</button>
}
Caution Don’t start the application when you have created the view. In the sections that follow, I demonstrate how to preserve the contents of the database, and if you start the application now, the ASP.NET Identity users will be deleted.
警告:創建了視圖之後不要啟動應用程式。在以下小節中,將演示如何保留資料庫的內容,如果現在啟動應用程式,將會刪除ASP.NET Identity的用戶。
15.2.2 Preparing for Database Migration
15.2.2 準備資料庫遷移
The default behavior for the Entity Framework Code First feature is to drop the tables in the database and re-create them whenever classes that drive the schema have changed. You saw this in Chapter 14 when I added support for roles: When the application was started, the database was reset, and the user accounts were lost.
Entity Framework Code First特性的預設行為是,一旦修改了派生資料庫架構的類,便會刪除資料庫中的數據表,並重新創建它們。在第14章可以看到這種情況,在我添加角色支持時:當重啟應用程式後,資料庫被重置,用戶賬號也丟失。
Don’t start the application yet, but if you were to do so, you would see a similar effect. Deleting data during development is usually not a problem, but doing so in a production setting is usually disastrous because it deletes all of the real user accounts and causes a panic while the backups are restored. In this section, I am going to demonstrate how to use the database migration feature, which updates a Code First schema in a less brutal manner and preserves the existing data it contains.
不要啟動應用程式,但如果你這麼做了,會看到類似的效果。在開發期間刪除數據沒什麼問題,但如果在產品設置中這麼做了,通常是災難性的,因為它會刪除所有真實的用戶賬號,而備份恢復是很痛苦的事。在本小節中,我打算演示如何使用資料庫遷移特性,它能以比較溫和的方式更新Code First的架構,並保留架構中的已有數據。
The first step is to issue the following command in the Visual Studio Package Manager Console:
第一個步驟是在Visual Studio的“Package Manager Console(包管理器控制台)”中發佈以下命令:
Enable-Migrations –EnableAutomaticMigrations
This enables the database migration support and creates a Migrations folder in the Solution Explorer that contains a Configuration.cs class file, the contents of which are shown in Listing 15-4.
它啟用了資料庫的遷移支持,併在“Solution Explorer(解決方案資源管理器)”創建一個Migrations文件夾,其中含有一個Configuration.cs類文件,內容如清單15-4所示。
Listing 15-4. The Contents of the Configuration.cs File
清單15-4. Configuration.cs文件的內容
namespace Users.Migrations {
using System;
using System.Data.Entity;
using System.Data.Entity.Migrations;
using System.Linq;

    internal sealed class Configuration
            : DbMigrationsConfiguration<
    Users.Infrastructure.AppIdentityDbContext> {
        public Configuration() {
            AutomaticMigrationsEnabled = true;
            ContextKey = "Users.Infrastructure.AppIdentityDbContext";
        }

        protected override void Seed(Users.Infrastructure.AppIdentityDbContext context) {
            // This method will be called after migrating to the latest version.
            // 此方法將在遷移到最新版本時調用

            // You can use the DbSet<T>.AddOrUpdate() helper extension method
            // to avoid creating duplicate seed data. E.g.
            // 例如,你可以使用DbSet<T>.AddOrUpdate()輔助器方法來避免創建重覆的種子數據
            //
            //    context.People.AddOrUpdate(
            //      p => p.FullName,
            //      new Person { FullName = "Andrew Peters" },
            //      new Person { FullName = "Brice Lambson" },
            //      new Person { FullName = "Rowan Miller" }
            //    );
            //
        }
    }
}
Tip You might be wondering why you are entering a database migration command into the console used to manage NuGet packages. The answer is that the Package Manager Console is really PowerShell, which is a general-purpose tool that is mislabeled by Visual Studio. You can use the console to issue a wide range of helpful commands. See http://go.microsoft.com/fwlink/?LinkID=108518 for details.
提示:你可能會覺得奇怪,為什麼要在管理NuGet包的控制臺中輸入資料庫遷移的命令?答案是“Package Manager Console(包管理控制台)”是真正的PowerShell,這是Visual studio冒用的一個通用工具。你可以使用此控制台發送大量的有用命令,詳見http://go.microsoft.com/fwlink/?LinkID=108518。
The class will be used to migrate existing content in the database to the new schema, and the Seed method will be called to provide an opportunity to update the existing database records. In Listing 15-5, you can see how I have used the Seed method to set a default value for the new City property I added to the AppUser class. (I have also updated the class file to reflect my usual coding style.)
這個類將用於把資料庫中的現有內容遷移到新的資料庫架構,Seed方法的調用為更新現有資料庫記錄提供了機會。在清單15-5中可以看到,我如何用Seed方法為新的City屬性設置預設值,City是添加到AppUser類中自定義屬性。(為了體現我一貫的編碼風格,我對這個類文件也進行了更新。)
Listing 15-5. Managing Existing Content in the Configuration.cs File
清單15-5. 在Configuration.cs文件中管理已有內容
using System.Data.Entity.Migrations;
using Microsoft.AspNet.Identity;
using Microsoft.AspNet.Identity.EntityFramework;
using Users.Infrastructure;
using Users.Models;

namespace Users.Migrations {

    internal sealed class Configuration
            : DbMigrationsConfiguration<AppIdentityDbContext> {

        public Configuration() {
            AutomaticMigrationsEnabled = true;
            ContextKey = "Users.Infrastructure.AppIdentityDbContext";
        }

        protected override void Seed(AppIdentityDbContext context) {


            AppUserManager userMgr = new AppUserManager(new UserStore<AppUser>(context));
            AppRoleManager roleMgr = new AppRoleManager(new RoleStore<AppRole>(context));

            string roleName = "Administrators";
            string userName = "Admin";
            string password = "MySecret";
            string email = "[email protected]";

            if (!roleMgr.RoleExists(roleName)) {
                 roleMgr.Create(new AppRole(roleName));
            }

            AppUser user = userMgr.FindByName(userName);
            if (user == null) {
                userMgr.Create(new AppUser { UserName = userName, Email = email },
                    password);
                user = userMgr.FindByName(userName);
            }

            if (!userMgr.IsInRole(user.Id, roleName)) {
                 userMgr.AddToRole(user.Id, roleName);
            }

            foreach (AppUser dbUser in userMgr.Users) {
                 dbUser.City = Cities.PARIS;
            }
            context.SaveChanges();
        }
    }
}
You will notice that much of the code that I added to the Seed method is taken from the IdentityDbInit class, which I used to seed the database with an administration user in Chapter 14. This is because the new Configuration class added to support database migrations will replace the seeding function of the IdentityDbInit class, which I’ll update shortly. Aside from ensuring that there is an admin user, the statements in the Seed method that are important are the ones that set the initial value for the City property I added to the AppUser class, as follows:
你可能會註意到,添加到Seed方法中的許多代碼取自於IdentityDbInit類,在第14章中我用這個類將管理用戶植入了資料庫。這是因為這個新添加的、用以支持資料庫遷移的Configuration類,將代替IdentityDbInit類的種植功能,我很快便會更新這個類。除了要確保有admin用戶之外,在Seed方法中的重要語句是那些為AppUser類的City屬性設置初值的語句,如下所示:
...
foreach (AppUser dbUser in userMgr.Users) {
     dbUser.City = Cities.PARIS;
}
context.SaveChanges();
...
You don’t have to set a default value for new properties—I just wanted to demonstrate that the Seed method in the Configuration class can be used to update the existing user records in the database.
你不一定要為新屬性設置預設值——這裡只是想演示Configuration類中的Seed方法,可以用它更新資料庫中的已有用戶記錄。
Caution Be careful when setting values for properties in the Seed method for real projects because the values will be applied every time you change the schema, overriding any values that the user has set since the last schema update was performed. I set the value of the City property just to demonstrate that it can be done.
警告:在用於真實項目的Seed方法中為屬性設置值時要小心,因為你每一次修改架構時,都會運用這些值,這會將自執行上一次架構更新之後,用戶設置的任何數據覆蓋掉。這裡設置City屬性的值只是為了演示它能夠這麼做。
Changing the Database Context Class
修改資料庫上下文類
The reason that I added the seeding code to the Configuration class is that I need to change the IdentityDbInit class. At present, the IdentityDbInit class is derived from the descriptively named DropCreateDatabaseIfModelChanges<AppIdentityDbContext> class, which, as you might imagine, drops the entire database when the Code First classes change. Listing 15-6 shows the changes I made to the IdentityDbInit class to prevent it from affecting the database.
在Configuration類中添加種植代碼的原因是我需要修改IdentityDbInit類。此時,IdentityDbInit類派生於描述性命名的DropCreateDatabaseIfModelChanges<AppIdentityDbContext> 類,和你相像的一樣,它會在Code First類改變時刪除整個資料庫。清單15-6顯示了我對IdentityDbInit類所做的修改,以防止它影響資料庫。
Listing 15-6. Preventing Database Schema Changes in the AppIdentityDbContext.cs File
清單15-6. 在AppIdentityDbContext.cs文件是阻止資料庫架構變化
using System.Data.Entity;
using Microsoft.AspNet.Identity.EntityFramework;
using Users.Models;
using Microsoft.AspNet.Identity;

namespace Users.Infrastructure {
    public class AppIdentityDbContext : IdentityDbContext<AppUser> {

        public AppIdentityDbContext() : base("IdentityDb") { }

        static AppIdentityDbContext() {
            Database.SetInitializer<AppIdentityDbContext>(new IdentityDbInit());
        }

        public static AppIdentityDbContext Create() {
             return new AppIdentityDbContext();
        }
    }
     public class IdentityDbInit : NullDatabaseInitializer<AppIdentityDbContext> {
    }
}
I have removed the methods defined by the class and changed its base to NullDatabaseInitializer<AppIdentityDbContext> , which prevents the schema from being altered.
我刪除了這個類中所定義的方法,並將它的基類改為NullDatabaseInitializer<AppIdentityDbContext> ,它可以防止架構修改。
15.2.3 Performing the Migration
15.2.3 執行遷移
All that remains is to generate and apply the migration. First, run the following command in the Package Manager Console:
剩下的事情只是生成並運用遷移了。首先,在“Package Manager Console(包管理器控制台)”中執行以下命令:
Add-Migration CityProperty
This creates a new migration called CityProperty (I like my migration names to reflect the changes I made). A class new file will be added to the Migrations folder, and its name reflects the time at which the command was run and the name of the migration. My file is called 201402262244036_CityProperty.cs, for example. The contents of this file contain the details of how Entity Framework will change the database during the migration, as shown in Listing 15-7.
這創建了一個名稱為CityProperty的新遷移(我比較喜歡讓遷移的名稱反映出我所做的修改)。這會在文件夾中添加一個新的類文件,而且其命名會反映出該命令執行的時間以及遷移名稱,例如,我的這個文件名稱為201402262244036_CityProperty.cs。該文件的內容含有遷移期間Entity Framework修改資料庫的細節,如清單15-7所示。
Listing 15-7. The Contents of the 201402262244036_CityProperty.cs File
清單15-7. 201402262244036_CityProperty.cs文件的內容
namespace Users.Migrations {
    using System;
    using System.Data.Entity.Migrations;

    public partial class Init : DbMigration {
        public override void Up() {
            AddColumn("dbo.AspNetUsers", "City", c => c.Int(nullable: false));
        }

        public override void Down() {
            DropColumn("dbo.AspNetUsers", "City");
        }
    }
}
The Up method describes the changes that have to be made to the schema when the database is upgraded, which in this case means adding a City column to the AspNetUsers table, which is the one that is used to store user records in the ASP.NET Identity database.
Up方法描述了在資料庫升級時,需要對架構所做的修改,在這個例子中,意味著要在AspNetUsers數據表中添加City數據列,該數據表是ASP.NET Identity資料庫用來存儲用戶記錄的。
The final step is to perform the migration. Without starting the application, run the following command in the Package Manager Console:
最後一步是執行遷移。無需啟動應用程式,只需在“Package Manager Console(包管理器控制台)”中運行以下命令即可:
Update-Database –TargetMigration CityProperty
The database schema will be modified, and the code in the Configuration.Seed method will be executed. The existing user accounts will have been preserved and enhanced with a City property (which I set to Paris in the Seed method).
這會修改資料庫架構,並執行Configuration.Seed方法中的代碼。已有用戶賬號會被保留,且增強了City屬性(我在Seed方法中已將其設置為“Paris”)。
15.2.4 Testing the Migration
15.2.4 測試遷移
To test the effect of the migration, start the application, navigate to the /Home/UserProps URL, and authenticate as one of the Identity users (for example, as Alice with the password MySecret). Once authenticated, you will see the current value of the City property for the user and have the opportunity to change it, as shown in Figure 15-3.
為了測試遷移的效果,啟動應用程式,導航到/Home/UserProps URL,並以Identity中的用戶(例如Alice,口令MySecret)進行認證。一旦已被認證,便會看到該用戶City屬性的當前值,並可以對其進行修改,如圖15-3所示。

Figure 15-3. Displaying and changing a custom user property
圖15-3. 顯示和個性自定義用戶屬性
15.2.5 Defining an Additional Property
15.2.5 定義附加屬性
Now that database migrations are set up, I am going to define a further property just to demonstrate how subsequent changes are handled and to show a more useful (and less dangerous) example of using the Configuration.Seed method. Listing 15-8 shows how I added a Country property to the AppUser class.
現在,已經建立了資料庫遷移,我打算再定義一個屬性,這恰恰演示瞭如何處理持續不斷的修改,也為了演示Configuration.Seed方法更有用(至少無害)的示例。清單15-8顯示了我在AppUser類上添加了一個Country屬性。
Listing 15-8. Adding Another Property in the AppUserModels.cs File
清單15-8. 在AppUserModels.cs文件中添加另一個屬性
using System;
using Microsoft.AspNet.Identity.EntityFramework;

namespace Users.Models {

    public enum Cities {
        LONDON, PARIS, CHICAGO
    }

     public enum Countries {
         NONE, UK, FRANCE, USA
    }

    public class AppUser : IdentityUser {
         public Cities City { get; set; }
         public Countries Country { get; set; }

        public void SetCountryFromCity(Cities city) {
            switch (city) {
                case Cities.LONDON:
                    Country = Countries.UK;
                    break;
                case Cities.PARIS:
                    Country = Countries.FRANCE;
                    break;
                case Cities.CHICAGO:
                    Country = Countries.USA;
                    break;
                default:
                    Country = Countries.NONE;
                    break;
            }
        }
    }
}
I have added an enumeration to define the country names and a helper method that selects a country value based on the City property. Listing 15-9 shows the change I made to the Configuration class so that the Seed method sets the Country property based on the City, but only if the value of Country is NONE (which it will be for all users when the database is migrated because the Entity Framework sets enumeration columns to the first value).
我已經添加了一個枚舉,它定義了國家名稱。還添加了一個輔助器方法,它可以根據City屬性選擇一個國家。清單15-9顯示了對Configuration類所做的修改,以使Seed方法根據City設置Country屬性,但只當Country為NONE時才進行設置(在遷移資料庫時,所有用戶都是NONE,因為Entity Framework會將枚舉列設置為枚舉的第一個值)。
Listing 15-9. Modifying the Database Seed in the Configuration.cs File
清單15-9. 在Configuration.cs文件中修改資料庫種子
using System.Data.Entity.Migrations;
using Microsoft.AspNet.Identity;
using Microsoft.AspNet.Identity.EntityFramework;
using Users.Infrastructure;
using Users.Models;

namespace Users.Migrations {

    internal sealed class Configuration
            : DbMigrationsConfiguration<AppIdentityDbContext> {

        public Configuration() {
            AutomaticMigrationsEnabled = true;
            ContextKey = "Users.Infrastructure.AppIdentityDbContext";
        }

        protected override void Seed(AppIdentityDbContext context) {

            AppUserManager userMgr = new AppUserManager(new UserStore<AppUser>(context));
            AppRoleManager roleMgr = new AppRoleManager(new RoleStore<AppRole>(context));

            string roleName = "Administrators";
            string userName = "Admin";
            string password = "MySecret";
            string email = "[email protected]";

            if (!roleMgr.RoleExists(roleName)) {
                 roleMgr.Create(new AppRole(roleName));
            }

            AppUser user = userMgr.FindByName(userName);
            if (user == null) {
                userMgr.Create(new AppUser { UserName = userName, Email = email },
                    password);
                user = userMgr.FindByName(userName);
            }

            if (!userMgr.IsInRole(user.Id, roleName)) {
                userMgr.AddToRole(user.Id, roleName);
            }

            foreach (AppUser dbUser in userMgr.Users) {
                if (dbUser.Country == Countries.NONE) {
                    dbUser.SetCountryFromCity(dbUser.City);
                }
            }

            context.SaveChanges();
        }
    }
}
This kind of seeding is more useful in a real project because it will set a value for the Country property only if one has not already been set—subsequent migrations won’t be affected, and user selections won’t be lost.
這種種植在實際項目中會更有用,因為它只會在Country屬性未設置時,才會設置Country屬性的值——後繼的遷移不會受到影響,因此不會失去用戶的選擇。
1. Adding Application Support
1. 添加應用程式支持
There is no point defining additional user properties if they are not available in the application, so Listing 15-10 shows the change I made to the Views/Home/UserProps.cshtml file to display the value of the Country property.
應用程式中如果沒有定義附加屬性的地方,則附加屬性就無法使用了,因此,清單15-10顯示了我對Views/Home/UserProps.cshtml文件的修改,以顯示Country屬性的值。
Listing 15-10. Displaying an Additional Property in the UserProps.cshtml File
清單15-10. 在UserProps.cshtml文件中顯示附加屬性
@using Users.Models
@model AppUser
@{ ViewBag.Title = "UserProps";}
<div class="panel panel-primary">
    <div class="panel-heading">
        Custom User Properties
    </div>
    <table class="table table-striped">
        <tr><th>City</th><td>@Model.City</td></tr>
        <tr><th>Country</th><td>@Model.Country</td></tr>
    </table>
</div>
@using (Html.BeginForm()) {
    <div class="form-group">
        <label>City</label>
        @Html.DropDownListFor(x => x.City, new SelectList(Enum.GetNames(typeof(Cities))))
    </div>
    <button class="btn btn-primary" type="submit">Save</button>
}
Listing 15-11 shows the corresponding change I made to the Home controller to update the Country property when the City value changes.
為了在City值變化時能夠更新Country屬性,清單15-11顯示了我對Home控制器所做的相應修改。
Listing 15-11. Setting Custom Properties in the HomeController.cs File
清單15-11. 在HomeController.cs文件中設置自定義屬性
using System.Web.Mvc;
using System.Collections.Generic;
using System.Web;
using System.Security.Principal;
using System.Threading.Tasks;
using Users.Infrastructure;
using Microsoft.AspNet.Identity;
using Microsoft.AspNet.Identity.Owin;
using Users.Models;

namespace Users.Controllers {

    public class HomeController : Controller {
          // ...other action methods omitted for brevity...
          // ...出於簡化,這裡忽略了其他動作方法...

        [Authorize]
        public ActionResult UserProps() {
            return View(CurrentUser);
        }

        [Authorize]
        [HttpPost]
        public async Task<ActionResult> UserProps(Cities city) {
            AppUser user = CurrentUser;
            user.City = city;
            user.SetCountryFromCity(city);
            await UserManager.UpdateAsync(user);
            return View(user);
        }

        // ...properties omitted for brevity...
        // ...出於簡化,這裡忽略了一些屬性...
    }
}
2. Performing the Migration
2. 準備遷移
All that remains is to create and apply a new migration. Enter the following command into the Package Manager Console:
剩下的事情就是創建和運用新的遷移了。在“Package Manager Console(包管理器控制台)”中輸入以下命令:
Add-Migration CountryProperty
This will generate another file in the Migrations folder that contains the instruction to add the Country column. To apply the migration, execute the following command:
這將在Migrations文件夾中生成另一個文件,它含有添加Country數據表列的指令。為了運用遷移,可執行以下命令:
Update-Database –TargetMigration CountryProperty
The migration will be performed, and the value of the Country property will be set based on the value of the existing City property for each user. You can check the new user property by starting the application and authenticating and navigating to the /Home/UserProps URL, as shown in Figure 15-4.
這將執行遷移,Country屬性的值將根據每個用戶當前的City屬性進行設置。通過啟動應用程式,認證並導航到/Home/UserProps URL,便可以查看新的用戶屬性,如圖15-4所示。

Figure 15-4. Creating an additional user property
圖15-4. 創建附加用戶屬性
Tip Although I am focused on the process of upgrading the database, you can also migrate back to a previous version by specifying an earlier migration. Use the –Force argument make changes that cause data loss, such as removing a column.
提示:雖然我們關註了升級資料庫的過程,但你也可以回退到以前的版本,只需指定一個早期的遷移即可。使用-Force參數進行修改,會引起數據丟失,例如刪除數據表列。
15.3 Working with Claims
15.3 使用聲明(Claims)
In older user-management systems, such as ASP.NET Membership, the application was assumed to be the authoritative source of all information about the user, essentially treating the application as a closed world and trusting the data that is contained within it.
在舊的用戶管理系統中,例如ASP.NET Membership,應用程式被假設成是用戶所有信息的權威來源,本質上將應用程式視為是一個封閉的世界,並且只信任其中所包含的數據。
This is such an ingrained approach to software development that it can be hard to recognize that’s what is happening, but you saw an example of the closed-world technique in Chapter 14 when I authenticated users against the credentials stored in the database and granted access based on the roles associated with those credentials. I did the same thing again in this chapter when I added properties to the user class. Every piece of information that I needed to manage user authentication and authorization came from within my application—and that is a perfectly satisfactory approach for many web applications, which is why I demonstrated these techniques in such depth.
這是軟體開發的一種根深蒂固的方法,使人很難認識到這到底意味著什麼,第14章你已看到了這種封閉世界技術的例子,根據存儲在資料庫中的憑據來認證用戶,並根據與憑據關聯在一起的角色來授權訪問。本章前述在用戶類上添加屬性,也做了同樣的事情。我管理用戶認證與授權所需的每一個數據片段都來自於我的應用程式——而且這是許多Web應用程式都相當滿意的一種方法,這也是我如此深入地演示這些技術的原因。
ASP.NET Identity also supports an alternative approach for dealing with users, which works well when the MVC framework application isn’t the sole source of information about users and which can be used to authorize users in more flexible and fluid ways than traditional roles allow.
ASP.NET Identity還支持另一種處理用戶的辦法,當MVC框架的應用程式不是有關用戶的唯一信息源時,這種辦法會工作得很好,而且能夠比傳統的角色授權更為靈活且流暢的方式進行授權。
This alternative approach uses claims, and in this section I’ll describe how ASP.NET Identity supports claims-based authorization. Table 15-4 puts claims in context.
這種可選的辦法使用了“Claims(聲明)”,因此在本小節中,我將描述ASP.NET Identity如何支持“Claims-Based Authorization(基於聲明的授權)”。表15-4描述了聲明(Claims)的情形。
提示:“Claim”在英文字典中不完全是“聲明”的義思,根據本文的描述,感覺把它說成“聲明”也不一定合適,所以在之後的譯文中基本都寫成中英文並用的形式,即“聲明(Claims)”。根據表15-4中的聲明(Claims)的定義:聲明(Claims)是關於用戶的一些信息片段。一個用戶的信息片段當然有很多,每一個信息片段就是一項聲明(Claim),用戶的所有信息片段合起來就是該用戶的聲明(Claims)。請讀者註意該單詞的單複數形式——譯者註
| Question 問題 |
Answer 答案 |
|---|---|
| What is it? 什麼是聲明(Claims)? |
Claims are pieces of information about users that you can use to make authorization decisions. Claims can be obtained from external systems as well as from the local Identity database. 聲明(Claims)是關於用戶的一些信息片段,可以用它們做出授權決定。聲明(Claims)可以從外部系統獲取,也可以從本地的Identity資料庫獲取。 |
| Why should I care? 為何要關心它? |
Claims can be used to flexibly authorize access to action methods. Unlike conventional roles, claims allow access to be driven by the information that describes the user. 聲明(Claims)可以用來對動作方法進行靈活的授權訪問。與傳統的角色不同,聲明(Claims)讓訪問能夠由描述用戶的信息進行驅動。 |
| How is it used by the MVC framework? 如何在MVC框架中使用它? |
This feature isn’t used directly by the MVC framework, but it is integrated into the standard authorization features, such as the Authorize attribute. 這不是直接由MVC框架使用的特性,但它集成到了標準的授權特性之中,例如Authorize註解屬性。 |
Tip you don’t have to use claims in your applications, and as Chapter 14 showed, ASP.NET Identity is perfectly happy providing an application with the authentication and authorization services without any need to understand claims at all.
提示:你在應用程式中不一定要使用聲明(Claims),正如第14章所展示的那樣,ASP.NET Identity能夠為應用程式提供充分的認證與授權服務,而根本不需要理解聲明(Claims)。
15.3.1 Understanding Claims
15.3.1 理解聲明(Claims)
A claim is a piece of information about the user, along with some information about where the information came from. The easiest way to unpack claims is through some practical demonstrations, without which any discussion becomes too abstract to be truly useful. To get started, I added a Claims controller to the example project, the definition of which you can see in Listing 15-12.
一項聲明(Claim)是關於用戶的一個信息片段(請註意這個英文單詞的單複數形式——譯者註),並伴有該片段出自何處的某種信息。揭開聲明(Claims)含義最容易的方式是做一些實際演示,任何討論都會過於抽象根本沒有真正的用處。為此,我在示例項目中添加了一個Claims控制器,其定義如清單15-12所示。
Listing 15-12. The Contents of the ClaimsController.cs File
清單15-12. ClaimsController.cs文件的內容
using System.Security.Claims;
using System.Web;
using System.Web.Mvc;

namespace Users.Controllers {
    public class ClaimsController : Controller {

        [Authorize]
        public ActionResult Index() {
            ClaimsIdentity ident = HttpContext.User.Identity as ClaimsIdentity;
            if (ident == null) {
                return View("Error", new string[] { "No claims available" });
            } else {
                return View(ident.Claims);
            }
        }
    }
}
Tip You may feel a little lost as I define the code for this example. Don’t worry about the details for the moment—just stick with it until you see the output from the action method and view that I define. More than anything else, that will help put claims into perspective.
提示:你或許會對我為此例定義的代碼感到有點失望。此刻對此細節不必著急——只要稍事忍耐,當看到該動作方法和視圖的輸出便會明白。尤為重要的是,這有助於洞察聲明(Claims)。
You can get the claims associated with a user in different ways. One approach is to use the Claims property defined by the user class, but in this example, I have used the HttpContext.User.Identity property to demonstrate the way that ASP.NET Identity is integrated with the rest of the ASP.NET platform. As I explained in Chapter 13, the HttpContext.User.Identity property returns an implementation of the IIdentity interface, which is a ClaimsIdentity object when working using ASP.NET Identity. The ClaimsIdentity class is defined in the System.Security.Claims namespace, and Table 15-5 shows the members it defines that are relevant to this chapter.
可以通過不同的方式獲得與用戶相關聯的聲明(Claims)。方法之一就是使用由用戶類定義的Claims屬性,但在這個例子中,我使用了HttpContext.User.Identity屬性,目的是演示ASP.NET Identity與ASP.NET平臺集成的方式(請註意這句話所表示的含義:用戶類的Claims屬性屬於ASP.NET Identity,而HttpContext.User.Identity屬性則屬於ASP.NET平臺。由此可見,ASP.NET Identity已經融合到了ASP.NET平臺之中——譯者註)。正如第13章所解釋的那樣,HttpContext.User.Identity屬性返回IIdentity的介面實現,當使用ASP.NET Identity時,該實現是一個ClaimsIdentity對象。ClaimsIdentity類是在System.Security.Claims命名空間中定義的,表15-5顯示了它所定義的與本章有關的成員。
| Name 名稱 |
Description 描述 |
|---|---|
| Claims | Returns an enumeration of Claim objects representing the claims for the user. 返回表示用戶聲明(Claims)的Claim對象枚舉 |
| AddClaim(claim) | Adds a claim to the user identity. 給用戶添加一個聲明(Claim) |
| AddClaims(claims) | Adds an enumeration of Claim objects to the user identity. 給用戶添加Claim對象的枚舉。 |
| HasClaim(predicate) | Returns true if the user identity contains a claim that matches the specified predicate. See the “Applying Claims” section for an example predicate. 如果用戶含有與指定謂詞匹配的聲明(Claim)時,返回true。參見“運用聲明(Claims)”中的示例謂詞 |
| RemoveClaim(claim) | Removes a claim from the user identity. 刪除用戶的聲明(Claim)。 |
Other members are available, but the ones in the table are those that are used most often in web applications, for reason that will become obvious as I demonstrate how claims fit into the wider ASP.NET platform.
還有一些可用的其它成員,但表中的這些是在Web應用程式中最常用的,隨著我演示如何將聲明(Claims)融入更寬泛的ASP.NET平臺,它們為什麼最常用就很顯然了。
In Listing 15-12, I cast the IIdentity implementation to the ClaimsIdentity type and pass the enumeration of Claim objects returned by the ClaimsIdentity.Claims property to the View method. A Claim object represents a single piece of data about the user, and the Claim class defines the properties shown in Table 15-6.
在清單15-12中,我將IIdentity實現轉換成了ClaimsIdentity類型,並且給View方法傳遞了ClaimsIdentity.Claims屬性所返回的Claim對象的枚舉。Claim對象所示表示的是關於用戶的一個單一的數據片段,Claim類定義的屬性如表15-6所示。
| Name 名稱 |
Description 描述 |
|---|---|
| Issuer | Returns the name of the system that provided the claim 返回提供聲明(Claim)的系統名稱 |
| Subject | Returns the ClaimsIdentity object for the user who the claim refers to 返回聲明(Claim)所指用戶的ClaimsIdentity對象 |
| Type | Returns the type of information that the claim represents 返回聲明(Claim)所表示的信息類型 |
| Value | Returns the piece of information that the claim represents 返回聲明(Claim)所表示的信息片段 |
Listing 15-13 shows the contents of the Index.cshtml file that I created in the Views/Claims folder and that is rendered by the Index action of the Claims controller. The view adds a row to a table for each claim about the user.
清單15-13顯示了我在Views/Claims文件夾中創建的Index.cshtml文件的內容,它由Claims控制器中的Index動作方法進行渲染。該視圖為用戶的每項聲明(Claim)添加了一個表格行。
Listing 15-13. The Contents of the Index.cshtml File in the Views/Claims Folder
清單15-13. Views/Claims文件夾中Index.cshtml文件的內容
@using System.Security.Claims
@using Users

