1.目的:學習nodejs連接使用mongodb,用angularjs2展示數據 2.使用技術: 資料庫: mongodb 後端數據獲取: nodejs 前端數據展示: angularjs2 ...
1.目的:學習nodejs連接使用mongodb,用angularjs2展示數據
2.使用技術:
資料庫: mongodb
後端數據獲取: nodejs
前端數據展示: angularjs2
3.應用:
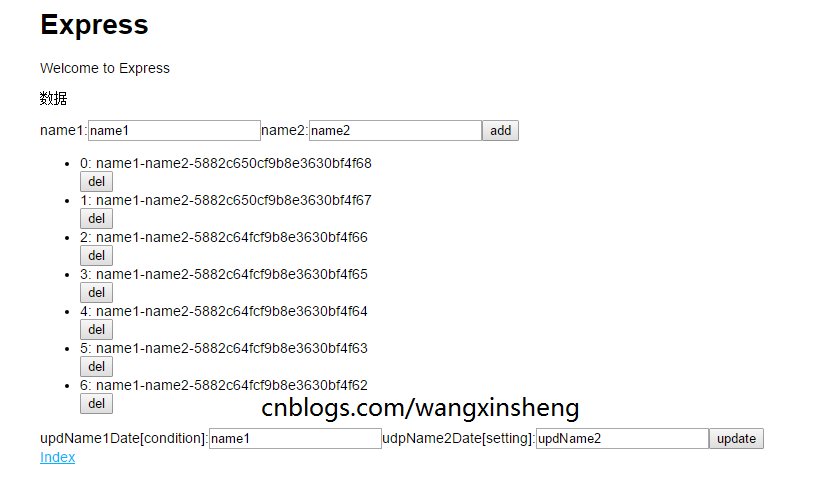
純mongodb CURD操作: http://127.0.0.1:3000/mongodb/
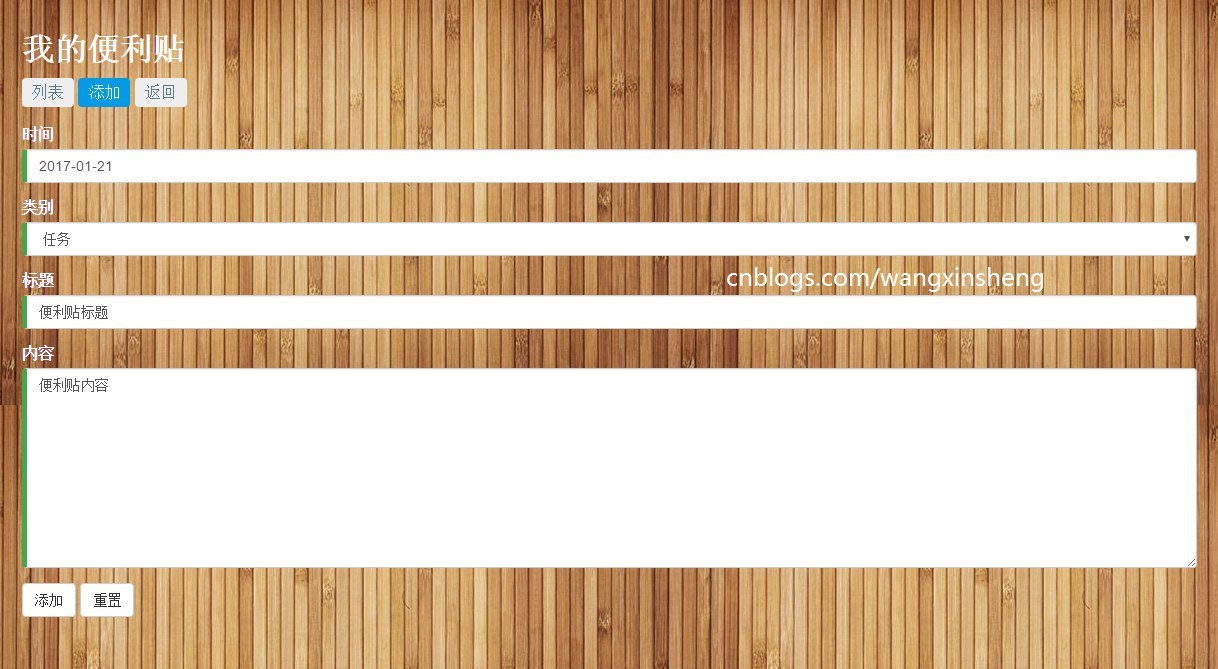
便利貼應用:http://127.0.0.1:3000/
4.運行方法:
1) 安裝有nodejs,mongodb
2) npm install supervisor -g
3) npm install
4) npm start
5.便利貼畫面樣式 參照http://jingyan.baidu.com/article/e75057f287c8abebc91a89d7.html
copyright:WangXinsheng
cnblogs.com/wangxinsheng
============================
http://127.0.0.1:3000/:


http://127.0.0.1:3000/mongodb/:

核心代碼:
1.mongodb操作用,使用mongodb驅動[nodejs]:
  1 // insert method
  2 var insertDocuments = function(db,data,col,callback) {
  3     // Get the documents collection
  4     var collection = db.collection(col);
  5     // Insert some documents
  6     collection.insertMany([data], function(err, result) {
  7         assert.equal(err, null);
  8         callback(result);
  9     });
 10 }
 11 // find documents
 12 var findDocuments = function(db,col,callback,filterJson={}) {
 13     // Get the documents collection
 14     var collection = db.collection(col);
 15     // Find some documents
 16     collection.find(filterJson).toArray(function(err, docs) {
 17         assert.equal(err, null);
 18         docs.sort(function(a,b){return b.time.replace(/\-/g,'') - a.time.replace(/\-/g,'');});
 19         callback(docs);
 20     });
 21 }
 22 // remove docs
 23 var removeDocument = function(db,removeJson,col,callback) {
 24     // Get the documents collection
 25     var collection = db.collection(col);
 26     // or use methode: remove
 27     collection.deleteOne(removeJson, function(err, result) {
 28         assert.equal(err, null);
 29         callback(result);
 30     });
 31 }
 32 // update docs
 33 var updateDocument = function(db,updateJson,setJson,col,callback) {
 34     // Get the documents collection
 35     var collection = db.collection(col);
 36     // Update document
 37     collection.updateMany(updateJson
 38     , { $set: setJson }, function(err, result) {
 39         assert.equal(err, null);
 40         callback(result);
 41     });
 42 }
 43 /*
 44 note opp
 45  */
 46 router.get('/getAllNote',function(req, res, next) {
 47     // Use connect method to connect to the server
 48     MongoClient.connect(url,function(err, db) {
 49         assert.equal(null, err);
 50         findDocuments(db,'note',function(allDocs) {
 51             db.close();
 52             res.json(allDocs);
 53         });
 54     });
 55 });
 56
 57 router.post('/getNote',function(req, res, next) {
 58     // Use connect method to connect to the server
 59     MongoClient.connect(url,function(err, db) {
 60         assert.equal(null, err);
 61         let filterJson = {'_id':new ObjectID(req.body._id)};
 62         findDocuments(db,'note',function(allDocs) {
 63             db.close();
 64             res.json(allDocs);
 65         },filterJson);
 66     });
 67 });
 68
 69 router.post('/addNote',function(req, res, next) {
 70     // Use connect method to connect to the server
 71     MongoClient.connect(url, function(err, db) {
 72         insertDocuments(db,req.body,'note',function(result) {
 73             db.close();
 74             res.json(result);
 75         });
 76     });
 77 });
 78
 79 router.post('/delNote',function(req, res, next) {
 80     // Use connect method to connect to the server
 81     MongoClient.connect(url, function(err, db) {
 82         let removeJson = {'_id': new ObjectID(req.body._id)};
 83         removeDocument(db,removeJson,'note',function(result) {
 84             db.close();
 85             res.json(result);
 86         });
 87     });
 88 });
 89
 90 router.post('/editNote',function(req, res, next) {
 91     // Use connect method to connect to the server
 92     MongoClient.connect(url, function(err, db) {
 93         let updateJson = {'_id':new ObjectID(req.body._id)};
 94         let setJson = {'time':req.body.time,'content':req.body.content,'name':req.body.name,'sts':req.body.sts};
 95         updateDocument(db, updateJson, setJson,'note',function(result) {
 96             db.close();
 97             res.json(result);
 98         });
 99     });
100 });
2.模板代碼[略,詳見附件]:
note.jade
noteDetail.html
noteList.html
noteShow.html
3.angularjs2 服務代碼:
 1 import { Injectable } from '@angular/core';
 2 import {Http,Response} from '@angular/http';
 3 import 'rxjs/add/operator/toPromise';
 4 import 'rxjs/add/operator/catch';
 5 import 'rxjs/add/operator/debounceTime';
 6 import 'rxjs/add/operator/distinctUntilChanged';
 7 import 'rxjs/add/operator/map';
 8 import 'rxjs/add/operator/switchMap';
 9
10 @Injectable()
11 export class noteService {
12   constructor(private http: Http) {
13   }
14   getAllNote():Promise<any[]> {
15     return this.http.get('/mongodb/getAllNote').toPromise().then(res=>
16       JSON.parse(res.text()) as any[]
17     ).catch(this.handleError);
18   }
19   getNote(noteId:string):Promise<any[]> {
20     return this.http.post('/mongodb/getNote',{_id:noteId}).toPromise().then(res=>
21       JSON.parse(res.text()) as any[]
22     ).catch(this.handleError);
23   }
24   addNote(note:any):Promise<any[]> {
25     return this.http.post('/mongodb/addNote',note).toPromise().then(res=>
26       JSON.parse(res.text()) as any
27     ).catch(this.handleError);
28   }
29   delNote(note:any):Promise<any[]> {
30     return this.http.post('/mongodb/delNote',note).toPromise().then(res=>
31       JSON.parse(res.text()) as any
32     ).catch(this.handleError);
33   }
34   editNote(note:any):Promise<any[]> {
35     return this.http.post('/mongodb/editNote',note).toPromise().then(res=>
36       JSON.parse(res.text()) as any
37     ).catch(this.handleError);
38   }
39
40   private handleError (error: Response | any) {
41     console.error(error);
42     return { };
43   }
44 }
4.angularjs2 列表顯示代碼:
import {Component, OnInit, ViewChild, Renderer, ElementRef, AfterViewInit, animate, trigger,state,style,transition} from '@angular/core';
import {Http,Response} from '@angular/http';
import 'rxjs/add/operator/toPromise';
import 'rxjs/add/operator/catch';
import 'rxjs/add/operator/debounceTime';
import 'rxjs/add/operator/distinctUntilChanged';
import 'rxjs/add/operator/map';
import 'rxjs/add/operator/switchMap';
import { noteService } from './note.service';
import { Router,ActivatedRoute, Params }  from '@angular/router';

@Component({
  selector: 'noteList',
  templateUrl: '/noteList.html',
  styleUrls: ['stylesheets/noteList.css']
})
export class AppListComponent  implements OnInit {
    notes:any[] = [];
    constructor(private noteService: noteService,private router: Router,private route: ActivatedRoute) {
    }
    ngOnInit(){
        this.noteService.getAllNote().then(notes => this.notes=notes);
    }
  doEdit(editNote:any){
    this.router.navigate(['/noteEdit', JSON.stringify(editNote)]);
  }
  doDel(delNote:any){
    this.noteService.delNote(delNote).then(result => {
      this.noteService.getAllNote().then(notes => this.notes=notes);
    });
  }
  doShow(noteId:string){
    this.router.navigate(['/noteShow', noteId]);
  }
}
5.添加編輯顯示代碼[略,詳見附件]:
noteAddForm.component.ts [添加與修改]
noteShow.component.ts [顯示詳細]
完整源碼下載:http://download.csdn.net/detail/wangxsh42/9742804


