
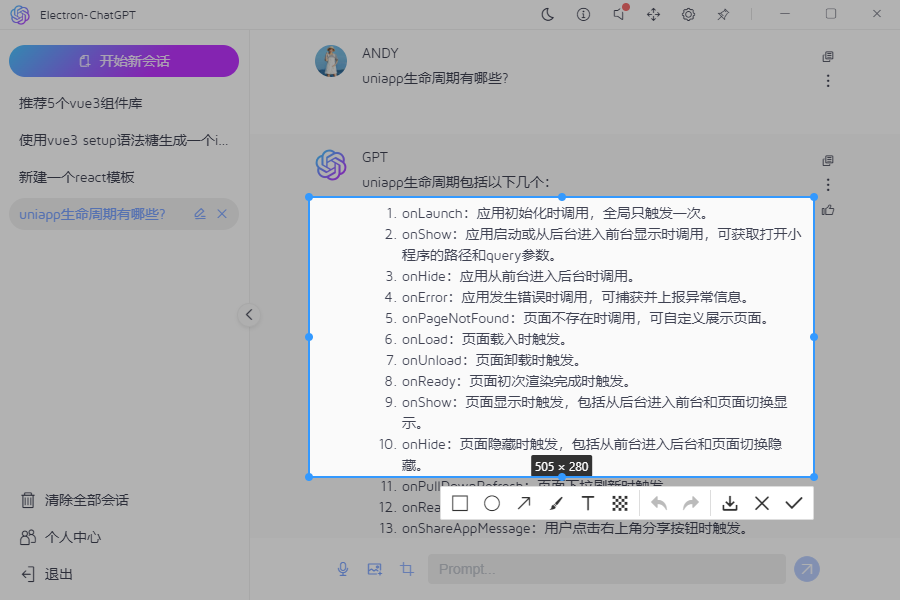
基於electron25+vite4+vue3仿製chatgpt客戶端聊天模板ElectronChatGPT。 electron-chatgpt 使用最新桌面端技術Electron25.x結合Vite4.x全家桶技術開發跨端模仿ChatGPT智能聊天程式模板。支持經典+分欄兩種佈局、暗黑+明亮主題模 ...
基於electron25+vite4+vue3仿製chatgpt客戶端聊天模板ElectronChatGPT。
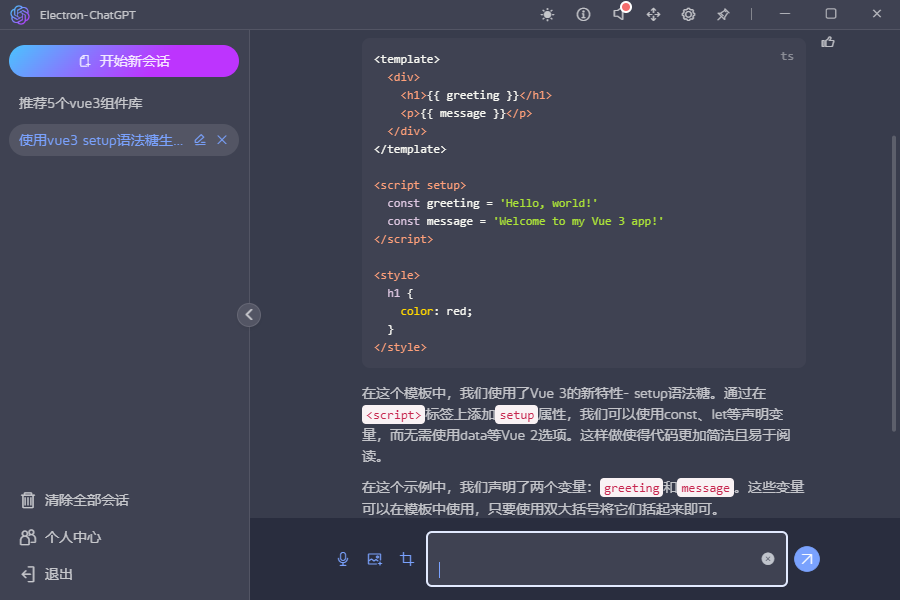
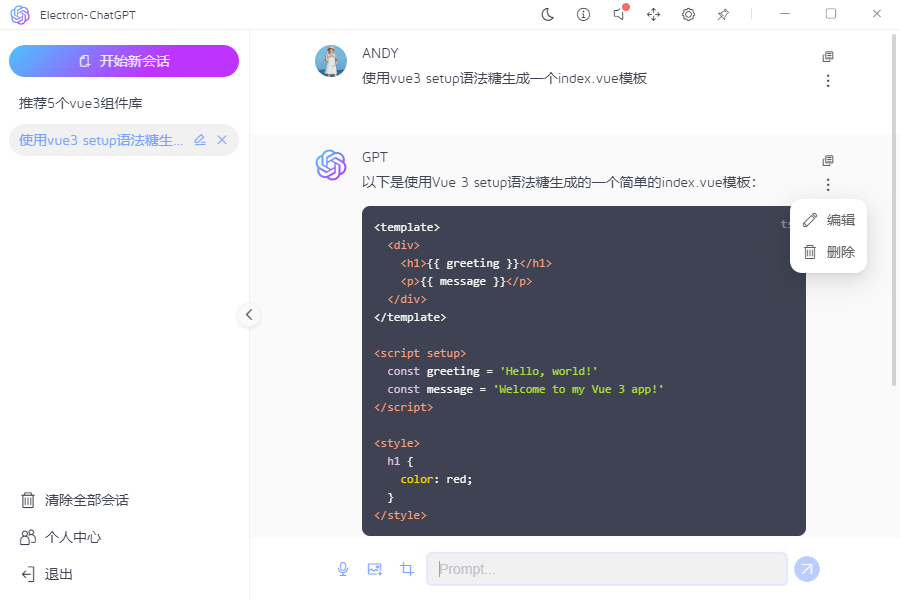
electron-chatgpt 使用最新桌面端技術Electron25.x結合Vite4.x全家桶技術開發跨端模仿ChatGPT智能聊天程式模板。支持經典+分欄兩種佈局、暗黑+明亮主題模式,集成electron封裝多視窗及通訊功能。
技術棧
- 編碼工具:vscode
- 框架技術:electron25+vite4+vue3+pinia2
- 組件庫:veplus (基於vue3自定義組件庫)
- 打包工具:electron-builder^23.6.0
- 調試工具:electron-devtools-installer^3.2.0
- 代碼高亮:highlight.js^11.7.0
- markdown組件:vue3-markdown-it
- 本地緩存:pinia-plugin-persistedstate^3.1.0
- electron結合vite插件:vite-plugin-electron^0.11.2

項目結構
基於electron最新版本融合vite4.x技術搭建模仿chatgpt桌面端程式。

如果對electron+vite4創建跨端應用及多開視窗感興趣,可以去看看之前的這兩篇分享文章。
https://www.cnblogs.com/xiaoyan2017/p/17436076.html
https://www.cnblogs.com/xiaoyan2017/p/17442502.html
隨著electron快速迭代更新,加上vite極速編譯,二者配合創建的應用運行速度超快。


Vue3桌面UI組件庫
考慮到項目比較輕量級,所以採用自研vue3組件庫ve-plus。

關於veplus組件庫這裡不作過多介紹,之前有過一篇分享文章,大家可以去看看。
https://www.cnblogs.com/xiaoyan2017/p/17170454.html
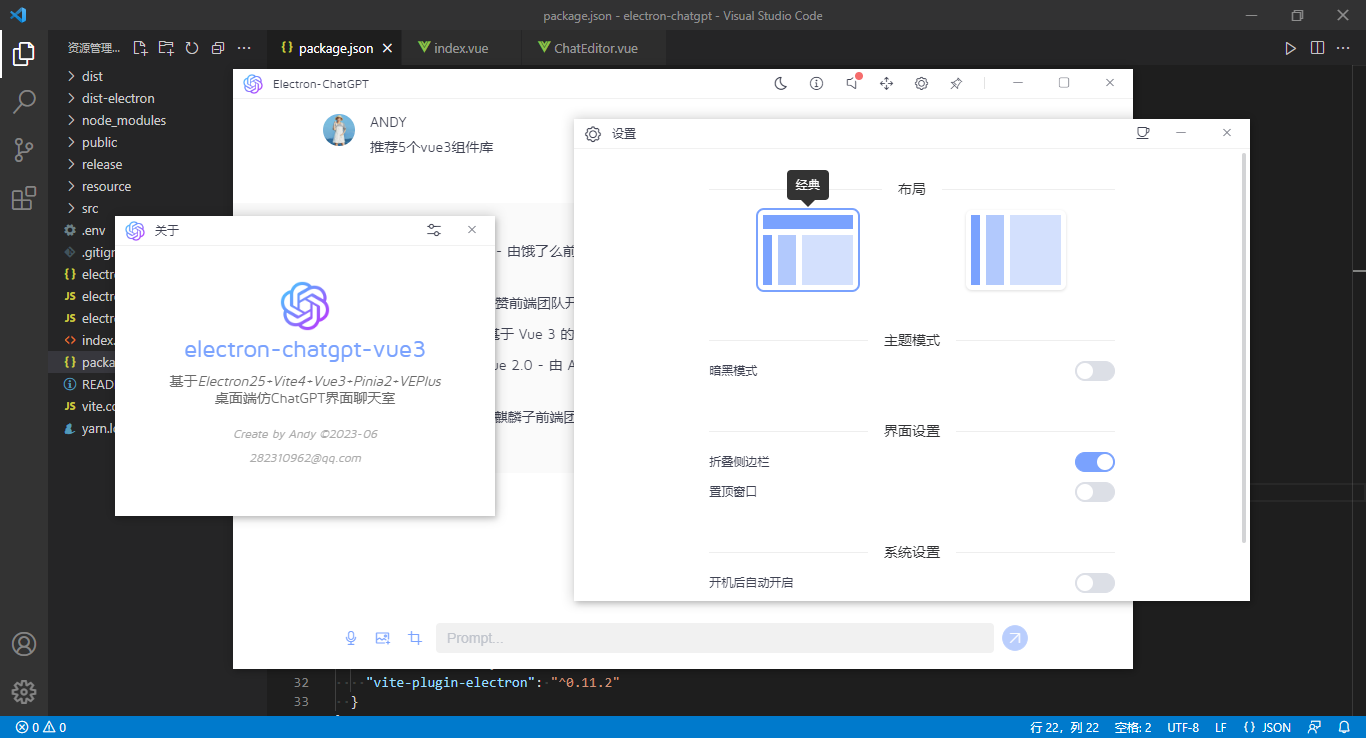
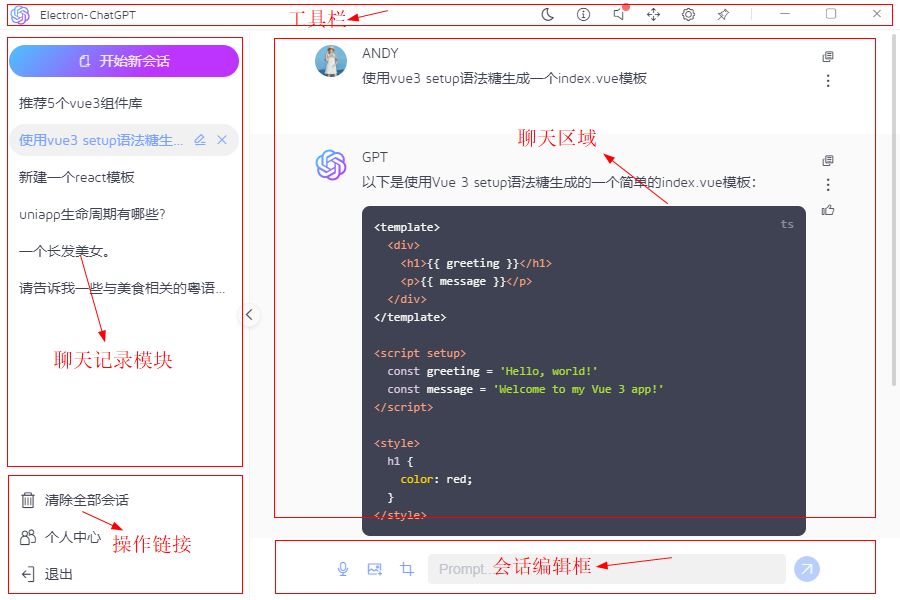
項目佈局
項目整體大致分為頂部導航工具欄+左側會話記錄/操作鏈接+右側會話區/編輯框等模塊。
<template>
    <div class="vegpt__layout flexbox flex-col">
        <!-- //頂部工具欄 -->
        <Toolbar />

        <div class="ve__layout-body flex1 flexbox">
            <!-- //側邊欄 -->
            <div class="ve__layout-menus flexbox" :class="{'hidden': store.config.collapse}">
                <aside class="ve__layout-aside flexbox flex-col">
                    <ChatNew />
                    <Scrollbar class="flex1" autohide size="4" gap="1">
                        <ChatList />
                    </Scrollbar>
                    <ExtraLink />
                    <Collapse />
                </aside>
            </div>

            <!-- //主體區域 -->
            <div class="ve__layout-main flex1 flexbox flex-col">
                <Main />
            </div>
        </div>
    </div>
</template>
Electron主進程入口
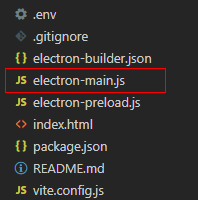
根目錄下新建 electron-main.js 作為主進程入口文件。
/**
 * 主進程入口
 * @author YXY
 */

const { app, BrowserWindow } = require('electron')

const MultiWindow = require('./src/multiwindow')

// 屏蔽安全警告
// ectron Security Warning (Insecure Content-Security-Policy)
process.env['ELECTRON_DISABLE_SECURITY_WARNINGS'] = 'true'

const createWindow = () => {
    let win = new MultiWindow()
    win.createWin({isMainWin: true})
}

app.whenReady().then(() => {
    createWindow()
    app.on('activate', () => {
        if(BrowserWindow.getAllWindows().length === 0) createWindow()
    })
})

app.on('window-all-closed', () => {
    if(process.platform !== 'darwin') app.quit()
})
使用electron的vite插件,在vite.config.js中配置入口。
import { defineConfig, loadEnv } from 'vite'
import vue from '@vitejs/plugin-vue'
import electron from 'vite-plugin-electron'
import { resolve } from 'path'
import { parseEnv } from './src/utils/env'

export default defineConfig(({ command, mode }) => {
  const viteEnv = loadEnv(mode, process.cwd())
  const env = parseEnv(viteEnv)

  return {
    plugins: [
      vue(),
      electron({
        // 主進程入口文件
        entry: 'electron-main.js'
      })
    ],

    /*構建選項*/
    build: {
      /* minify: 'esbuild', // 打包方式 esbuild(打包快)|terser
      chunkSizeWarningLimit: 2000, // 打包大小警告
      rollupOptions: {
          output: {
              chunkFileNames: 'assets/js/[name]-[hash].js',
              entryFileNames: 'assets/js/[name]-[hash].js',
              assetFileNames: 'assets/[ext]/[name]-[hash].[ext]',
          }
      } */

      // 如果打包方式是terser,則配置如下
      /* minify: "terser",
      terserOptions: {
        compress: {
          // 去掉所有console和debugger
          // drop_console: true,
          // drop_debugger: true,

          drop_console: command !== 'serve',
          drop_debugger: command !== 'serve',
          //pure_funcs:['console.log'] // 移除console.log
        }
      } */
    },
    esbuild: {
      // 打包去除 console.log 和 debugger
      drop: env.VITE_DROP_CONSOLE && command === 'build' ? ["console", "debugger"] : []
    },

    /*開發伺服器選項*/
    server: {
      // 埠
      port: env.VITE_PORT,
      // ...
    },

    resolve: {
      // 設置別名
      alias: {
        '@': resolve(__dirname, 'src'),
        '@assets': resolve(__dirname, 'src/assets'),
        '@components': resolve(__dirname, 'src/components'),
        '@views': resolve(__dirname, 'src/views')
      }
    }
  }
})
需要註意:由於目前Electron 尚未支持 "type": "module",需要在package.json中去掉,並且配置 "main": "electron-main.js", 入口。
Electron自定義無邊框視窗工具欄


創建視窗的時候配置 frame: false 參數,創建的視窗則沒有系統頂部導航欄及邊框。拖拽區域/最大化/最小化及關閉按鈕均需要自定義操作。
通過設置css3屬性 -webkit-app-region: drag ,則可對自定義區域進行拖拽操作,設置後按鈕/鏈接點擊則會失效,這時通過對按鈕或鏈接設置-webkit-app-region: no-drag就可恢復事件響應。
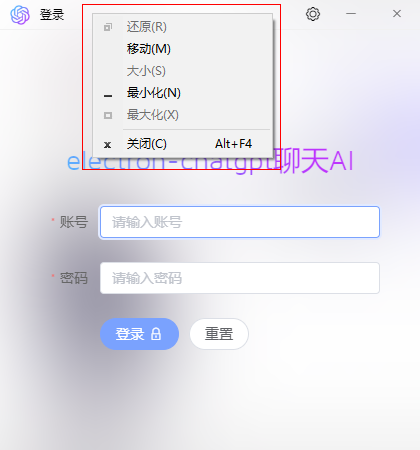

不過設置-webkit-app-region: drag,點擊滑鼠右鍵,會出現上圖系統菜單,經過一番調試,windows下可以暫時通過如下方法屏蔽右鍵菜單。
// 屏蔽系統右鍵菜單
win.hookWindowMessage(278, () => {
    win.setEnabled(false)
    setTimeout(() => {
        win.setEnabled(true)
    }, 100)

    return true
})
在components/titlebar目錄自定義工具欄條。
control.vue自定義最大化/最小化/關閉按鈕
<template>
    <div class="vegpt__control ve__nodrag">
        <div class="vegpt__control-btns" :style="{'color': color}">
            <slot />
            <div v-if="isTrue(minimizable)" class="btn win-btn win-min" @click="handleMin"><i class="iconfont ve-icon-minimize"></i></div>
            <div v-if="isTrue(maximizable) && winCfg.window.resizable" class="btn win-btn win-maxmin" @click="handleRestore">
                <i class="iconfont" :class="isMaximized ? 've-icon-maxrestore' : 've-icon-maximize'"></i>
            </div>
            <div v-if="isTrue(closable)" class="btn win-btn win-close" @click="handleQuit"><i class="iconfont ve-icon-close"></i></div>
        </div>
    </div>
</template>
<template>
<div class="vegpt__control ve__nodrag">
<div class="vegpt__control-btns" :style="{'color': color}">
<slot />
<div v-if="isTrue(minimizable)" class="btn win-btn win-min" @click="handleMin"><i class="iconfont ve-icon-minimize"></i></div>
<div v-if="isTrue(maximizable) && winCfg.window.resizable" class="btn win-btn win-maxmin" @click="handleRestore">
<i class="iconfont" :class="isMaximized ? 've-icon-maxrestore' : 've-icon-maximize'"></i>
</div>
<div v-if="isTrue(closable)" class="btn win-btn win-close" @click="handleQuit"><i class="iconfont ve-icon-close"></i></div>
</div>
</div>
</template>
<script setup>
import { onMounted, ref } from 'vue'
import { winCfg, setWin } from '@/multiwindow/actions'
import { appStore } from '@/pinia/modules/app'
import { isTrue } from '@/utils'
const appState = appStore()
const props = defineProps({
// 標題顏色
color: String,
// 視窗是否可以最小化
minimizable: { type: [Boolean, String], default: true },
// 視窗是否可以最大化
maximizable: { type: [Boolean, String], default: true },
// 視窗是否可以關閉
closable: { type: [Boolean, String], default: true }
})
// 是否最大化
let isMaximized = ref(false)
onMounted(() => {
window.electronAPI.invoke('win__isMaximized').then(data => {
console.log(data)
isMaximized.value = data
})
window.electronAPI.receive('win__hasMaximized', (e, data) => {
console.log(data)
isMaximized.value = data
})
})
// 最小化
const handleMin = () => {
window.electronAPI.send('win__minimize')
}
// 最大化/還原
const handleRestore = () => {
window.electronAPI.invoke('win__max2min').then(data => {
console.log(data)
isMaximized.value = data
})
}
// 關閉窗體
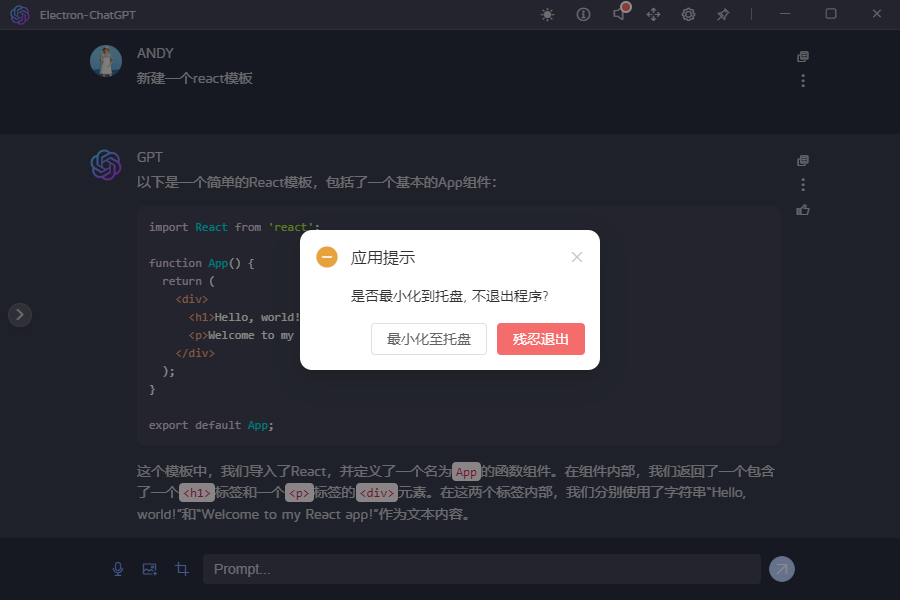
const handleQuit = () => {
if(winCfg.window.isMainWin) {
MessageBox.confirm('應用提示', '是否最小化到托盤, 不退出程式?', {
type: 'warning',
cancelText: '最小化至托盤',
confirmText: '殘忍退出',
confirmType: 'danger',
width: 300,
callback: action => {
if(action == 'confirm') {
appState.$reset()
setWin('close')
}else if(action == 'cancel') {
setWin('hide', winCfg.window.id)
}
}
})
}else {
setWin('close', winCfg.window.id)
}
}
</script>
在 index.vue 中引入 control.vue 操作按鈕,並支持自定義左側、標題等功能。
<template>
    <div class="vegpt__titlebar" :class="{'fixed': isTrue(fixed), 'transparent fixed': isTrue(transparent)}">
        <div class="vegpt__titlebar-wrapper flexbox flex-alignc ve__drag" :style="{'background': bgcolor, 'color': color, 'z-index': zIndex}">
            <slot name="left">
                <img src="/logo.png" height="20" style="margin-left: 10px;" />
            </slot>
            <div class="vegpt__titlebar-title" :class="{'center': isTrue(center)}">
                <slot name="title">{{ title || winCfg.window.title || env.VITE_APPTITLE }}</slot>
            </div>

            <!-- 控制按鈕 -->
            <Control :minimizable="minimizable" :maximizable="maximizable" :closable="closable">
                <slot name="btn" />
            </Control>
        </div>
    </div>
</template>
Electron創建系統托盤圖標
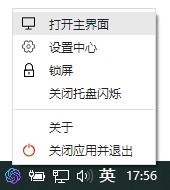
// 創建系統托盤圖標
createTray() {
    console.log('——+——+——Start Create Tray!')
    console.log(__dirname)
    console.log(join(process.env.ROOT, 'resource/tray.ico'))

    const trayMenu = Menu.buildFromTemplate([
        {
            label: '打開主界面',
            icon: join(process.env.ROOT, 'resource/home.png'),
            click: () => {
                try {
                    for(let i in this.group) {
                        let win = this.getWin(i)
                        if(!win) return
                        // 是否主視窗
                        if(this.group[i].isMainWin) {
                            if(win.isMinimized()) win.restore()
                            win.show()
                        }
                    }
                } catch (error) {
                    console.log(error)
                }
            }
        },
        {
            label: '設置中心',
            icon: join(process.env.ROOT, 'resource/setting.png'),
            click: () => {
                for(let i in this.group) {
                    let win = this.getWin(i)
                    if(win) win.webContents.send('win__ipcData', { type: 'CREATE_WIN_SETTING', value: null })
                }
            },
        },
        {
            label: '鎖屏',
            icon: join(process.env.ROOT, 'resource/lock.png'),
            click: () => null,
        },
        {
            label: '關閉托盤閃爍',
            click: () => {
                this.flashTray(false)
            }
        },
        {type: 'separator'},
        /* {
            label: '重啟',
            click: () => {
                // app.relaunch({ args: process.argv.slice(1).concat(['--relaunch']) })
                // app.exit(0)
            }
        }, */
        {
            label: '關於',
            click: () => {
                for(let i in this.group) {
                    let win = this.getWin(i)
                    if(win) win.webContents.send('win__ipcData', { type: 'CREATE_WIN_ABOUT', value: null })
                }
            }
        },
        {
            label: '關閉應用並退出',
            icon: join(process.env.ROOT, 'resource/quit.png'),
            click: () => {
                dialog.showMessageBox(this.main, {
                    title: '詢問',
                    message: '確定要退出應用程式嗎?',
                    buttons: ['取消', '最小化托盤', '退出應用'],
                    type: 'error',
                    noLink: false,  // true傳統按鈕樣式  false鏈接樣式
                    cancelId: 0
                }).then(res => {
                    console.log(res)

                    const index = res.response
                    if(index == 0) {
                        console.log('取消')
                    }if(index == 1) {
                        console.log('最小化托盤')
                        for(let i in this.group) {
                            let win = this.getWin(i)
                            if(win) win.hide()
                        }
                    }else if(index == 2) {
                        console.log('退出應用')

                        try {
                            for(let i in this.group) {
                                let win = this.getWin(i)
                                if(win) win.webContents.send('win__ipcData', { type: 'WIN_LOGOUT', value: null })
                            }
                            // app.quit 和 app.exit(0) 都可退出應用。
                            // 前者可以被打斷並觸發一些事件,而後者將強制應用程式退出而不觸發任何事件或允許應用程式取消操作。
                            app.quit()
                        } catch (error) {
                            console.log(error)
                        }
                    }
                })
            }
        }
    ])
    this.tray = new Tray(this.trayIco1)
    this.tray.setContextMenu(trayMenu)
    this.tray.setToolTip(app.name)
    this.tray.on('double-click', () => {
        console.log('double clicked')
    })

    // 開啟托盤閃爍
    // this.flashTray(true)
}

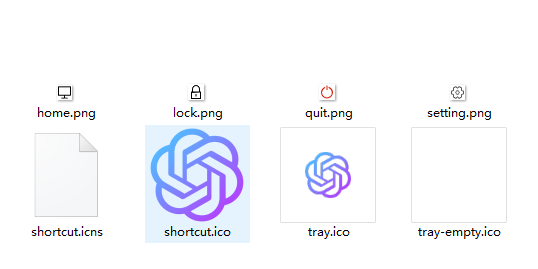
托盤圖標、右鍵菜單圖標及打包圖標均在resource目錄下。
Electron打包腳本electron-builder
在根目錄新建一個electron打包配置文件electron-builder.json。
{
    "productName": "Electron-ChatGPT",
    "appId": "com.yxy.electron-chatgpt-vue3",
    "copyright": "Copyright © 2023-present Andy",
    "compression": "maximum",
    "asar": true,
    "directories": {
        "output": "release/${version}"
    },
    "nsis": {
        "oneClick": false,
        "allowToChangeInstallationDirectory": true,
        "perMachine": true,
        "deleteAppDataOnUninstall": true,
        "createDesktopShortcut": true,
        "createStartMenuShortcut": true,
        "shortcutName": "ElectronVite4Vue3"
    },
    "win": {
        "icon": "./resource/shortcut.ico",
        "artifactName": "${productName}-v${version}-${platform}-${arch}-setup.${ext}",
        "target": [
            {
                "target": "nsis",
                "arch": ["ia32"]
            }
        ]
    },
    "mac": {
        "icon": "./resource/shortcut.icns",
        "artifactName": "${productName}-v${version}-${platform}-${arch}-setup.${ext}"
    },
    "linux": {
        "icon": "./resource",
        "artifactName": "${productName}-v${version}-${platform}-${arch}-setup.${ext}"
    }
}
Electron主渲染進程通訊傳值
由於electron主渲染進程一般都是單視窗之間進行傳值。如果需要在多個視窗間傳值,如切換主題功能,則需要在渲染進程發送請求,主進程監聽後再發送請求給渲染進程(App.vue中監聽)。
<div
    class="toolbar__item"
    :title="`切換 暗黑/明亮 模式(當前 ${appState.config.isDark ? '暗黑' : '明亮'}模式)`"
    @click="changeMode"
>
    <Icon :name="appState.config.isDark ? 've-icon-sunny' : 've-icon-yewan'" />
</div>

// 主題切換
const changeMode = () => {
    appState.config.isDark = !appState.config.isDark
    ipcRenderer.send('win__postData', appState.config.isDark)
}
在主進程中使用ipcMain.on監聽。
// 主/渲染進程傳參
ipcMain.on('win__postData', (event, args) => {
    mainWin.webContents.send('win__postData', args)
})
然後在渲染進程App.vue頁面監聽並處理通訊傳值。
/**
 * 接收主進程發送的事件
 */
ipcRenderer.on('win__postData', (e, data) => {
    console.log('——+——+——receive multiwin data:', data)

    switch(data.type) {
        // 退出登錄
        case 'WIN_LOGOUT':
            appState.$reset()
            break;
        // 佈局切換
        case 'CHANGE_LAYOUT':
            appState.config.layout = data.value
            break;
        // 切換主題
        case 'CHANGE_MODE':
            appState.config.isDark = data.value
            appState.changeDark()
            break;
        // 側邊欄收縮
        case 'CHANGE_COLLAPSE':
            appState.config.collapse = data.value
            break;
      }
})
這樣就能簡單實現多視窗傳值了。如果大家有其他方法,歡迎一起交流學習哈~
Ok,基於electron25+vue3開發桌面端仿chatgpt聊天實例就先分享到這裡,希望對大家有所幫助

