1.更改代理(方便步驟3) 方法一: go env -w GOPROXY="https://goproxy.cn" 方法二:(非永久性,該方法對我有效) $env:GOPROXY="https://goproxy.cn" 註: http://mirrors.aliyun.com/goproxy/ 阿 ...
1.更改代理(方便步驟3)
方法一:
go env -w GOPROXY="https://goproxy.cn"
方法二:(非永久性,該方法對我有效)
$env:GOPROXY="https://goproxy.cn"
註:    http://mirrors.aliyun.com/goproxy/  阿裡雲代理
      https://goproxy.cn  七雲牛代理
2.安裝protoc
從該網站https://github.com/protocolbuffers/protobuf/releases/選擇合適版本下載並解壓,將其中的protoc.exe文件寫入到環境變數就能使用
(我創建了一個相關的目錄aboutProtobuf,然後將學習protobuf需要用到的東西都放到裡面了,配置環境變數時也是使用該目錄)
3.安裝protoc-gen-go
使用該命令
go install github.com/golang/protobuf/protoc-gen-go@latest
直接安裝protoc-gen-go,然後將GOPATH中的protoc-gen-go.exe文件剪切到相關目錄aboutProtobuf中(不剪切也行)
4.測試
//測試代碼
syntax = "proto2";
package testProtobuf;
option go_package ="./testProtobuf";

message Person {
  required string name = 1;
  required int32 age = 2;
  optional string email = 3;

}
輸入命令
protoc --go_out=. test.proto
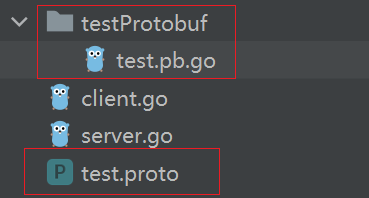
無報錯,並且生成如下go文件

則成功
5.生成的go文件中google.golang.org/protobuf/reflect/protoreflect依賴爆紅
在GOPATH/src目錄下新建google.golang.org文件夾,併在該文件下使用命令:
git clone https://e.coding.net/robinqiwei/googleprotobuf.git protobuf


