
搭建微服務基礎環境02 3.創建使用會員微服務模塊-service consumer 3.1需求分析 瀏覽器向service consumer請求某個數據,service consumer會去向service provider請求數據,然後將service provider返回的數據返回給瀏覽器。 ...
搭建微服務基礎環境02
3.創建使用會員微服務模塊-service consumer
3.1需求分析
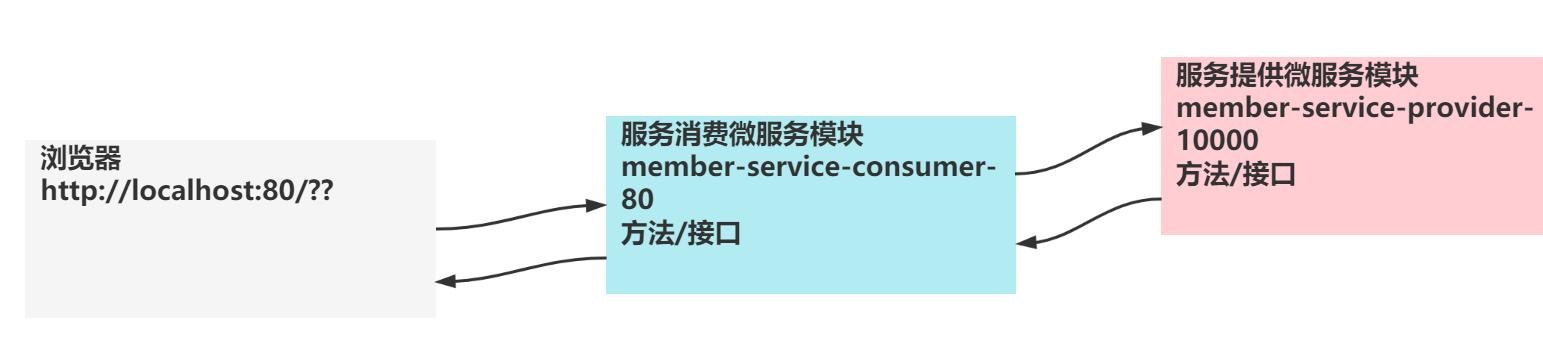
瀏覽器向service consumer請求某個數據,service consumer會去向service provider請求數據,然後將service provider返回的數據返回給瀏覽器。
添加數據同理。
3.2思路分析
- 創建Module(member-service-consumer-80) & 完成配置
- 創建controller
- 完成測試
3.3實現步驟
3.3.1創建Module&完成配置
步驟同上一篇的2.3.1
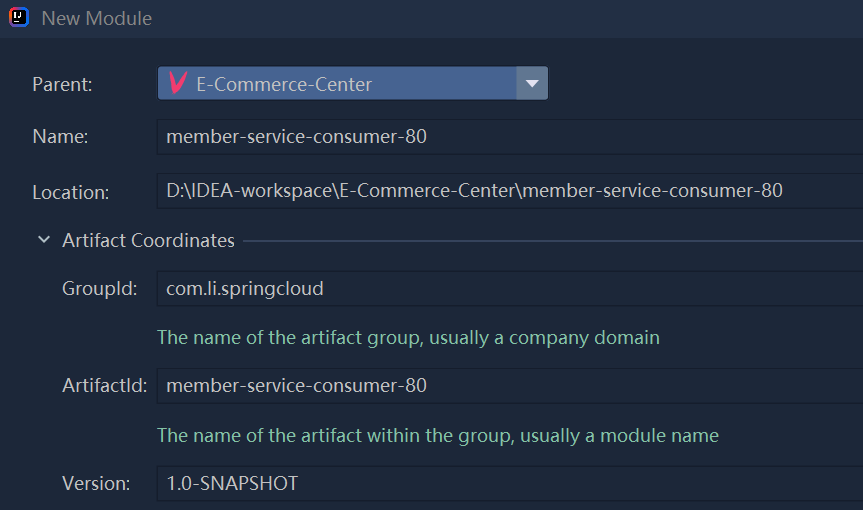
(1)創建Module:member-service-consumer-80
(2)在子模塊的pom.xml文件中加入相關的依賴:
因為這個模塊不需要直接操作資料庫,相比於之間的子模塊,減少了和資料庫相關的依賴。
<?xml version="1.0" encoding="UTF-8"?>
<project xmlns="http://maven.apache.org/POM/4.0.0"
         xmlns:xsi="http://www.w3.org/2001/XMLSchema-instance"
         xsi:schemaLocation="http://maven.apache.org/POM/4.0.0 http://maven.apache.org/xsd/maven-4.0.0.xsd">
    <parent>
        <artifactId>E-Commerce-Center</artifactId>
        <groupId>com.li.springcloud</groupId>
        <version>1.0-SNAPSHOT</version>
    </parent>
    <modelVersion>4.0.0</modelVersion>

    <artifactId>member-service-consumer-80</artifactId>

    <properties>
        <maven.compiler.source>8</maven.compiler.source>
        <maven.compiler.target>8</maven.compiler.target>
    </properties>

    <!--引入相關的依賴,版本都使用父項目聲明的版本-->
    <dependencies>
        <!--web-starter-->
        <dependency>
            <groupId>org.springframework.boot</groupId>
            <artifactId>spring-boot-starter-web</artifactId>
        </dependency>

        <!--actuator-starter 是 springboot程式的監控系統,可以實現系統的健康監測
            可以通過http://localhost:10000/actuator看到相關的連接和信息-->
        <dependency>
            <groupId>org.springframework.boot</groupId>
            <artifactId>spring-boot-starter-actuator</artifactId>
        </dependency>

        <!--lombok-->
        <dependency>
            <groupId>org.projectlombok</groupId>
            <artifactId>lombok</artifactId>
        </dependency>
    </dependencies>
</project>
(3)創建resources/application.yml
server:
  port: 80
spring:
  application:
    name: member-service-consumer-80
(4)創建啟動類
package com.li.springcloud;

import org.springframework.boot.SpringApplication;
import org.springframework.boot.autoconfigure.SpringBootApplication;

/**
 * @author 李
 * @version 1.0
 */
@SpringBootApplication
public class MemberConsumerApplication {
    public static void main(String[] args) {
        SpringApplication.run(MemberConsumerApplication.class,args);
    }
}
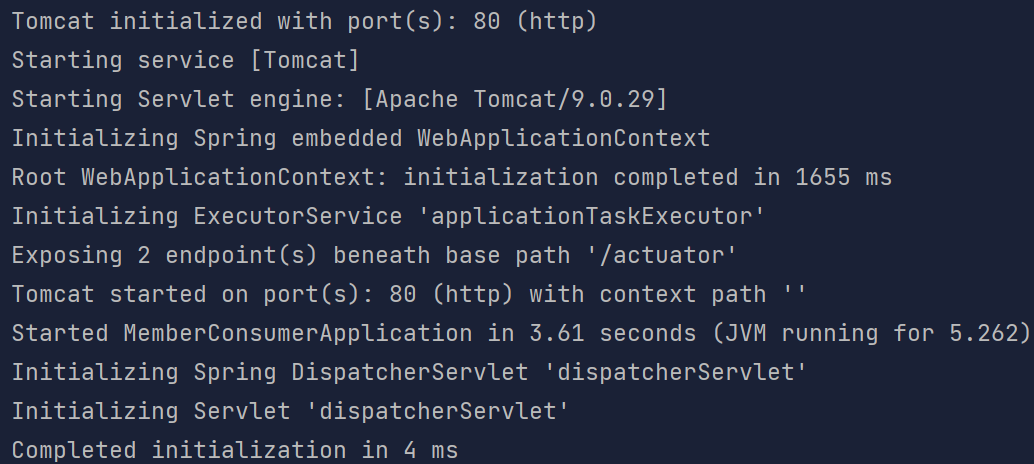
測試,啟動成功:
3.3.1業務實現
3.3.1.1utils層
創建工具類Result.java(略,見2.3.3.1)
3.3.1.2Entity層
Member.java
package com.li.springcloud.entity;

import lombok.AllArgsConstructor;
import lombok.Data;
import lombok.NoArgsConstructor;

/**
 * @author 李
 * @version 1.0
 */
@Data
@AllArgsConstructor
@NoArgsConstructor
//因為對象在網路中以流的形式傳遞,這裡最好實現Serializable介面
public class Member implements Serializable{
    private Long id;
    private String name;
    private String pwd;
    private String mobile;
    private String email;
    private Integer gender;
}
3.3.1.3註入RestTemplate
RestTemplate 基本介紹:RestTemplate 是 Spring 提供的用於訪問Rest服務的模板類,它提供來了許多便捷訪問遠程 Http 服務的方法。
通過 RestTemplate,我們可以向另一個微服務模塊發出 Http 請求(支持 Restful 風格),去調用該模塊的 Controller 提供的 API 介面,就像瀏覽器發出請求調用該 API 介面一樣。
RestTemplate 官網:RestTemplate (Spring Framework 5.2.2.RELEASE API)
創建配置類,註入RestTemplate對象:
package com.li.springcloud.config;

import org.springframework.context.annotation.Bean;
import org.springframework.context.annotation.Configuration;
import org.springframework.web.client.RestTemplate;

/**
 * @author 李
 * @version 1.0
 * 註入RestTemplate Bean
 */
@Configuration
public class CustomInitBean {
    @Bean
    public RestTemplate getRestTemplate() {
        return new RestTemplate();
    }
}
3.3.1.4Controller層
MemberConsumerController.java:
package com.li.springcloud.controller;

import com.li.springcloud.entity.Member;
import com.li.springcloud.utils.Result;
import lombok.extern.slf4j.Slf4j;
import org.springframework.stereotype.Controller;
import org.springframework.validation.annotation.Validated;
import org.springframework.web.bind.annotation.GetMapping;
import org.springframework.web.bind.annotation.PathVariable;
import org.springframework.web.bind.annotation.PostMapping;
import org.springframework.web.bind.annotation.RestController;
import org.springframework.web.client.RestTemplate;

import javax.annotation.Resource;

/**
 * @author 李
 * @version 1.0
 */
@RestController
@Slf4j
public class MemberConsumerController {
    @Resource
    private RestTemplate restTemplate;

    //定義一個基礎的url
    public static final String MEMBER_SERVICE_PROVIDER_URL =
            "http://localhost:10000";

    //添加對象到資料庫表中
    @PostMapping("/member/consumer/save")
    public Result<Member> save(Member member) {
        log.info("service-consumer member={}", member);
        /**
         * MEMBER_SERVICE_PROVIDER_URL + "/member/save":就是向對應子模塊發出的完整url請求
         * member:就是通過 restTemplate 發出的 post 請求攜帶的數據(對象)
         * Result.class:就是返回的對象類型
         */
        return restTemplate.postForObject
                (MEMBER_SERVICE_PROVIDER_URL + "/member/save",
                        member,
                        Result.class);
    }

    //根據id調用服務介面,返回member對象信息
    @GetMapping("/member/consumer/get/{id}")
    public Result<Member> getMemberById(@PathVariable("id") Integer id) {
        return restTemplate.getForObject
                (MEMBER_SERVICE_PROVIDER_URL + "/member/get/" + id,
                        Result.class);
    }
}
3.3.1完成測試
分別啟動兩個子模塊(service consumer、service provider)
(1)測試save方法:postman以表單形式發出數據:
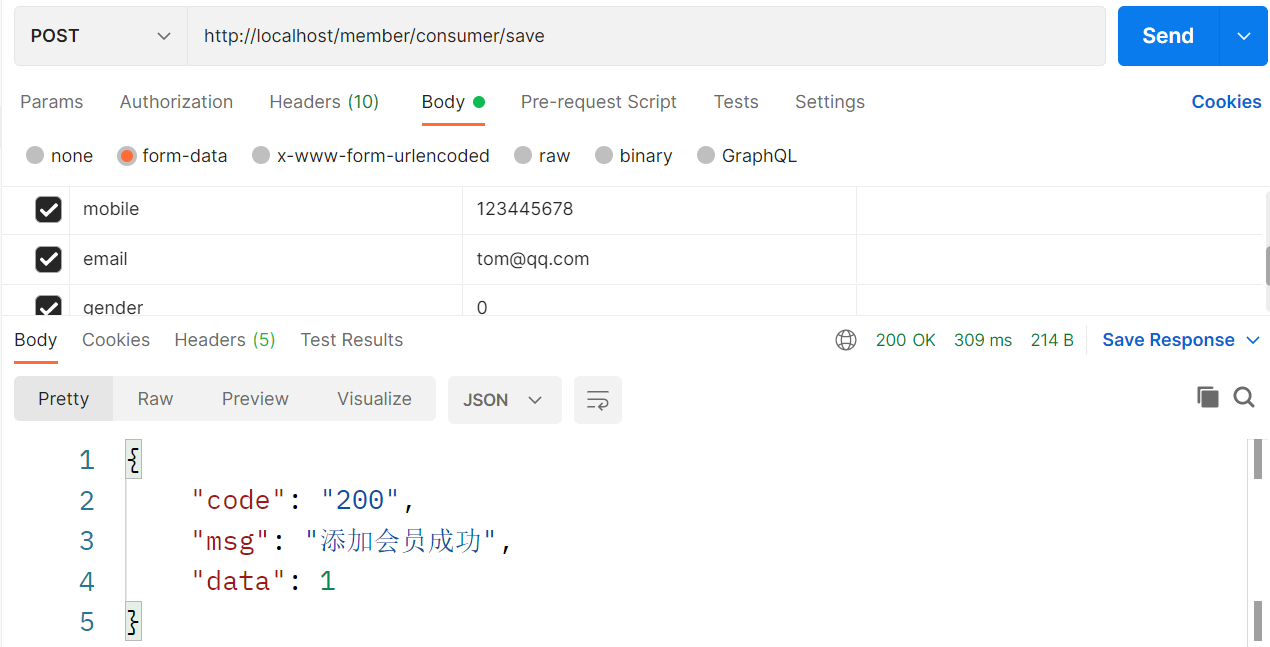
結果顯示添加成功,但是我們在資料庫中看到的確是空值:

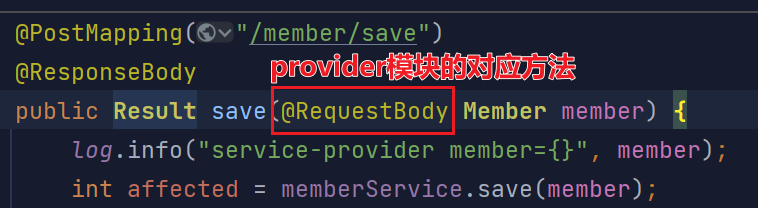
原因是因為使用RestTemplate,它會將數據以json格式發送。解決方法是在服務模塊對應方法參數中使用@RequestBody註解,將接收的json格式數據轉換成對象。
最好實體類實現Serializable,支持可序列化
重新啟動模塊,使用postman發送數據:資料庫添加成功。

(2)瀏覽器測試getMemberById方法:
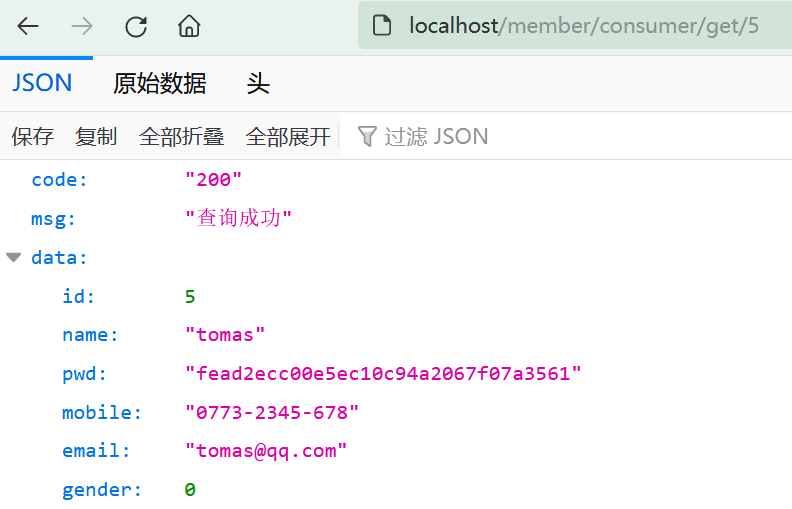
測試通過。
3.4註意事項和使用細節
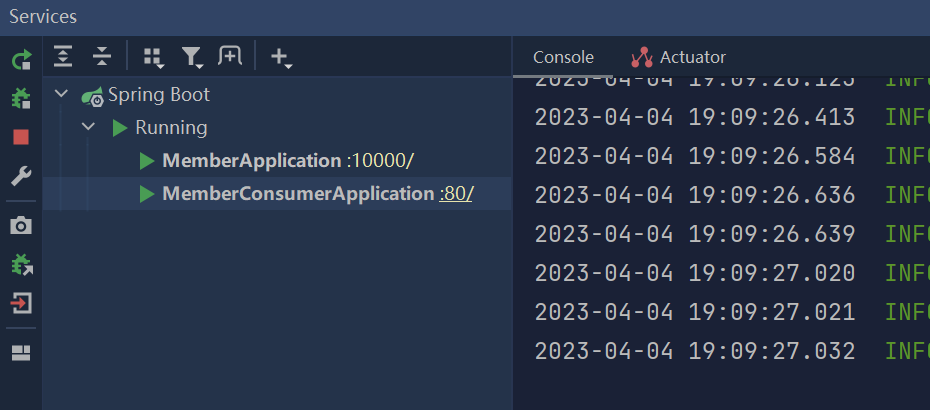
當SpringCloud的服務有多個時,管理多個服務的啟動使用右上角的run會不好管理,我們可以使用Run Dashboard:idea中如何開啟Dashboard
4.創建共用模塊-供其他模塊使用
4.1需求分析
我們在 consumer 和 provider 模塊都使用到了 Member 和 Result 類,我們可以將它們抽取到共用模塊(e_commerce_center_common-api),使用Maven 打包成 jar包,其他模塊需要使用直接引入依賴即可。
4.2思路分析
- 創建Module & 完成配置
- 創建Entity,把共用的實體類放到對應的包下
- 完成測試
4.3實現步驟
4.3.1創建Module&完成配置
(1)創建Module--e_commerce_center_common-api
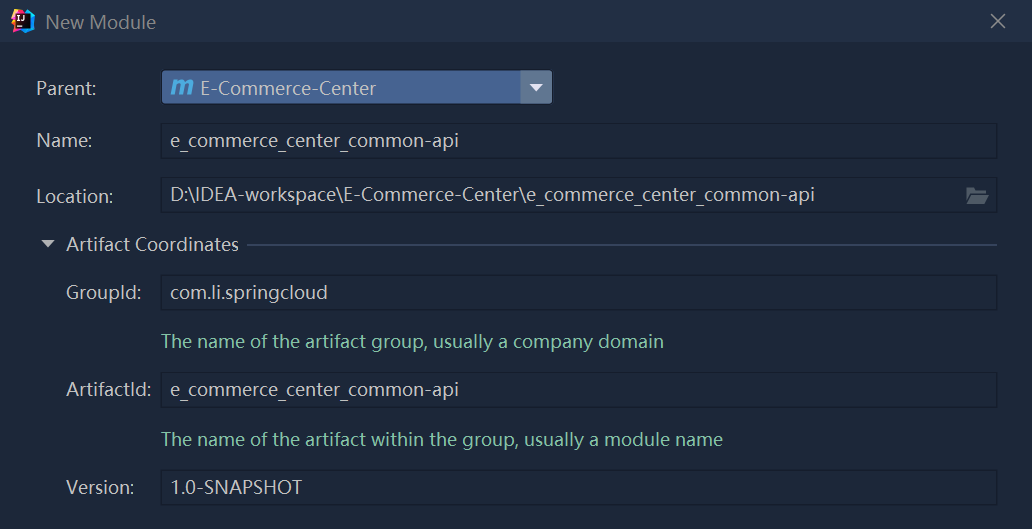
(2)在本模塊的pom.xml引入公共的依賴
<!--引入公共模塊需要的依賴-->
    <dependencies>
        <!--lombok-->
        <dependency>
            <groupId>org.projectlombok</groupId>
            <artifactId>lombok</artifactId>
            <!--<optional>true</optional>:防止將該依賴傳遞到其他模塊中
                1. true 表示兩個項目之間依賴不傳遞
                   比如 a 模塊依賴了本項目,那麼本項目不會把 lombok 的jar包給 a 模塊
                   意義在於繼承依賴時,防止jar發生版本衝突(如,a模塊可以自定義需要的Lombok版本)
                2. 不設置optional或optional=預設值false,都表示傳遞依賴
            -->
            <optional>true</optional>
        </dependency>
    </dependencies>
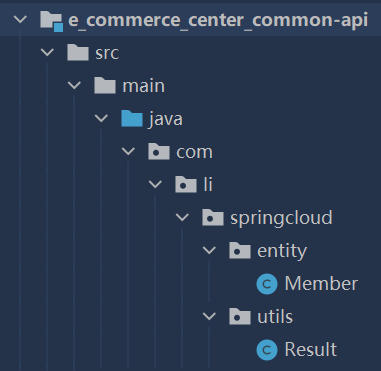
4.3.2抽取共用的API/類
創建多個子模塊都要使用的公共類,註意路徑要和其他模塊的路徑相同。
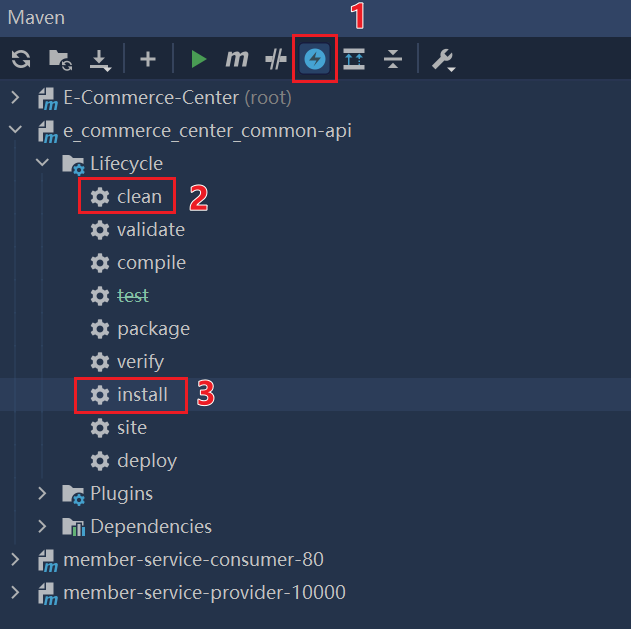
4.3.3使用Maven打包成jar
(1)按如下步驟進行打包:
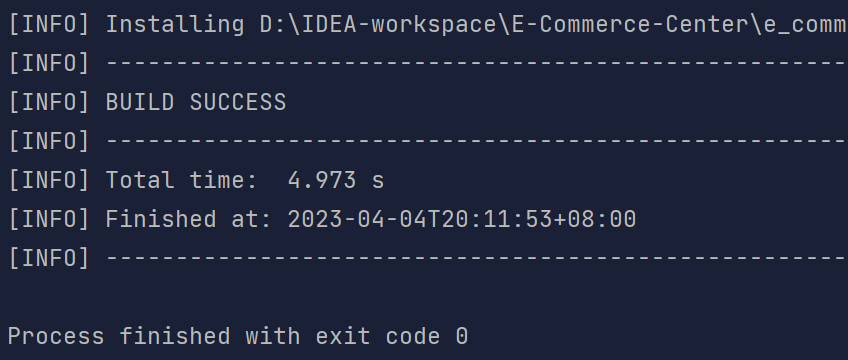
(2)成功後會在target目錄下生成對應的jar包:
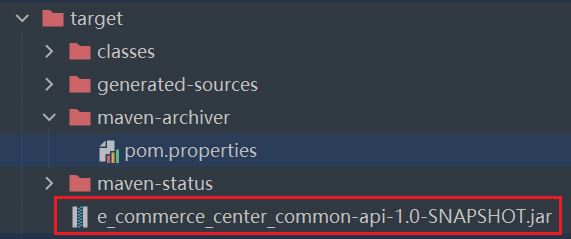
並且maven-archiver下的pom.properties中生成了項目對應的坐標:
#Generated by Maven
#Tue Apr 04 19:38:29 CST 2023
version=1.0-SNAPSHOT
groupId=com.li.springcloud
artifactId=e_commerce_center_common-api
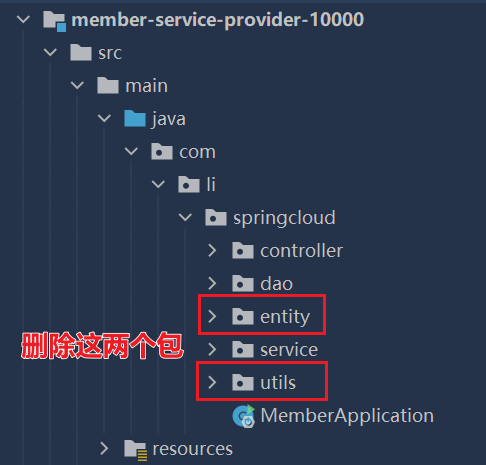
4.3.4工程重構
(1)在 member-service-provider-10000 模塊刪除當前模塊的 entity 包和 utils 包
(2)在 member-service-provider-10000 的 pom.xml 引入公共模塊:
<dependency>
    <groupId>com.li.springcloud</groupId>
    <artifactId>e_commerce_center_common-api</artifactId>
    <version>1.0-SNAPSHOT</version>
</dependency>
然後點擊刷新Maven,這樣就可以引入之前打包好的jar包代碼了。
(3)同理,在 member-service-consumer-80 模塊中也刪除 entity 和 utils 包,然後在本模塊的 pom.xml 文件中也引入公共模塊,然後刷新。
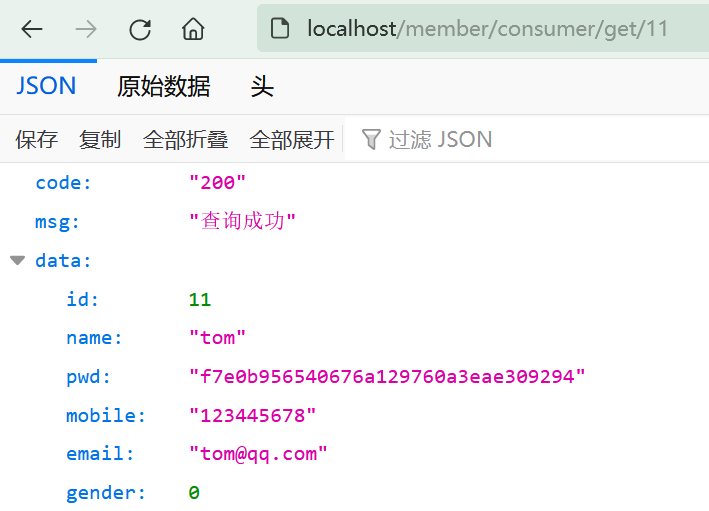
4.3.5完成測試
分別啟動 member-service-provider-10000 和 member-service-consumer-80 兩個子模塊,在瀏覽器中發送請求進行測試:
如下,測試成功,工程進行重構之後沒有問題,公共模塊引入各個模塊之後依然可以工作。
之後如果多個模塊還有公共的類,依然可以通過這種方式來抽取共用的API/類,然後通過引入公共模塊的方式來簡化代碼。


