一、瞭解UniApp 插件的開發方式 Xcode Framework 、 Static Library 基於Cocoapods開發 pod lib 已知UniApp的插件開發方式有兩種, 第一種 Xcode Framework的方式,這種方式是官方指定的方式。 這種方式的優點就是簡單直接, 但也有不 ...
一、瞭解UniApp 插件的開發方式
- Xcode Framework 、 Static Library
- 基於Cocoapods開發 pod lib
已知UniApp的插件開發方式有兩種, 第一種 Xcode Framework的方式,這種方式是官方指定的方式。 這種方式的優點就是簡單直接, 但也有不足,比如當插件需要引入一些三方庫時,操作起來就不是那麼方便。 而使用Cocoapods則可以很方便的引入三方庫。 接下來,本文探索使用Cocoapods的方式來進行UniApp插件開發。
探索之前可以先瞭解一下官方插件開發的流程及步驟:
iOS插件開發教程
二、準備
1.安裝Cocoapods
如果是首次使用Cocoapods ,則需要先安裝cocoapods。具體的安裝步驟非本文重點,可參考如下文章:
安裝Cocoapods的步驟
2. 下載UniApp iOS SDK
三、將HBuilder-UniPluginDemo轉成Cocoapods
找到UniApp iOS SDK下載的目錄,看一下官方提供的目錄結構
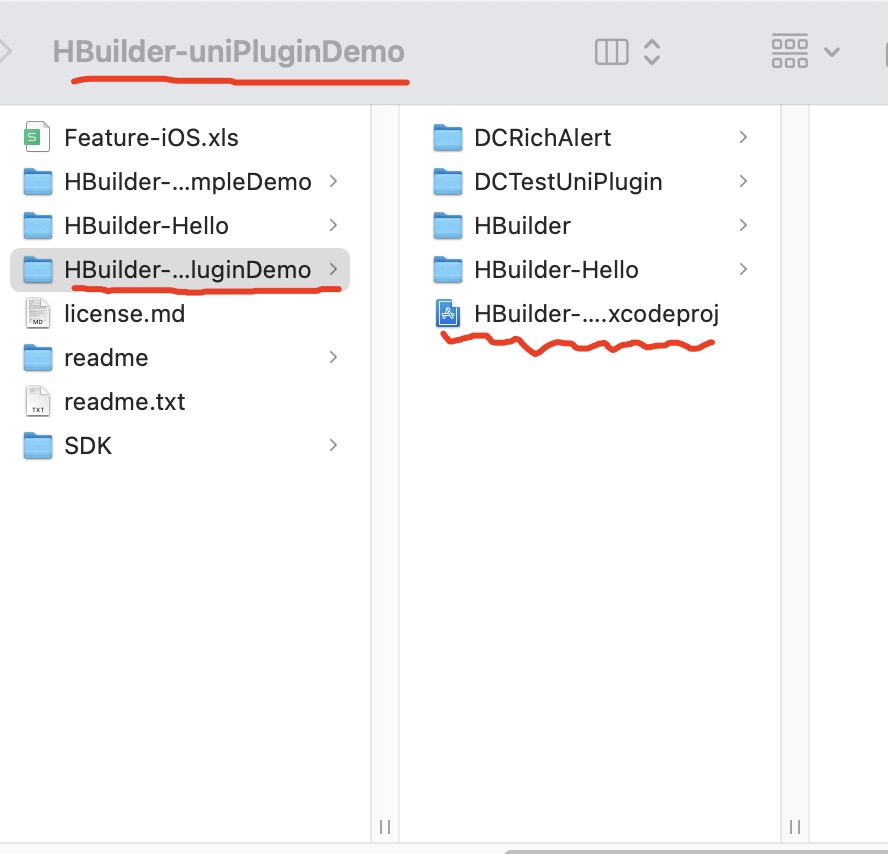
podfile的創建及配置
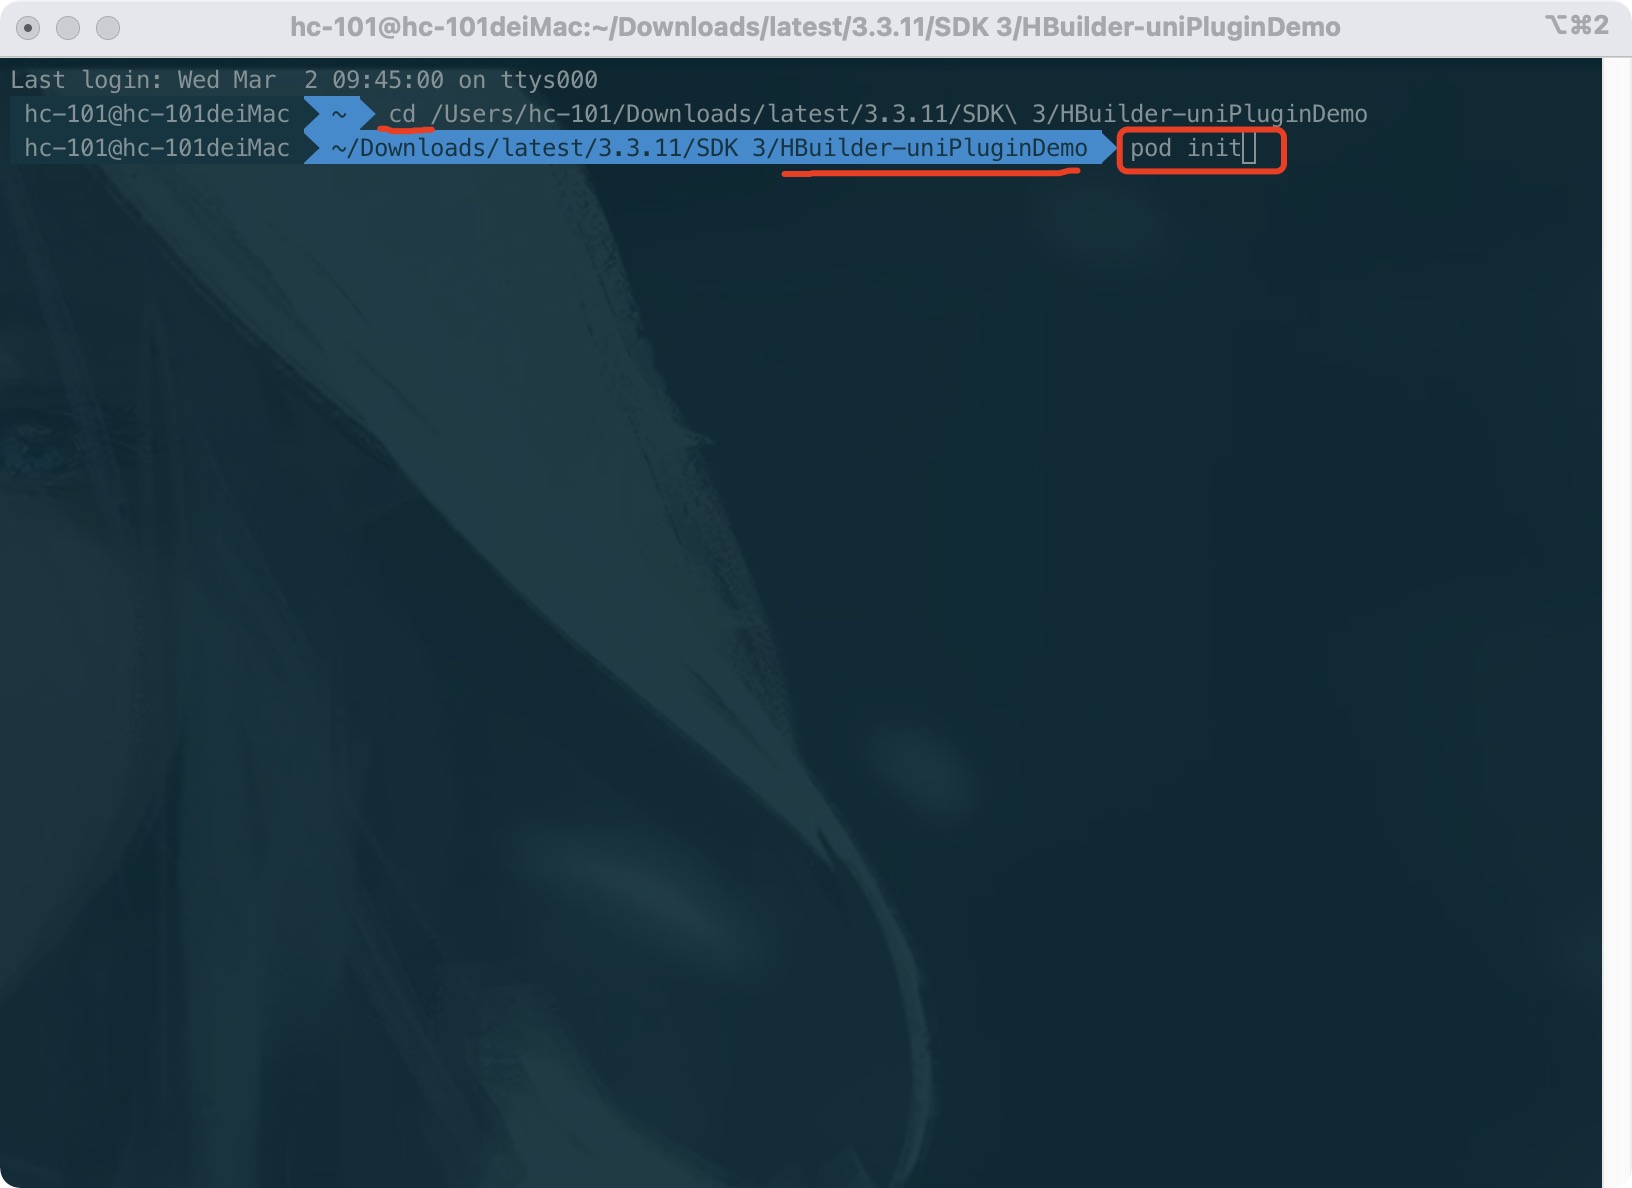
打開“命令行”工具,cd 到 HBuilder-uniPlugin.xcodeprj 工程所在目錄下, 並執行
pod init
來創建Podfile 文件模板
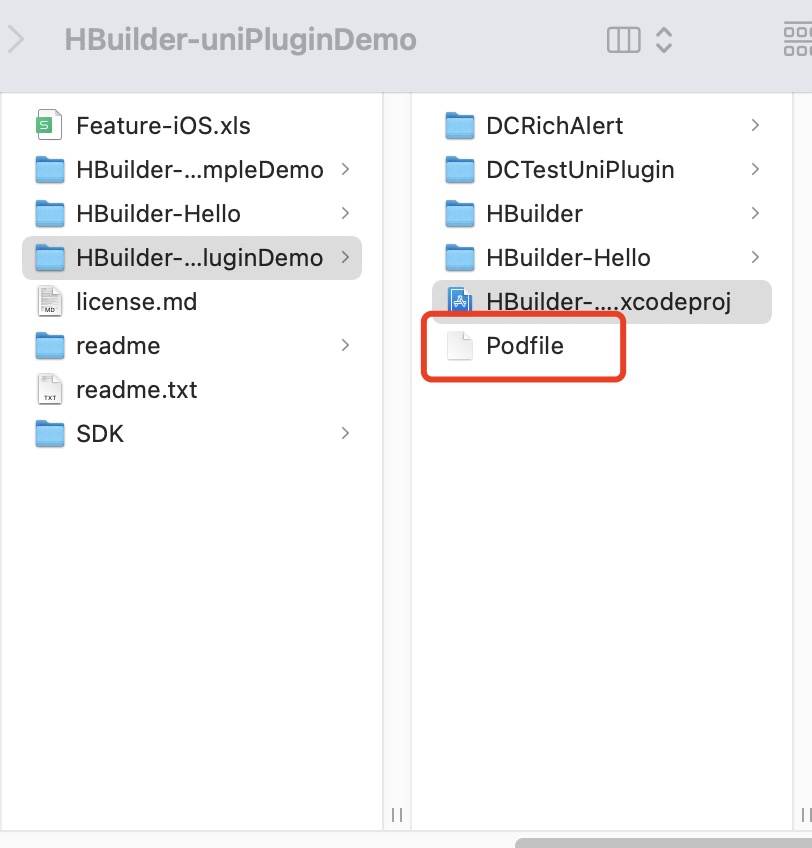
此時目錄下會多出一個 ‘Podfile’ 的文件
打開Podfile 文件, 配置相關設置如下 :
# Uncomment the next line to define a global platform for your project
platform :ios, '10.0'

#忽略pod所有庫警告
inhibit_all_warnings!

workspace 'uniPlugins'

#關閉所有pod庫的BITCODE
post_install do |installer|
  installer.pods_project.targets.each do |target|
    target.build_configurations.each do |config|
      config.build_settings['ENABLE_BITCODE'] = 'NO'
    end
  end
end


target 'HBuilder' do
  # Comment the next line if you don't want to use dynamic frameworks
  use_frameworks!

end
配置忽略Pod所有庫的警告
inhibit_all_warnings!
配置workspace名稱
workspace 'uniPlugins'
關閉所有pod庫的BITCODE
post_install do |installer|
  installer.pods_project.targets.each do |target|
    target.build_configurations.each do |config|
      config.build_settings['ENABLE_BITCODE'] = 'NO'
    end
  end
end
使用pod lib 創建插件工程
在HBuilder-uniPluginDemo目錄下創建一個自定義插件目錄 ‘custom-plugins’ 用來存放自定義的插件工程,目錄結構如下:
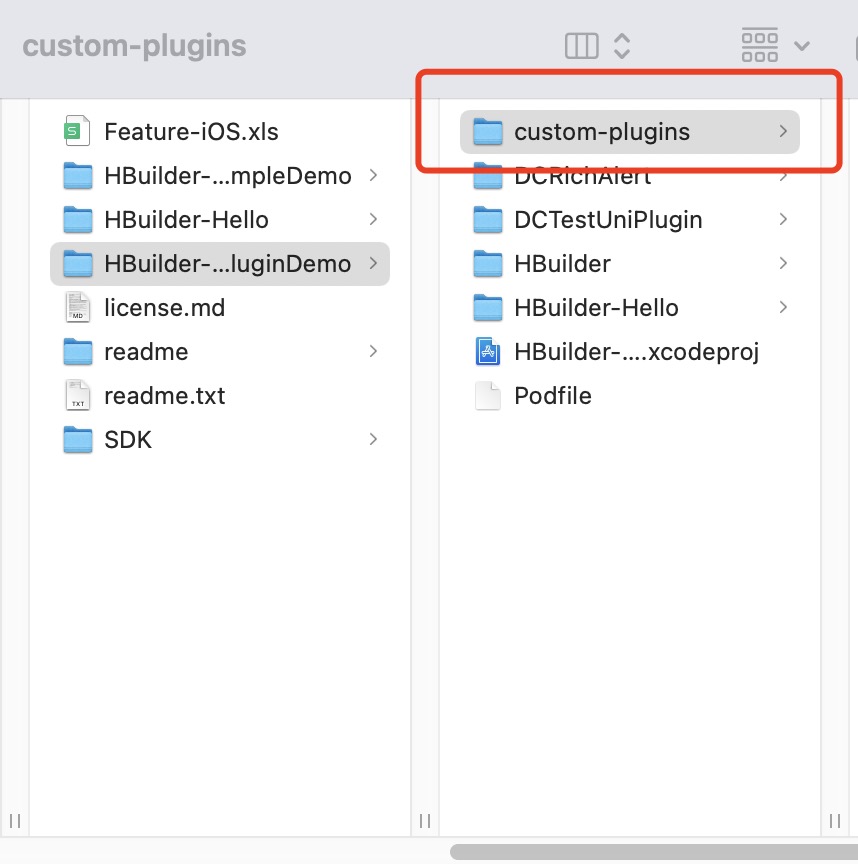
使用命令行工具, cd 到 custom-plugins目錄下, 並執行
pod lib create rz-testplugin
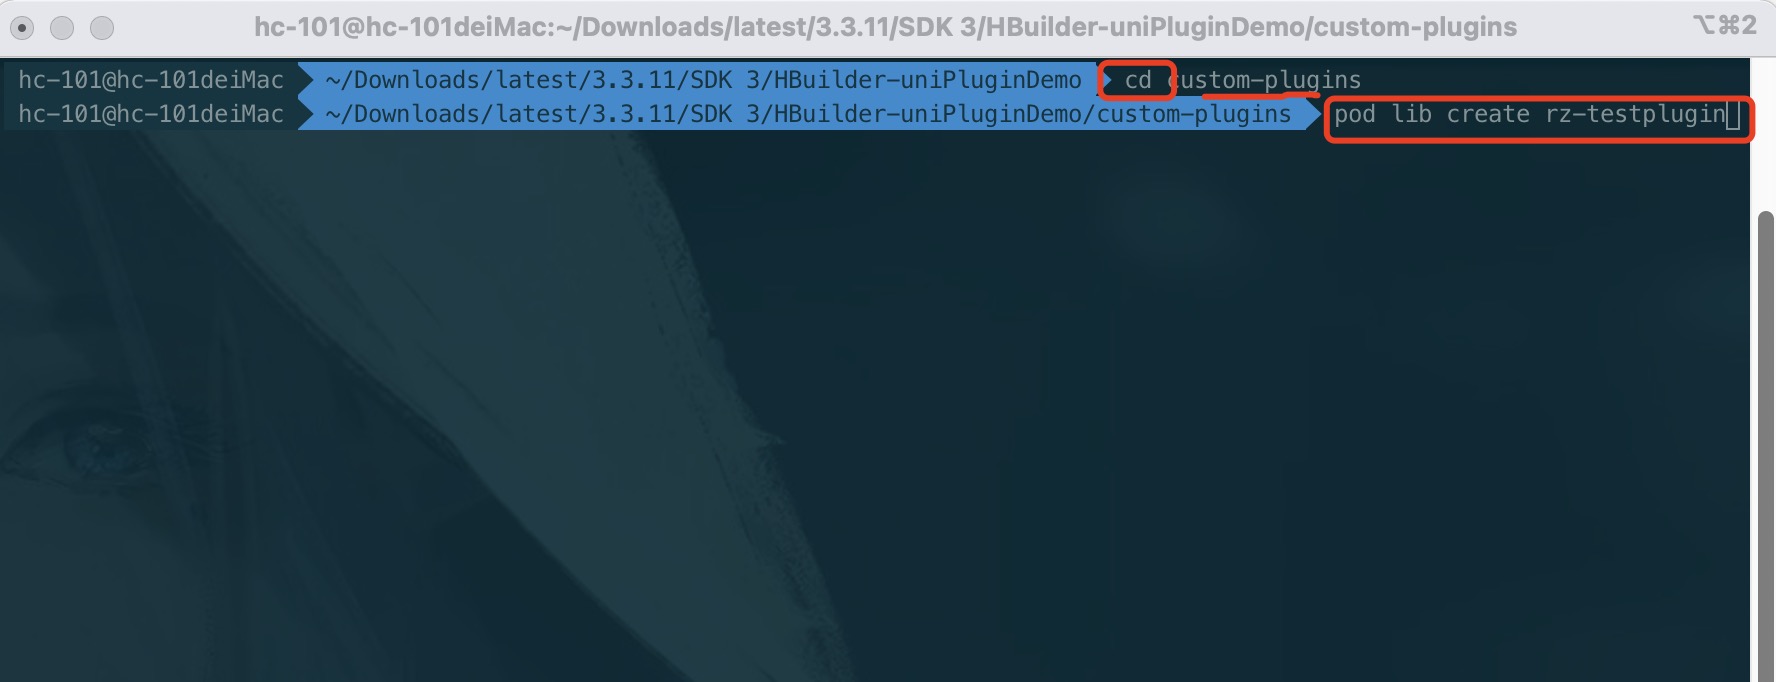
按回車,執行命令。 會從github上載入創建pod工程的模板。 模板下載結束後,會出現如下引導:
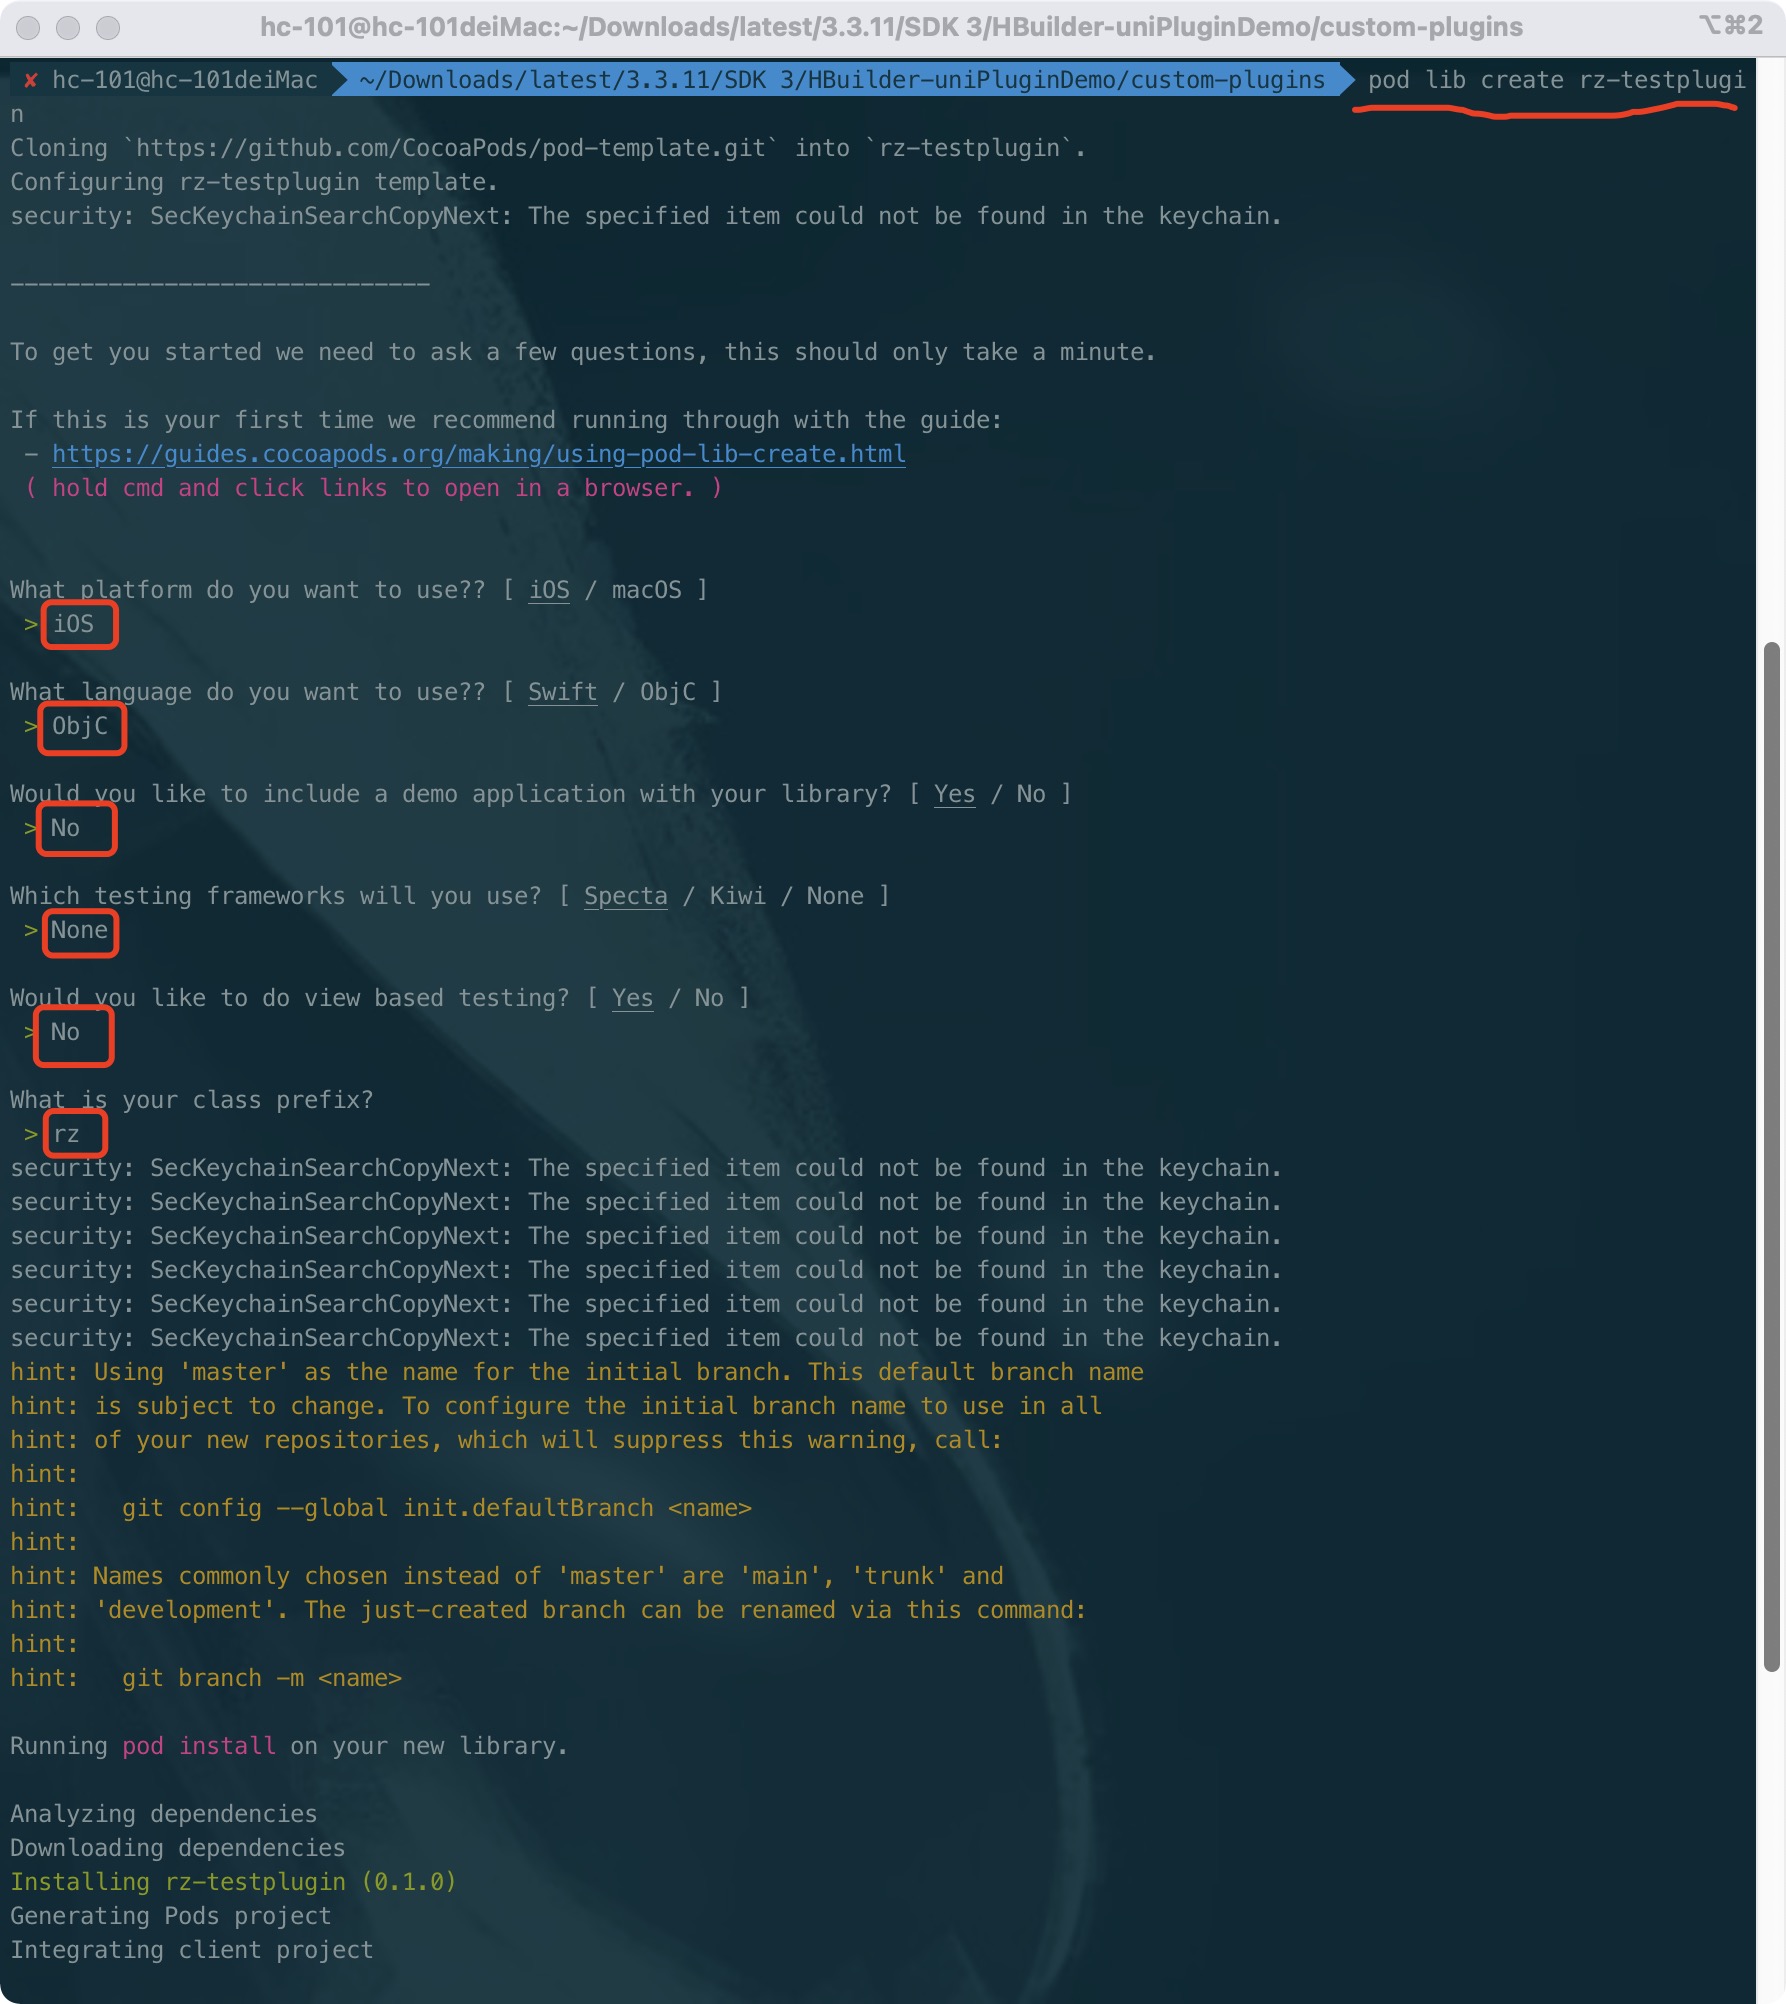
按上述引導完成配置,在完成創建後會自動打開pod 工程, 目前用不到此工程,接著關閉即可
回到目錄 HBuilder-uniPluginDemo下,找到Podfile 文件,並打開
將本地新創建的pod工程配置進去
target 'HBuilder' do
  # Comment the next line if you don't want to use dynamic frameworks
  use_frameworks!

  #重要: 導入自定義組件庫
  pod 'rz-testplugin', :path =>'./custom-plugins/rz-testplugin'
end
完整的Podfile文件如下:
# Uncomment the next line to define a global platform for your project
platform :ios, '10.0'

#忽略pod所有庫警告
inhibit_all_warnings!

workspace 'uniPlugins'

#關閉所有pod庫的BITCODE
post_install do |installer|
  installer.pods_project.targets.each do |target|
    target.build_configurations.each do |config|
      config.build_settings['ENABLE_BITCODE'] = 'NO'
    end
  end
end

target 'HBuilder' do
  # Comment the next line if you don't want to use dynamic frameworks
  use_frameworks!

  #重要: 導入自定義組件庫
  pod 'rz-testplugin', :path =>'./custom-plugins/rz-testplugin'
end
Podfile配置完成後, 使用命令行工具在Podfile所在目錄下,執行命令
pod install

此時的目錄結構如下:

我們看到在HBuilder-uniPluginDemo目錄下 多了一個 uniPlugins.xcworkspace 的文件, 而這個文件名不正是我們在podfile中配置的嗎
workspace 'uniPlugins'
雙擊此文件打開, 工程結構如下

目前會有兩個工程如下: 一個DCTestUniPlugin, 一個HBuilder。 HBuilder 為主工程, DCTestUniPlugin為 SDK自帶的插件工程

預設如果在DCTestPlugin上,切換到HBuilder工程

好了,通過上面的操作,我們基本上已經把使用pod lib方式創建的插件工程集成到了workspace上了。 接下來就是插件開發了
四、第一個Module類型的插件
引用官方文檔:
插件擴展方式
原生插件是基於 DCUniPlugin 規範來實現,擴展原生功能有兩種方式:
- module:不需要參與頁面佈局,只需要通過 API 調用原生功能,比如:獲取當前定位信息、數據請求等功能,通過擴展module的方式來實現;
- component:需要參與頁面佈局,比如:map、image等需要顯示UI的功能,通過擴展component即組件的方法來實現;
您需要根據實際的情況選擇擴展方式,當然插件中可以同時存在 module 和 component,也可以是多個 module 和 多個 component;
配置插件環境
更多內容詳情: https://zhanglei.blog.csdn.net/article/details/123221947
五、常見問題
1.涉及到UIViewController,開發時應該寫在module里還是component?
2. 在Module中如何跳轉原生 UIViewController?
更多內容詳情: https://zhanglei.blog.csdn.net/article/details/123221947
本文來自博客園,作者:reyzhang,轉載請註明原文鏈接:https://www.cnblogs.com/reyzhang/p/17094730.html


