
本文目錄 Asp.net Core 對於授權的改動很友好,非常的靈活,本文以MVC為主,當然如果說webapi或者其他的分散式解決方案授權,也容易就可以實現單點登錄都非常的簡單,可以使用現成的IdentityServer框架或者自定義實現動非常方便和乾凈,如果你在運行示例代碼的時候未達到預期效果,請 ...
本文目錄
Asp.net Core 對於授權的改動很友好,非常的靈活,本文以MVC為主,當然如果說webapi或者其他的分散式解決方案授權,也容易就可以實現單點登錄都非常的簡單,可以使用現成的IdentityServer框架或者自定義實現動非常方便和乾凈,如果你在運行示例代碼的時候未達到預期效果,請把文章拉到結尾尋找答案。
本文示例代碼下載,github我這訪問不了,暫且直接上傳博客園存儲了。
準備
- 創建一個名為AuthorizationForoNetCore的(web)解決方案,選擇Empty模板
- 添加相關nuget包引用Microsoft.AspNetCore.Mvc(選擇最新版本)
- 編輯Startup.cs文件,添加mvcservice併進行預設路由配置
 1 public class Startup
 2     {
 3         public void ConfigureServices(IServiceCollection services)
 4         {
 5             services.AddMvc();
 6         }
 7
 8         public void Configure(IApplicationBuilder app)
 9         {
10             app.UseMvc(routes =>
11             {
12                 routes.MapRoute(
13                      name: "default",
14                      template: "{controller=Home}/{action=Index}/{id?}");
15             });
16         }
17     }
-
添加Controllers文件夾,添加HomeContrller
 public class HomeController : Controller
    {
        public IActionResult Index()
        {
            return View();
        }
    }
-
創建
Views/Home文件夾,並添加Index(Action)對應的Index.cshtml文件<!--Index.cshtml--> 假如生活欺騙了你 假如生活欺騙了你, 不要悲傷,不要心急! 憂郁的日子里須要鎮靜: 相信吧,快樂的日子將會來臨!
使用Authorization
- 添加相關nuget包(均使用最新版本)
- Microsoft.AspNetCore.Authorization
- Microsoft.AspNetCore.Authentication.Cookies
- 在ConfigureServices()方法中添加對應服務: services.AddAuthorization()
- 在Index(Action)方法上添加 [Authorize] 特性,毫無疑問,添加後執行dotnet run 指令後後會返回401的授權碼,那麼接著操作
- 編輯Startup.cs在Configureapp.UseMvc()方法之前,我們添加一個cookie 中間件,用於持久化請求管道中的身份配置信息
app.UseCookieAuthentication(new CookieAuthenticationOptions { AuthenticationScheme = "MyCookieMiddlewareInstance", LoginPath = new PathString("/Account/Unauthorized/"), AccessDeniedPath = new PathString("/Account/Forbidden/"), AutomaticAuthenticate = true, AutomaticChallenge = true }); -
tip:相關配置參數細節請參閱:https://docs.asp.net/en/latest/security/authentication/cookie.html
- 添加Controllers/Account文件夾,添加 AccountController.cs 控制器文件,實現上述指定的方法,可能這裡你會疑惑,為什麼文檔里不是一個 /Account/Login 這類的,文檔說了別較真,這就是個例子而已,繼續你就明白了。
- 添加並實現上述中間件重定向的action 方法如下,你可以看到其實Unauthorized方法模擬實現了登陸的過程。tip:假如你添加Unauthorized視圖,並且沒有該不實現模擬登陸,那麼運行你會直接看到 Unauthorized.cshtml 的內容,這裡我們不需要添加該視圖,僅作說明。
-
public class AccountController : Controller
{
     public async Task<IActionResult> Unauthorized(string returnUrl = null)
     {
         List<Claim> claims = new List<Claim>();
         claims.Add(new Claim(ClaimTypes.Name, "halower", ClaimValueTypes.String, "https://www.cnblogs.com/rohelm"));
         var userIdentity = new ClaimsIdentity("管理員");
         userIdentity.AddClaims(claims);
         var userPrincipal = new ClaimsPrincipal(userIdentity);
         await HttpContext.Authentication.SignInAsync("MyCookieMiddlewareInstance", userPrincipal,
             new AuthenticationProperties
             {
                 ExpiresUtc = DateTime.UtcNow.AddMinutes(20),
                 IsPersistent = false,
                 AllowRefresh = false
             });

        if (Url.IsLocalUrl(returnUrl))
         {
             return Redirect(returnUrl);
         }
         else
         {
             return RedirectToAction("Index", "Home");
         }
     }

     public IActionResult Forbidden()
     {
         return View();
     }
}
-
編輯
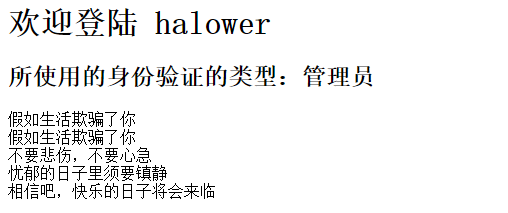
Home/Index.schtml@using System.Security.Claims; @if (User.Identities.Any(u => u.IsAuthenticated)) { <h1> 歡迎登陸 @User.Identities.First(u => u.IsAuthenticated).FindFirst(ClaimTypes.Name).Value </h1> <h2>所使用的身份驗證的類型:@User.Identity.AuthenticationType</h2> } <article> 假如生活欺騙了你<br /> 假如生活欺騙了你<br /> 不要悲傷,不要心急<br /> 憂郁的日子里須要鎮靜<br /> 相信吧,快樂的日子將會來臨 </article>
- 運行代碼你會看到如下結果(程式獲取我們提供的由issuer發佈claims並展示在視圖中,後續會檢查Claims看他們是否匹配)
使用全局授權策略
- 去除Home/Index (Action)上的 [Authorize] 特性
- 添加 Views/Account/Forbidden.cshtml 頁面,內容為 <h1>拒絕訪問</h1>
- 修改 ConfigureServices 方法中的 services.AddMvc() 使用它的 AddMvc(this IServiceCollection services, Action<MvcOptions> setupAction) 重載
- 運行查看結果,你會發現這幾乎成了一個無限的重定向從而造成錯誤,因為每個頁面都需要授權。
- 為 AccountController 添加 [AllowAnonymous] 特性,啟動匿名訪問,再次運行項目,查看結果
- 結果就是重定向到了 Forbidden.cshtml 頁面
使用角色授權
- 在 HomeController 上添加 [Authorize(Roles = "Administrator")] 特性
- 在模擬登陸處( Unauthorized方法中 )添加角色說明的身份信息條目:
- claims.Add(new Claim(ClaimTypes.Role, "Administrator", ClaimValueTypes.String, "https://www.cnblogs.com/rohelm"));
- 運行項目查看結果
可以使用中你會發現Asp.net Core安全驗證方面較以往的版本最大的改變就是全部採用中間件的方式進行驗證授權,並很好的使用了Policy (策略)這個概念,下那麼繼續~。
基於聲明的授權
- 返回Startup.cs,修改 services.AddAuthorization() 方法如下:
services.AddAuthorization(options =>
{
    options.AddPolicy("EmployeeOnly", policy => policy.RequireClaim("EmployeeNumber"));
});
- 修改HomeController上的特性,添加 [Authorize(Policy = "EmployeeOnly")]
- 運行項目查看結果,發現被拒絕了
- 在模擬登陸處 Unauthorize方法添加:
claims.Add(new Claim("EmployeeNumber", "123456", ClaimValueTypes.String, "http://www.cnblogs.com/rohelm"));
- goto 3.
- 多重策略的應用,與之前的版本幾乎一樣,例如本次修改的結果可以為:
 [Authorize(Roles = "Administrator")]
    public class HomeController:Controller
    {
        [Authorize(Policy = "EmployeeOnly")]
        public IActionResult Index()
        {
            return View();
        }
    }
- 詳情請參閱:https://docs.asp.net/en/latest/security/authorization/claims.html的說明
自定義授權策略
自定義授權策略的實現,包括實現一個 IAuthorizationRequirement 的Requirement,和實現 AuthorizationHandler<TRequirement> 的處理器,這裡使用文檔
https://docs.asp.net/en/latest/security/authorization/policies.html中的Code。
- 添加 MinimumAgeHandler 處理器實現
public class MinimumAgeRequirement: AuthorizationHandler<MinimumAgeRequirement>, IAuthorizationRequirement
    {
        int _minimumAge;

        public MinimumAgeRequirement(int minimumAge)
        {
            _minimumAge = minimumAge;
        }

        protected override void Handle(AuthorizationContext context, MinimumAgeRequirement requirement)
        {
            if (!context.User.HasClaim(c => c.Type == ClaimTypes.DateOfBirth))
            {
                return;
            }

            var dateOfBirth = Convert.ToDateTime(
                context.User.FindFirst(c => c.Type == ClaimTypes.DateOfBirth).Value);

            int calculatedAge = DateTime.Today.Year - dateOfBirth.Year;
            if (dateOfBirth > DateTime.Today.AddYears(-calculatedAge))
            {
                calculatedAge--;
            }

            if (calculatedAge >= _minimumAge)
            {
                context.Succeed(requirement);
            }
        }
    }
- 在 AddAuthorization 中添加一個名為Over21的策略
options.AddPolicy("Over21", policy => policy.Requirements.Add(new MinimumAgeRequirement(21)));
- 在HomeController上應用該策略 [Authorize(Policy = "Over21")]
- 在 Unauthorized 函數中添加對應的聲明信息條目 claims.Add(new Claim(ClaimTypes.DateOfBirth, "1900-01-01", ClaimValueTypes.Date));
-
修改時間(例如小於21歲的生日,2000-01-01)並運行調試,查看結果
對一個Requirement應用多個處理器
tip:上面的演示,我們使用了一個同時實現AuthorizationHandler<MinimumAgeRequirement>, IAuthorizationRequirement的MinimumAgeRequirement來做演示,但是如果一個Requirement徐要實現多個處理器就需要分開寫了,原因很簡單,這裡無法實現類的多重繼承。
下麵我們實現一個使用Token登陸的需求
- 添加一個LoginRequirement的需求
    public class LoginRequirement: IAuthorizationRequirement
    {
    }
- 添加一個使用用戶名密碼登陸的處理器
 public class HasPasswordHandler : AuthorizationHandler<LoginRequirement>
    {
        protected override void Handle(AuthorizationContext context, LoginRequirement requirement)
        {
            if (!context.User.HasClaim(c => c.Type == "UsernameAndPassword" && c.Issuer == "http://www.cnblogs.com/rohelm"))
                return;
            context.Succeed(requirement);
        }
    }
- 在一些場景中我們也會使用發放訪問令牌的方式讓用戶登陸
public class HasAccessTokenHandler : AuthorizationHandler<LoginRequirement>
    {
        protected override void Handle(AuthorizationContext context, LoginRequirement requirement)
        {
            if (!context.User.HasClaim(c => c.Type == "AccessToken" && c.Issuer == "http://www.cnblogs.com/rohelm"))
                return;

            var toeknExpiryIn = Convert.ToDateTime(context.User.FindFirst(c => c.Type == "AccessToken" && c.Issuer == "http://www.cnblogs.com/rohelm").Value);

            if (toeknExpiryIn > DateTime.Now)
            {
                context.Succeed(requirement);
            }
        }
    }
- 在 AddAuthorization 中添加一個名為CanLogin的策略
options.AddPolicy("CanLogin", policy => policy.Requirements.Add(new LoginRequirement()));
- 註冊自定義策略
services.AddSingleton<IAuthorizationHandler, HasPasswordHandler>(); services.AddSingleton<IAuthorizationHandler, HasAccessTokenHandler>(); - 在Unauthorized 函數中添加對應的聲明信息條目
  claims.Add(new Claim("UsernameAndPassword", "123456", ClaimValueTypes.String, "http://www.cnblogs.com/rohelm"));
 // 測試切換登陸聲明方式
// claims.Add(new Claim("AccessToken", DateTime.Now.AddMinutes(1).ToString(), ClaimValueTypes.String, "http://www.cnblogs.com/rohelm")); - 在HomeController上應用該策略 [Authorize(Policy = "CanLogin")]
- 運行並查看結果。
基於資源的Requirements
在實際開發者中,除了基於用戶的授權驗證外,通過我們也會遇到針對一些資源的授許可權制,例如有的人可以編輯文檔,有的人只能查看文檔,由此引出該話題
https://docs.asp.net/en/latest/security/authorization/resourcebased.html
- 定義一個Document類
public class Document
    {
        public int Id { get; set; }
        public string Author { get; set; }
    }
- 定義Document倉儲介面
public interface IDocumentRepository
    {
        IEnumerable<Document> Get();
        Document Get(int id);
    }
- 模擬實現上述介面
public class FakeDocumentRepository : IDocumentRepository
    {
        static List<Document> _documents = new List<Document> {
            new Document { Id = 1, Author = "halower" },
            new Document { Id = 2, Author = "others" }
        };
        public IEnumerable<Document> Get()
        {
            return _documents;
        }

        public Document Get(int id)
        {
            return _documents.FirstOrDefault(d => d.Id == id);
        }
    }
- 註冊介面實現類
services.AddSingleton<IDocumentRepository, FakeDocumentRepository>();
- 創建一個 DocumentController 並修改為如下內容
public class DocumentController : Controller
    {
        IDocumentRepository _documentRepository;

        public DocumentController(IDocumentRepository documentRepository)
        {
            _documentRepository = documentRepository;
        }

        public IActionResult Index()
        {
            return View(_documentRepository.Get());
        }

        public IActionResult Edit(int id)
        {
            var document = _documentRepository.Get(id);

            if (document == null)
                return new NotFoundResult();

            return View(document);
        }
    }
- 添加對應 Index.cshtml 視圖文件
@model IEnumerable<AuthorizationForoNetCore.Modles.Document>

<h1>文檔列表</h1>
@foreach (var document in Model)
{
    <p>
        @Html.ActionLink("文檔 #" + document.Id, "編輯", new { id = document.Id })
    </p>
}
- 添加對應的 Edit.cshtml 視圖文件
@model AuthorizationForoNetCore.Modles.Document <h1>文檔 #@Model.Id</h1> <h2>作者: @Model.Author</h2> - 定義EditRequirement
public class EditRequirement : IAuthorizationRequirement
 {
 }
- 添加對應的編輯文檔處理器
public class DocumentEditHandler : AuthorizationHandler<EditRequirement, Document>
    {
        protected override void Handle(AuthorizationContext context, EditRequirement requirement, Document resource)
        {
            if (resource.Author == context.User.FindFirst(ClaimTypes.Name).Value)
            {
                context.Succeed(requirement);
            }
        }
    }
- 在 ConfigureServices() 方法中註冊處理器實現
1 services.AddSingleton<IAuthorizationHandler, DocumentEditHandler>(); - 由於對於文檔的授權服務僅僅反正在操作方法的內部,因此我們需要直接註入 IAuthorizationService 對象併在需要的Action內部直接處理
public class DocumentController : Controller
    {
        IDocumentRepository _documentRepository;
        IAuthorizationService _authorizationService;

        public DocumentController(IDocumentRepository documentRepository, IAuthorizationService authorizationService)
        {
            _documentRepository = documentRepository;
            _authorizationService = authorizationService;
        }

        public IActionResult Index()
        {
            return View(_documentRepository.Get());
        }

        public async Task<IActionResult> Edit(int id)
        {
            var document = _documentRepository.Get(id);

            if (document == null)
                return new NotFoundResult();

            if (await _authorizationService.AuthorizeAsync(User, document, new EditRequirement()))
            {
                return View(document);
            }
            else
            {
                return new ChallengeResult();
            }
        }
    }
- 運行查看結果
在視圖中進行授權
問題來了額,上面示例的視圖中怎麼做限制了,那就繼續了
1.使用 @inject 命令註入 AuthorizationService
2.應用該上述同樣策略,做簡單修改
@using Microsoft.AspNetCore.Authorization
@model IEnumerable<AuthorizationForoNetCore.Modles.Document>
@inject IAuthorizationService AuthorizationService
@using AuthorizationForoNetCore.Policy
<h1>文檔列表</h1>
@{
    var requirement = new EditRequirement();
    foreach (var document in Model)
    {
        if (await AuthorizationService.AuthorizeAsync(User, document, requirement)) {
    <p>
        @Html.ActionLink("文檔 #" + document.Id, "編輯", new { id = document.Id })
    </p>
    }
}
}
請在運行時清理Cookie,或者在試驗時直接暫時禁用
之前寫的一個插件,誰有時間幫升級支持下asp.net Core:https://github.com/halower/JqGridForMvc


