
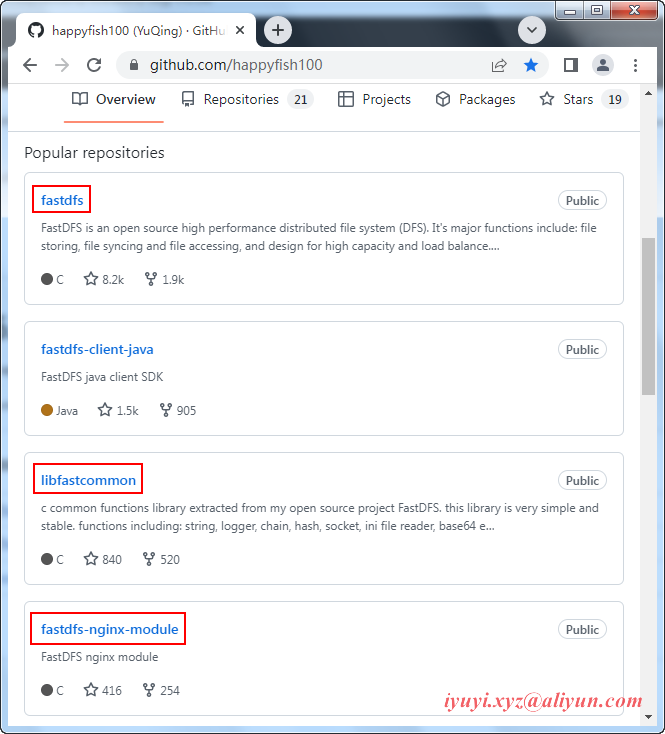
一、CentOS 7.9 安裝 fastdfs 地址 https://github.com/happyfish100 http://nginx.org/en/download.html wget 下載 wget https://github.com/happyfish100/libfastcommo ...
一、CentOS 7.9 安裝 fastdfs
地址
wget 下載
wget https://github.com/happyfish100/libfastcommon/archive/refs/tags/V1.0.57.tar.gz
wget https://github.com/happyfish100/libserverframe/archive/refs/tags/V1.1.15.tar.gz
wget https://github.com/happyfish100/fastdfs/archive/refs/tags/V6.08.tar.gz
wget https://github.com/happyfish100/fastdfs-nginx-module/archive/refs/tags/V1.22.tar.gz
wget http://nginx.org/download/nginx-1.18.0.tar.gz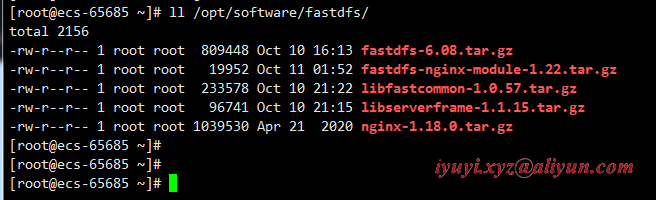
二、安裝環境
安裝gcc環境(若以安裝可以忽略)
gcc 4.8.5 試過了,可以的安裝
yum install -y gcc gcc-c++

[root@ecs-65685 ~]# gcc --version
gcc (GCC) 4.8.5 20150623 (Red Hat 4.8.5-44)
Copyright (C) 2015 Free Software Foundation, Inc.
This is free software; see the source for copying conditions.  There is NO
warranty; not even for MERCHANTABILITY or FITNESS FOR A PARTICULAR PURPOSE.
安裝libevent(運行時需求)
yum install -y libevent
三、安裝 libfastcommon-1.0.57
解壓
mkire /opt/fastdfs
tar -zxvf /opt/software/fastdfs/libfastcommon-1.0.57.tar.gz -C /opt/fastdfs/
編譯&安裝
cd /opt/fastdfs/libfastcommon-1.0.57
./make.sh clean && ./make.sh && ./make.sh install在老版本中要建立軟連接,而新版本中不需要建立軟連接,usr/lib存在文件則不需要操作
find /usr/lib64 -name libfastcommon.so
find /usr/lib -name libfastcommon.so
四、安裝 libserverframe-1.1.15
解壓
tar -zxvf /opt/software/fastdfs/libserverframe-1.1.15.tar.gz -C /opt/fastdfs編譯&安裝
cd /opt/fastdfs/libfastcommon-1.0.55
./make.sh clean && ./make.sh && ./make.sh install
五、安裝 fastdfs-6.08
解壓目錄
tar -zxvf fastdfs-6.08.tar.gz -C /opt/fastdfs/編譯&安裝
cd /opt/fastdfs/fastdfs-6.08
./make.sh clean && ./make.sh && ./make.sh install 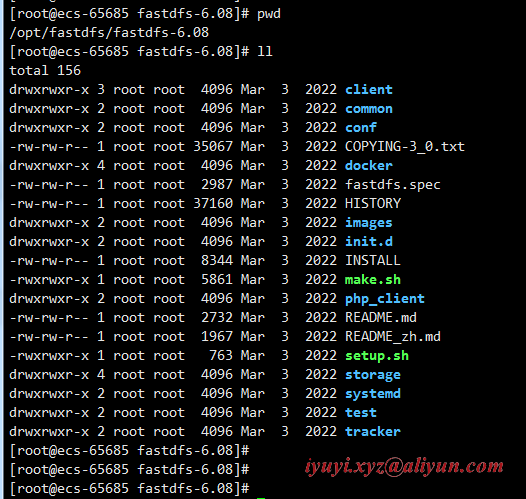
進入 fastdfs 的配置文件目錄 /etc/fdfs,對4個文件進行備份,這是個好習慣,作用很大的。
cd /etc/fdfs
cp client.conf client.conf.bak
cp storage.conf storage.conf.bak
cp storage_ids.conf storage_ids.conf.bak
cp tracker.conf tracker.conf.bak 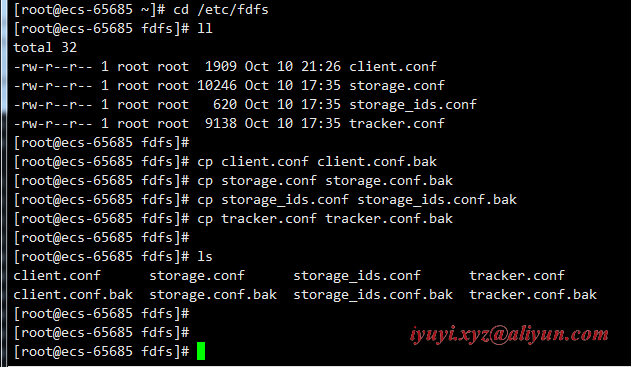
編譯安裝後 生成的 fastdfs 主程式
ls /usr/bin|grep fdfs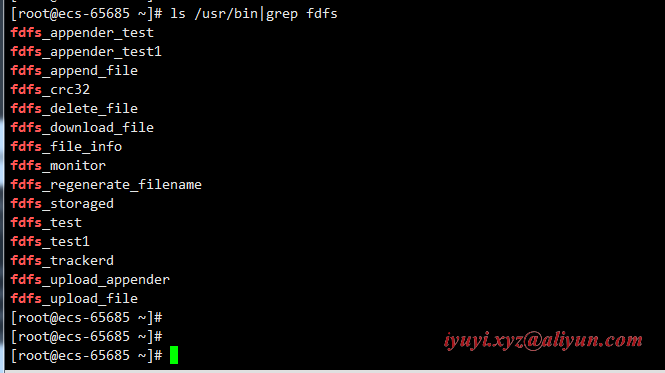
fastdfs 已經安裝完成,配置tracker和storage了。
六、fastdfs關聯tracker配置
1 創建tracker伺服器文件存放路徑
在配置tracker之前,首先需要創建tracker伺服器的文件路徑,即用於存儲tracker的數據文件和日誌文件等。
這裡我選擇在/opt/fastdfs/data目錄下創建一個fastdfs_tracker目錄用於存放tracker伺服器的相關文件。
mkdir -p /opt/fastdfs/data/fastdfs_tracker
2 編輯安裝 fastdfs 軟體時產生的tracker.conf配置文件
vim /etc/fdfs/tracker.conf

[root@ecs-65685 fdfs]# rm -rf client.conf.bak
# is this config file disabled
# false for enabled
# true for disabled
disabled = false # 啟用配置文件(預設啟用)

# the tracker server port
port = 22122 # 設置tracker的埠號,通常採用22122這個預設埠

# the base path to store data and log files
base_path = /opt/fastdfs/data/fastdfs_tracker # 設置tracker的數據文件和日誌目錄

# HTTP port on this tracker server
http.server_port = 9991 # 設置tracker服務的http埠號,和tracker-nginx的http埠相關
3 啟動tracker
保存配置後啟動tracker,命令如下
service fdfs_trackerd start如果不能啟動,或提示用 systemctl 可改用命令
systemctl start fdfs_trackerd成功後應該可以看到
卡住了,按 Catrl + C 還是啟動成功的(補)
如果啟動命令執行成功,那麼同時在剛纔創建的tracker文件目錄 /opt/fastdfs/data/fastdfs_tracker 中就可以看到啟動後新生成的data和logs目錄。

tracker服務的埠也應當被正常監聽,最後再通過netstat命令查看一下埠監聽情況。
[root@ecs-65685 data]# netstat -lntup |grep fdfs
tcp        0      0 0.0.0.0:22122           0.0.0.0:*               LISTEN      5577/fdfs_trackerd
七、fastdfs關聯storage配置
1 創建storage伺服器文件存放路徑
同理,步驟基本與配置tracker一致,首先是創建storage伺服器的文件目錄。
需要註意的是同tracker相比多建了一個目錄,因為storage還需要一個文件存儲路徑,用於存放接收的文件。
mkdir /opt/fastdfs/data/fastdfs_storage
mkdir /opt/fastdfs/data/fastdfs_storage_data
2 編輯安裝 fastdfs 軟體時產生的storage.conf配置文件
vim storage.conf
# is this config file disabled
# false for enabled
# true for disabled
disabled = false # 啟用配置文件(預設啟用)

# the name of the group this storage server belongs to
#
# comment or remove this item for fetching from tracker server,
# in this case, use_storage_id must set to true in tracker.conf,
# and storage_ids.conf must be configured correctly.
group_name = group1 # 組名,根據實際情況修改

# the storage server port
port = 23000  # 設置storage的埠號,預設是23000,同一個組的storage埠號必須一致

# the base path to store data and log files
# NOTE: the binlog files maybe are large, make sure
#       the base path has enough disk space,
#       eg. the disk free space should > 50GB
base_path = /opt/fastdfs/data/fastdfs_storage # 設置storage數據文件和日誌目錄

# store path (disk or mount point) count, default value is 1
store_path_count = 1  #存儲路徑個數,需要和store_path個數匹配

# store_path#, based on 0, to configure the store paths to store files
# if store_path0 not exists, it's value is base_path (NOT recommended)
# the paths must be exist.
#
# IMPORTANT NOTE:
#       the store paths' order is very important, don't mess up!!!
#       the base_path should be independent (different) of the store paths

store_path0 = /opt/fastdfs/data/fastdfs_storage_data # 圖片文件實際存儲路徑

# tracker_server can ocur more than once for multi tracker servers.
# the value format of tracker_server is "HOST:PORT",
#   the HOST can be hostname or ip address,
#   and the HOST can be dual IPs or hostnames seperated by comma,
#   the dual IPS must be an inner (intranet) IP and an outer (extranet) IP,
#   or two different types of inner (intranet) IPs.
#   for example: 192.168.2.100,122.244.141.46:22122
#   another eg.: 192.168.1.10,172.17.4.21:22122

tracker_server = 192.168.0.98:22122
#tracker_server = 192.168.209.122:22122
#tracker 伺服器的 IP地址和埠號,
#如果是單機搭建,IP不要寫127.0.0.1,否則啟動不成功(此處的ip是我的CentOS虛擬機ip,也不是映射的公網地址)

# the port of the web server on this storage server
http.server_port = 9992 # 設置storage的http 埠號,和stroage-nginx的http埠相關
3 啟動storage
service fdfs_storaged start
systemctl start fdfs_storaged
netstat -unltp | grep fdfs
4 檢查fastdfs的tracker與storage是否整合成功
上面可以看到此時已經正常監聽tracker的22122埠和storage的23000埠,至此storage伺服器就已經配置完成。
確定了storage伺服器啟動成功後,還有一項工作就是看看storage伺服器是否已經登記到tracker伺服器(也可以理解為tracker與storage是否整合成功)。
運行以下命令:
查看代碼
 [root@ecs-65685 ~]# /usr/bin/fdfs_monitor /etc/fdfs/storage.conf
[2022-10-10 23:29:24] DEBUG - base_path=/opt/fastdfs/data/fastdfs_storage, connect_timeout=5, network_timeout=60, tracker_server_count=1, anti_steal_token=0, anti_steal_secret_key length=0, use_connection_pool=1, g_connection_pool_max_idle_time=3600s, use_storage_id=0, storage server id count: 0

server_count=1, server_index=0

tracker server is 192.168.0.98:22122

group count: 1

Group 1:
group name = group1
disk total space = 40,188 MB
disk free space = 18,461 MB
trunk free space = 0 MB
storage server count = 1
active server count = 1
storage server port = 23000
storage HTTP port = 9992
store path count = 1
subdir count per path = 256
current write server index = 0
current trunk file id = 0

	Storage 1:
		id = 192.168.0.98
		ip_addr = 192.168.0.98  ACTIVE
		http domain =
		version = 6.08
		join time = 2022-10-10 23:17:35
		up time = 2022-10-10 23:17:35
		total storage = 40,188 MB
		free storage = 18,461 MB
		upload priority = 10
		store_path_count = 1
		subdir_count_per_path = 256
		storage_port = 23000
		storage_http_port = 9992
		current_write_path = 0
		source storage id =
		if_trunk_server = 0
		connection.alloc_count = 256
		connection.current_count = 0
		connection.max_count = 0
		total_upload_count = 0
		success_upload_count = 0
		total_append_count = 0
		success_append_count = 0
		total_modify_count = 0
		success_modify_count = 0
		total_truncate_count = 0
		success_truncate_count = 0
		total_set_meta_count = 0
		success_set_meta_count = 0
		total_delete_count = 0
		success_delete_count = 0
		total_download_count = 0
		success_download_count = 0
		total_get_meta_count = 0
		success_get_meta_count = 0
		total_create_link_count = 0
		success_create_link_count = 0
		total_delete_link_count = 0
		success_delete_link_count = 0
		total_upload_bytes = 0
		success_upload_bytes = 0
		total_append_bytes = 0
		success_append_bytes = 0
		total_modify_bytes = 0
		success_modify_bytes = 0
		stotal_download_bytes = 0
		success_download_bytes = 0
		total_sync_in_bytes = 0
		success_sync_in_bytes = 0
		total_sync_out_bytes = 0
		success_sync_out_bytes = 0
		total_file_open_count = 0
		success_file_open_count = 0
		total_file_read_count = 0
		success_file_read_count = 0
		total_file_write_count = 0
		success_file_write_count = 0
		last_heart_beat_time = 2022-10-10 23:29:10
		last_source_update = 2022-10-10 23:24:44
		last_sync_update = 1970-01-01 08:00:00
		last_synced_timestamp = 1970-01-01 08:00:00
5 加入開機啟動
[root@ecs-65685 ~]# ll /etc/rc.d/rc.local
-rw-r--r-- 1 root root 473 Jan 14  2022 /etc/rc.d/rc.local
[root@ecs-65685 ~]#
[root@ecs-65685 ~]# chmod +x /etc/rc.d/rc.local
[root@ecs-65685 ~]#
[root@ecs-65685 ~]# ll /etc/rc.d/rc.local
-rwxr-xr-x 1 root root 473 Jan 14  2022 /etc/rc.d/rc.local
[root@ecs-65685 ~]#
[root@ecs-65685 ~]# vim /etc/rc.d/rc.local

#!/bin/bash
# THIS FILE IS ADDED FOR COMPATIBILITY PURPOSES
#
# It is highly advisable to create own systemd services or udev rules
# to run scripts during boot instead of using this file.
#
# In contrast to previous versions due to parallel execution during boot
# this script will NOT be run after all other services.
#
# Please note that you must run 'chmod +x /etc/rc.d/rc.local' to ensure
# that this script will be executed during boot.

touch /var/lock/subsys/local
service fdfs_trackerd start
service fdfs_storaged start
八、測試fastdfs客戶端工具進行文件上傳下載
1 編輯客戶端client.conf配置文件
測試時需要設置客戶端的配置文件,編輯/etc/fdfs目錄下的client.conf 文件
vim /etc/fdfs/client.conf

# the base path to store log files
base_path = /opt/fastdfs/data/fastdfs_tracker # tracker伺服器文件路徑

# tracker_server can ocur more than once for multi tracker servers.
# the value format of tracker_server is "HOST:PORT",
#   the HOST can be hostname or ip address,
#   and the HOST can be dual IPs or hostnames seperated by comma,
#   the dual IPS must be an inner (intranet) IP and an outer (extranet) IP,
#   or two different types of inner (intranet) IPs.
#   for example: 192.168.2.100,122.244.141.46:22122
#   another eg.: 192.168.1.10,172.17.4.21:22122

tracker_server = 192.168.0.98:22122 # tracker服務IP地址和埠號
#tracker_server = 192.168.0.197:22122

#HTTP settings
http.tracker_server_port = 9991 # tracker 服務的 http.server_port 埠號,必須和tracker配置文件里的設置對應起來
2 準備需要上傳的圖片
配置完成後就可以模擬文件上傳了,先給/home/img/目錄下放一張圖片(1.png)
/usr/bin/fdfs_upload_file /etc/fdfs/client.conf /home/img/0.jpggroup1/M00/00/00/wKgAYmNEPCuAXEJUABnyrhpMC68201.png
如果返回了一個路徑,就表示文件已經上傳成功了。
組名:group1
磁碟:M00
目錄:00/00
文件名稱:wKgAYmNEPCuAXEJUABnyrhpMC68201.png
當文件存儲到某個子目錄後,即認為該文件存儲成功,接下來會為該文件生成一個文件名,文件名由group、存儲目錄、兩級子目錄、fileid、文件尾碼名(由客戶端指定,主要用於區分文件類型)拼接而成。
同時在之前配置的storage伺服器的實際文件存儲路徑中也可以根據返回的路徑找到實際文件。
3 查看上傳的圖片新的信息
/usr/bin/fdfs_file_info /etc/fdfs/client.conf group1/M00/00/00/wKgAYmNEPCuAXEJUABnyrhpMC68201.png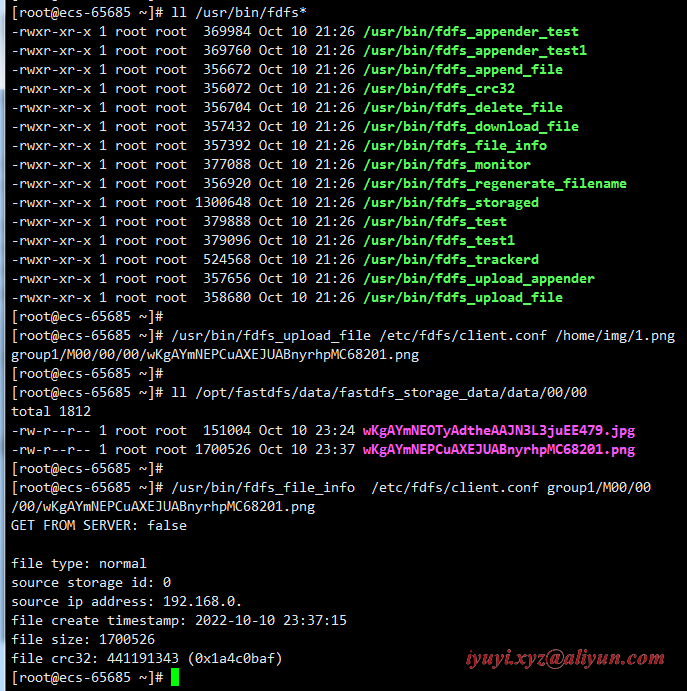
4 下載圖片
不需要跟保存路徑,預設下載到當前目錄
/usr/bin/fdfs_download_file /etc/fdfs/client.conf group1/M00/00/00/wKgAYmNEPCuAXEJUABnyrhpMC68201.png
5 查看存儲節點狀態
查看代碼
 [root@ecs-65685 ~]# /usr/bin/fdfs_monitor /etc/fdfs/client.conf
[2022-10-10 23:49:32] DEBUG - base_path=/opt/fastdfs/data/fastdfs_tracker, connect_timeout=5, network_timeout=60, tracker_server_count=1, anti_steal_token=0, anti_steal_secret_key length=0, use_connection_pool=0, g_connection_pool_max_idle_time=3600s, use_storage_id=0, storage server id count: 0

server_count=1, server_index=0

tracker server is 192.168.0.98:22122

group count: 1

Group 1:
group name = group1
disk total space = 40,188 MB
disk free space = 18,456 MB
trunk free space = 0 MB
storage server count = 1
active server count = 1
storage server port = 23000
storage HTTP port = 9992
store path count = 1
subdir count per path = 256
current write server index = 0
current trunk file id = 0

	Storage 1:
		id = 192.168.0.98
		ip_addr = 192.168.0.98  ACTIVE
		http domain =
		version = 6.08
		join time = 2022-10-10 23:17:35
		up time = 2022-10-10 23:17:35
		total storage = 40,188 MB
		free storage = 18,456 MB
		upload priority = 10
		store_path_count = 1
		subdir_count_per_path = 256
		storage_port = 23000
		storage_http_port = 9992
		current_write_path = 0
		source storage id =
		if_trunk_server = 0
		connection.alloc_count = 256
		connection.current_count = 0
		connection.max_count = 1
		total_upload_count = 2
		success_upload_count = 2
		total_append_count = 0
		success_append_count = 0
		total_modify_count = 0
		success_modify_count = 0
		total_truncate_count = 0
		success_truncate_count = 0
		total_set_meta_count = 0
		success_set_meta_count = 0
		total_delete_count = 0
		success_delete_count = 0
		total_download_count = 1
		success_download_count = 1
		total_get_meta_count = 0
		success_get_meta_count = 0
		total_create_link_count = 0
		success_create_link_count = 0
		total_delete_link_count = 0
		success_delete_link_count = 0
		total_upload_bytes = 1851530
		success_upload_bytes = 1851530
		total_append_bytes = 0
		success_append_bytes = 0
		total_modify_bytes = 0
		success_modify_bytes = 0
		stotal_download_bytes = 1700526
		success_download_bytes = 1700526
		total_sync_in_bytes = 0
		success_sync_in_bytes = 0
		total_sync_out_bytes = 0
		success_sync_out_bytes = 0
		total_file_open_count = 3
		success_file_open_count = 3
		total_file_read_count = 7
		success_file_read_count = 7
		total_file_write_count = 8
		success_file_write_count = 8
		last_heart_beat_time = 2022-10-10 23:49:09
		last_source_update = 2022-10-10 23:37:14
		last_sync_update = 1970-01-01 08:00:00
		last_synced_timestamp = 1970-01-01 08:00:00
九、安裝 fastdfs-nginx-module-1.22
解壓
[root@ecs-65685 src]# tar -zxvf /opt/software/fastdfs/fastdfs-nginx-module-1.22.tar.gz -C /opt/fastdfs/
[root@ecs-65685 src]# cd /opt/fastdfs/fastdfs-nginx-module-1.22/src
[root@ecs-65685 src]# ll
total 84
-rw-rw-r-- 1 root root 43493 Sep 15 12:23 common.c
-rw-rw-r-- 1 root root  3995 Sep 15 12:23 common.h
-rw-rw-r-- 1 root root  1078 Sep 15 12:23 config
-rw-rw-r-- 1 root root  3725 Sep 15 12:23 mod_fastdfs.conf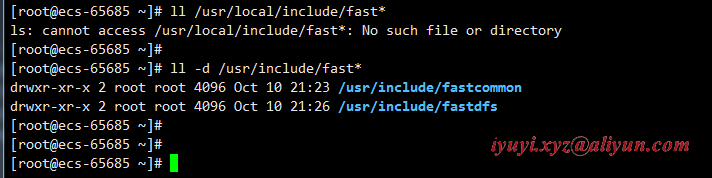
-rw-rw-r-- 1 root root 28668 Sep 15 12:23 ngx_http_fastdfs_module.c修改fastdfs-nginx-module軟體安裝包裡面的config文件
vim /opt/fastdfs/fastdfs-nginx-module-1.22/src/config
# ngx_module_incs="/usr/include"
# CORE_INCS="$CORE_INCS /usr/include"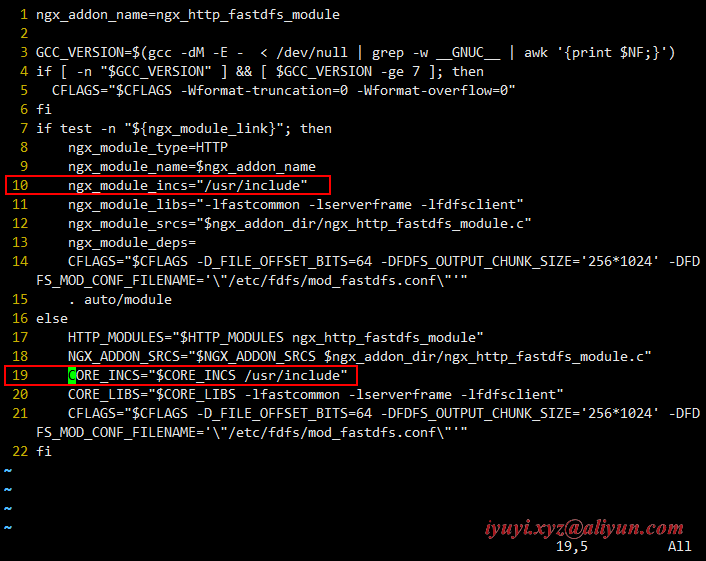
十、配置nginx為storage server提供http訪問介面
1 安裝nginx前期準備工作 CentOS 7.9 安裝 nginx-1.22.0:https://www.cnblogs.com/huaxiayuyi/p/16759643.html
2 編譯安裝nginx(nginx_storage)
- --prefix=/opt/fastdfs/nginx/nginx_tracker_9991
- --add-module=/opt/fastdfs/fastdfs-nginx-module-1.22/src
./configure \
--user=nginxxyz \
--group=nginxxyz \
--with-threads \
--with-file-aio \
--with-http_ssl_module \
--with-http_v2_module \
--with-http_realip_module \
--with-http_addition_module \
--with-http_xslt_module=dynamic \
--with-http_image_filter_module=dynamic \
--with-http_geoip_module=dynamic \
--with-http_sub_module \
--with-http_dav_module \
--with-http_flv_module \
--with-http_mp4_module \
--with-http_gunzip_module \
--with-http_gzip_static_module \
--with-http_auth_request_module \
--with-http_random_index_module \
--with-http_secure_link_module \
--with-http_degradation_module \
--with-http_slice_module \
--with-http_stub_status_module \
--with-stream=dynamic \
--with-stream_ssl_module \
--with-stream_realip_module \
--with-stream_geoip_module=dynamic \
--with-stream_ssl_preread_module \
--with-compat \
--with-pcre-jit \
--prefix=/opt/fastdfs/nginx/nginx_storage_9992 \
--add-module=/opt/fastdfs/fastdfs-nginx-module-1.22/src
3 編輯修改nginx(nginx.conf)配置文件
vim /opt/fastdfs/nginx/nginx_storage_9992/conf/nginx.conf

[root@ecs-65685 nginx-1.22.0]# egrep -v "#|^$" /opt/fastdfs/nginx/nginx_storage_9992/conf/nginx.conf
worker_processes  1;
events {
    worker_connections  1024;
}
http {
    include       mime.types;
    default_type  application/octet-stream;
    sendfile        on;
    keepalive_timeout  65;
    server {
        listen       9992;
        server_name  localhost;
        location / {
            if ($args ~ type=download){
                add_header Content-Disposition "attachment;";
            }
            root /opt/fastdfs/data/fastdfs_storage_data;   #文件實際存儲路徑
            ngx_fastdfs_module;   #模塊名稱
        }
        error_page   500 502 503 504  /50x.html;
        location = /50x.html {
            root   html;
        }
    }
}
4 授權
chown -R nginxxyz:nginxxyz /opt/fastdfs/nginx/nginx_storage_99925 拷貝fastdfs的配置文件
將Fastdfs軟體包裡面的http.conf和mime.types拷貝到/etc/fdfs目錄下。
cp /opt/fastdfs/fastdfs-6.08/conf/http.conf /etc/fdfs/
cp /opt/fastdfs/fastdfs-6.08/conf/mime.types /etc/fdfs/
6 拷貝fastdfs-nginx-module的配置文件mod_fastdfs.conf
cp /opt/fastdfs/fastdfs-nginx-module-1.23/src/mod_fastdfs.conf /etc/fdfs/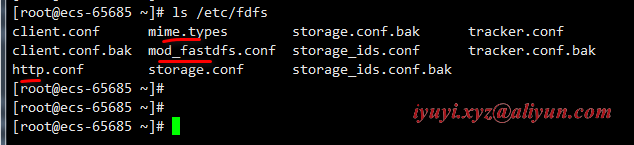
7 編輯拷貝的mod_fastdfs.conf配置文件
[root@ecs-65685 ~]# vim /etc/fdfs/mod_fastdfs.conf
[root@ecs-65685 ~]# egrep -v '^$|#' /etc/fdfs/mod_fastdfs.conf
#include http.conf   #這一行必須存在,導入引用文件
connect_timeout=2
network_timeout=30
base_path=/opt/fastdfs/data/fastdfs_tracker # 設置storage數據文件和日誌目錄
load_fdfs_parameters_from_tracker=true
storage_sync_file_max_delay = 86400
use_storage_id = false
storage_ids_filename = storage_ids.conf
tracker_server=192.168...:22122 # tracker服務的IP地址以及埠號
storage_server_port=23000 # storage服務的埠號
group_name=group1
url_have_group_name = true # 文件url 中是否有 group 名
store_path_count=1
store_path0=/opt/fastdfs/data/fastdfs_storage_data # 文件實際存儲路徑
log_level=info
log_filename=
response_mode=proxy
if_alias_prefix=
flv_support = true
flv_extension = flv
group_count = 2 # 設置組的個數,預設為0,事實上這次只使用了group1
# 文件尾部追加這2個group setting:
[group1]
group_name=group1
storage_server_port=23000
store_path_count=1
store_path0=/opt/fastdfs/data/fastdfs_storage_data
[group2]
group_name=group2
storage_server_port=23000
store_path_count=1
store_path0=/opt/fastdfs/data/fastdfs_storage_data註意:include http.conf必須存在,導入引用文件
8 啟動nginx
/opt/fastdfs/nginx/nginx_storage_9992/sbin/nginx -t
/opt/fastdfs/nginx/nginx_storage_9992/sbin/nginx
netstat -lntup |grep nginx
9 關閉防火牆
# 關閉防火牆
systemctl stop firewalld

# 配置允許放行
firewall-cmd --zone=public --permanent --add-port=23000/tcp && firewall-cmd --reload
firewall-cmd --zone=public --permanent --add-port=22122/tcp && firewall-cmd --reload
firewall-cmd --zone=public --permanent --add-port=9991/tcp && firewall-cmd --reload
firewall-cmd --zone=public --permanent --add-port=9992/tcp && firewall-cmd --reload雲主機需配置安全組,在入方向規則,允許放行

10 測試storage的http訪問:瀏覽器訪問ip+http埠號
http://http://114.116...:9992/group1/M00/00/00/wKgAYmNEPCuAXEJUABnyrhpMC68201.png 
十一、配置nginx為tracker server提供http訪問介面
1 進入 nginx 安裝包
改變一下安裝路徑:--prefix=/opt/fastdfs/nginx/nginx_tracker_9991
./configure \
--user=nginxxyz \
--group=nginxxyz \
--with-threads \
--with-file-aio \
--with-http_ssl_module \
--with-http_v2_module \
--with-http_realip_module \
--with-http_addition_module \
--with-http_xslt_module=dynamic \
--with-http_image_filter_module=dynamic \
--with-http_geoip_module=dynamic \
--with-http_sub_module \
--with-http_dav_module \
--with-http_flv_module \
--with-http_mp4_module \
--with-http_gunzip_module \
--with-http_gzip_static_module \
--with-http_auth_request_module \
--with-http_random_index_module \
--with-http_secure_link_module \
--with-http_degradation_module \
--with-http_slice_module \
--with-http_stub_status_module \
--with-stream=dynamic \
--with-stream_ssl_module \
--with-stream_realip_module \
--with-stream_geoip_module=dynamic \
--with-stream_ssl_preread_module \
--with-compat \
--with-pcre-jit \
--prefix=/opt/fastdfs/nginx/nginx_tracker_9991 \
--add-module=/opt/fastdfs/fastdfs-nginx-module-1.22/src
2 編譯安裝nginx(nginx_tracker)
vim /opt/fastdfs/nginx/nginx_tracker_9991/conf/nginx.conf
user root;
worker_processes  1;
events {
    worker_connections  102400;
}
http {
    include       mime.types;
    default_type  application/octet-stream;
    sendfile        on;
    upstream fdfs_group1 {
      server 127.0.0.1:9992;  # 負載均衡是訪問的實際地址是storage的http.server_port:9992
    }
    server {
        listen       9991; # tracker服務的http埠號,訪問這個埠的時候會自動去訪問上面負載的實際地址storage_nginx的http地址。
        server_name  localhost;
        location /group1/M00 {
           proxy_pass http://fdfs_group1;
        }
        error_page   500 502 503 504  /50x.html;
        location = /50x.html {
            root   html;
        }
    }
}
3 授權
chown -R nginxxyz:nginxxyz /opt/fastdfs/nginx/nginx_tracker_99914 啟動nginx
/opt/fastdfs/nginx/nginx_tracker_9991/sbin/nginx -t
/opt/fastdfs/nginx/nginx_tracker_9991/sbin/nginx
netstat -lntup |grep nginx
5 測試tracker的http訪問:瀏覽器訪問ip+http埠號
http://114.116...:9991/group1/M00/00/00/wKgAYmNEOTyAdtheAAJN3L3juEE479.jpg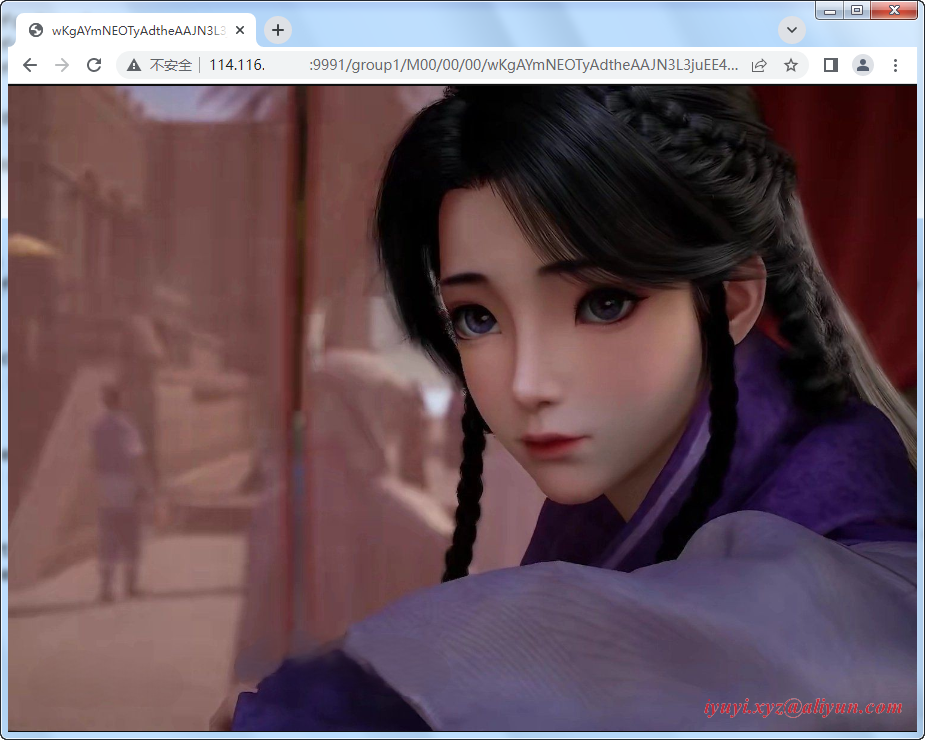
十二、報錯 No such file or directory
fastdfs 6.08版本執行 ./make.sh install 報錯 No such file or directory
是選擇的 libfastcommon 低於1.0.56
gcc -Wall -D_FILE_OFFSET_BITS=64 -D_GNU_SOURCE -g -O1 -DDEBUG_FLAG -o fdfs_monitor fdfs_monitor.c  ../common/fdfs_global.o ../common/fdfs_http_shared.o ../common/mime_file_parser.o ../tracker/tracker_proto.o ../tracker/fdfs_shared_func.o ../tracker/fdfs_server_id_func.o ../storage/trunk_mgr/trunk_shared.o tracker_client.o client_func.o client_global.o storage_client.o -L/usr/lib64 -lpthread -lfastcommon -I../common -I../tracker -I/usr/include/fastcommon
../common/fdfs_http_shared.o: In function `fdfs_http_get_content_type_by_extname':
/opt/fastdfs/fastdfs-6.08/client/../common/fdfs_http_shared.c:75: undefined reference to `fc_hash_find_ex'
../common/fdfs_http_shared.o: In function `fdfs_http_params_load':
/opt/fastdfs/fastdfs-6.08/client/../common/fdfs_http_shared.c:285: undefined reference to `fc_hash_destroy'
../common/fdfs_http_shared.o: In function `fdfs_http_params_destroy':
/opt/fastdfs/fastdfs-6.08/client/../common/fdfs_http_shared.c:304: undefined reference to `fc_hash_destroy'
../common/mime_file_parser.o: In function `load_mime_types_from_file':
/opt/fastdfs/fastdfs-6.08/client/../common/mime_file_parser.c:72: undefined reference to `fc_hash_init_ex'
/opt/fastdfs/fastdfs-6.08/client/../common/mime_file_parser.c:111: undefined reference to `fc_hash_insert_ex'
collect2: error: ld returned 1 exit status
make: *** [fdfs_monitor] Error 1
mkdir -p /usr/bin
mkdir -p /etc/fdfs
cp -f fdfs_trackerd /usr/bin
if [ ! -f /etc/fdfs/tracker.conf ]; then cp -f ../conf/tracker.conf /etc/fdfs/tracker.conf; fi
if [ ! -f /etc/fdfs/storage_ids.conf ]; then cp -f ../conf/storage_ids.conf /etc/fdfs/storage_ids.conf; fi
mkdir -p /usr/bin
mkdir -p /etc/fdfs
cp -f fdfs_storaged  /usr/bin
if [ ! -f /etc/fdfs/storage.conf ]; then cp -f ../conf/storage.conf /etc/fdfs/storage.conf; fi
mkdir -p /usr/bin
mkdir -p /etc/fdfs
mkdir -p /usr/lib64
mkdir -p /usr/lib
cp -f fdfs_monitor fdfs_test fdfs_test1 fdfs_crc32 fdfs_upload_file fdfs_download_file fdfs_delete_file fdfs_file_info fdfs_appender_test fdfs_appender_test1 fdfs_append_file fdfs_upload_appender fdfs_regenerate_filename /usr/bin
cp: cannot stat ‘fdfs_monitor’: No such file or directory
cp: cannot stat ‘fdfs_test’: No such file or directory
cp: cannot stat ‘fdfs_test1’: No such file or directory
cp: cannot stat ‘fdfs_crc32’: No such file or directory
cp: cannot stat ‘fdfs_upload_file’: No such file or directory
cp: cannot stat ‘fdfs_download_file’: No such file or directory
cp: cannot stat ‘fdfs_delete_file’: No such file or directory
cp: cannot stat ‘fdfs_file_info’: No such file or directory
cp: cannot stat ‘fdfs_appender_test’: No such file or directory
cp: cannot stat ‘fdfs_appender_test1’: No such file or directory
cp: cannot stat ‘fdfs_append_file’: No such file or directory
cp: cannot stat ‘fdfs_upload_appender’: No such file or directory
cp: cannot stat ‘fdfs_regenerate_filename’: No such file or directory
make: *** [install] Error 1 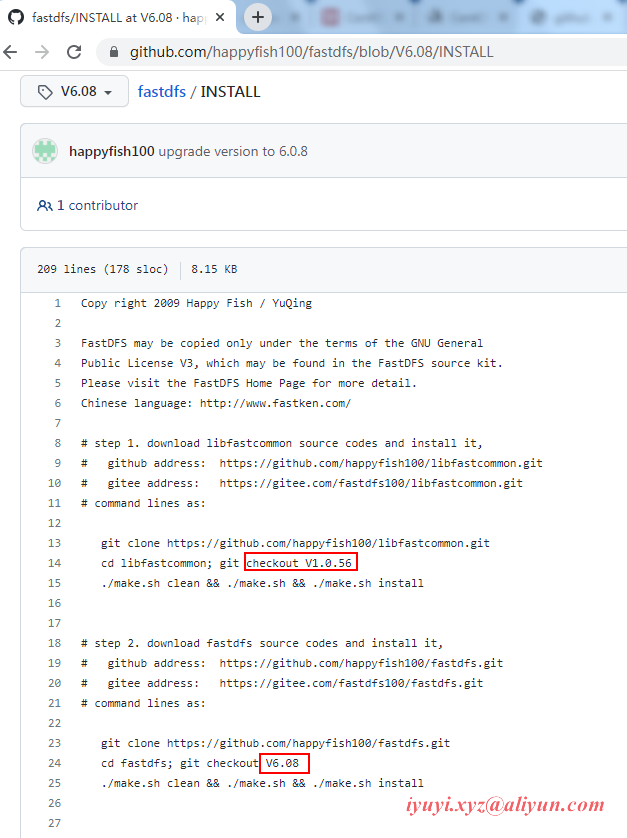
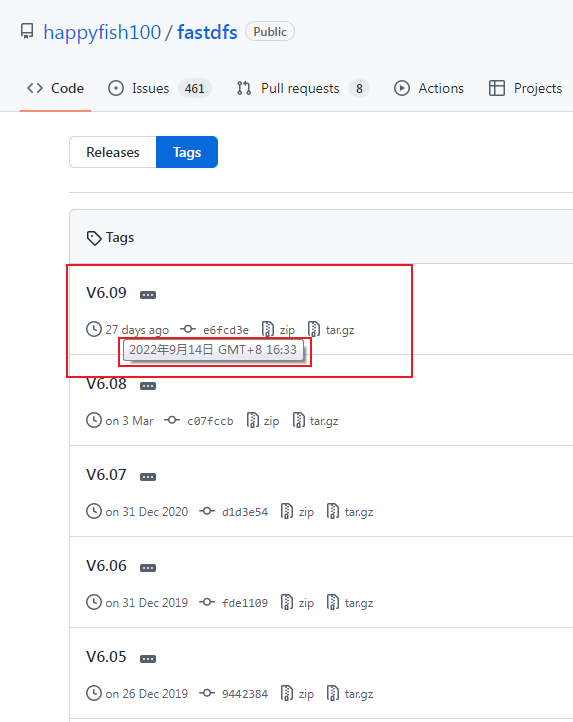
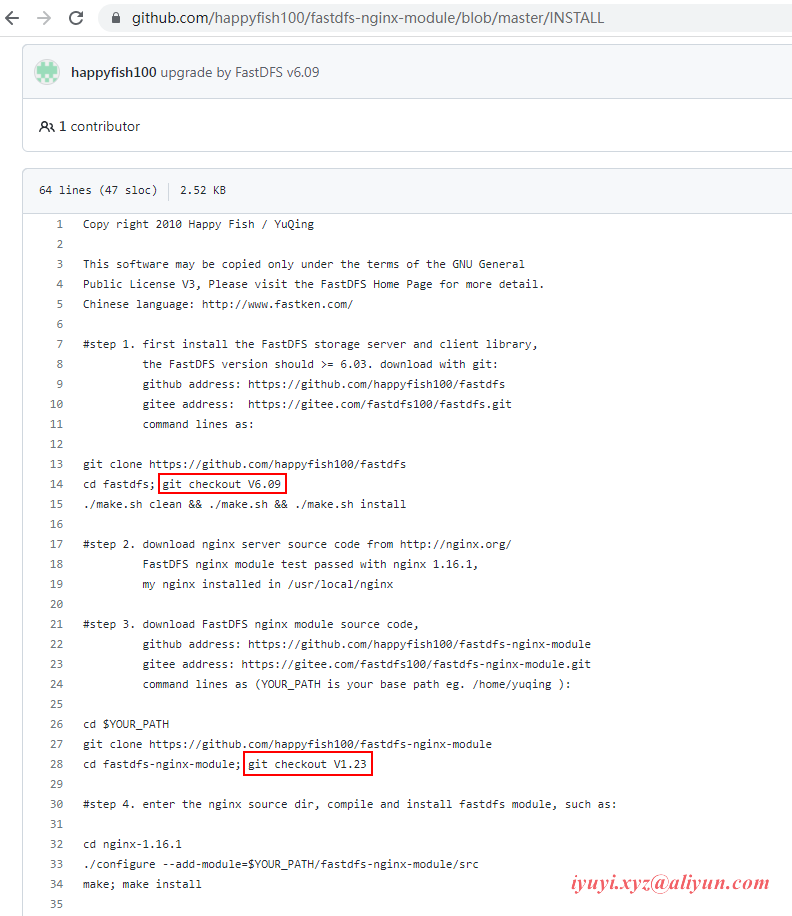
十三、fastdfs-nginx-module-1.23 需使用 fastdfs-6.09 版本
https://github.com/happyfish100/fastdfs-nginx-module/tags
看好對應版本號,不要瞎折騰。

https://github.com/happyfish100/fastdfs/tags
https://github.com/happyfish100/fastdfs-nginx-module/blob/master/INSTALL
十四、記錄常用命令
192.168.0.
http.server_port = 9991 # tracker-nginx的http埠相關
/opt/fastdfs/data/fastdfs_tracker

http.server_port = 9992 # stroage-nginx的http埠相關
/opt/fastdfs/data/fastdfs_storage

/opt/fastdfs/data/fastdfs_storage_data

http.tracker_server_port = 9991 # client.conf配置文件

systemctl start fdfs_tracker
systemctl start fdfs_storaged
netstat -unltp | grep fdfs

make && make install
echo $?
egrep -v "#|^$" nginx.conf
chown -R nginxxyz:nginxxyz  /opt/fastdfs/nginx/nginx_tracker_9991
chown -R nginxxyz:nginxxyz  /opt/fastdfs/nginx/nginx_storage_9992

/opt/fastdfs/nginx/nginx_tracker_9991/sbin/nginx
/opt/fastdfs/nginx/nginx_storage_9992/sbin/nginx

group1/M00/00/00/wKgAYmNEOTyAdtheAAJN3L3juEE479.jpg
group1/M00/00/00/wKgAYmNEPCuAXEJUABnyrhpMC68201.png

# 執行完stop,瀏覽器還可以訪問呢!??
systemctl stop fdfs_tracker
systemctl stop fdfs_storaged


