文章的評論製作 先做跟評論,在做子評論 發表評論框的製作: 前端渲染髮表評論框: {# 評論功能開始#} {% if request.user.is_authenticated %} <div> <p><span class="glyphicon glyphicon-comment">發表評論:</ ...
文章的評論製作
先做跟評論,在做子評論
發表評論框的製作:
前端渲染髮表評論框:
    {#    評論功能開始#}
    {% if request.user.is_authenticated %}
        <div>
            <p><span class="glyphicon glyphicon-comment">發表評論:</span></p>
            <div>
                <textarea name="" id="comment" cols="60" rows="10"></textarea>
            </div>
            <button class="btn btn-primary" id="id_commit">提交評論</button>
        </div>
    {% else %}
        <li><a href="{% url 'login' %}">登錄</a></li>
        <li><a href="{% url 'reg' %}">註冊</a></li>
    {% endif %}

    {#    評論功能結束#}
提交評論數據:
        // 向後端提交用戶評論數據
        $('#id_commit').click(function () {
            let conTent = $('#comment').val();
            $.ajax({
                type: 'post',
                url: '/comment/',
                data: {
                    'article_id': '{{ article_obj.pk }}',
                    'content': conTent,
                    'csrfmiddlewaretoken': '{{ csrf_token }}',
                },
                success: function (args) {
                    alert(args)
                }
            })
        })
後端獲取評論數據:
# 九、評論視圖
def comment(request):
    if request.method == 'POST':
        back_dic = {'code':1000,'msg':''}
        if request.user.is_authenticated:
            article_id = request.POST.get('article_id')
            content = request.POST.get('content')
            with transaction.atomic():
                models.Article.objects.filter(pk=article_id).update(comment_num=F('comment_num')+1)
                models.Comment.objects.create(user=request.user,article_id=article_id,content=content)
            back_dic['msg'] = '評論成功'
        else:
            back_dic['code'] = 1001
            back_dic['msg'] = '請先登錄'
        return JsonResponse(back_dic)
跟評論展示:
需要在詳情視圖函數內傳入評論內容到前端!
{# 評論展示開始#}
{# #1樓 2022-10-09 08:51 lyshark#}
<div>
<h4>評論列表</h4>
<hr>、
<ul class="list-group">
{% for comment in comment_list %}
<li class="list-group-item">
<div>
<span>#{{ forloop.counter }}樓</span>
<span>{{ comment.create_time|date:'Y-m-d h:i:s' }}</span>
<span>{{ comment.user.username }}</span>
<span><a href="" class="pull-right">回覆</a></span>
<div>
{{ comment.content }}
</div>
</div>
</li>
{% endfor %}
</ul>
</div>
{# 評論展示結束#}
跟評論臨時渲染:
提交評論之後,臨時渲染到評論列表,刷新之後才會展示正常的評論格式:
步驟:
1.DOM臨時渲染(用到了模板字元串)
2.頁面刷新render渲染
3.提交評論之後清空評論框內容
success: function (args) {
if (args.code == 1000) {
// 將評論框內容清空
$('#comment').val('');
// dom臨時渲染評論
let Name = '{{ request.user.username }}'
// 模板字元串添加臨時渲染標簽到評論列表
let temp = `
<li class="list-group-item">
<div>
<span class="glyphicon glyphicon-comment"> ${Name}</span>
<span><a href="" class="pull-right">回覆</a></span>
<div>
${conTent}
</div>
</div>
</li>
`
// 將生成好的標簽添加到對應標簽下
$('.list-group').append(temp)
}
}
子評論展示製作:
1.點擊跟評論回覆按鈕,發生了以下幾件事:
(1).評論框自動聚焦
(2).將回覆那一行的評論人姓名,拼接成@username放到評論框中
(3).評論框自動換行
<span><a class="pull-right reply" username="{{ comment.user.username }}" comment_id="{{ comment.pk }}">回覆</a></span>
回覆按鈕標簽內,需要添加對應的自定義屬性,方便我們點擊時獲取對應的值
        // 給回覆按鈕綁定一個點擊事件
        $('.reply').click(function (){
            // 獲取當前點擊所在行的用戶名和跟評論主鍵值
            let commentUserName = $(this).attr('username');
            parentID = $(this).attr('comment_id');
            // 拼接@username放到評論框中並自動聚焦
            $('#comment').val('@'+ commentUserName + '\n').focus();
}
2.判斷該評論是跟評論還是子評論
判斷的依據在於,該評論是否有parent_id
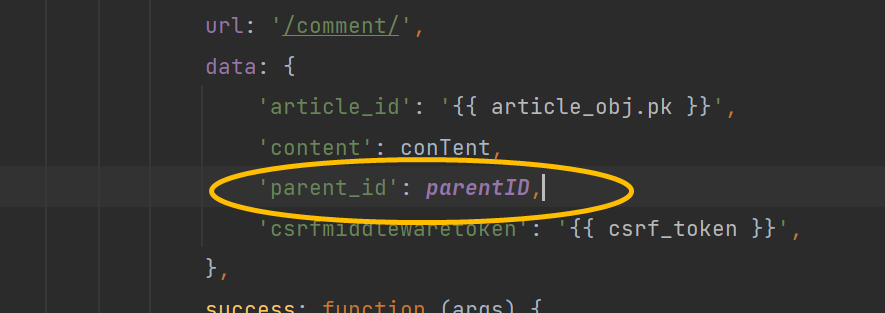
在點擊回覆時,我們已經獲取了parent_id,當我們點擊提交評論時,又觸發了提交評論事件,因此改事件里需要多添加一個parent_id數據

parent_id 變數可以定義在全局,預設為空,當點擊回覆時在重新賦予對應的值
在後端的視圖函數里也可以進行相應的獲取parent_id 並添加到資料庫中:

3.添加到資料庫的子評論內容有@username的數據,我們需要把它去除,只需要在提交評論事件里對應判斷一下是否是子評論就行,是則對評論內容進行處理!!

4.在前端顯示還是需要顯示一下@username的,我們可以也判斷一下,手動添加一下

5.最後需要將parent_id手動清空,不然下次評論還是子評論!


