腳本安裝lamp [root@localhost ~]# mkdir lamp [root@localhost ~]# cd lamp/ [root@localhost lamp]# mkdir files [root@localhost lamp]# ls files [root@localhos ...
腳本安裝lamp
[root@localhost ~]# mkdir lamp
[root@localhost ~]# cd lamp/
[root@localhost lamp]# mkdir files
[root@localhost lamp]# ls
files
[root@localhost lamp]# touch lamp_install.sh
[root@localhost lamp]# chmod +x lamp_install.sh
[root@localhost lamp]# ls
files  lamp_install.sh
[root@localhost lamp]# ls files/
apr-1.7.0.tar.gz       httpd-2.4.54.tar.gz  mysql-5.7.38-linux-glibc2.12-x86_64.tar.gz
apr-util-1.6.1.tar.gz  libzip-1.3.2.tar.gz  php-7.4.29.tar.gz
[root@localhost lamp]# vim lamp_install.sh
[root@localhost lamp]# cat lamp_install.sh
#!/bin/bash

#設置執行許可權
if [ $UID -ne 0 ];then
    echo "請以管理員用戶進行執行"
    exit
fi
#列印當前絕對路徑
script_path=$(pwd)
port=3306

#安裝apache
#定義變數
apache_version=2.4.54
install_dir=/usr/local/apache
#創建用戶
id apache &> /dev/null
if [ $? -ne 0 ];then
    useradd -r -M -s /sbin/nologin apache
else
    echo "用戶已存在"
fi
#安裝依賴包
yum -y install epel-release  --allowerasing && \
dnf groups mark install 'Development Tools' -y --allowerasing
dnf -y install openssl-devel pcre-devel expat-devel libtool gcc gcc-c++ wget vim make  --allowerasing
dnf -y install ncurses-devel openssl-devel openssl cmake mariadb-devel --allowerasing
dnf -y install libxml2 libxml2-devel openssl openssl-devel bzip2 bzip2-devel libcurl libcurl-devel libicu-devel libjpeg libjpeg-devel libpng libpng-devel openldap-devel  pcre-devel freetype freetype-devel gmp gmp-devel libmcrypt libmcrypt-devel readline readline-devel libxslt libxslt-devel mhash mhash-devel php-mysqlnd ncurses-compat-libs libsqlite3x-devel libzip-devel perl --allowerasing
#解壓源碼包
tar xf files/apr-1.7.0.tar.gz -C /tmp/
tar xf files/apr-util-1.6.1.tar.gz -C /tmp/
tar xf files/httpd-$apache_version.tar.gz -C /tmp/
#編譯安裝apr
cd /tmp/apr-1.7.0
if [ ! -d /usr/local/apr ];then
    sed -i '/$RM "$cfgfile"/d' configure
    ./configure --prefix=/usr/local/apr && \
    make && make install
else
    ls /usr/local
    echo "apr 編譯安裝完成"
fi
#編譯安裝apr-util
cd ../apr-util-1.6.1/
if [ ! -d /usr/local/apr-util ];then
    ./configure --prefix=/usr/local/apr-util --with-apr=/usr/local/apr && \
    make && make install
else
    ls /usr/local/
    echo "apr-util 編譯安裝完成"
fi
#編譯安裝httpd
cd ../httpd-$apache_version/
if [ ! -d ${install_dir} ];then
    ./configure --prefix=${install_dir} \
         --enable-so \
         --enable-ssl \
         --enable-cgi \
         --enable-rewrite \
         --with-zlib \
         --with-pcre \
         --with-apr=/usr/local/apr \
         --with-apr-util=/usr/local/apr-util/ \
         --enable-modules=most \
         --enable-mpms-shared=all \
         --with-mpm=prefork
    make && make install
else
    ls ${install_dir}
    echo "httpd 編譯安裝完成"
fi
#設置環境變數,man文檔,頭文件
echo "export PATH=${install_dir}/bin:\$PATH" > /etc/profile.d/apache.sh
ln -s ${install_dir}/include /usr/include/apache &> /dev/null
grep 'apache' /etc/man_db.conf &> /dev/null
if [ $? -ne 0 ];then
        sed -i "22a MANDATORY_MANPATH                       ${install_dir}/man" /etc/man_db.conf
fi
#將其加入systemd服務裡面
cat > /usr/lib/systemd/system/httpd.service <<EOF
[Unit]
Description=httpd server daemon
After=network.target

[Service]
Type=forking
ExecStart=${install_dir}/bin/apachectl start
ExecStop=${install_dir}/bin/apachectl stop
ExecReload=/bin/kill -HUP \$MAINPID

[Install]
WantedBy=multi-user.target
EOF
#載入文件並設置開機自啟
systemctl daemon-reload
systemctl enable --now httpd
#查看埠
ss -antl

#安裝mysql
#安裝依賴包
yum install -y libxml2-devel --allowerasing
yum install -y sqlite-devel  --allowerasing
yum install bzip2 bzip2-devel -y --allowerasing
yum install -y libcurl-devel.x86_64  --allowerasing
yum install -y gd-devel --allowerasing
yum config-manager --set-enabled PowerTools --allowerasing
yum -y install oniguruma oniguruma-devel  --allowerasing
yum -y install readline-devel --allowerasing
#定義變數
passwd=123456
#創建用戶
id mysql &> /dev/null
if [ $? -ne 0 ];then
    useradd -r -M -s /sbin/nologin mysql
else
    echo "用戶已存在"
fi
#解壓軟體包,修改目錄和所屬組
if [ ! -d /usr/local/mysql ];then
    echo "解壓軟體包"
    tar xf ${script_path}/files/mysql-5.7.38-linux-glibc2.12-x86_64.tar.gz -C /usr/local
    cd /usr/local
    mv mysql-5.7.38-linux-glibc2.12-x86_64 mysql
fi
chown -R mysql.mysql /usr/local/mysql
#設置環境變數
echo 'export PATH=/usr/local/mysql/lib' > /etc/ld.so.conf.d/mysql.conf
#做頭文件
ln -s /usr/local/mysql/include /usr/include/mysql
#配置lib
echo '/usr/local/mysql/lib' > /etc/ld.so.conf.d/mysql.conf
ldconfig
#設置man文檔
grep '/usr/local/mysql/man' /etc/man_db.conf &> /dev/null
if [ $? -ne 0 ];then
        sed -i "22a MANDATORY_MANPATH                       /usr/local/mysql/man" /etc/man_db.conf
fi
#建立數據存放目錄
if [ -d /opt/xbz ];then
    mkdir -p /opt/xbz
fi
chown -R mysql.mysql /opt/xbz
#格式化數據
/usr/local/mysql/bin/mysqld --initialize --user=mysql --datadir=/opt/xbz &> /tmp/passwd
password=$(grep 'password' /tmp/passwd |awk '{print $NF}')
#生成數據配置文件
cat > /etc/my.cnf << EOF
[mysqld]
basedir = /usr/local/mysql
datadir = /opt/xbz
socket = /tmp/mysql.sock
port = 3306
pid-file = /opt/xbz/mysql.pid
user = mysql
skip-name-resolve
EOF
#配置服務啟動腳本
if [ ! -d /etc/init.d ];then
    mkdir -p /etc/init.d
fi
cp  -a   /usr/local/mysql/support-files/mysql.server /etc/init.d/mysqld
sed -ri 's#^(basedir=).*#\1/usr/local/mysql#g' /etc/init.d/mysqld
sed -ri 's#^(datadir=).*#\1/opt/xbz#g' /etc/init.d/mysqld
chmod +x /etc/init.d/mysqld
#啟動mysql並設置開機自啟
service mysqld start
sleep 6
chkconfig --add mysqld
/usr/local/mysql/bin/mysql -uroot -p"$password" --connect-expired-password -e "set password = password('$passwd');"
echo "資料庫的密碼是: $passwd"
#查看埠
ss -antl

#安裝php
#移除系統中的libzip包
yum remove libzip -y
#定義php變數
php_install_dir=/usr/local/php7
#解壓軟體包
if [ ! -d /usr/src/php-7.4.29 ];then
    echo "正在解壓"
    tar xf ${script_path}/files/php-7.4.29.tar.gz -C /usr/src
else
    ls /usr/src/php-7.4.29
    sleep
    echo "php已解壓"
fi
if [ ! -d /usr/src/libzip-1.3.2 ];then
    tar xf ${script_path}/files/libzip-1.3.2.tar.gz -C /usr/src
else
    ls /usr/src/libzip-1.3.2
    sleep
    echo "libzip已解壓"
fi
#配置讓系統識別libzip包的環境
if [ ! -d libzip-1.3.2 ];then
    cd /usr/src/libzip-1.3.2
    ./configure && make && make install
    export PKG_CONFIG_PATH="/usr/local/lib/pkgconfig/"
else
    echo "libzip已安裝"
fi
#編譯安裝php
if [ ! -d php-7.4.29 ];then
    cd /usr/src/php-7.4.29
    ./configure --prefix=$php_install_dir  \
        --with-config-file-path=/etc \
        --enable-fpm \
        --enable-inline-optimization \
        --disable-debug \
        --disable-rpath \
        --enable-shared \
        --enable-soap \
        --with-openssl \
        --enable-bcmath \
        --with-iconv \
        --with-bz2 \
        --enable-calendar \
        --with-curl \
        --enable-exif  \
        --enable-ftp \
        --enable-gd \
        --with-jpeg \
        --with-zlib-dir \
        --with-freetype \
        --with-gettext \
        --enable-json \
        --enable-mbstring \
        --enable-pdo \
        --with-mysqli=mysqlnd \
        --with-pdo-mysql=mysqlnd \
        --with-readline \
        --enable-shmop \
        --enable-simplexml \
        --enable-sockets \
        --with-zip \
        --enable-mysqlnd-compression-support \
        --with-pear \
        --enable-pcntl \
        --enable-posix && \
    make && make install
else
    ls $php_install_dir
    sleep 3
    echo "PHP編譯安裝完成"
fi
#設置環境變數
echo "export PATH=${php_install_dir}/bin:${php_install_dir}/:sbin:\$PATH" > /etc/profile.d/php7.sh
#lib庫文件
echo "${php_install_dir}/lib" > /etc/ld.so.conf.d/php.conf
ldconfig
sleep 2
#做頭文件
ln -s ${php_install_dir}/include /usr/include/php &> /dev/null
#配置php-fpm
cp php.ini-production /etc/php.ini
cp sapi/fpm/init.d.php-fpm /etc/init.d/php-fpm
chmod +x /etc/rc.d/init.d/php-fpm
cd ${php_install_dir}/etc/
cp php-fpm.conf.default php-fpm.conf
cp php-fpm.d/www.conf.default php-fpm.d/www.conf
#啟動PHP,並設置開機自啟
service php-fpm start
chkconfig --add php-fpm
echo "PHP安裝完成."
sleep 3
#查看埠
ss -antl

#配置PHP界面
cat > ${install_dir}/htdocs/index.php <<EOF
<?php
    phpinfo();
?>
EOF

#配置Apache
cat > ${install_dir}/conf/extra/vhosts.conf <<EOF
<VirtualHost *:80>
    DocumentRoot "${install_dir}/htdocs"
    ServerName xbz.example.com
    ErrorLog "logs/xbz.example.com-error_log"
    CustomLog "logs/xbz.example.com-access_log" common
    ProxyRequests Off
    ProxyPassMatch ^/(.*\.php)$ fcgi://127.0.0.1:9000${install_dir}/htdocs/\$1
    <Directory "${install_dir}/htdocs">
        Options none
        AllowOverride none
        Require all granted
    </Directory>
</VirtualHost>
EOF
#配置Apache主配置文件
grep 'AddType application/x-httpd-php .php' ${install_dir}/conf/httpd.conf &> /dev/null
if [ $? -ne 0 ];then
            sed -i '/\bAddType.*.gz .tgz/a \    AddType application/x-httpd-php .php' ${install_dir}/conf/httpd.conf
fi
grep 'AddType application/x-httpd-php-source .phps' ${install_dir}/conf/httpd.conf &> /dev/null
if [ $? -ne 0 ];then
            sed -i '/\bAddType.*.php/a \    AddType application/x-httpd-php-source .phps' ${install_dir}/conf/httpd.conf
fi
sed -i '/index.html/c \    DirectoryIndex index.php index.html' ${install_dir}/conf/httpd.conf

#啟動Apache相關的模塊
sed -i '/proxy_module/s/#//g' ${install_dir}/conf/httpd.conf
sed -i '/proxy_fcgi_module/s/#//g' ${install_dir}/conf/httpd.conf
#配置httpd主配置文件包含vhosts文件
grep 'Include conf/extra/vhosts.conf' ${install_dir}/conf/httpd.conf &> /dev/null
if [ $? -ne 0 ];then
            echo 'Include conf/extra/vhosts.conf' >> ${install_dir}/conf/httpd.conf
fi
#設置其所屬主組
chown -R apache.apache ${install_dir}
#重啟httpd,mysql和php
systemctl restart httpd
service mysqld restart
service php-fpm restart
sleep 3
#查看埠
ss -antl
#添加防火牆規則
firewall-cmd --add-rich-rule 'rule family=ipv4 source address=0.0.0.0/0 port port=80 protocol=tcp accept' --permanent &> /dev/null
firewall-cmd --reload
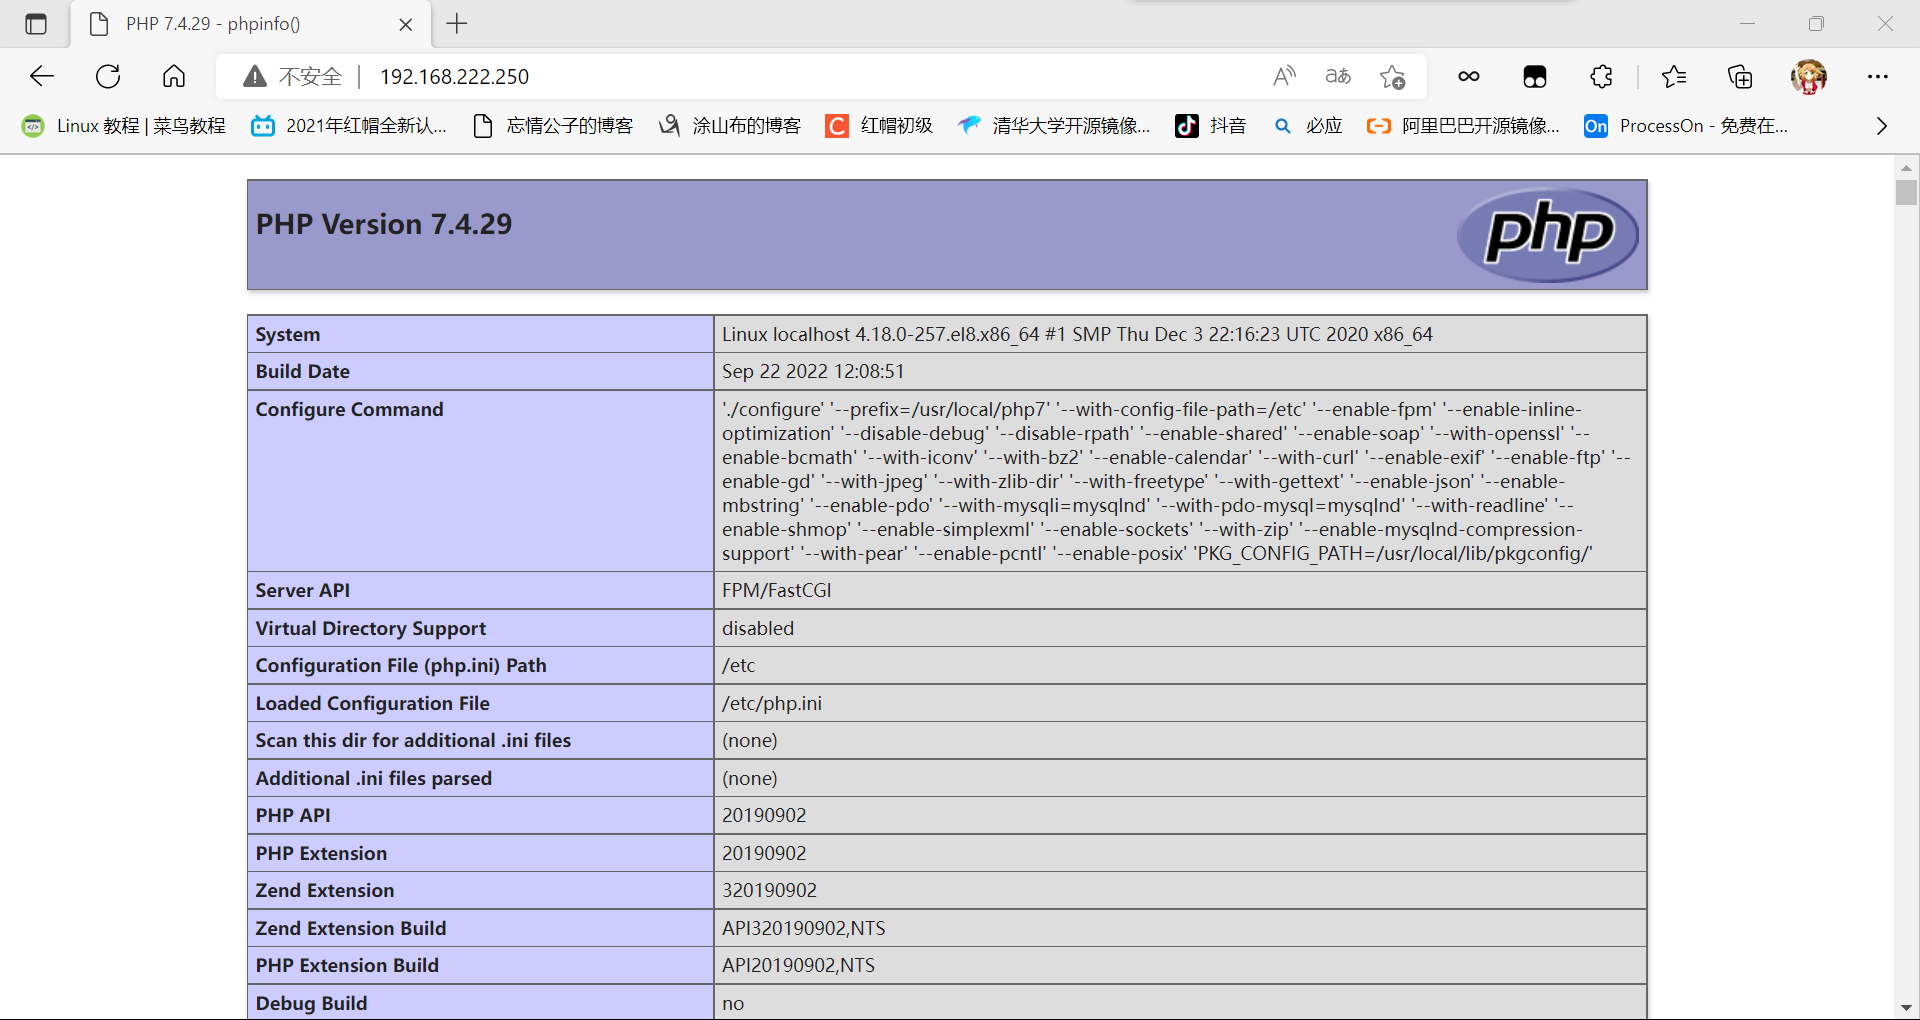
訪問:


