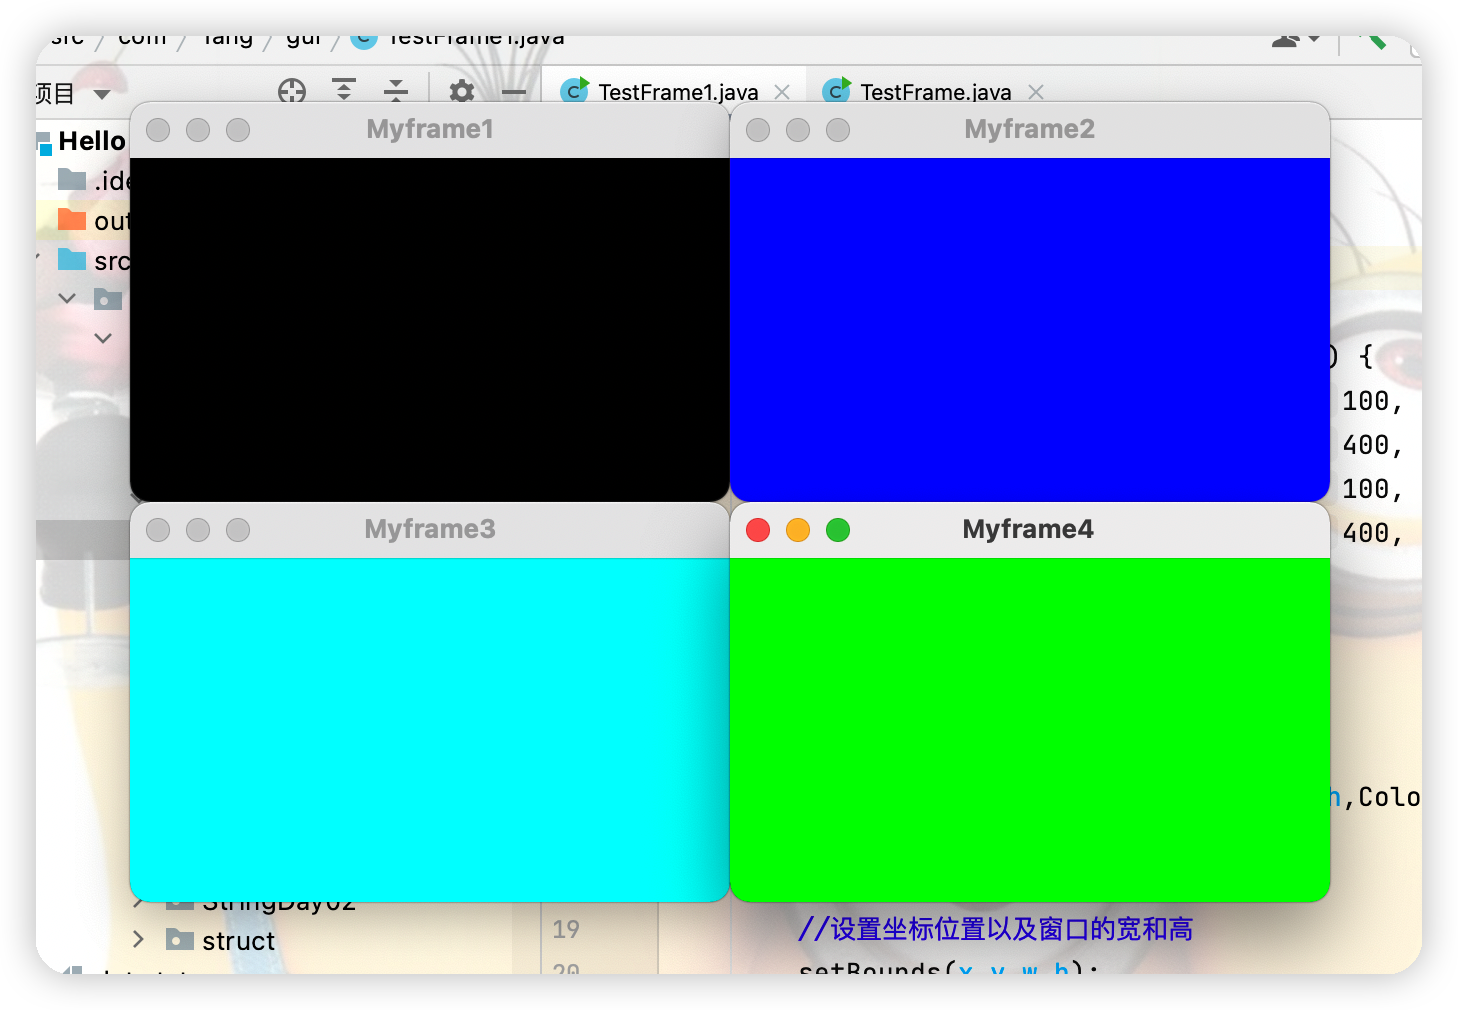
一、Frame視窗 點擊查看代碼 package com.Tang.gui; import java.awt.*; public class TestFrame1 { public static void main(String[] args) { MyFrame myFrame1 = new My ...
一、Frame視窗
點擊查看代碼
package com.Tang.gui;

import java.awt.*;

public class TestFrame1 {
    public static void main(String[] args) {
        MyFrame myFrame1 = new MyFrame(100, 100, 300, 200, Color.black);
        MyFrame myFrame2 = new MyFrame(400, 100, 300, 200, Color.blue);
        MyFrame myFrame3 = new MyFrame(100, 300, 300, 200, Color.cyan);
        MyFrame myFrame4 = new MyFrame(400, 300, 300, 200, Color.GREEN);
    }
}
//將一個視窗的屬性封裝起來
class MyFrame extends Frame {
    static int id =0;
    public MyFrame(int x,int y,int w,int h,Color color){
        //調用父類的有參構造
        super("Myframe"+(++id));
        //設置坐標位置以及視窗的寬和高
        setBounds(x,y,w,h);
        //設置視窗的背景顏色
        setBackground(color);
        ////設置視窗可見性
        setVisible(true);

    }
}
二、Panel面板
點擊查看代碼
package com.Tang.gui;

import java.awt.*;
import java.awt.event.WindowAdapter;
import java.awt.event.WindowEvent;

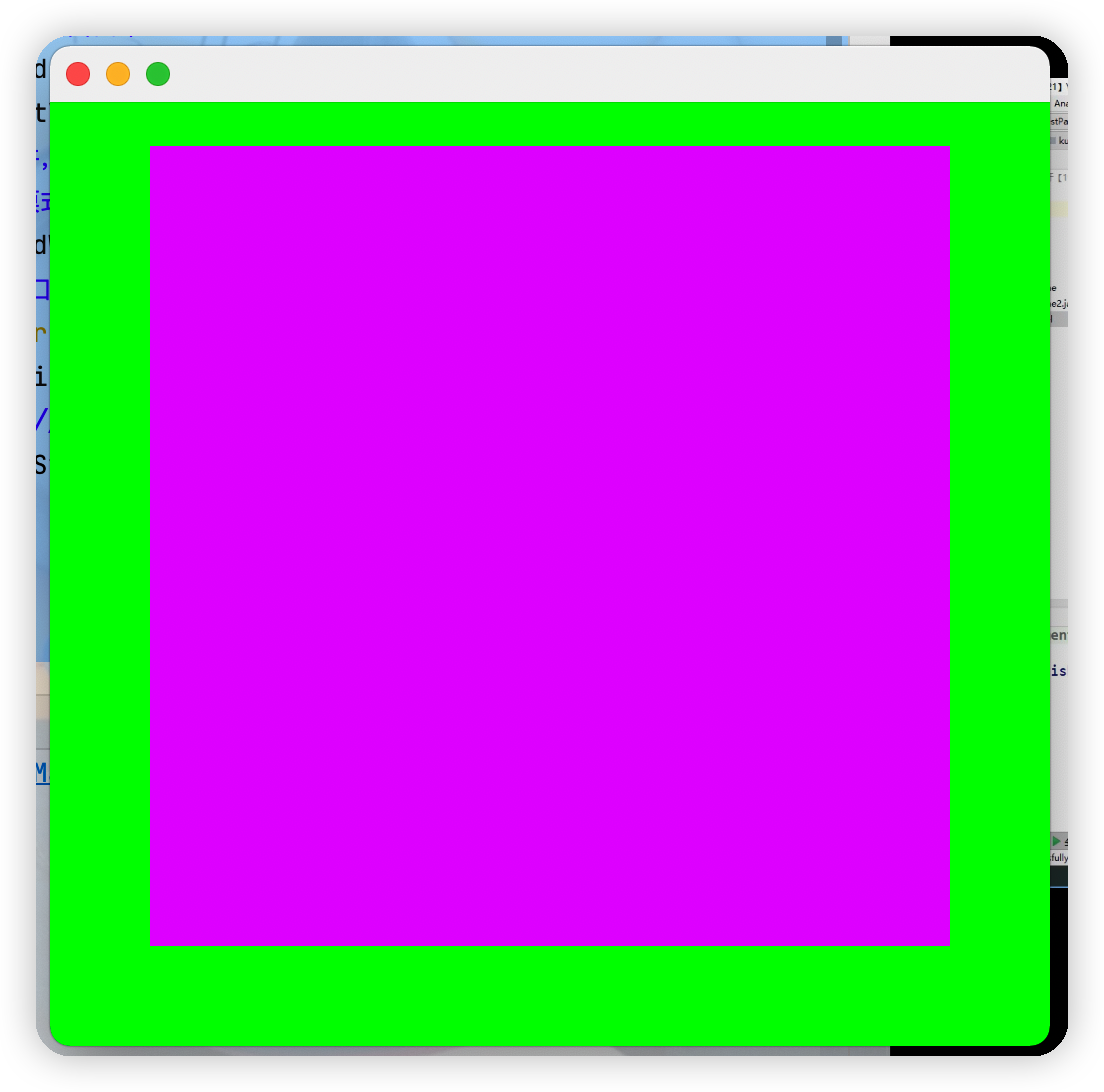
//panel可以看成是一個空間,但是不能單獨存在
public class PanelTest {
    public static void main(String[] args) {
        Frame frame = new Frame();
        Panel panel = new Panel();

        //設置佈局
        frame.setLayout(null);

        //坐標
        frame.setBounds(300,300,500,500);
        frame.setBackground(new Color(0, 255, 0));
        //panel設置坐標,相對於frame而言
        panel.setBounds(50,50,400,400);
        panel.setBackground(new Color(211, 0, 255));
        //將面板放入視窗中
        frame.add(panel);
        frame.setVisible(true);
        //監聽事件,監聽視窗關閉事件,System.exit(0)
        //適配器模式:利用WindowAdapter重寫自己需要的方法即可
        frame.addWindowListener(new WindowAdapter() {
            //視窗點擊關閉的時候需要做的事情
            @Override
            public void windowClosing(WindowEvent e) {
                //結束程式
                System.exit(0);
            }
        });
    }
}
三、佈局管理器
1.流式佈局
點擊查看代碼
package com.Tang.gui;

import java.awt.*;
import java.awt.event.WindowAdapter;
import java.awt.event.WindowEvent;

public class FlowLayoutTest {
    public static void main(String[] args) {
        Frame frame = new Frame();
        frame.setSize(200,200);

        Button button1 = new Button("Button1");
        Button button2 = new Button("Button2");
        Button button3 = new Button("Button3");

        //設置佈局,FlowLayout由源碼可知無參預設是居中模式
//        frame.setLayout(new FlowLayout());
        //在視窗里的按鈕統一靠左
        frame.setLayout(new FlowLayout(FlowLayout.LEFT));

        frame.add(button1);
        frame.add(button2);
        frame.add(button3);

        frame.setVisible(true);

        frame.addWindowListener(new WindowAdapter() {
            @Override
            public void windowClosing(WindowEvent e) {
                System.exit(0);
            }
        });
    }
}

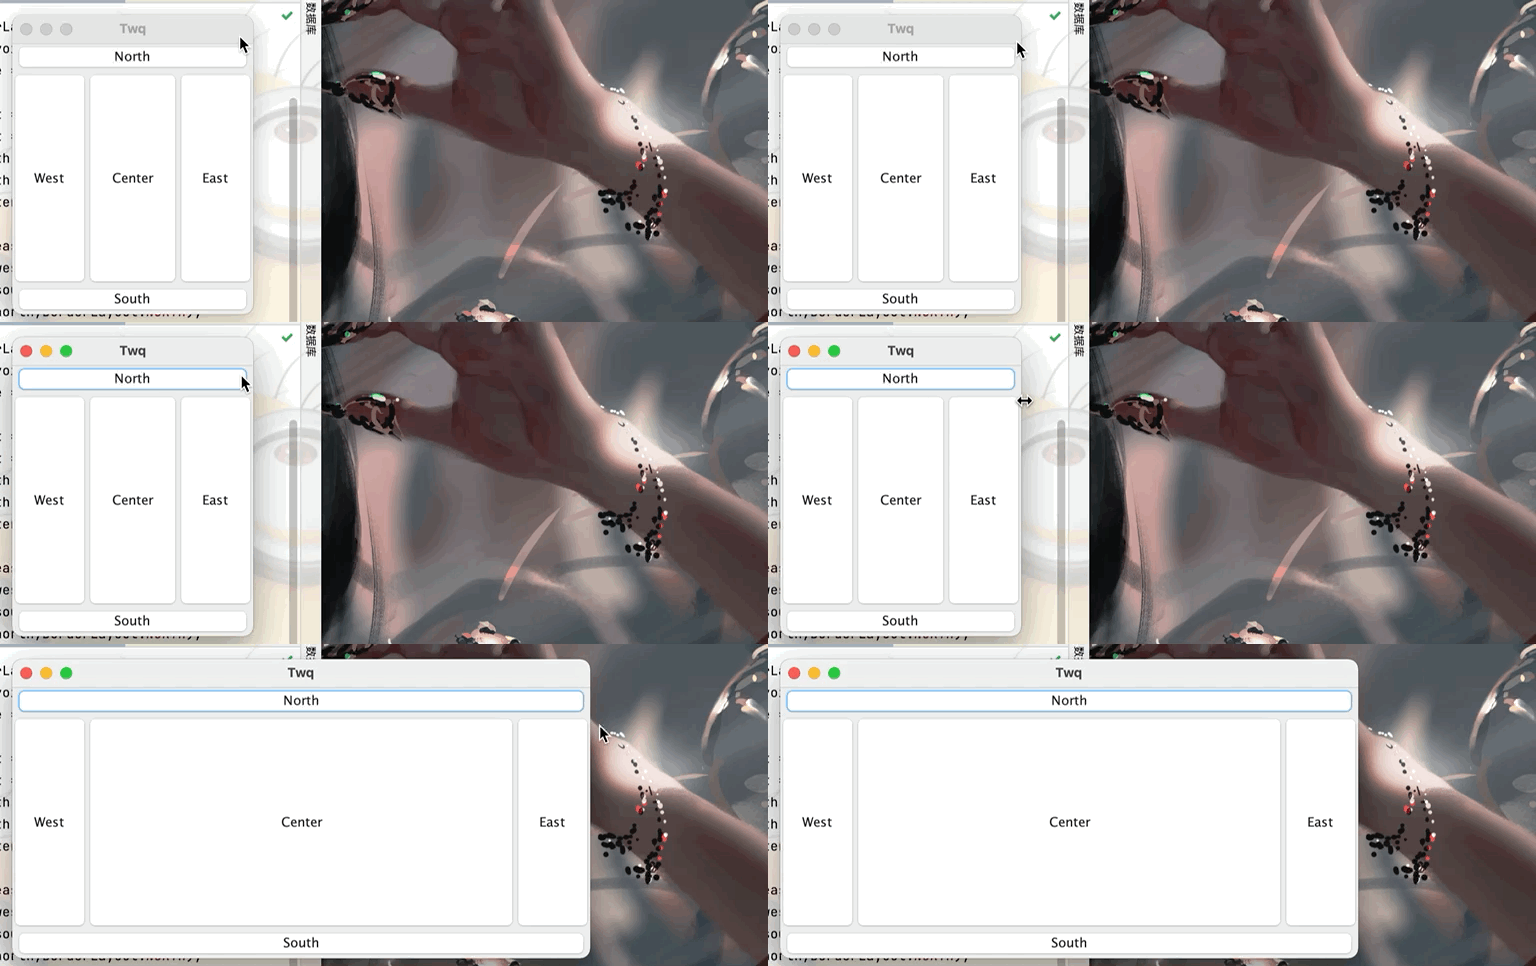
2.邊界佈局
點擊查看代碼
package com.Tang.gui;

import java.awt.*;
import java.awt.event.WindowAdapter;
import java.awt.event.WindowEvent;

public class BorderLayoutTest {
    public static void main(String[] args) {
        Frame frame = new Frame("Twq");

        Button east = new Button("East");
        Button west = new Button("West");
        Button south = new Button("South");
        Button north = new Button("North");
        Button center = new Button("Center");

        frame.add(east, BorderLayout.EAST);
        frame.add(west,BorderLayout.WEST);
        frame.add(south,BorderLayout.SOUTH);
        frame.add(north,BorderLayout.NORTH);
        frame.add(center,BorderLayout.CENTER);

        frame.setSize(200,300);
        frame.setVisible(true);

        frame.addWindowListener(new WindowAdapter() {
            @Override
            public void windowClosing(WindowEvent e) {
                System.exit(0);
            }
        });
    }
}
3.表格佈局
點擊查看代碼
package com.Tang.gui;

import java.awt.*;
import java.awt.event.WindowAdapter;
import java.awt.event.WindowEvent;

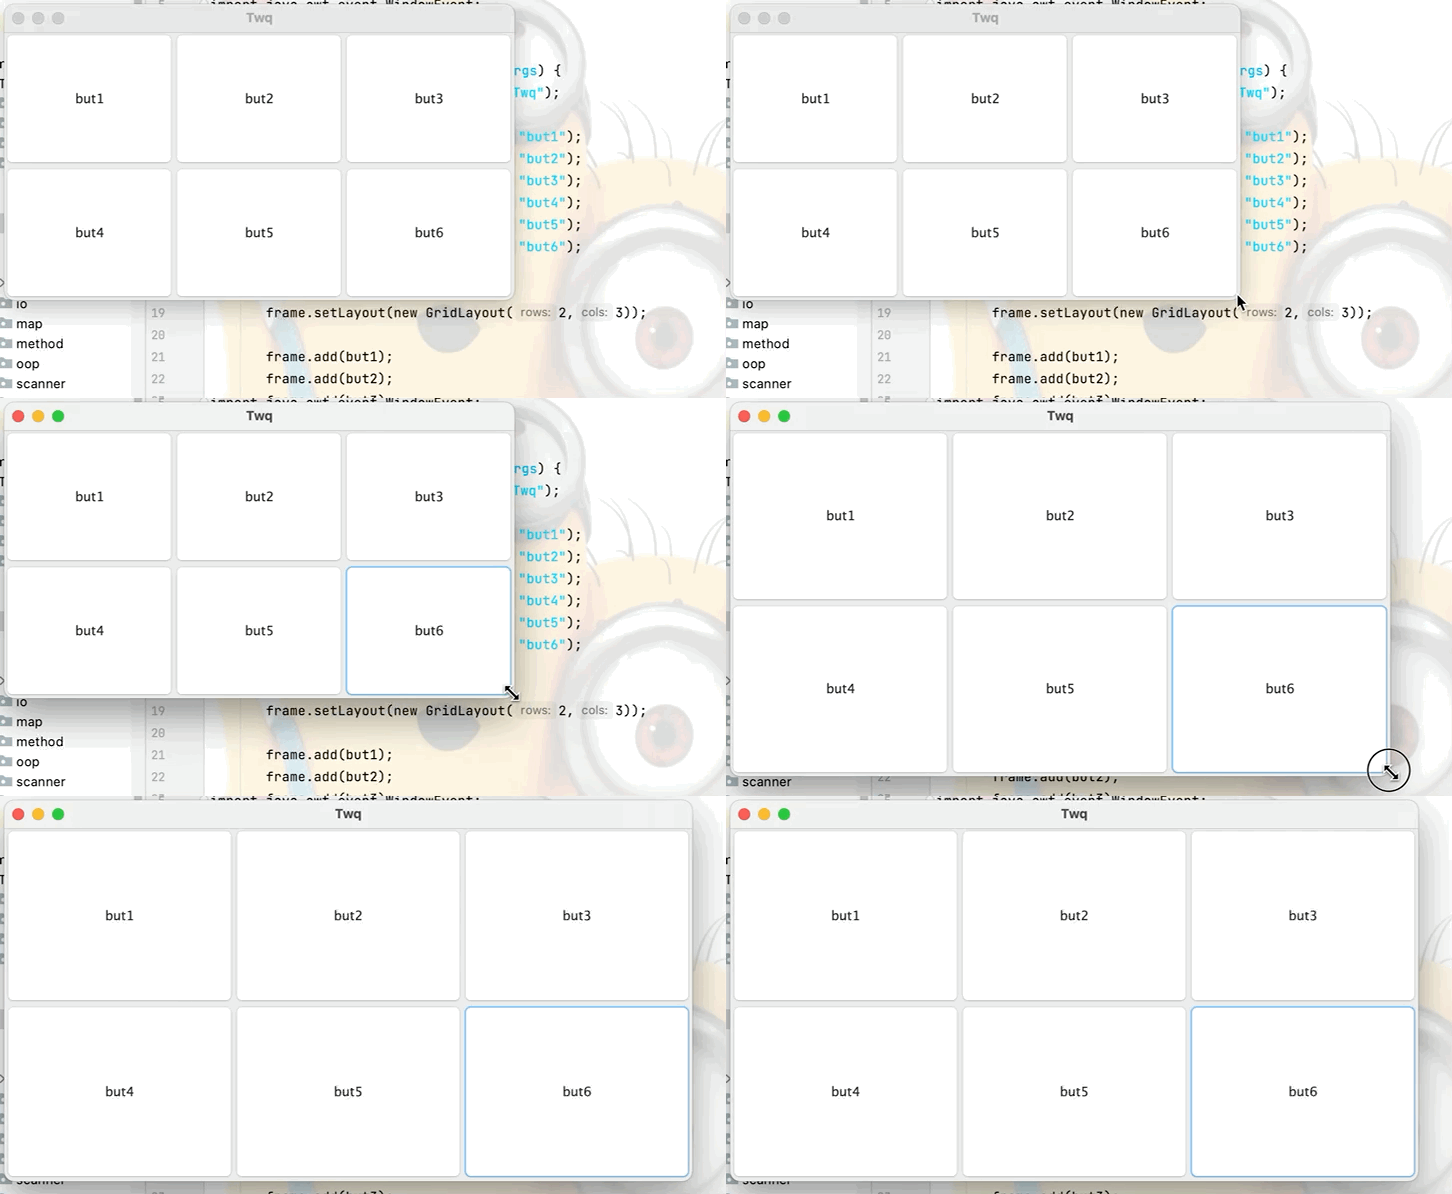
public class GridLayoutTest {
    public static void main(String[] args) {
        Frame frame = new Frame("Twq");

        Button but1 = new Button("but1");
        Button but2 = new Button("but2");
        Button but3 = new Button("but3");
        Button but4 = new Button("but4");
        Button but5 = new Button("but5");
        Button but6 = new Button("but6");

        //設置表格佈局為兩行三列,還可在後面繼續加參數即上下的間隔
       frame.setLayout(new GridLayout(2,3));

       frame.add(but1);
       frame.add(but2);
       frame.add(but3);
       frame.add(but4);
       frame.add(but5);
       frame.add(but6);

       //不用設置視窗的大小,視窗會根據所添加的東西自動分配空間大小
       frame.pack();
       frame.setVisible(true);

       frame.addWindowListener(new WindowAdapter() {
           @Override
           public void windowClosing(WindowEvent e) {
               System.exit(0);
           }
       });
    }
}
4.練習
實現下圖操作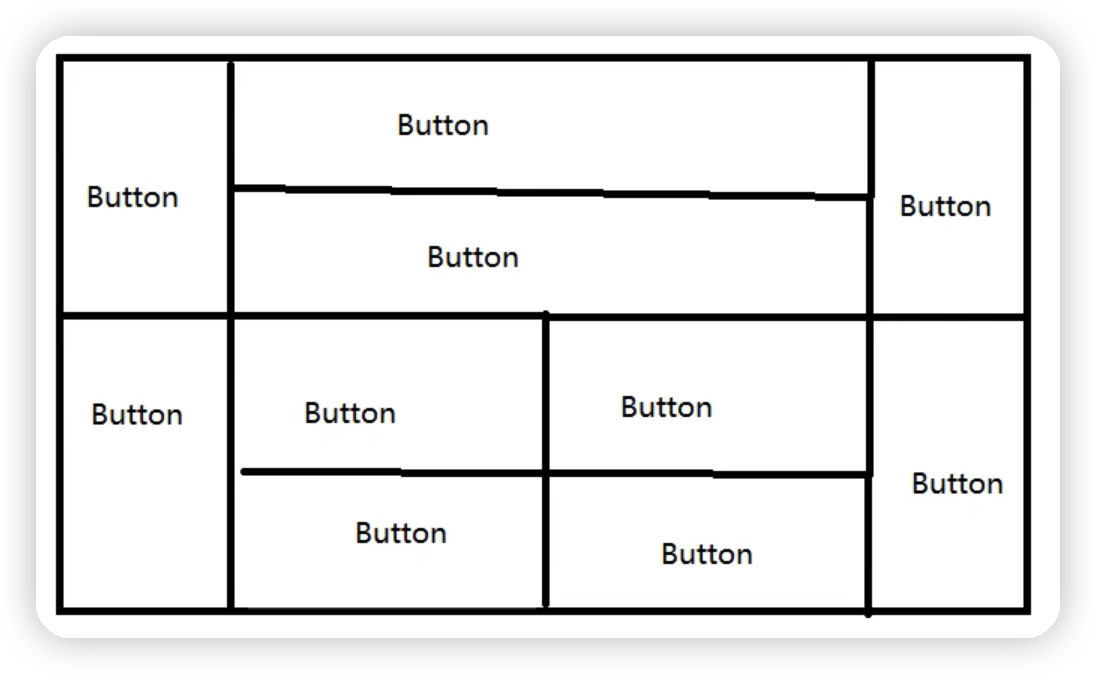
點擊查看代碼
package com.Tang.gui;

import java.awt.*;
import java.awt.event.WindowAdapter;
import java.awt.event.WindowEvent;

public class ExDemo {

    public static void main(String[] args) {
        Frame frame = new Frame();

        Panel panel1 = new Panel();
        Panel panel2 = new Panel();
        //首先分為上下兩個結構,分別用面板來放置下麵的按鈕
        frame.setLayout(new GridLayout(2,1));
        frame.add(panel1);
        frame.add(panel2);

        //對於上半部分,使用borderLayout佈局,左右放button,中間放面板(以便在中間繼續放置按鈕)
        Button button1 = new Button("button1");
        Panel panel3 = new Panel();

        Button button4 = new Button("button4");
        panel1.add(button1,BorderLayout.WEST);
        panel1.add(panel3,BorderLayout.CENTER);
        panel1.add(button4,BorderLayout.EAST);

        //對於中間部分的panel3繼續採用表格佈局,上下方button
        panel3.setLayout(new GridLayout(2,1));
        Button button2 = new Button("button2");
        Button button3 = new Button("button3");
        panel3.add(button2);
        panel3.add(button3);

        //然後對於下半部分,同理左右放置button,中間放置面板
        Button button5 = new Button("button5");
        Panel panel4 = new Panel();
        Button button10 = new Button("button10");
        panel2.add(button5,BorderLayout.WEST);
        panel2.add(panel4,BorderLayout.CENTER);
        panel2.add(button10,BorderLayout.EAST);

        //對於中間部分的panel4繼續採用表格佈局2行2列
        panel4.setLayout(new GridLayout(2,2));
        Button button6 = new Button("button6");
        Button button7 = new Button("button7");
        Button button8 = new Button("button8");
        Button button9 = new Button("button9");

        panel4.add(button6);
        panel4.add(button7);
        panel4.add(button8);
        panel4.add(button9);

        frame.setSize(400,300);
        frame.setLocation(300,400);
        frame.setVisible(true);
        frame.addWindowListener(new WindowAdapter() {
            @Override
            public void windowClosing(WindowEvent e) {
                System.exit(0);
            }
        });
    }
}
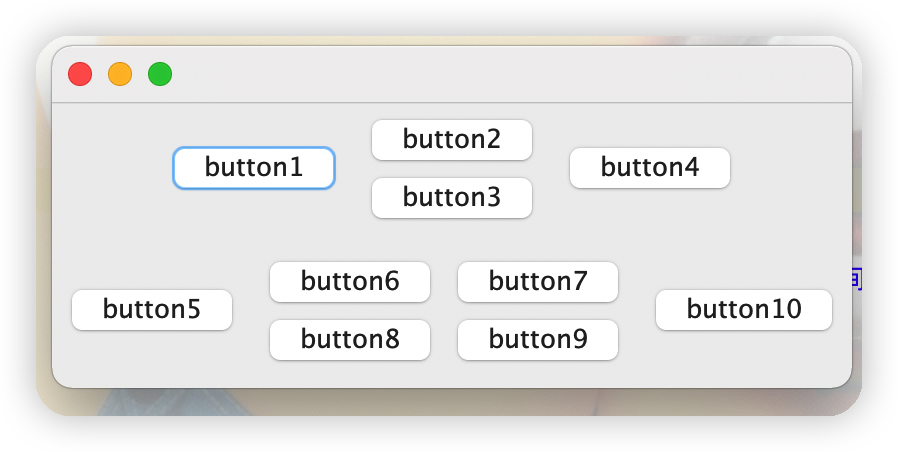
運行結果如下圖
四、事件監聽
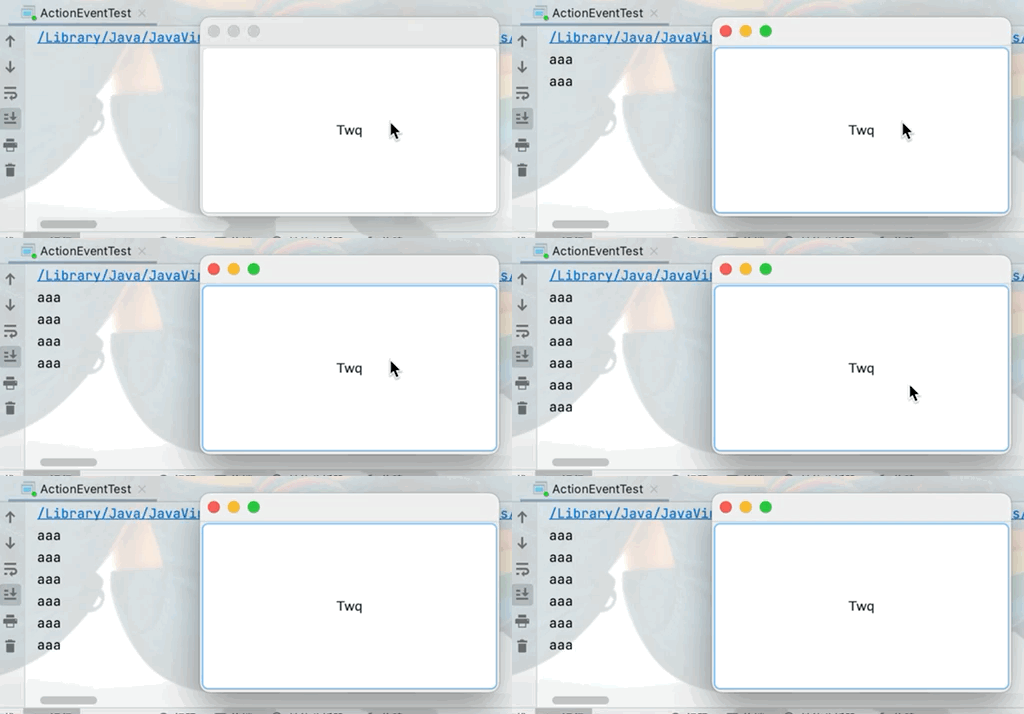
1.實現當點擊按鈕時控制台輸出aaa
點擊查看代碼
package com.Tang.gui;

import java.awt.*;
import java.awt.event.ActionEvent;
import java.awt.event.ActionListener;
import java.awt.event.WindowAdapter;
import java.awt.event.WindowEvent;

public class ActionEventTest {

    public static void main(String[] args) {
        //按下按鈕,觸發一些事件
        Frame frame = new Frame();
        Button button = new Button("Twq");
        //因為addActionListener需要一個ActionListener,所以,我們需要構造一個ActionListener
        //構造原則:是介面就實現其方法,是父類就繼承
        MyActionListener myActionListener = new MyActionListener();
        button.addActionListener(myActionListener);
        frame.add(button);
        frame.setSize(300,200);
        frame.setVisible(true);

        frame.addWindowListener(new WindowAdapter() {
            @Override
            public void windowClosing(WindowEvent e) {
                System.exit(0);
            }
        });
    }
}
class MyActionListener implements ActionListener{

    @Override
    public void actionPerformed(ActionEvent e) {
        System.out.println("aaa");
    }
}
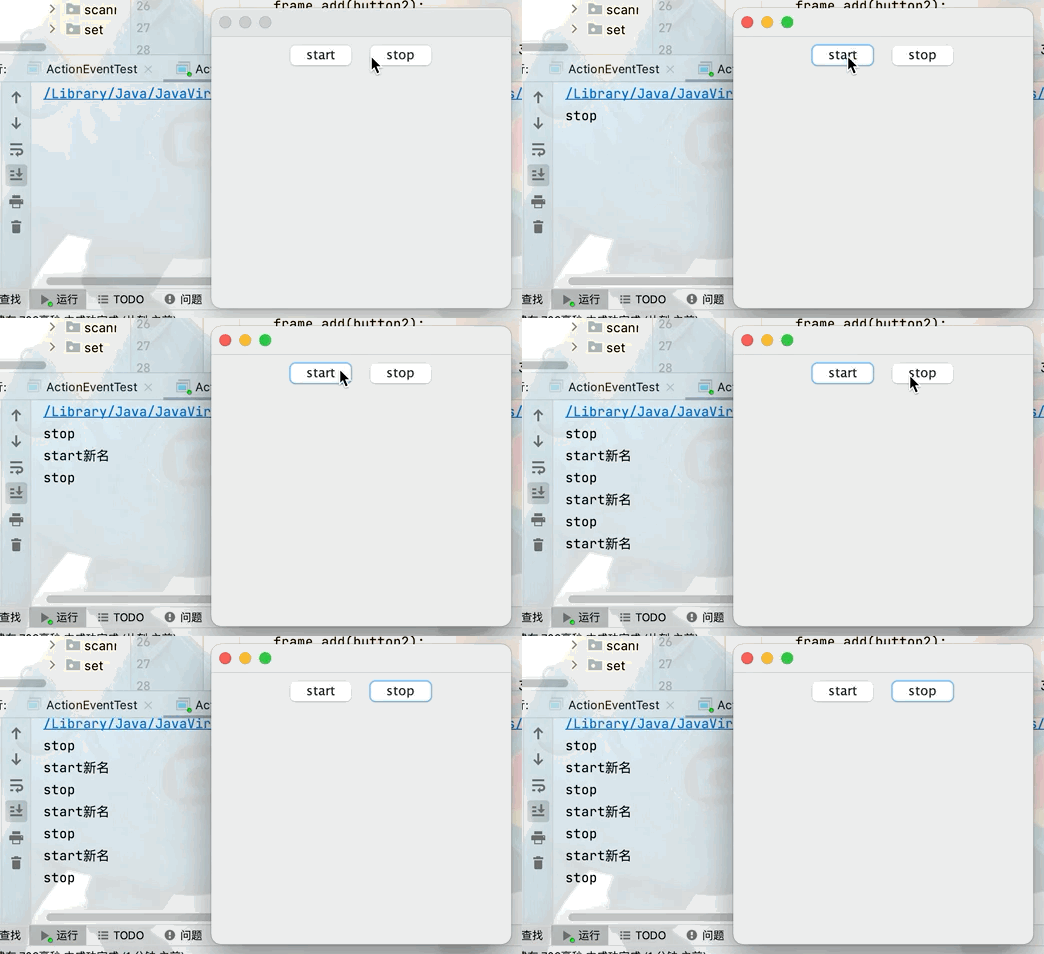
2.兩個按鈕實現同一個監聽
點擊查看代碼
package com.Tang.gui;

import java.awt.*;
import java.awt.event.ActionEvent;
import java.awt.event.ActionListener;
import java.awt.event.WindowAdapter;
import java.awt.event.WindowEvent;

public class ActionMonitorTest {
    public static void main(String[] args) {
        Frame frame = new Frame();

        Button button1 = new Button("start");
        Button button2 = new Button("stop");

        //如果不顯示定義就會走預設的無參構造
        button1.setActionCommand("start新名");

        MyMonitr myMonitr = new MyMonitr();
        button1.addActionListener(myMonitr);
        button2.addActionListener(myMonitr);

        frame.setLayout(new FlowLayout(FlowLayout.CENTER));

        frame.add(button1);
        frame.add(button2);

        frame.setSize(300,300);
        frame.setVisible(true);
        frame.addWindowListener(new WindowAdapter() {
            @Override
            public void windowClosing(WindowEvent e) {
                System.exit(0);
            }
        });
    }
}
class MyMonitr implements ActionListener{

    @Override
    public void actionPerformed(ActionEvent e) {
        //e.getActionCommand()獲取按鈕信息
        System.out.println(e.getActionCommand());
    }
}
4.輸入框事件的監聽
點擊查看代碼
package com.Tang.gui;

import java.awt.*;
import java.awt.event.ActionEvent;
import java.awt.event.ActionListener;
import java.awt.event.WindowAdapter;
import java.awt.event.WindowEvent;

public class ActionEventTest2 {
    public static void main(String[] args) {
        MyFrame1 myFrame1 = new MyFrame1();
        //關閉事件
        myFrame1.addWindowListener(new WindowAdapter() {
            @Override
            public void windowClosing(WindowEvent e) {
                System.exit(0);
            }
        });
    }
}

class MyFrame1 extends Frame {
    public MyFrame1(){
        TextField textField = new TextField();

        MyMoniter2 moniter2 = new MyMoniter2();
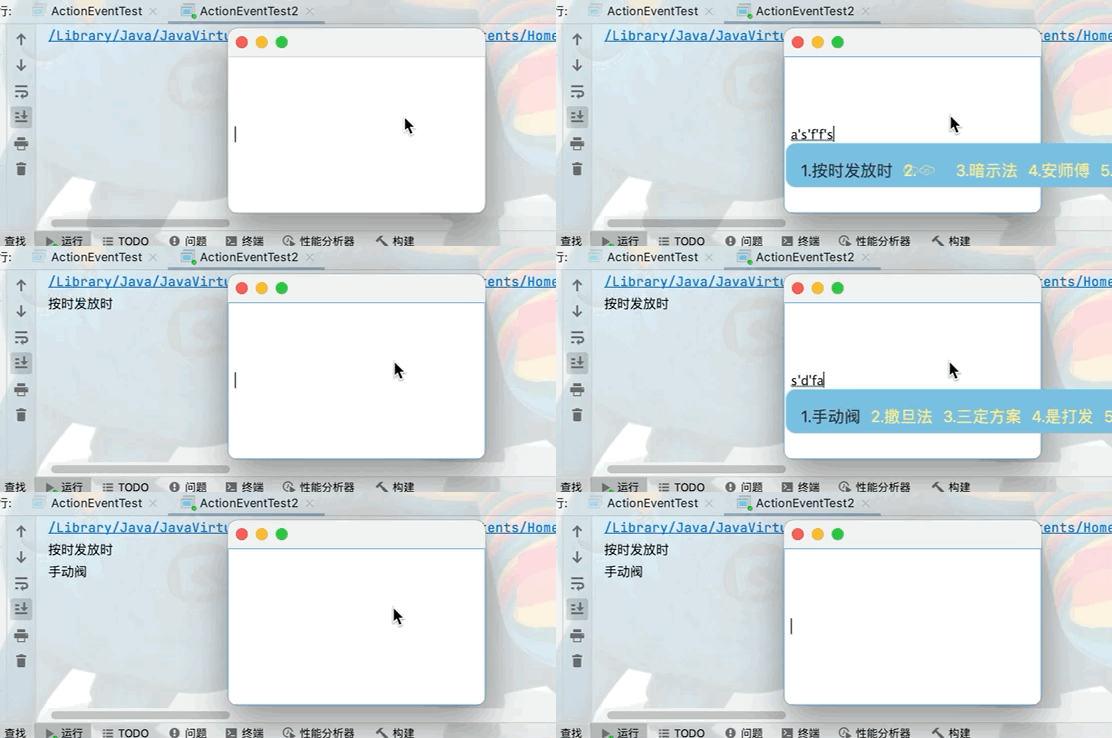
        //每次通過回車觸發監視器
        textField.addActionListener(moniter2);

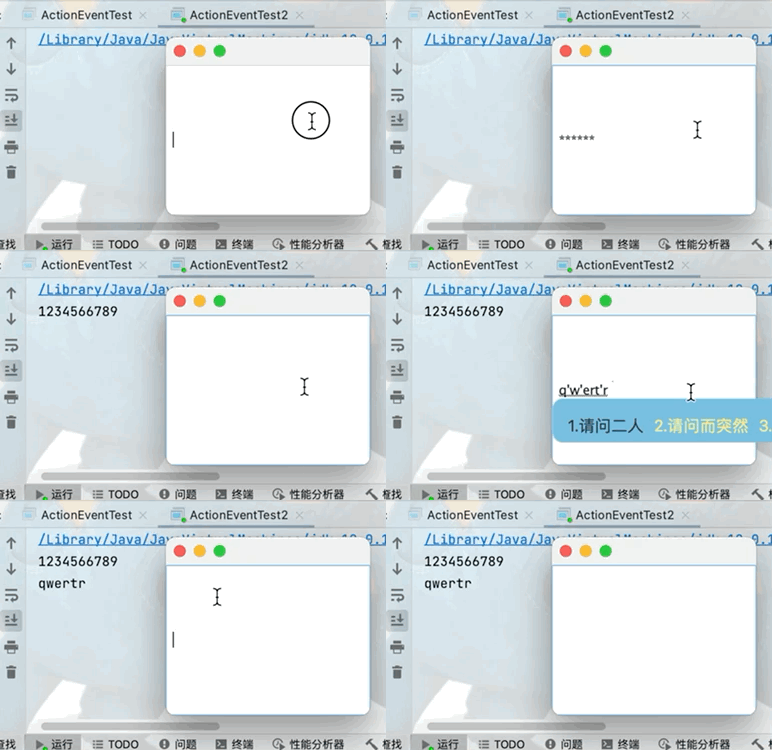
//        //在前臺實現輸入的內容為*,但是後臺獲取可以正常獲取輸入的數據
//        textField.setEchoChar('*');

        add(textField);
        pack();
        setVisible(true);

    }
}
class MyMoniter2 implements ActionListener{

    @Override
    public void actionPerformed(ActionEvent e) {
        Object source = e.getSource();
        TextField tf = (TextField)source;
        System.out.println(tf.getText());//獲取文本框的輸入的數據
        tf.setText("");//每次回車之後將文本框內容清空
    }
}
在前臺輸入框中不顯示輸入數據,但是在後臺可以正常獲取文本框中的數據
五、簡易計算器的實現
實現如下圖操作功能
點擊查看代碼
package com.Tang.gui;

import java.awt.*;
import java.awt.event.ActionEvent;
import java.awt.event.ActionListener;
import java.awt.event.WindowAdapter;
import java.awt.event.WindowEvent;

public class CalculateTest {
    public static void main(String[] args) {
        new MyFrame3();
    }
}
class MyFrame3 extends Frame {
    public MyFrame3(){
        //3個文本框
        TextField num1 = new TextField(10);
        TextField num2 = new TextField(10);
        TextField num3 = new TextField(20);

        //1個按鈕
        Button button = new Button("=");

        //1個標簽
        Label label = new Label("+");

        MyMoniter3 m = new MyMoniter3(num1,num2,num3);
        button.addActionListener(m);

        pack();
        add(num1);
        add(label);
        add(num2);
        add(button);
        add(num3);

        setLayout(new FlowLayout());
        setVisible(true);
        addWindowListener(new WindowAdapter() {
            @Override
            public void windowClosing(WindowEvent e) {
                System.exit(0);
            }
        });
    }
}
class MyMoniter3 implements ActionListener{
    //獲取三個文本框的值
    private TextField num1,num2,num3;
    public MyMoniter3(TextField num1,TextField num2,TextField num3) {
        this.num1 = num1;
        this.num2 = num2;
        this.num3 = num3;
    }

    @Override
    public void actionPerformed(ActionEvent e) {
        //1.獲得加數和被加數
        int i1 = Integer.parseInt(num1.getText());
        int i2 = Integer.parseInt(num2.getText());

        //2.將兩個數相加之後的值放入第三個文本框
        num3.setText(""+(i1+i2));

        //3.清除前兩個框
        num1.setText("");
        num2.setText("");
    }
}

代碼優化(轉換為面向對像)
點擊查看代碼
public class CalculateTest {
    public static void main(String[] args) {
        new Calculator().loadFrame();
    }
}
class Calculator extends Frame {
    //屬性
    TextField num1,num2,num3;

    //方法
    public void loadFrame(){
        //3個文本框
        num1 = new TextField(10);
        num2 = new TextField(10);
        num3 = new TextField(20);

        //1個按鈕
        Button button = new Button("=");

        //1個標簽
        Label label = new Label("+");

        MyMoniter3 m = new MyMoniter3(this);
        button.addActionListener(m);

        pack();
        add(num1);
        add(label);
        add(num2);
        add(button);
        add(num3);

        setLayout(new FlowLayout());
        setVisible(true);
        addWindowListener(new WindowAdapter() {
            @Override
            public void windowClosing(WindowEvent e) {
                System.exit(0);
            }
        });
    }

}
class MyMoniter3 implements ActionListener{
    //獲取計算器這個對象,在一個類中組合另一個類
    Calculator calculator;
    public MyMoniter3(Calculator calculator) {
        this.calculator = calculator;
    }

    @Override
    public void actionPerformed(ActionEvent e) {
        //1.獲得加數和被加數
        int i1 = Integer.parseInt(calculator.num1.getText());
        int i2 = Integer.parseInt(calculator.num2.getText());

        //2.將兩個數相加之後的值放入第三個文本框
        calculator.num3.setText(""+(i1+i2));

        //3.清除前兩個輸入框
        calculator.num1.setText("");
        calculator.num2.setText("");
    }
}
代碼進一步優化(將監聽器轉換為內部類)
點擊查看代碼
public class CalculateTest {
    public static void main(String[] args) {
        new Calculator().loadFrame();
    }
}
class Calculator extends Frame {
    //屬性
    TextField num1,num2,num3;

    //方法
    public void loadFrame(){
        //3個文本框
        num1 = new TextField(10);
        num2 = new TextField(10);
        num3 = new TextField(20);

        //1個按鈕
        Button button = new Button("=");

        //1個標簽
        Label label = new Label("+");

        MyMoniter3 m = new MyMoniter3();
        button.addActionListener(m);

        pack();
        add(num1);
        add(label);
        add(num2);
        add(button);
        add(num3);

        setLayout(new FlowLayout());
        setVisible(true);
        addWindowListener(new WindowAdapter() {
            @Override
            public void windowClosing(WindowEvent e) {
                System.exit(0);
            }
        });
    }
//監聽器類,內部類最大的好處就是可以暢通無阻的訪問外部內的屬性和方法
    class MyMoniter3 implements ActionListener{
        @Override
        public void actionPerformed(ActionEvent e) {
            //1.獲得加數和被加數
            int i1 = Integer.parseInt(num1.getText());
            int i2 = Integer.parseInt(num2.getText());

            //2.將兩個數相加之後的值放入第三個文本框
            num3.setText(""+(i1+i2));

            //3.清除前兩個框
            num1.setText("");
            num2.setText("");
        }
    }
}
六、畫筆
1.畫筆的簡單使用
點擊查看代碼
public class PaintTest {
    public static void main(String[] args) {
        new Mypaint().loadFrame();
    }
}
class Mypaint extends Frame {
    public void loadFrame(){
        setVisible(true);
        setBounds(200,200,400,400);
        addWindowListener(new WindowAdapter() {
            @Override
            public void windowClosing(WindowEvent e) {
                System.exit(0);
            }
        });
    }
    //重寫畫筆方法
    @Override
    public void paint(Graphics g) {
        //設置畫筆顏色
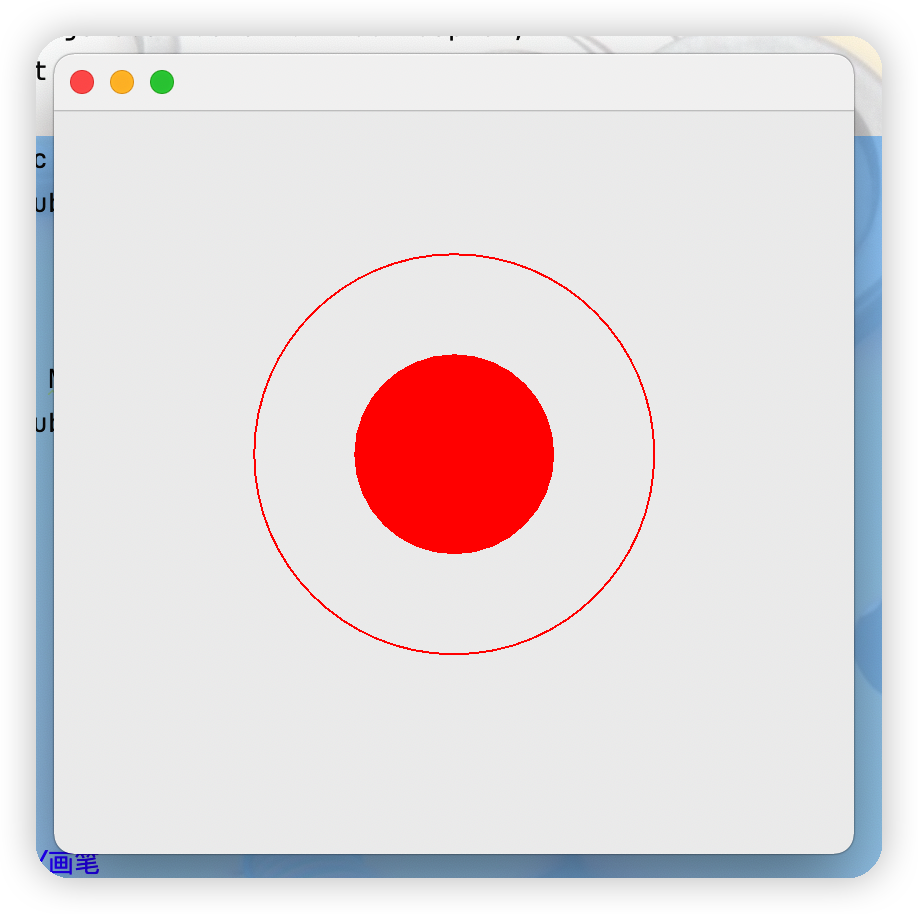
        g.setColor(Color.red);
        //畫一個空心圓
        g.drawOval(100,100,200,200);
        //畫一個實心圓
        g.fillOval(150,150,100,100);

        //養成喜歡:畫筆用完,將它還原為最初的顏色
    }
}
2.滑鼠監聽
目的:想要實現滑鼠畫畫點擊查看代碼
package com.Tang.gui;

import java.awt.*;
import java.awt.event.MouseAdapter;
import java.awt.event.MouseEvent;
import java.awt.event.WindowAdapter;
import java.awt.event.WindowEvent;
import java.util.ArrayList;
import java.util.Iterator;

public class MouseistenerTest {
    public static void main(String[] args) {
        new MyFrame4("畫圖");
    }
}
class MyFrame4 extends Frame {
    //畫畫需要畫筆,需要監聽滑鼠當前的位置
    //用集合數組存儲滑鼠當前點擊的位置
    ArrayList points;
    public MyFrame4(String title){
        super(title);
        setBounds(100,100,300,300);
        points = new ArrayList();
        //針對視窗的滑鼠的監聽器
        addMouseListener(new MouseListenered());
        setVisible(true);
        setSize(300,300);
        addWindowListener(new WindowAdapter() {
            @Override
            public void windowClosing(WindowEvent e) {
                System.exit(0);
            }
        });
    }

    @Override
    public void paint(Graphics g) {
        //畫畫,監聽滑鼠的事件
        Iterator iterator = points.iterator();
        while(iterator.hasNext()){
            //將當前獲取到的數組中的點轉換為一個點類
            Point point = (Point)iterator.next();
            //設置滑鼠點擊點的顏色
            g.setColor(Color.CYAN);
            //讓當前畫筆獲得滑鼠點擊的位置
            g.fillOval(point.x,point.y,10,10);
        }

    }
    //將獲取到的滑鼠的點存儲到數組裡
    public void addPaint(Point point){
        points.add(point);
    }
    //若採用實現MouseListener介面的話,就必須要重寫其介面內的所有方法
    //所以可以採用適配器模式去重寫自己需要的方法,
    class MouseListenered extends MouseAdapter {
        //滑鼠有按下,彈起,按住不放
        @Override
        public void mousePressed(MouseEvent e) {
            //在視窗上獲取當前滑鼠的位置
            MyFrame4 frame =(MyFrame4) e.getSource();
            frame.addPaint(new Point(e.getX(),e.getY()));
            //每次點擊滑鼠都需要重新畫一遍
            frame.repaint();//刷新
        }
    }
}
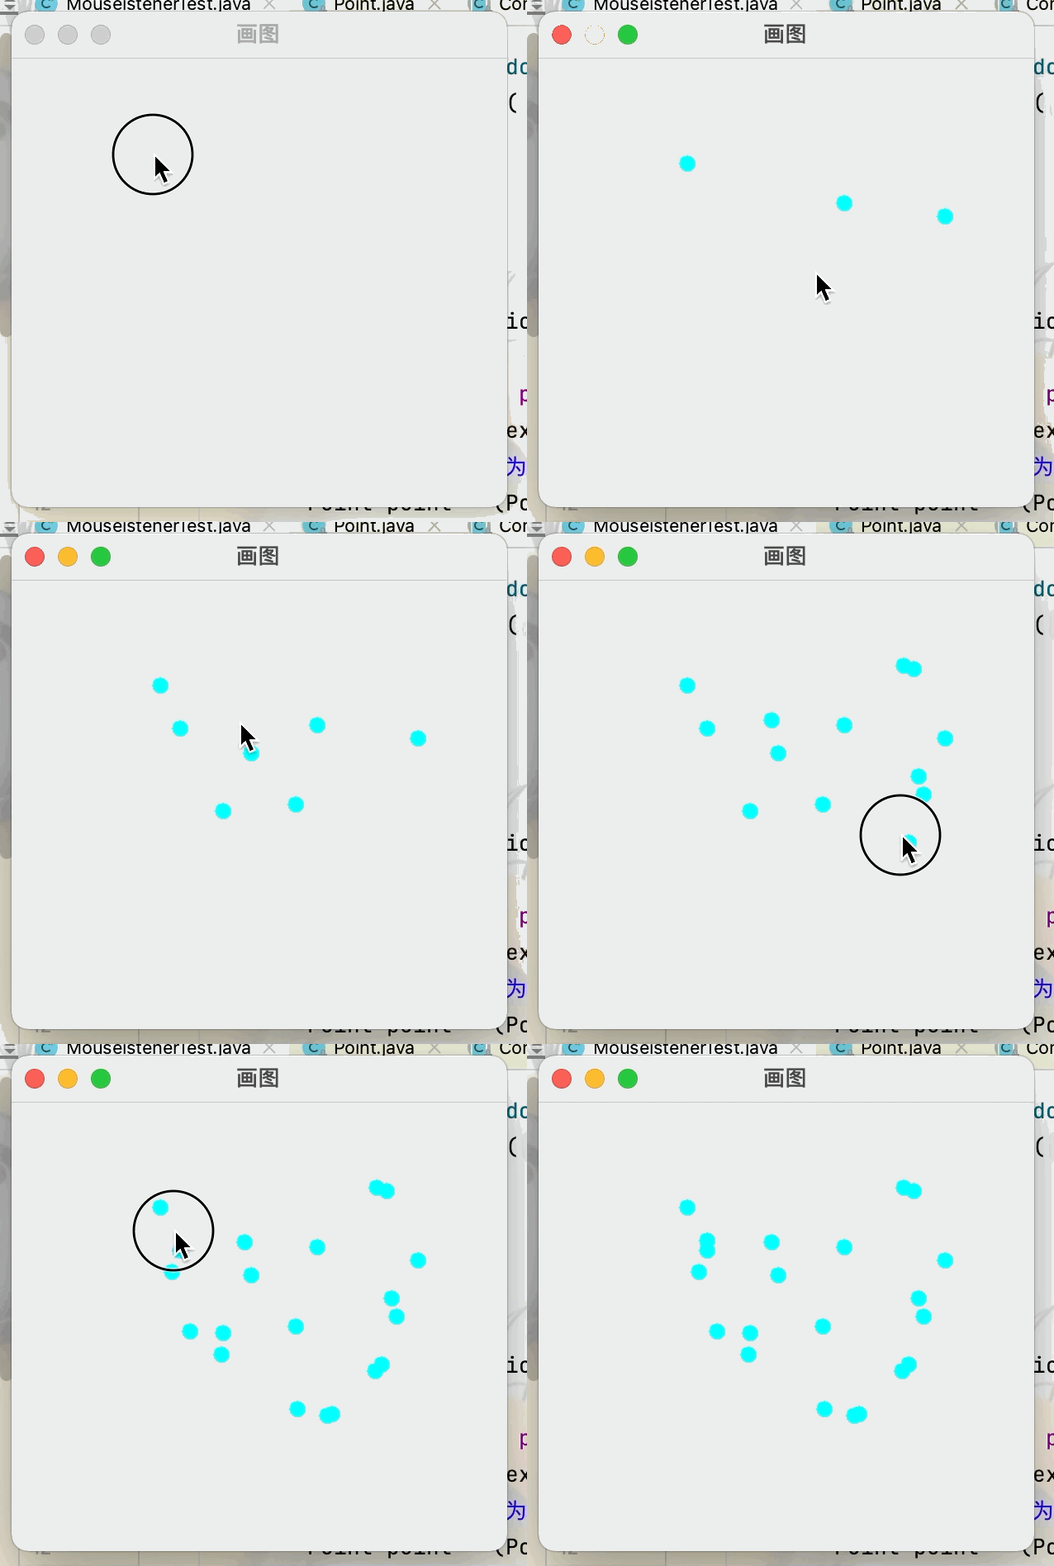
3.視窗監聽
目的:實現當 離開當前視窗後 視窗標題設置為“人呢?快回來”,回到當前視窗則視窗標題設置為“歡迎回來”點擊查看代碼
public class WindowListennerTest {
    public static void main(String[] args) {
        new MyWindowListener();
    }
}
class MyWindowListener extends Frame{
    public MyWindowListener(){
        setBounds(100,100,300,300);
        setVisible(true);
        addWindowListener(new WindowAdapter() {
            @Override
            public void windowClosing(WindowEvent e) {
                System.exit(0);
            }
            @Override
            public void windowDeactivated(WindowEvent e) {
                MyWindowListener mw =(MyWindowListener)e.getSource();
                mw.setTitle("人呢?快回來");
            }

            @Override
            public void windowActivated(WindowEvent e) {
                MyWindowListener mw =(MyWindowListener)e.getSource();
                mw.setTitle("歡迎回來");
            }

        });
    }
}
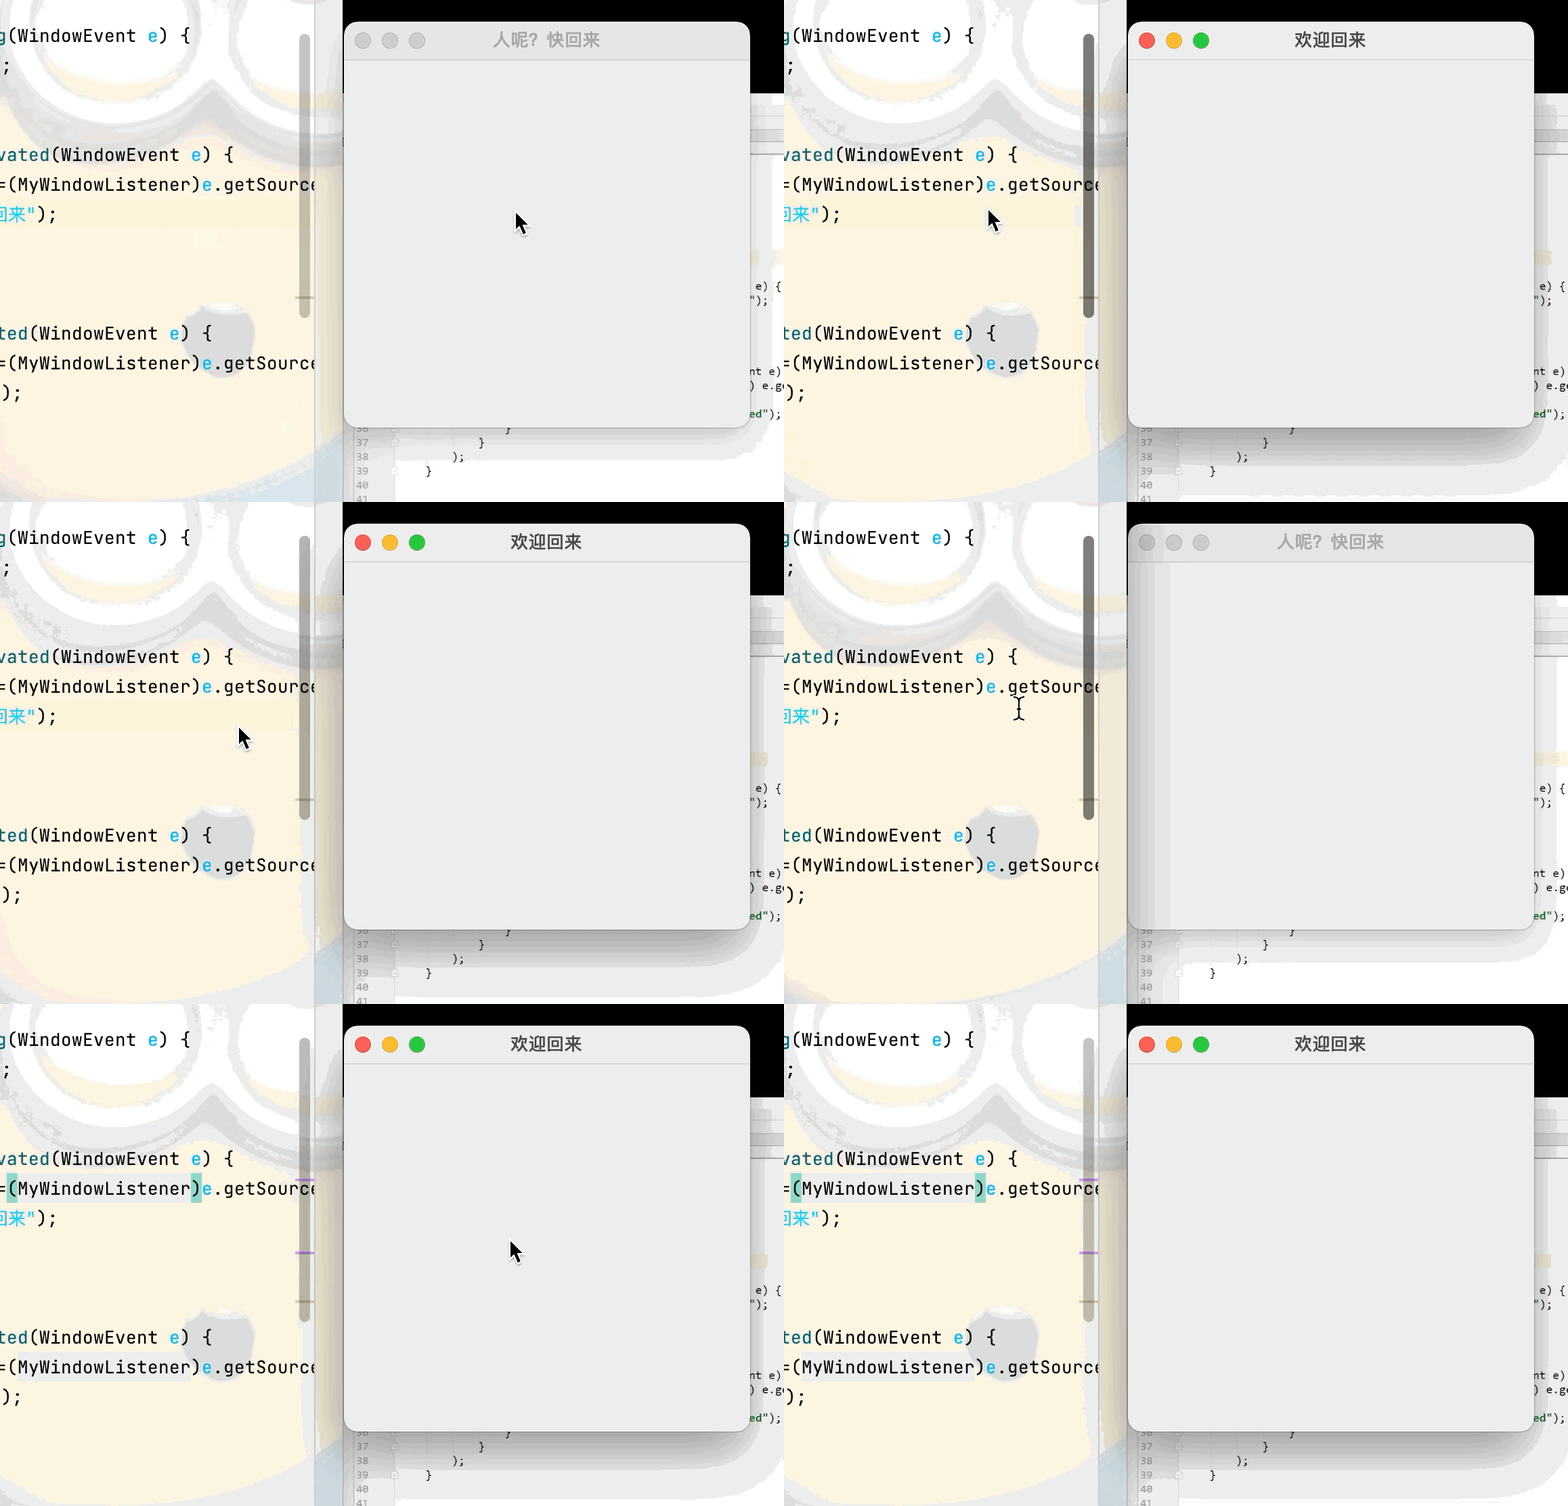
4.鍵盤監聽
目的:實現當在視窗中按下鍵盤的上鍵,則輸出你按下了上鍵點擊查看代碼
public class KeyListenerTest {
    public static void main(String[] args) {
        new KeyFrame();
    }
}
class KeyFrame extends Frame {
    public KeyFrame(){
        setVisible(true);
        setSize(300,300);
        addKeyListener(new KeyAdapter() {
            @Override
            public void keyPressed(KeyEvent e) {
                int keyCode = e.getKeyCode();
                if(keyCode == KeyEvent.VK_UP){
                    System.out.println("你按下了上鍵");
                }
            }
        });
    }
}
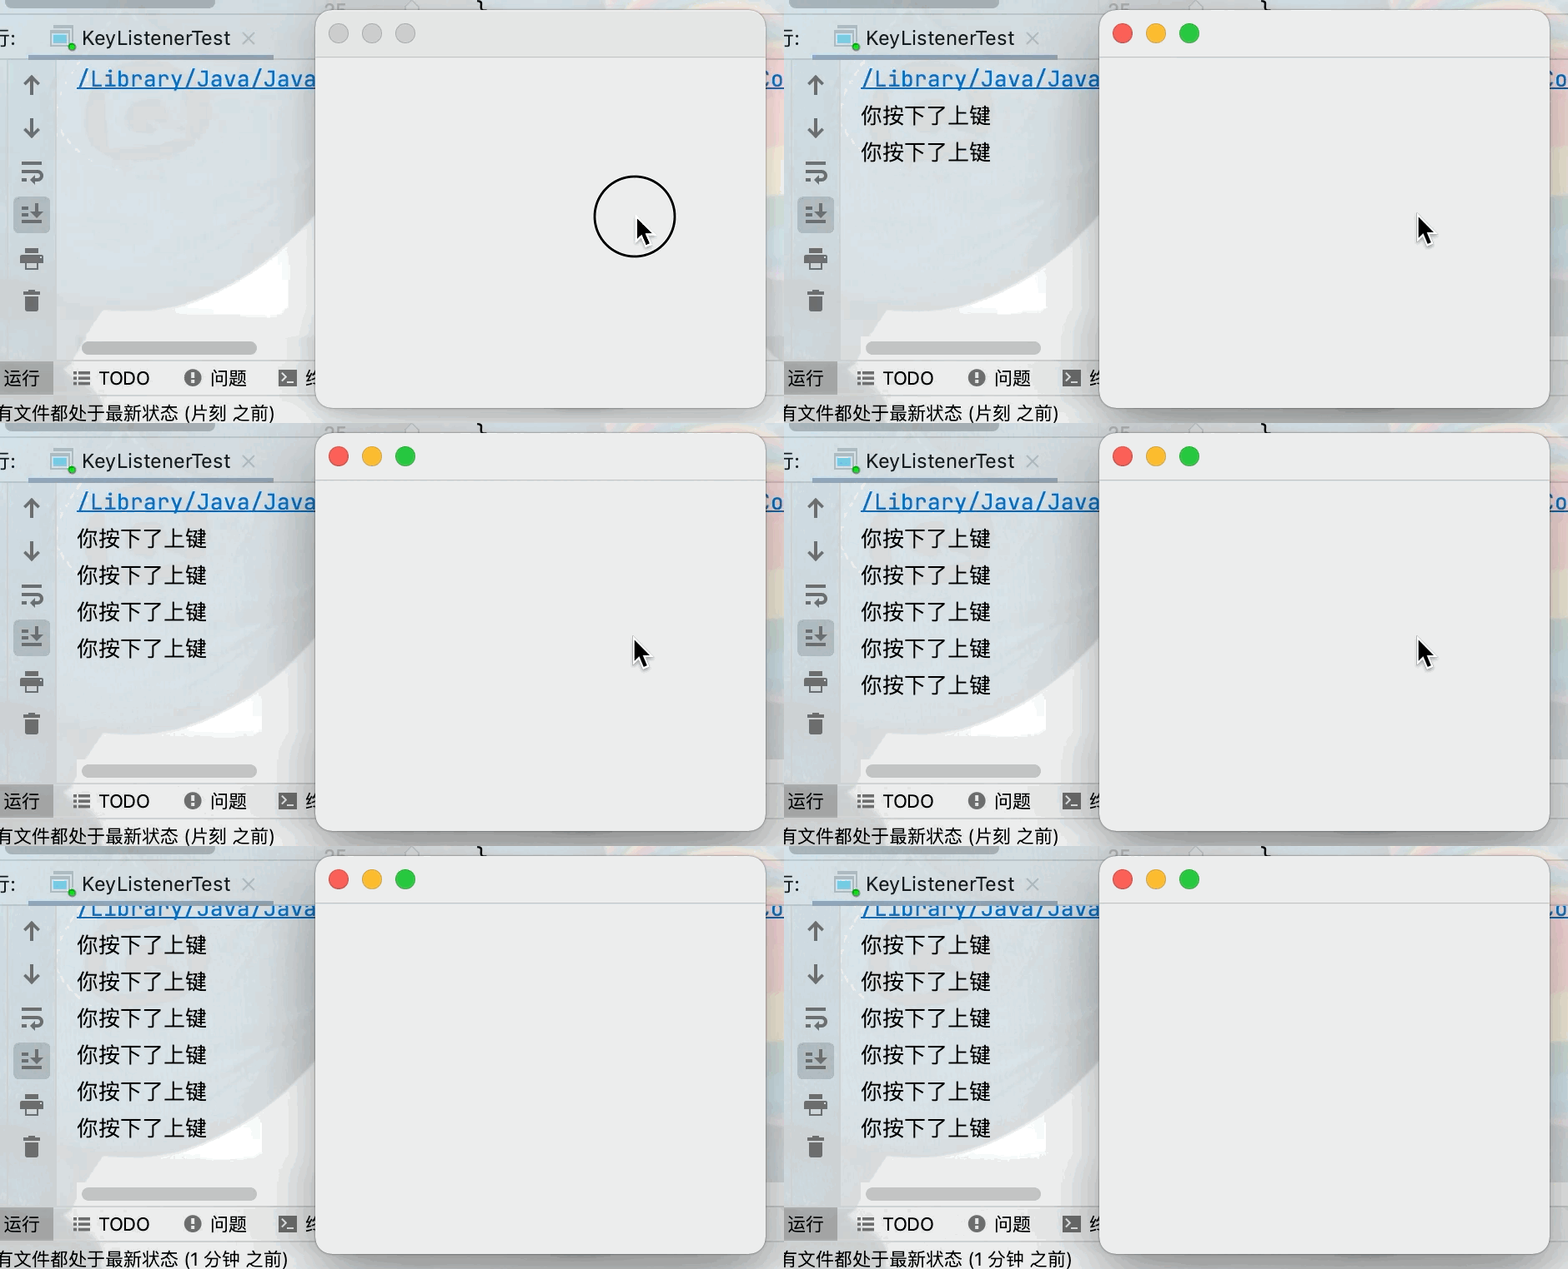
七、GUI-Swing窗體
1.JFrame窗體
看其源碼可知JFrame和Frame 還是有很大聯繫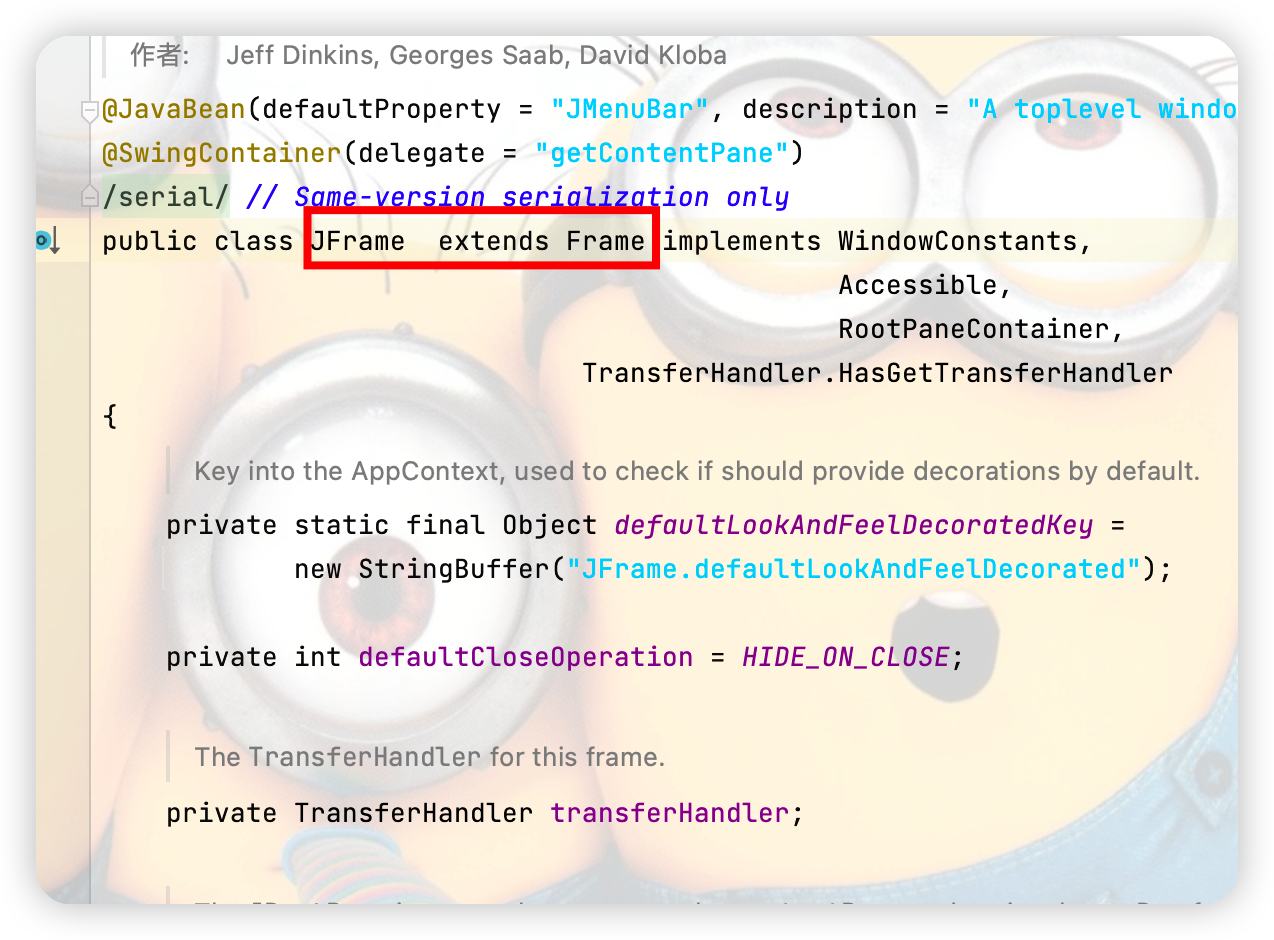
點擊查看代碼
public class JFrameTest {
    //init()用於視窗的初始化操作
    public void init(){
        //頂級視窗
        JFrame jf = new JFrame("這是一個JFrame視窗");

        JLabel label = new JLabel("歡迎進入Twq的博客,歡迎點贊加關註");
        jf.add(label);
        //讓標簽居中顯示
        label.setHorizontalAlignment(SwingConstants.CENTER);
        //由於JFrame設計到容器的概念,所有東西要放在容器里去實現
        //jf.setBackground(Color.gray);這樣寫並不能實現背景的設置
        jf.getContentPane().setBackground(Color.cyan);
        //視窗關閉
        jf.setDefaultCloseOperation(WindowConstants.DISPOSE_ON_CLOSE);

        jf.setBounds(100,100,300,300);
        jf.setVisible(true);
    }

    public static void main(String[] args) {
        new JFrameTest().init();
    }
}

2.彈窗
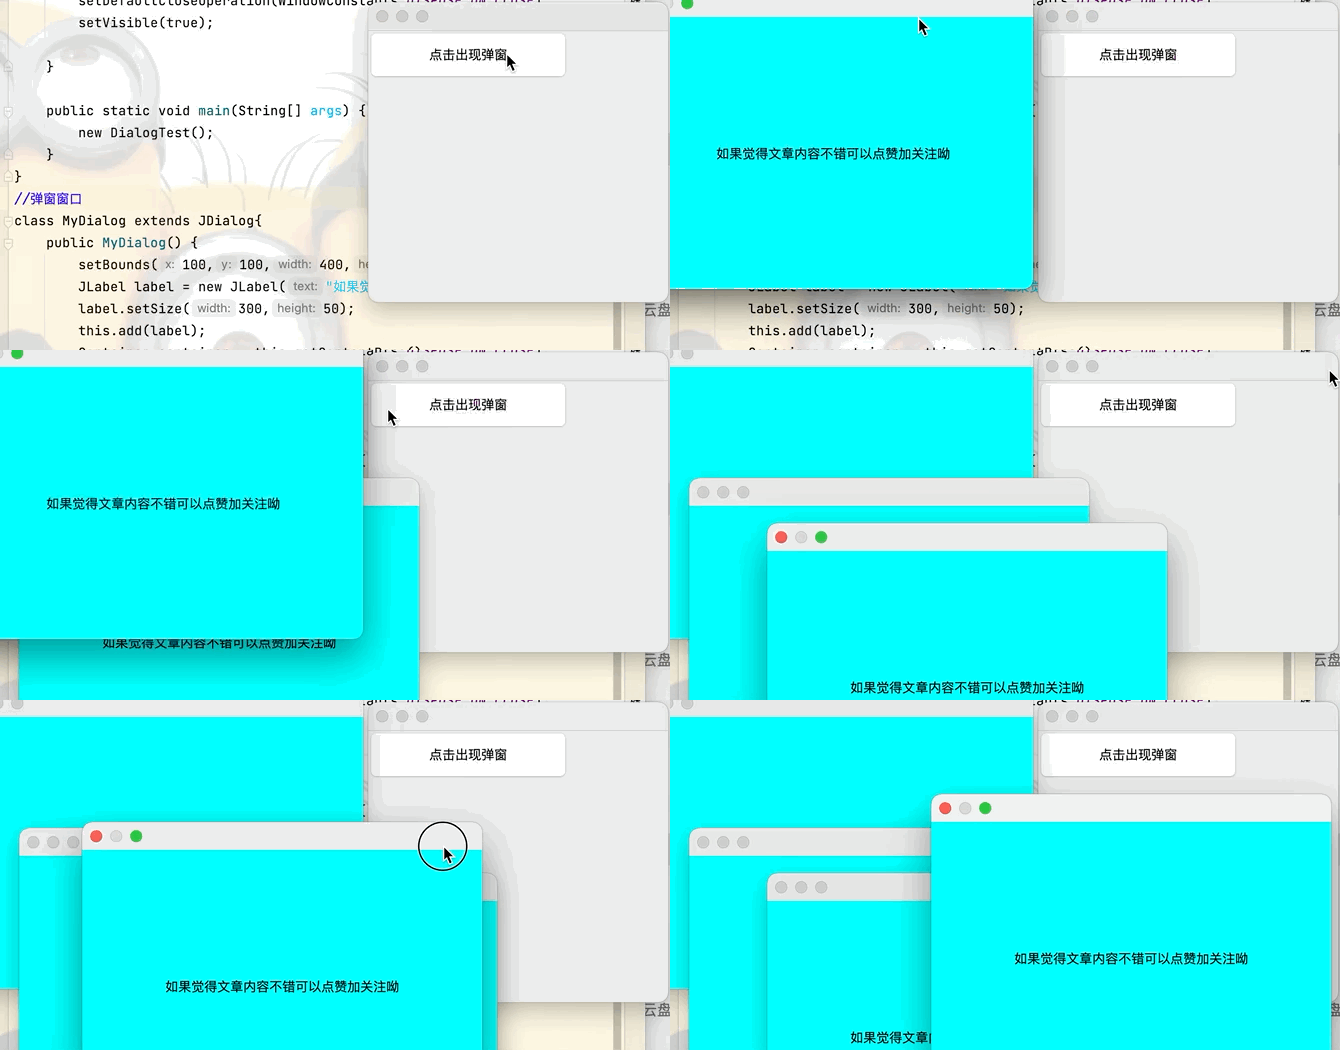
點擊查看代碼
//主視窗
public class DialogTest extends JFrame{
    public DialogTest() {
        Container container = this.getContentPane();
        JButton button = new JButton("點擊出現彈窗");
        button.setSize(200,50);
        add(button);
        //添加按鈕監聽事件
        button.addActionListener(new ActionListener() {
            @Override
            public void actionPerformed(ActionEvent e) {
                new MyDialog();//當按鈕被點擊後新建一個視窗
            }
        });
        setLayout(null);
        setBounds(80,80,300,300);
        setDefaultCloseOperation(WindowConstants.DISPOSE_ON_CLOSE);
        setVisible(true);

    }

    public static void main(String[] args) {
        new DialogTest();
    }
}
//彈窗視窗
class MyDialog extends JDialog{
    public MyDialog() {
        setBounds(100,100,400,300);
        JLabel label = new JLabel("如果覺得文章內容不錯可以點贊加關註呦");
        label.setSize(300,50);
        this.add(label);
        Container container = this.getContentPane();
        label.setHorizontalAlignment(SwingConstants.CENTER);
        container.setBackground(Color.CYAN);
        //彈窗預設就可以進行關閉操作,不需要在進行關閉操作
        //setDefaultCloseOperation(WindowConstants.DISPOSE_ON_CLOSE);
        setVisible(true);
    }
}
3.標簽之Icon
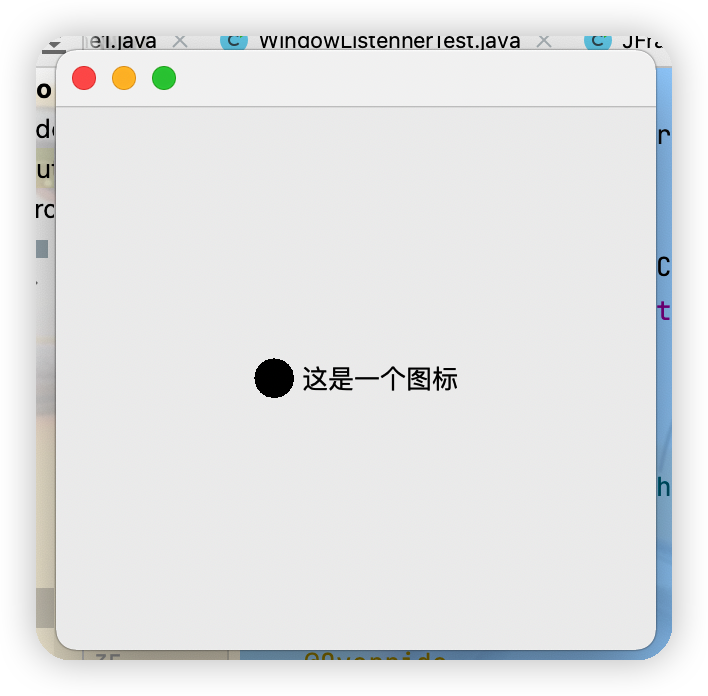
(1)圖標Icon點擊查看代碼
public class IconTest extends JFrame implements Icon {
    private int width,height;

    public IconTest() {
    }
    public IconTest(int width,int height) {
        this.width = width;
        this.height = height;
    }
    public void init(){
        IconTest iconTest = new IconTest(20,20);
        //圖標放在標簽上,也可以放在按鈕上
        JLabel label = new JLabel("這是一個圖標",iconTest,SwingConstants.CENTER);
        Container container = getContentPane();
        container.add(label);
        setBounds(100,100,300,300);
        setVisible(true);
        setDefaultCloseOperation(WindowConstants.DISPOSE_ON_CLOSE);
    }
    @Override
    public void paintIcon(Component c, Graphics g, int x, int y) {
        g.fillOval(x,y,width,height);
    }

    @Override
    public int getIconWidth() {
        return this.width;
    }

    @Override
    public int getIconHeight() {
        return this.height;
    }

    public static void main(String[] args) {
        new IconTest().init();
    }
}
(2)圖片Icon
點擊查看代碼
package com.Tang.gui.swing;

import javax.swing.*;
import java.awt.*;
import java.net.URL;

public class ImageIconTest extends JFrame {
    public ImageIconTest(){
        //獲取圖片地址
        URL url = ImageIconTest.class.getResource("tx的副本.jpg");
        JLabel label = new JLabel("這是一個圖片圖標");
        //圖片圖標獲取圖片的路徑
        ImageIcon imageIcon = new ImageIcon(url);
        //將圖片放入標簽中
        label.setIcon(imageIcon);
        Container container = getContentPane();
        container.add(label);
        setBounds(100,100,300,200);
        setDefaultCloseOperation(WindowConstants.DISPOSE_ON_CLOSE);
        setVisible(true);
    }
    public static void main(String[] args) {
        new ImageIconTest();
    }
}

4.面板
(1)普通面板
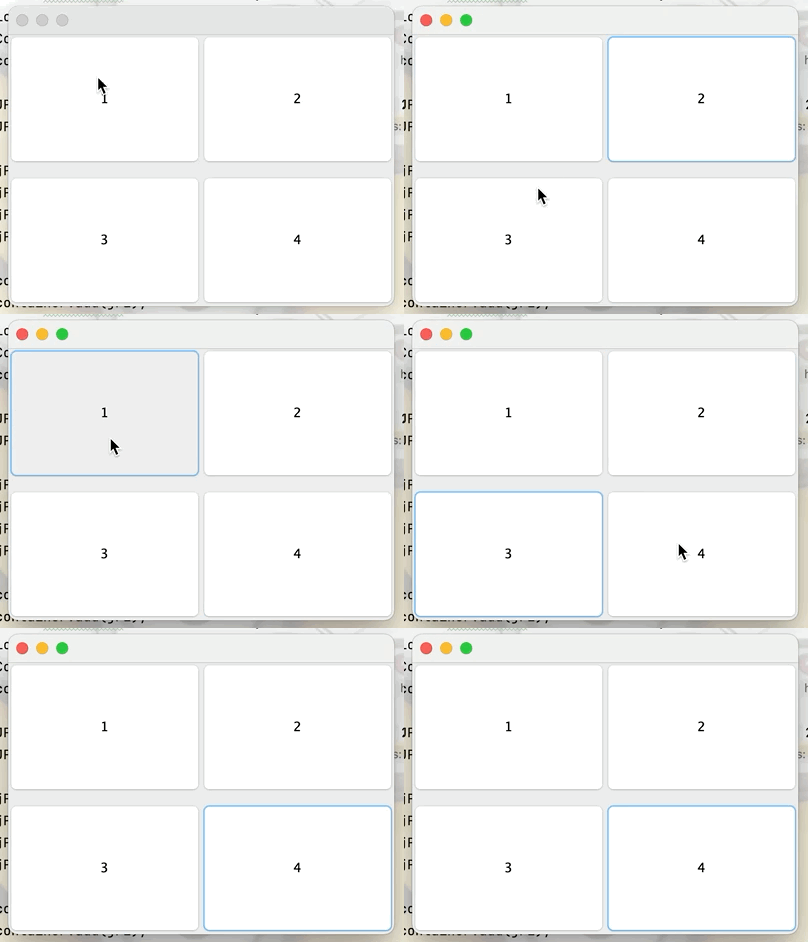
點擊查看代碼
package com.Tang.gui.swing;

import javax.swing.*;
import java.awt.*;

public class JPanneltest extends JFrame {
    public JPanneltest(){
        Container container = this.getContentPane();
        container.setLayout(new GridLayout(2,1,10,10));

        JPanel jP = new JPanel(new GridLayout(1,2));
        JPanel jP1 = new JPanel(new GridLayout(1,2));

        jP.add(new JButton("1"));
        jP.add(new JButton("2"));
        jP1.add(new JButton("3"));
        jP1.add(new JButton("4"));

        container.add(jP);
        container.add(jP1);
        this.setBounds(200,200,300,300);
        this.setVisible(true);
      //設置關閉視窗操作
        this.setDefaultCloseOperation(WindowConstants.DISPOSE_ON_CLOSE);
    }

    public static void main(String[] args) {
        new JPanneltest();
    }
}
(2)JScroll(滾輪)面板
點擊查看代碼
public class ScrollPanelTest extends JFrame {
    public ScrollPanelTest() {
        Container container = this.getContentPane();

        //文本域:在文本框中輸入的時候可以進行換行操作
        JTextArea textArea = new JTextArea();

        //設置滾動面板,並將文本域放到面板中
        JScrollPane scrollPane = new JScrollPane(textArea);

        //將滾動面板添加到視窗中
        container.add(scrollPane);

        //設置視窗的初始狀態
        setVisible(true);
        setDefaultCloseOperation(WindowConstants.DISPOSE_ON_CLOSE);
        setBounds(200,200,300,300);
    }

    public static void main(String[] args) {
        new ScrollPanelTest();
    }
}

5.按鈕
(1)圖片按鈕
目的:實現將一張圖片變成圖標,並放在按鈕上,並且當滑鼠放在按鈕上停留時顯示文字點擊查看代碼
public class ButtonImageTest extends JFrame {
    public ButtonImageTest() {
        Container container = this.getContentPane();
        URL url = ButtonImageTest.class.getResource("tx的副本.jpg");
        Icon icon = new ImageIcon(url);

        JButton button = new JButton();
        //將圖片放入按鈕中
        button.setIcon(icon);
        //當滑鼠在按鈕上停留的時候就會顯示下方設置的文字
        button.setToolTipText("圖片按鈕");

        container.add(button);

        setVisible(true);
        setDefaultCloseOperation(WindowConstants.DISPOSE_ON_CLOSE);
        setBounds(100,100,200,200);
    }

    public static void main(String[] args) {
        new ButtonImageTest();
    }
}

(2)單選框按鈕
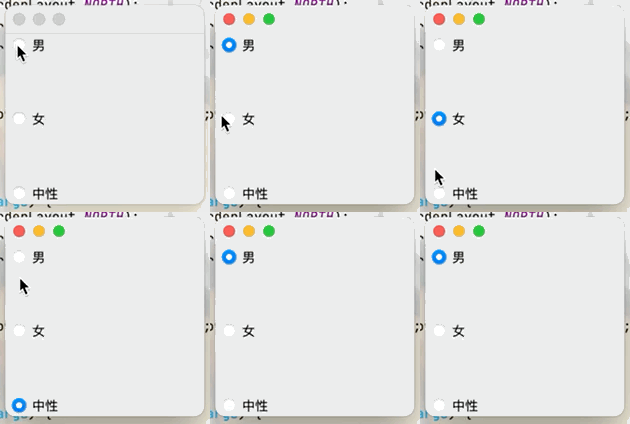
目的:實現單選框只能選擇一個選項的功能點擊查看代碼
public class JButtonTest02 extends JFrame {
    public JButtonTest02() {
        Container container = getContentPane();

        JRadioButton radioButton1 = new JRadioButton("男");
        JRadioButton radioButton2 = new JRadioButton("女");
        JRadioButton radioButton3 = new JRadioButton("中性");
        //由於單選框只能選擇一個,將三個按鈕放入一個組中就可以實現只選一個
        ButtonGroup group = new ButtonGroup();

        //將三個按鈕放入一個組中
        group.add(radioButton1);
        group.add(radioButton2);
        group.add(radioButton3);

        container.add(radioButton1,BorderLayout.NORTH);
        container.add(radioButton2,BorderLayout.CENTER);
        container.add(radioButton3,BorderLayout.SOUTH);

        setVisible(true);
        setDefaultCloseOperation(WindowConstants.EXIT_ON_CLOSE);
        setBounds(100,100,200,200);
    }

    public static void main(String[] args) {
        new JButtonTest02();
    }
}
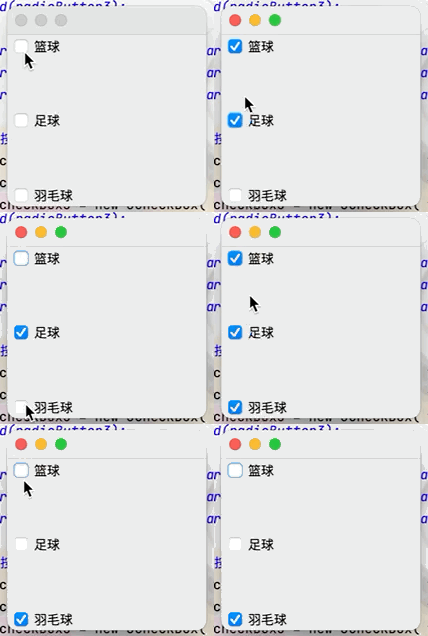
(3)覆選框按鈕
目的:實現多項選擇的功能點擊查看代碼
public class JButtonTest02 extends JFrame {
    public JButtonTest02() {
        Container container = getContentPane();

        JRadioButton radioButton1 = new JRadioButton("男");
        JRadioButton radioButton2 = new JRadioButton("女");
        JRadioButton radioButton3 = new JRadioButton("中性");

        //實現覆選框按鈕
        JCheckBox checkBox1 = new JCheckBox("籃球");
        JCheckBox checkBox2 = new JCheckBox("足球");
        JCheckBox checkBox3 = new JCheckBox("羽毛球");

        container.add(checkBox1,BorderLayout.NORTH);
        container.add(checkBox2,BorderLayout.CENTER);
        container.add(checkBox3,BorderLayout.SOUTH);

        setVisible(true);
        setDefaultCloseOperation(WindowConstants.EXIT_ON_CLOSE);
        setBounds(100,100,200,200);
    }

    public static void main(String[] args) {
        new JButtonTest02();
    }
}
(4)下拉框選項
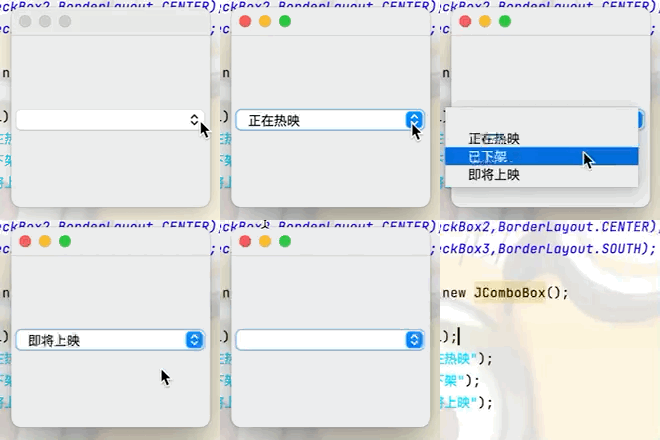
點擊查看代碼
public class JButtonTest02 extends JFrame {
    public JButtonTest02() {
        Container container = getContentPane();

        //創建一個下拉框
        JComboBox statue = new JComboBox();
        //提供下拉選項
        statue.addItem(null);
        statue.addItem("正在熱映");
        statue.addItem("已下架");
        statue.addItem("即將上映");

        container.add(statue);
        setVisible(true);
        setDefaultCloseOperation(WindowConstants.EXIT_ON_CLOSE);
        setBounds(100,100,200,200);
    }

    public static void main(String[] args) {
        new JButtonTest02();
    }
}
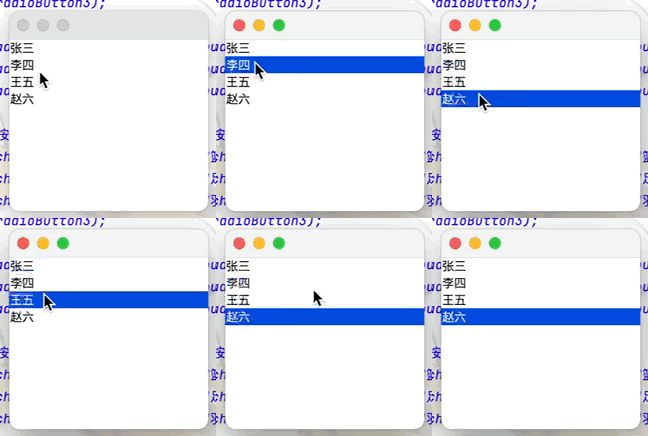
(5)列表框(如QQ好友列表)
點擊查看代碼
public class JButtonTest02 extends JFrame {
    public JButtonTest02() {
        Container container = getContentPane();

        //實現列表框
        Vector vector = new Vector();
        vector.add("張三");
        vector.add("李四");
        vector.add("王五");
        vector.add("趙六");
        //將vector集合中的內容放入列表框中
        JList jList = new JList(vector);
        container.add(jList);
        setVisible(true);
        setDefaultCloseOperation(WindowConstants.EXIT_ON_CLOSE);
        setBounds(100,100,200,200);
    }

    public static void main(String[] args) {
        new JButtonTest02();
    }
}
