哈爾濱工業大學2022春軟體構造Lab1實驗經歷與實驗心得,可供後來學子借鑒 ...
目錄
1、安裝編寫java程式的IDE——IntelliJ IDEA
(2)Problem 3:Turtle graphics and drawSquare
(4)Problem 6:Calculating Bearings
一、實驗目標概述
本次實驗通過求解三個問題,訓練基本 Java 編程技能,能夠利用 Java OO 開發基本的功能模塊,能夠閱讀理解已有代碼框架並根據功能需求補全代碼,能夠為所開發的代碼編寫基本的測試程式並完成測試,初步保證所開發代碼的正確性。另一方面,利用 Git 作為代碼配置管理的工具,學會 Git 的基本使用方法。
- 基本的 Java OO 編程
- 基於 Eclipse IDE 進行 Java 編程
- 基於 JUnit 的測試
- 基於 Git 的代碼配置管理
二、實驗環境配置
1、安裝編寫java程式的IDE——IntelliJ IDEA
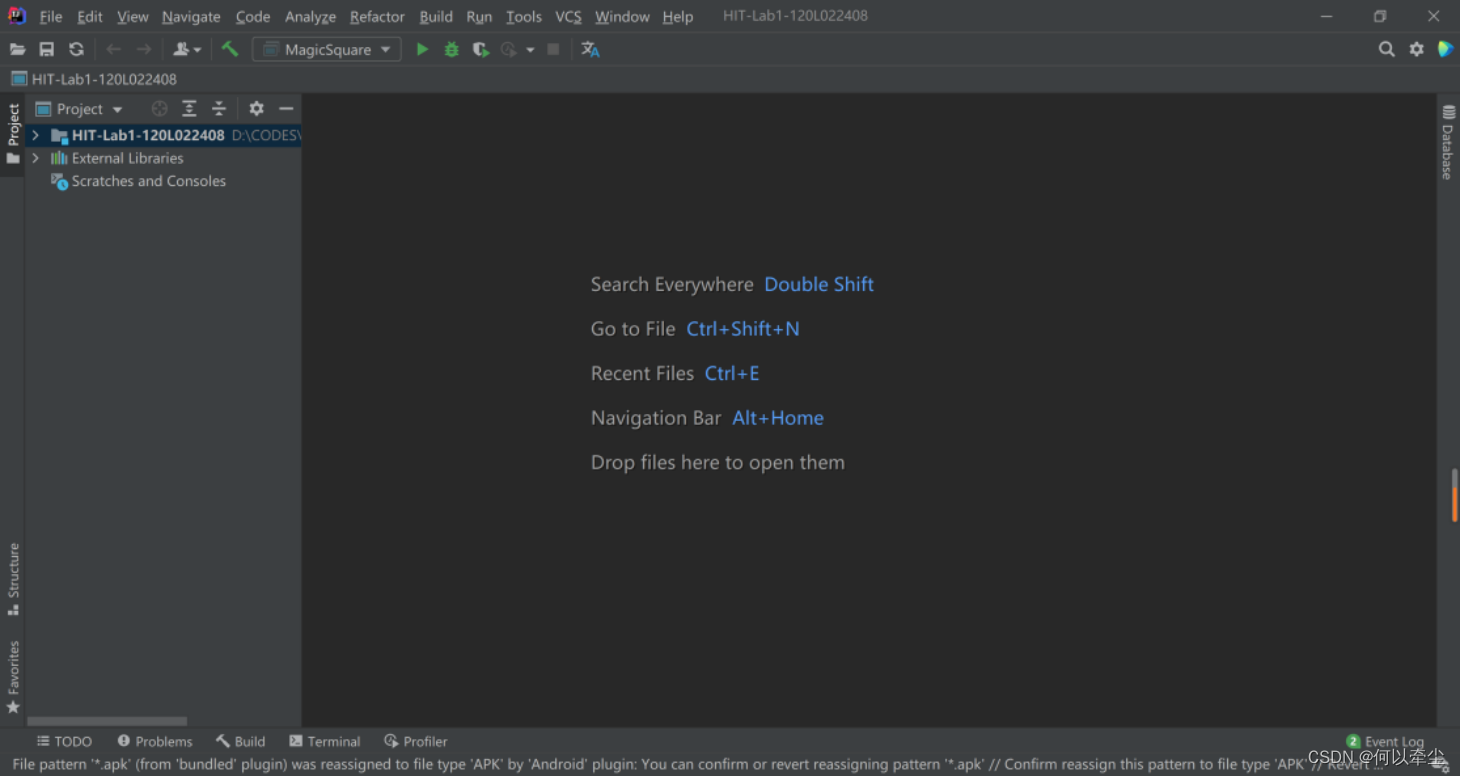
由於2021夏季小學期選擇了田英鑫老師的JavaEE課程,所以已經下載並配置好了編寫Java程式的IDE:IntelliJ IDEA
2、安裝Git
打開Git官網準備安裝時發現,自己原來在大一時便已安裝並配置好了Git工具,因此不需要再重覆安裝配置。
已於2021年11月14日安裝完成Git。
3、安裝Junit
打開IDEA的擴展市場:

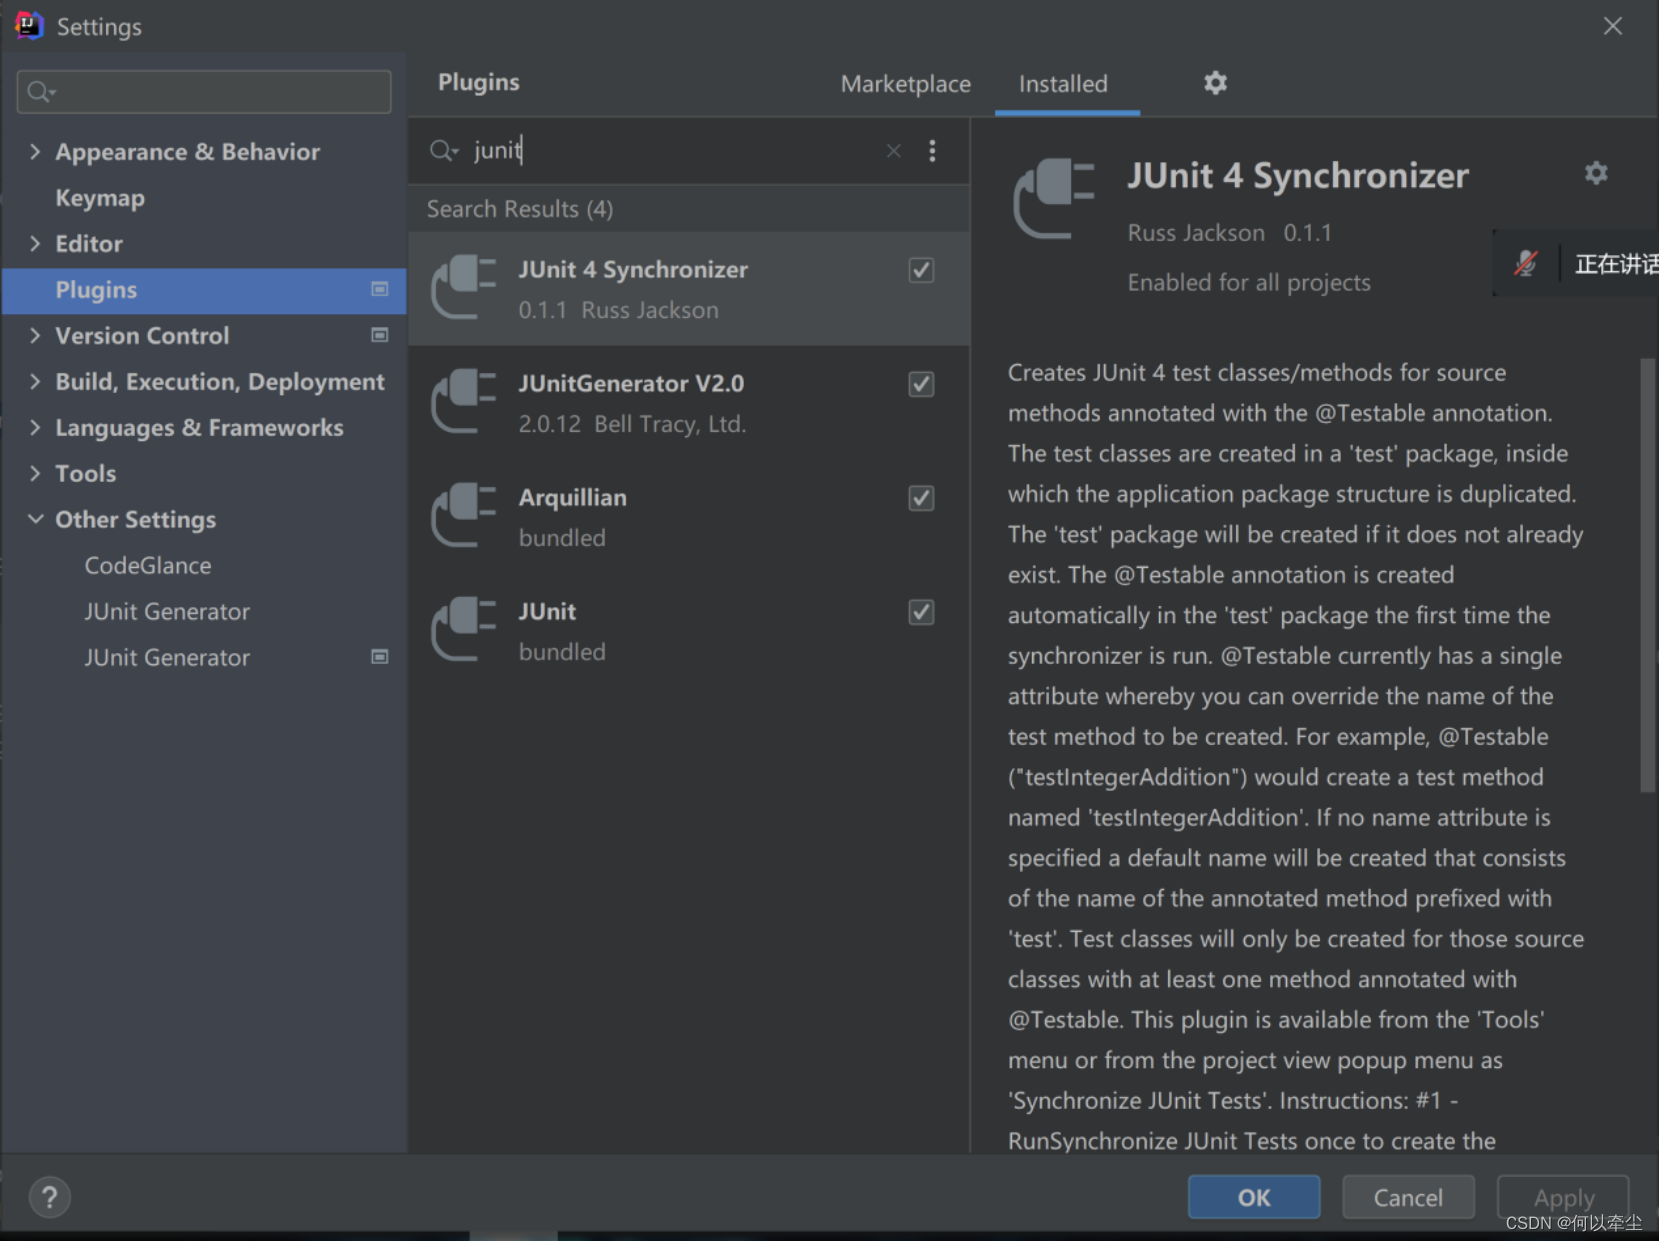
在糾結下載安裝哪一款插件時咨詢了同學,經同學告知,下載瞭如下插件並安裝在IDEA上:
4、GitHub Lab1倉庫的URL地址
https://github.com/ComputerScienceHIT/HIT-Lab1-120L022408
三、實驗過程
1、Magic Squares
本題與Magic Square有關,Magic Square,即幻方,查閱百科後瞭解到,幻方是一種將數字安排在正方形格子中,使每行、列和對角線上的數字和都相等的方法。題目1要求編寫一個Java程式(MagicSquare)先來檢查給定txt文檔中所記錄點五個矩陣的行/列/對角線值,然後分別判斷它們是否是一個幻方。題目2要求對給出的產生幻方的代碼(generateMagicSquare)進行改進擴展後加入MagicSquare類中進行測試。
(1)isLegalMagicSquare()
a、函數分析
本題要求編寫一個函數isLegalMagicSquare()判斷一個txt文件中保存的矩陣是否為符合幻方要求的矩陣。輸入參數為txt文件的文件路徑,函數返回一個boolean值,若符合要求返回true,否則返回false。
判斷幻方的合法性:
根據幻方的定義,首先需要判斷幻方必須是行數與列數相等的矩陣,假設幻方為N * N的矩陣,那麼幻方的元素值都是自然數集上從1到N * N的一個排列,不能為負數,不能為浮點數,兩兩元素值也不能相同。最後確定行列和、對角線和之間是否全部相等,若是,則為幻方,函數返回true。
b、實現思路
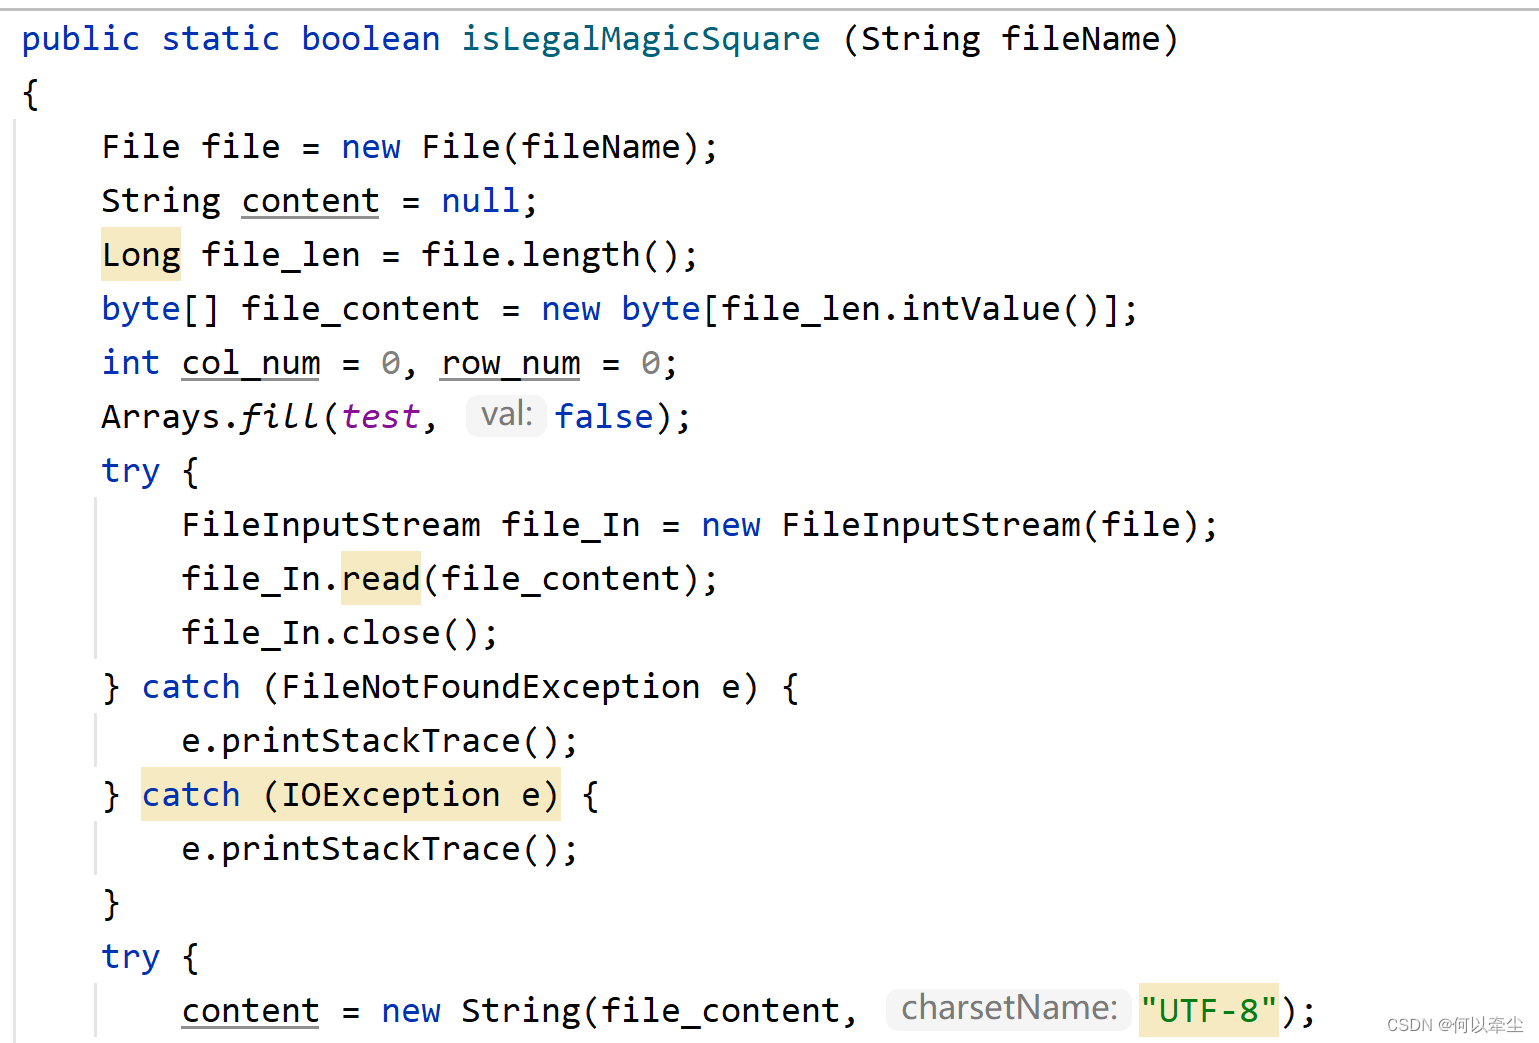
首先根據函數參數傳入的文件路徑new一個file對象,使用FileInputStream流讀取文件的內容,並保存在一個String類型的content字元串中。
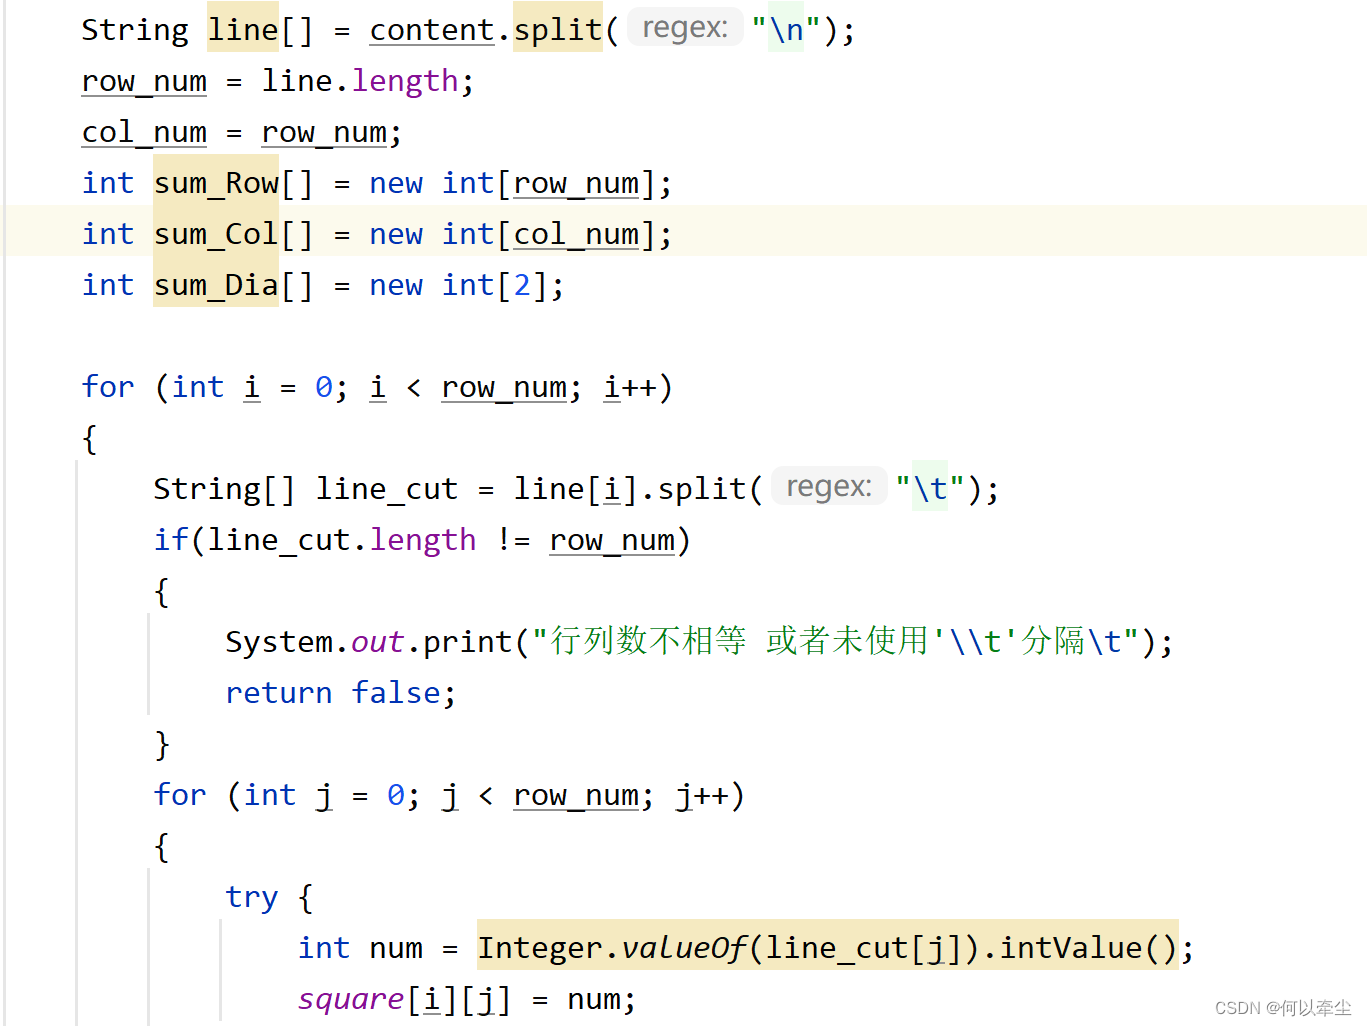
將文件內容讀取到String後開始對文件內容做處理,使用split("\n")方法檢測出文本中的換行標記,並以此分割出矩陣的每一行,並保存進一個字元串數組String line[]中,此時可調用length方法計算得出矩陣的行數row_num。再對矩陣的每一行進行處理,使用split("\t")方法檢測出每一行元素之間的分隔標記,並以此將其劃分為一個個數字字元串,保存在String[] line_cut中,並使用Integer.valueOf(String ).intValue()方法,得到字元串轉換為的數字num,迴圈保存至幻方中。至此,對文件的讀入及初始數據的處理完成。
在處理文本數據的過程中已判斷了行數與列數是否相等,故之後只需判斷一個行列數相等的矩陣元素是否滿足要求。由於在之前的try-catch語句中已將非整形數據的報錯拋出,故不需要考慮int型以外的其他數據格式。設置一個boolean[]數組test來判斷元素的值是否已經出現過,初始化將其全設置為false,每讀入一個元素,若不小於0且未出現過,則將其值所對應的boolean[]數組元素的值置為true。
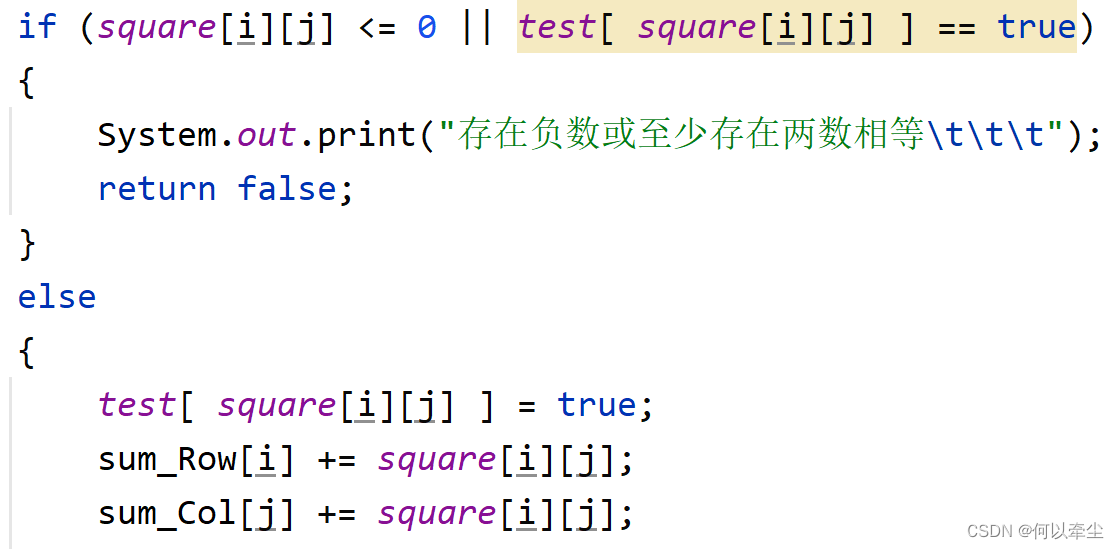
最後判斷行列和、對角線和是否全部相等,若是則返回true,否則返回false。
(2)generateMagicSquare()
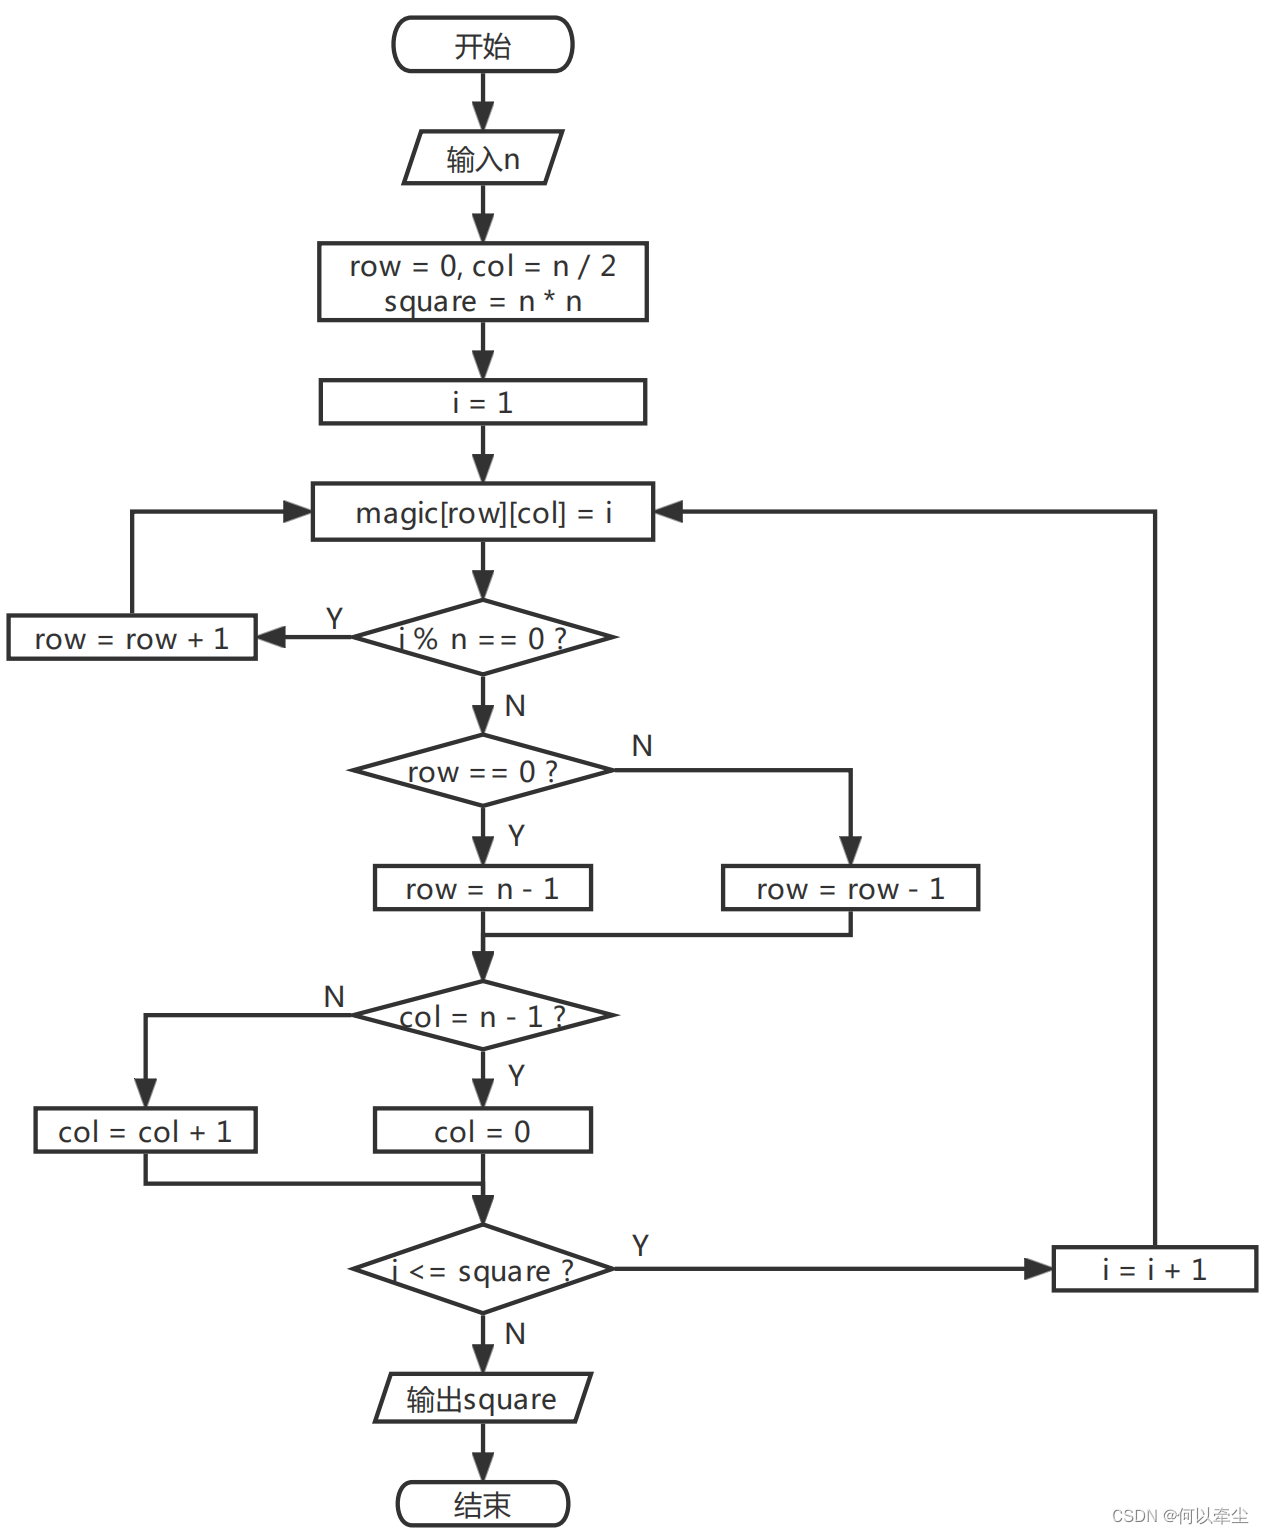
a、該函數的程式流程圖
b、實現思路
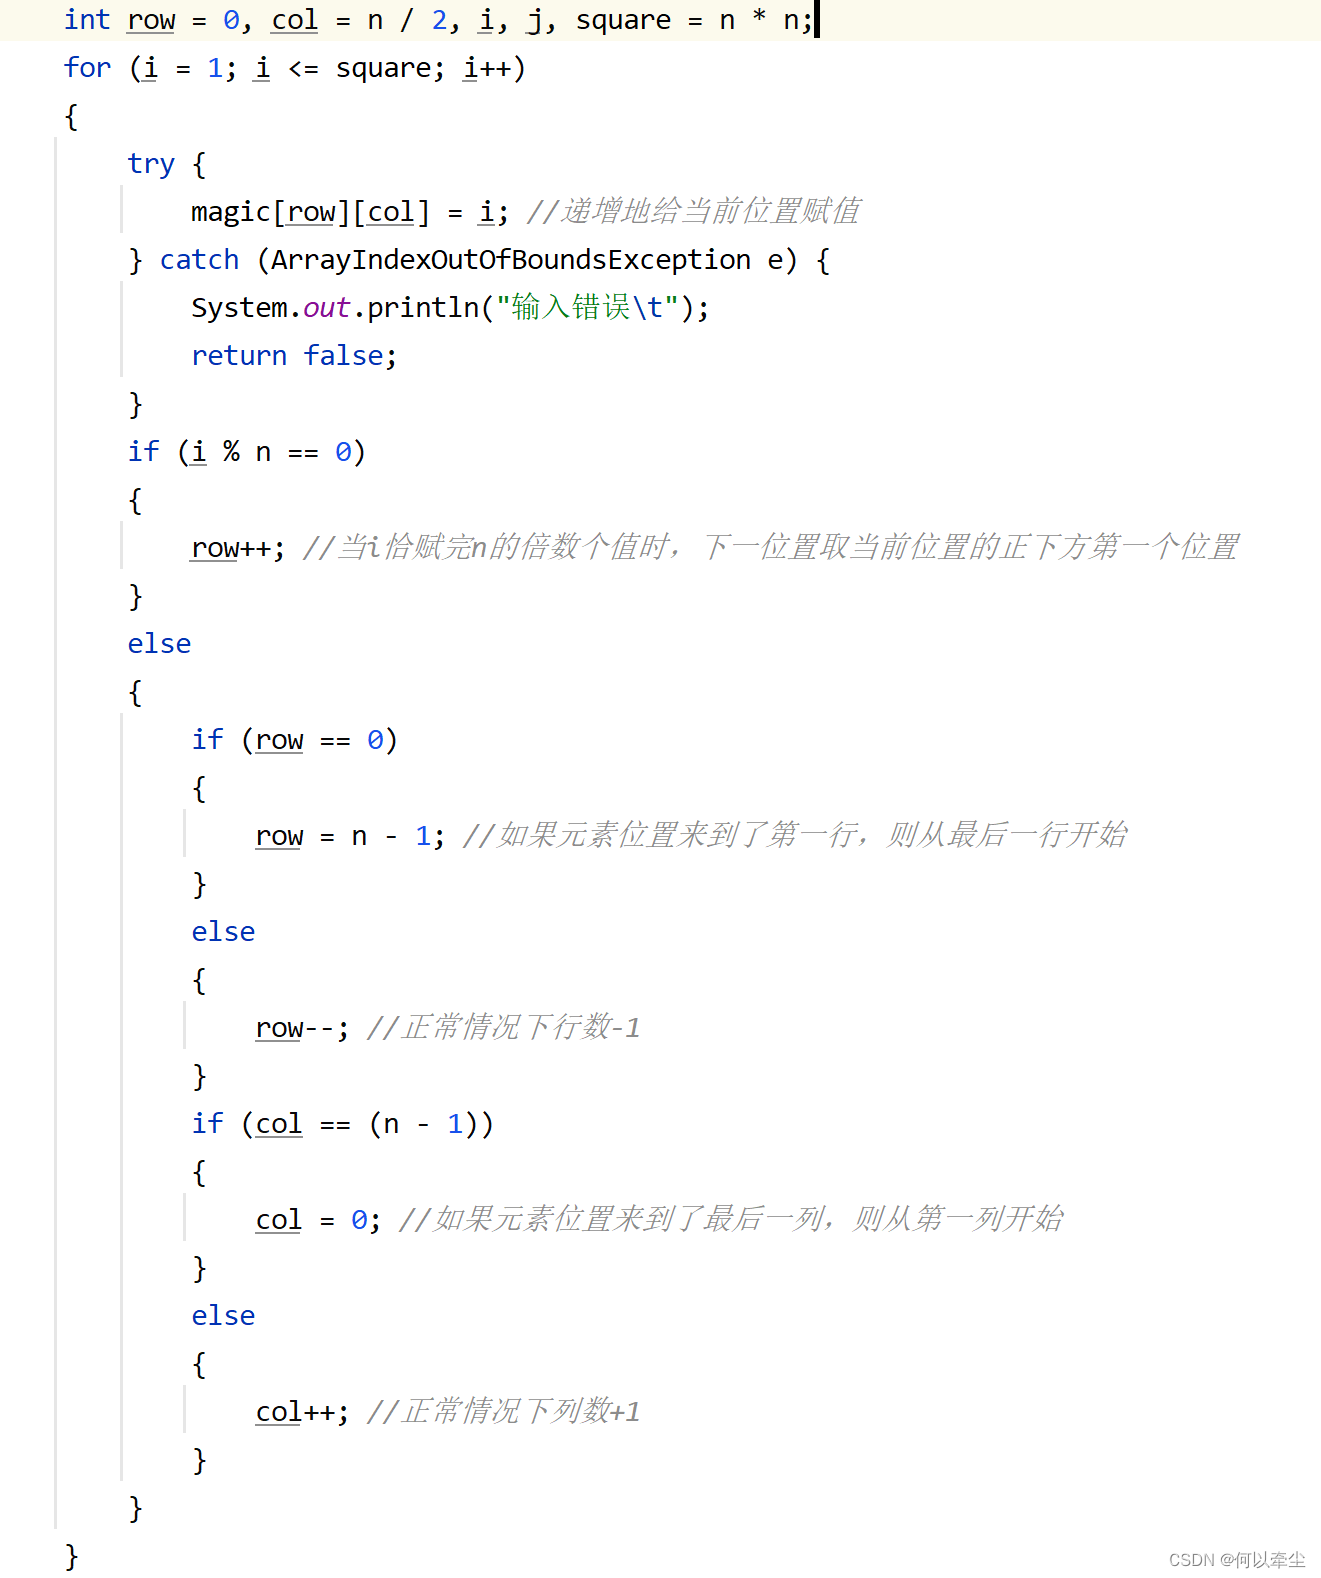
分析該函數的內容,給定一個參數n作為幻方的行列數,將初始位置置為(0, n / 2), 之後依次對1 ~ n * n賦值給一個位置,1賦值給初始位置,然後計算下一個位置為當前位置的右上位置。對於邊界情況:若當前行是第一行,則下一行取最後一行;若當前列是最右邊的那列,則下一列取最左邊的那列。當i能被n整除時,則將當前位置正下方的第一個位置賦值為i + 1,然後繼續迴圈賦值。當迴圈n的平方次後,即對整個矩陣賦完了值,且滿足每行每列以及兩條對角線之和均相同的約束。
c、對該函數進行擴展
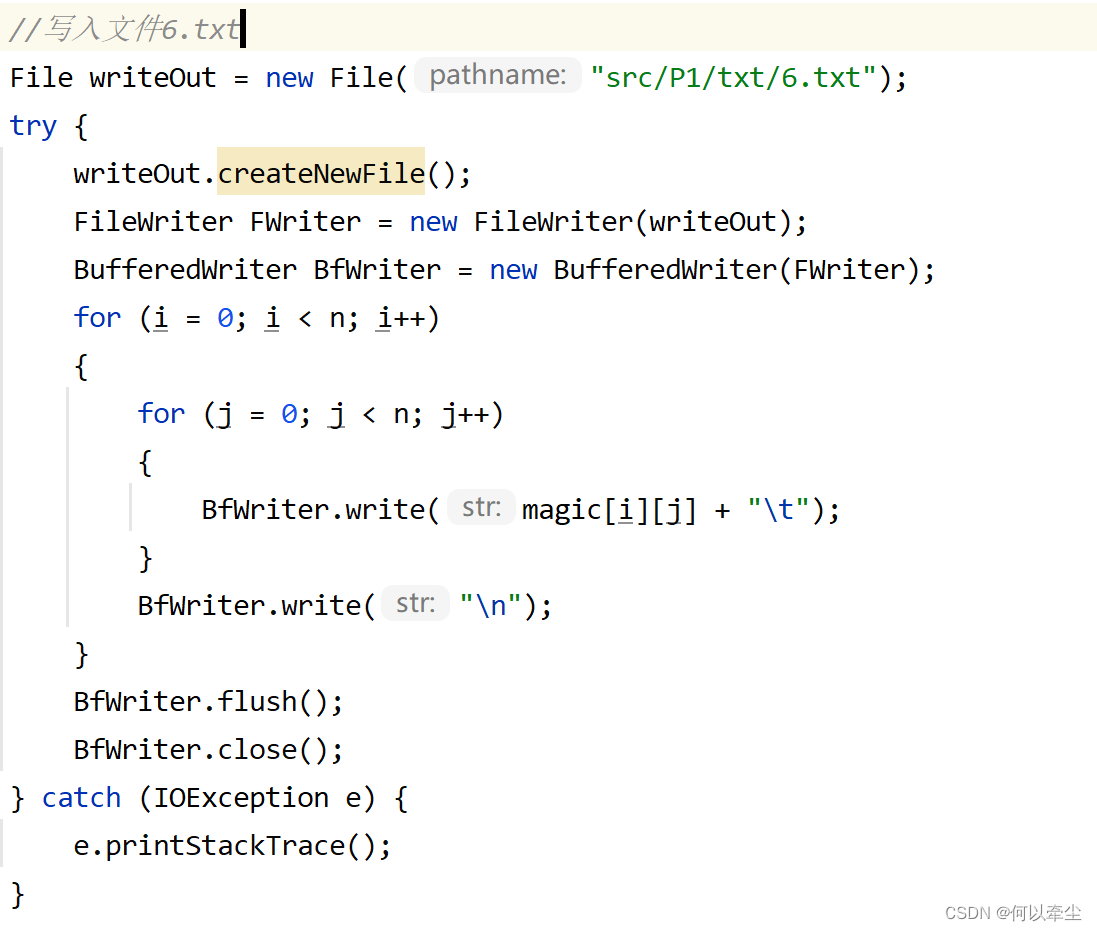
I、將產生的magic square寫入文件夾\src\P1\txt\6.txt中
使用FileWriter和BufferedWriter類寫入magic數組所存儲的矩陣中保存的內容。代碼如下所示:
II、當輸入的參數n不合法時,輸出提示和false退出
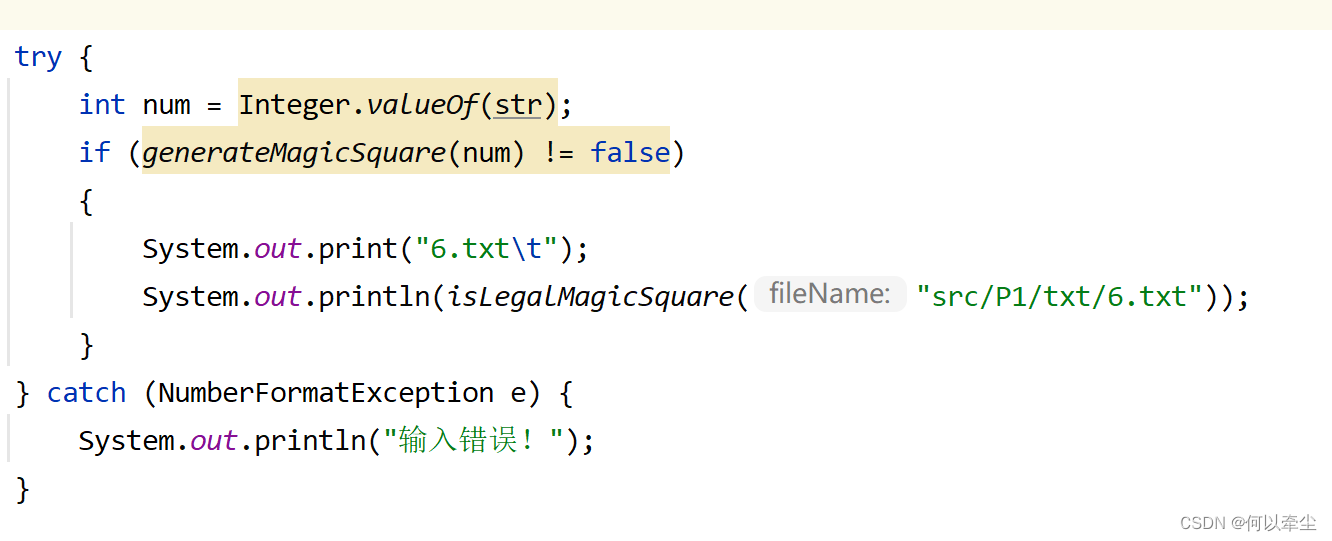
在main()函數中給generateMagicSquare()傳遞參數前進行判斷,用String str保存從鍵盤接收到的字元串的值,並用Integer.valueOf(str)將其轉換為數值保存到num中,這一步中若catch到NumberFormatException錯誤,則說明參數num不為整形,列印錯誤信息並提示重新輸入。
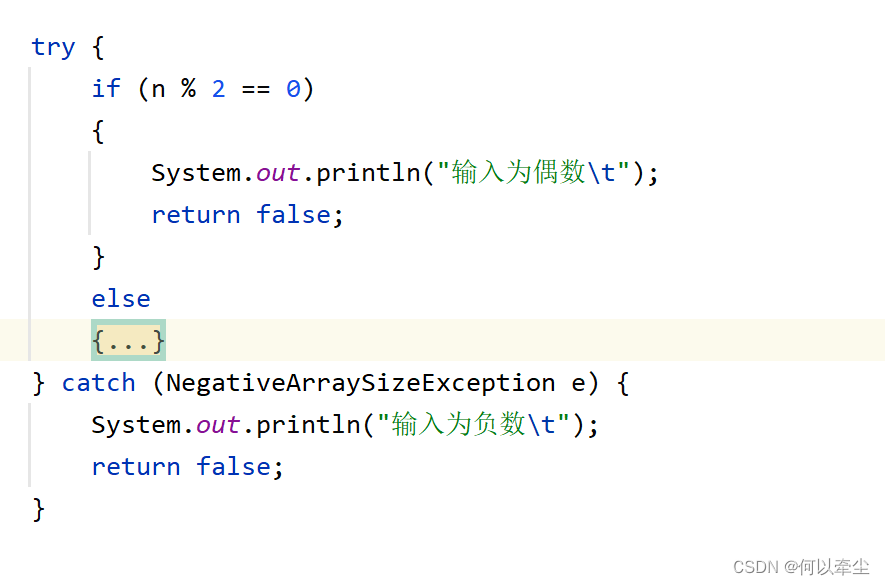
再在generateMagicSquare()函數中對參數n做判斷:若n為偶數,則列印錯誤信息並返回false;若n為負數,則catch到NegativeArraySizeException錯誤,同樣列印錯誤信息並返回false。
(3)源代碼
package P1;

import java.io.*;
import java.util.Arrays;
import java.util.Scanner;

public class MagicSquare
{
    static final int N = 200;
    public static int[][] square = new int[N][N];
    public static boolean[] test = new boolean[N * N + 1];

    public static boolean isLegalMagicSquare (String fileName)
    {
        File file = new File(fileName);
        String content = null;
        Long file_len = file.length();
        byte[] file_content = new byte[file_len.intValue()];
        int col_num = 0, row_num = 0;
        Arrays.fill(test, false);
        try {
            FileInputStream file_In = new FileInputStream(file);
            file_In.read(file_content);
            file_In.close();
        } catch (FileNotFoundException e) {
            e.printStackTrace();
        } catch (IOException e) {
            e.printStackTrace();
        }
        try {
            content = new String(file_content, "UTF-8");
        } catch (UnsupportedEncodingException e) {
            System.err.println("We don't support UTF-8\t");
            e.printStackTrace();
        }

        String line[] = content.split("\n");
        row_num = line.length;
        col_num = row_num;
        int sum_Row[] = new int[row_num];
        int sum_Col[] = new int[col_num];
        int sum_Dia[] = new int[2];

        for (int i = 0; i < row_num; i++)
        {
            String[] line_cut = line[i].split("\t");
            if(line_cut.length != row_num)
            {
                System.out.print("行列數不相等 或者未使用'\\t'分隔\t");
                return false;
            }
            for (int j = 0; j < row_num; j++)
            {
                try {
                    int num = Integer.valueOf(line_cut[j]).intValue();
                    square[i][j] = num;
                } catch (NumberFormatException e) {
                    System.out.print("存在非法輸入\t");
                    return false;
                }
                if (square[i][j] <= 0 || test[ square[i][j] ] == true)
                {
                    System.out.print("存在負數或至少存在兩數相等\t\t");
                    return false;
                }
                else
                {
                    test[ square[i][j] ] = true;
                    sum_Row[i] += square[i][j];
                    sum_Col[j] += square[i][j];
                    if (i == j)
                    {
                        sum_Dia[0] += square[i][j];
                    }
                    if (i + j + 1 == col_num)
                    {
                        sum_Dia[1] += square[i][j];
                    }
                }
            }
        }
        if(sum_Dia[0] != sum_Dia[1])
        {
            System.out.print("兩條對角線和不相等\t");
        }
        int Sum = sum_Dia[0];
        for(int i = 0; i < row_num; i++)
        {
            if (sum_Row[i] != Sum || sum_Col[i] !=Sum)
            {
                System.out.print("行列和與對角線和不相等\t");
                return false;
            }
        }
        return true;
    }

    public static boolean generateMagicSquare(int n)
    {
        try {
            if (n % 2 == 0)
            {
                System.out.println("輸入為偶數\t");
                return false;
            }
            else
            {
                int magic[][] = new int [n][n];
                int row = 0, col = n / 2, i, j, square = n * n;
                for (i = 1; i <= square; i++)
                {
                    try {
                        magic[row][col] = i; //遞增地給當前位置賦值
                    } catch (ArrayIndexOutOfBoundsException e) {
                        System.out.println("輸入錯誤\t");
                        return false;
                    }
                    if (i % n == 0)
                    {
                        row++; //當i恰賦完n的倍數個值時,下一位置取當前位置的正下方第一個位置
                    }
                    else
                    {
                        if (row == 0)
                        {
                            row = n - 1; //如果元素位置來到了第一行,則從最後一行開始
                        }
                        else
                        {
                            row--; //正常情況下行數-1
                        }
                        if (col == (n - 1))
                        {
                            col = 0; //如果元素位置來到了最後一列,則從第一列開始
                        }
                        else
                        {
                            col++; //正常情況下列數+1
                        }
                    }
                }
                //輸出矩陣元素
                for (i = 0; i < n; i++)
                {
                    for (j = 0; j < n; j++)
                    {
                        System.out.print(magic[i][j] + "\t");
                    }
                    System.out.println();
                }
                //寫入文件6.txt
                File writeOut = new File("src/P1/txt/6.txt");
                try {
                    writeOut.createNewFile();
                    FileWriter FWriter = new FileWriter(writeOut);
                    BufferedWriter BfWriter = new BufferedWriter(FWriter);
                    for (i = 0; i < n; i++)
                    {
                        for (j = 0; j < n; j++)
                        {
                            BfWriter.write(magic[i][j] + "\t");
                        }
                        BfWriter.write("\n");
                    }
                    BfWriter.flush();
                    BfWriter.close();
                } catch (IOException e) {
                    e.printStackTrace();
                }

                return true;
            }
        } catch (NegativeArraySizeException e) {
            System.out.println("輸入為負數\t");
            return false;
        }
    }


    public static void main(String[] args)
    {
        System.out.println("檢測以下五個txt中是否為幻方,若是則返回true,不是則列印錯誤原因並返回false:");
        for (char i = '1'; i <= '5'; i++)
        {
            System.out.print(i + ".txt\t");
            System.out.println(isLegalMagicSquare("src/P1/txt/" + i + ".txt"));
        }

        String str;
        Scanner scan = new Scanner(System.in);

        while (true)
        {
            System.out.println("請輸入奇數的幻方寬度或輸入'stop'以結束程式:");
            str = scan.nextLine();
            if(str.equals("stop"))
            {
                System.out.println("程式結束");
                return;
            }
            else
            {
                try {
                    int num = Integer.valueOf(str);
                    if (generateMagicSquare(num) != false)
                    {
                        System.out.print("6.txt\t");
                        System.out.println(isLegalMagicSquare("src/P1/txt/6.txt"));
                    }
                } catch (NumberFormatException e) {
                    System.out.println("輸入錯誤!");
                }
            }
        }
    }
}
2、Turtle Graphics
熟悉Turtle Graphics的各種函數介面,自己編寫部分函數,並使用Math庫的一些函數實現一些計算以畫出所需圖形。
(1)Problem 1:Clone and import
a、獲取任務代碼
從報告里的鏈接上獲取了源文件,在IDEA里建立了相關文件夾後,把下載的源文件放到對應文件夾里,IDEA刷新後修改包名並使用。
b、使用Git管理本地開發
先用Git創建本地倉庫,然後和遠程倉庫連接,git pull拉取代碼。
實現一個功能後用git add .上傳項目文件,然後commit、push提交到遠程倉庫上。
(2)Problem 3:Turtle graphics and drawSquare
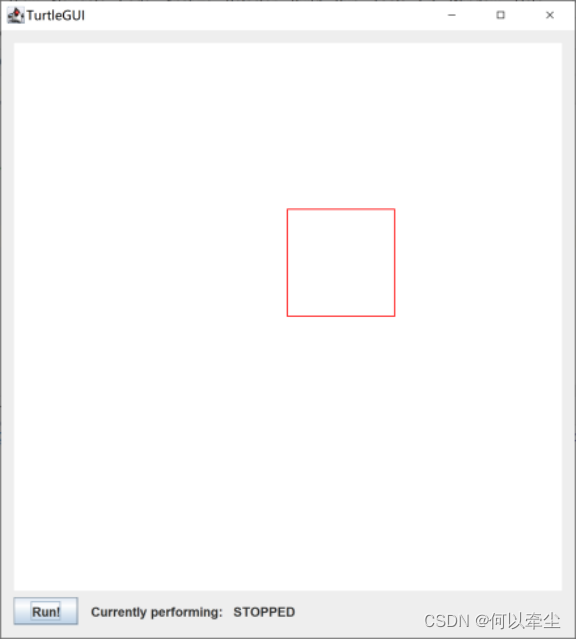
題目要求使用Turtle類中給出的forward()方法和turn()方法,參數是海龜對象turtle和邊長sideLength,最後實現出能夠畫出邊長為指定數值的正方形。
實現思路:
迴圈執行4次,每次forward前行sideLength的距離,然後畫筆方向旋轉90度,繼續下一次執行。即可得到所要求的正方形。實現結果如下(sideLength = 100):
函數代碼如下:
public static void drawSquare(Turtle turtle, int sideLength)
    {
        turtle.color(PenColor.RED);
        for (int i = 0; i < 4; i++)
        {
            turtle.forward(sideLength);
            turtle.turn(90);
        }
    }
(3)Problem 5:Drawing polygons
題目要求實現能夠畫出正多邊形的函數drawRegularPolygon()。
首先需要實現一個輔助函數calculateRegularPolygonAngle()用於計算正多邊形的每個內角度數。由數學知識可知,該函數實現如下:
    public static double calculateRegularPolygonAngle(int sides)
    {
        return (sides - 2) * (180.0 / sides);
    }
通過TurtleSoupTest中的Junit測試後再調用calculateRegularPolygonAngle()得出所求正多邊形的內角度數,類比畫正方形的函數,由數學公式可知,代碼實現如下:
    public static void drawRegularPolygon(Turtle turtle, int sides, int sideLength)
    {
        double angle = 180 - calculateRegularPolygonAngle(sides);
        for (int i = 0; i < sides; i++)
        {
            turtle.forward(sideLength);
            turtle.turn(angle);
        }
    }
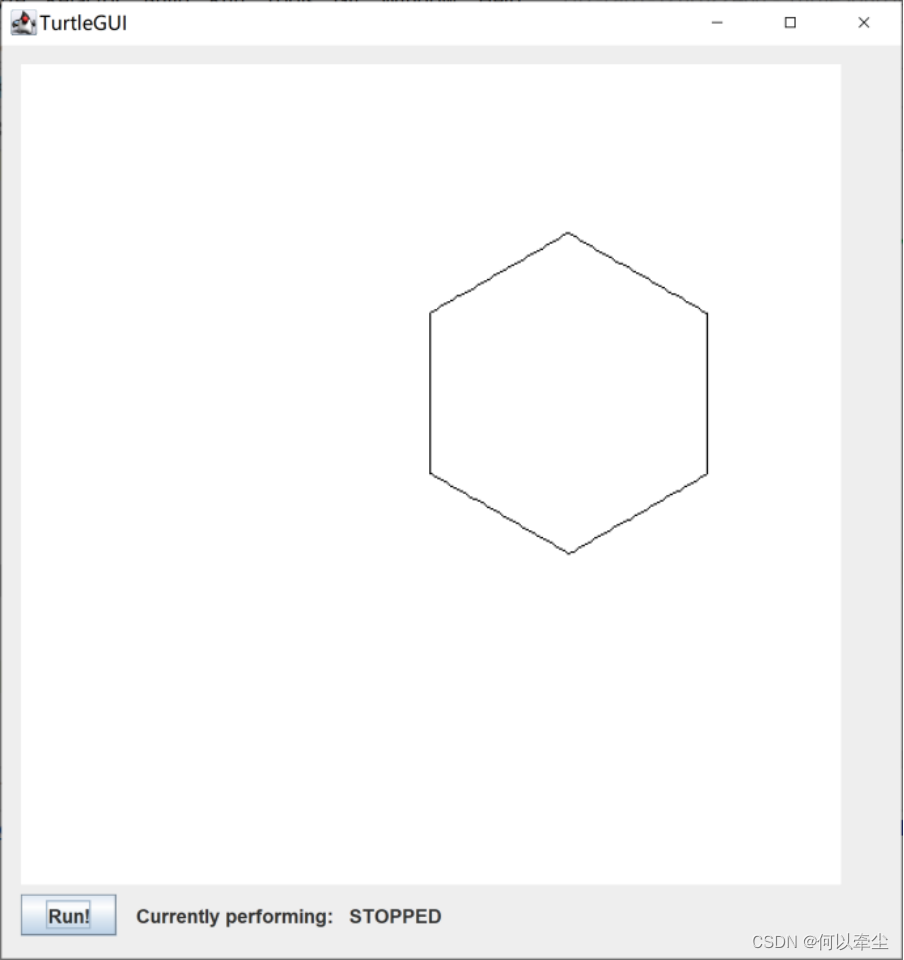
運行效果如下(邊長為100的正六邊形):
(4)Problem 6:Calculating Bearings
a、實現 calculateBearingToPoint()
題目要求在已知當前起點和當前朝向角度已知的情況下,計算從起點轉動到終點的角度。因此首先使用Math.atan2()函數計算兩點之間的邊在坐標系中的角度,再減去當前朝向的角度,註意到海龜旋轉方向與坐標軸旋轉角度方向相反,因此需要取相反數。同樣,海龜的基準線是向上,坐標的基準線是向右,因此還需減去90度,最後調整結果在0~360度之間。
代碼實現如下:
    public static double calculateBearingToPoint(double currentBearing, int currentX, int currentY, int targetX, int targetY)
    {
        double degree = Math.toDegrees(Math.atan2(targetY - currentY, targetX - currentX));
        degree = (90 - degree) - currentBearing;
        if (degree < 0)
        {
            degree += 360;
        }
        return degree;
    }
運行並通過了Junit測試。
b、實現 calculateBearings()
題目要求已知若幹個點,現在想計算出從第一個點開始到第二個點,第二個點到第三個點……以此類推每次轉向的角度。
不妨記有n個點,一開始將“起點”選為第一個點,迴圈n-1次,每次將i+1個點設置為“終點”,通過calculateBearingToPoint()函數計算旋轉角度並保存到List中,再將當前“終點”當做下一次迴圈的“起點”,繼續迴圈……最後返回List。
代碼實現如下:
    public static List<Double> calculateBearings(List<Integer> xCoords, List<Integer> yCoords)
    {
        List<Double> result = new ArrayList<Double>();
        result.add(calculateBearingToPoint(0.0, xCoords.get(0), yCoords.get(0), xCoords.get(1), yCoords.get(1)));
        if (xCoords.size() > 2)
        {
            for (int i = 2; i < xCoords.size(); i++)
            {
                result.add(calculateBearingToPoint(result.get(i - 2), xCoords.get(i - 1), yCoords.get(i - 1), xCoords.get(i), yCoords.get(i)));
            }
        }
        return result;
    }
運行並通過了Junit測試。
(5)Problem 7:Convex Hulls
根據題目提示,運用Gift wrapping algorithm演算法,每次都選擇轉向角最小且點間距離最長的點加入集合中,計算轉向角度可使用上題的calculateBearingToPoint函數。其中相同轉向角點之間的取捨,可以在迴圈中使用標記變數Dist_target記錄其與當前目標點的距離,如果之後出現了新的目標點,就用Dist_target和計算得到的當前點的距離Dist_temp來比較,取更大者為新的Dist_target。
代碼實現如下:
    public static Set<Point> convexHull(Set<Point> points)
    {
        ArrayList<Point> Points_convex = new ArrayList<Point>();
        ArrayList<Point> Points_temp = new ArrayList<Point>();
        Points_temp.addAll(points);
        Set<Point> result = new HashSet<Point>();

        int totalNum = Points_temp.size();
        if (totalNum < 4) // 點集中點小於4時,直接返回
        {
            return points;
        }
        Point Point_first = Points_temp.get(0);
        for (Point Point_now : points)
        { // 找到起始點
            if (Point_now.x() < Point_first.x())
            {
                Point_first = Point_now;
            }
            else if (Point_now.x() == Point_first.x() && Point_now.y() < Point_first.y())
            {
                Point_first = Point_now;
            }
        }
        Points_convex.add(Point_first);//初始點加入集合
        Points_temp.remove(Point_first);//從原始集合中去除初始點

        Point Point_previous = Point_first;
        int count = 0;
        do {
            if (count == 1)
            {
                Points_temp.add(Point_first);//再把原始點加入集合,作為迴圈的終止條件
            }
            Point Point_target = null;//初始點目標點為空
            double Angle_target = 360;//每次迴圈找到的最小角度,初始化為360
            double Dist_target = 0;
            for (Point Point_now : Points_temp)
            {
                double Angle_temp = calculateBearingToPoint(0, (int) Point_previous.x(), (int) Point_previous.y(), (int) Point_now.x(), (int) Point_now.y());//計算轉向角
                double Dist_temp = Math.pow(Point_previous.x() - Point_now.x(), 2) + Math.pow(Point_previous.y() - Point_now.y(), 2);//計算距離
                if (Angle_temp < Angle_target) //如果轉向角比當前找到的最小角度要小,設置新的Angle_target和Dist_target
                {
                    Angle_target = Angle_temp;
                    Point_target = Point_now;
                    Dist_target = Dist_temp;
                }
                else if (Angle_temp == Angle_target && Dist_temp > Dist_target) //取遠端點
                {
                    Dist_target = Dist_temp;
                    Point_target = Point_now;
                }
            }
            Points_convex.add(Point_target);
            Points_temp.remove(Point_target);
            Point_previous = Point_target;
            count++;
        } while (Points_convex.get(count) != Point_first);
        result.addAll(Points_convex);
        return result;
    }
運行並通過了Junit測試。
(6)Problem 8:Personal Art
思路:在畫正多邊形的基礎上,步長越來越長,並且角度比畫正多邊形需要的角度略多一點,每次拐彎變換一次顏色。
其中NumColor是顏色數量,Step是每次變化的步長,Change控制螺旋的密度,其值越大拐彎幅度越大。
效果如下:
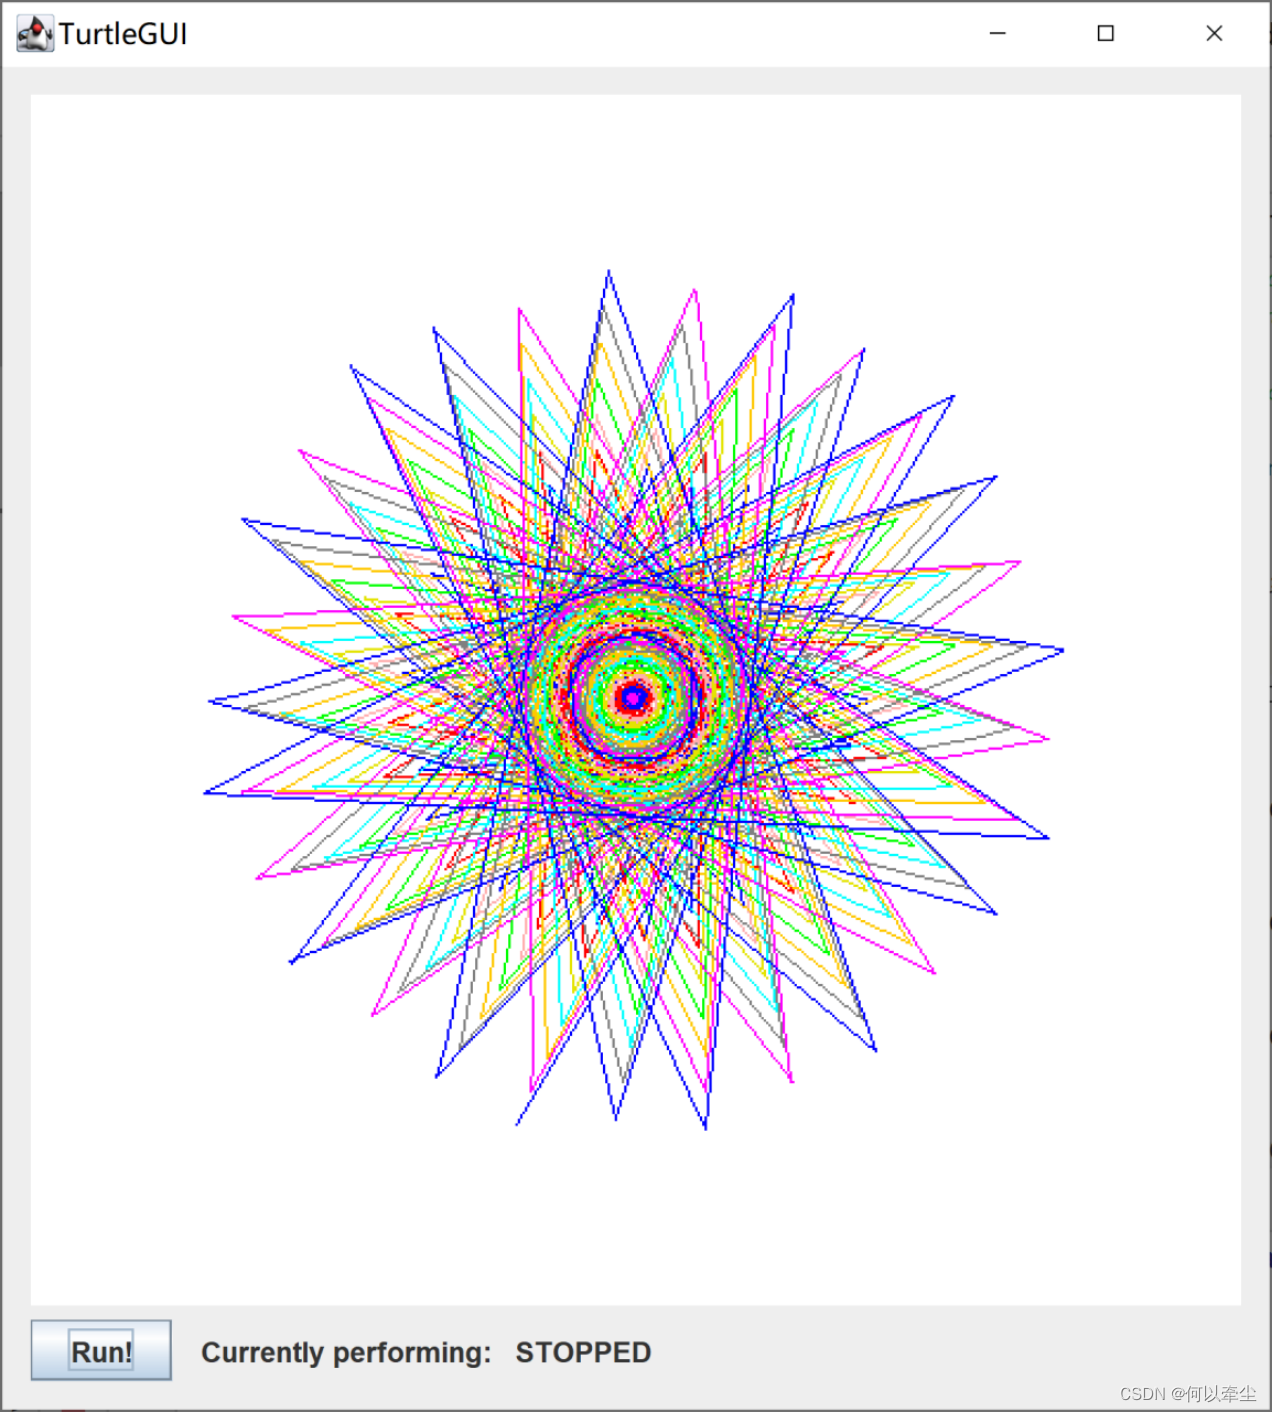
代碼實現如下(其中Switch語句里設置畫筆的顏色):
public static void drawPersonalArt(Turtle turtle)
    {
        int NumColor = 9, Step = 1, Change = 109, Size = 360;
        for (int i = 0; i < Size; i++)
        {
            int temp = i / 18;
            switch (temp % NumColor)
            {
                case 0:
                    turtle.color(PenColor.MAGENTA);
                    break;
                case 1:
                    turtle.color(PenColor.BLUE);
                    break;
                case 2:
                    turtle.color(PenColor.RED);
                    break;
                case 3:
                    turtle.color(PenColor.PINK);
                    break;
                case 4:
                    turtle.color(PenColor.YELLOW);
                    break;
                case 5:
                    turtle.color(PenColor.GREEN);
                    break;
                case 6:
                    turtle.color(PenColor.CYAN);
                    break;
                case 7:
                    turtle.color(PenColor.ORANGE);
                    break;
                case 8:
                    turtle.color(PenColor.GRAY);
                    break;
            }
            turtle.forward(Step * i);
            turtle.turn(360 / NumColor + Change);
        }
    }
(7)Submitting
在CSDN的博客(https://blog.csdn.net/qq_28849009/article/details/104486824)里初步學習了Git的使用。
①到要上傳的文件夾裡面
cd /d/CODES/GitHub/SoftwareConstruction/HIT-Lab1-120L022408
②初始化本地git倉庫
git init
③添加倉庫url
git remote add origin https://github.com/ComputerScienceHIT/HIT-Lab1-120L022408
④認證身份
git config --global user.name "XXX"
git config --global user.email "[email protected]"
⑤選擇所要上傳的文件
git add .
⑥添加修改日誌
git commit -m "XXX"
⑦上傳文件
git push -u origin master
3、Social Network
題目要求設計實現一張社交關係網路圖,並編寫一個計算人機關係“距離”的函數。網路圖基於兩個類,分別是FriendshipGraph類和Person類。
(1)設計/實現FriendshipGraph類
每個成員的朋友放在List中,用Graph存取圖的映射關係。
public Map<Person,ArrayList<Person>> Graph = new HashMap<Person, ArrayList<Person>>();a、addVertex(Person People)
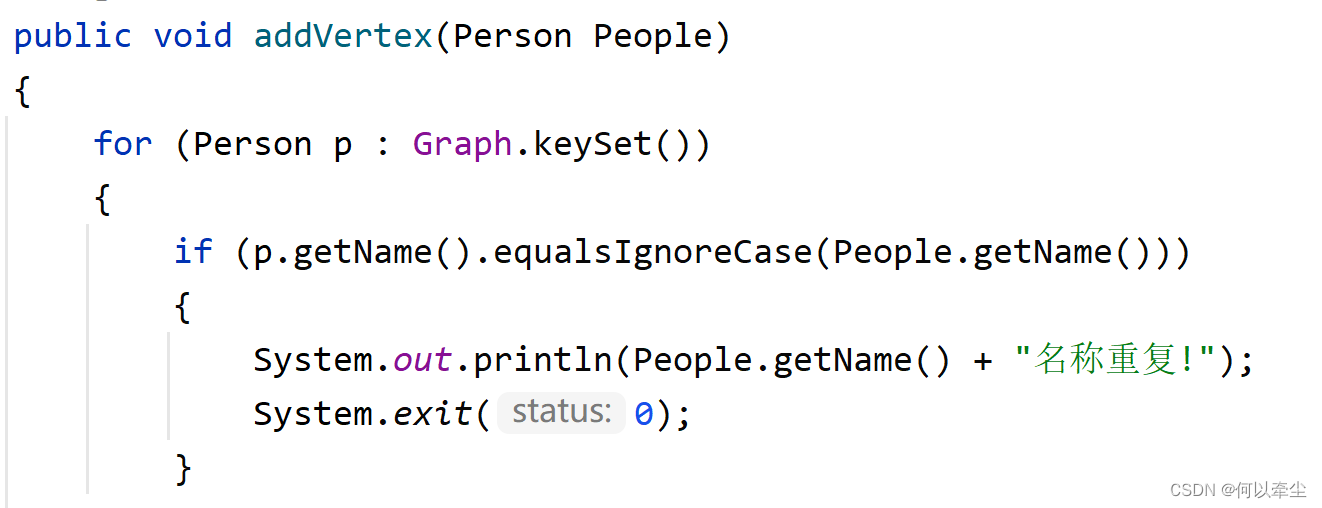
用來向people列表加入新的成員,註意需要在加入之前先在圖中檢測是否有重名的成員,有則輸出錯誤提示並退出。
    public void addVertex(Person People)
    {
        for (Person p : Graph.keySet())
        {
            if (p.getName().equalsIgnoreCase(People.getName()))
            {
                System.out.println(People.getName() + "名稱重覆!");
                System.exit(0);
            }
        }
        ArrayList<Person> newArray = new ArrayList<Person>();
        this.Graph.put(People, newArray);
    }
b、addEdge(Person People1, Person People2)
函數使用Graph.get(People1).add(People2),在每個人的朋友列表中添加新的朋友。同樣,在添加朋友之前先檢查被添加朋友的成員在圖中是否存在,若不存在則報錯並退出。
    public void addEdge(Person People1, Person People2)
    {
        if (Graph.containsKey(People1))
        {
            Graph.get(People1).add(People2);
        }
        else
        {
            System.out.println(People1.getName() + "查無此人!");
            System.exit(0);
        }
    }
c、getDistance(Person People1, Person People2)
該函數首先聲明一個ArrayList<Personr> visited_Person數據結構,來保存已訪問過的成員對象。使用鄰接表廣度搜索的方法,藉助隊列,先將起點入隊,然後執行迴圈,直到隊列為空前:彈出隊列頭元素,計算當前距離,把彈出點的所有“朋友”入隊,並加入visited_Person中,設置距離為先前計算的距離+1。直到找到目標點,返回當前距離。若直到隊列為空仍未找到目標點,返回 -1。
public int getDistance(Person People1, Person People2)
    {
        Person Temp = People1, Target = People1;
        int i = 0 , distance = 0;
        Queue<Person> queue_Person = new LinkedList<Person>();
        ArrayList<Person> visited_Person = new ArrayList<Person>();
        if (People1 == People2)
        {
            return distance;
        }
        queue_Person.add(Temp);
        visited_Person.add(Temp);
        while (!queue_Person.isEmpty())
        {
            Temp = queue_Person.poll();
            distance ++;
            while (i < Graph.get(Temp).size())
            {
                Target = Graph.get(Temp).get(i);
                if (Target == People2)
                {
                    return distance; //找到了即返回當前的距離
                }
                if (!visited_Person.contains(Target))
                {
                    queue_Person.add(Target);
                    visited_Person.add(Target);
                }
                i++;
            }
            i = 0;
        }
        return -1;   //找不到說明People1和People2不存在聯繫
    }
(2)設計實現Person類
Person類:
保存對象名字的字元串private String Name
得到當前對象名字的方法getName()
判斷當前對象名字與給定名字是否相同的方法isSameName()
package P3;

public class Person
{
    private final String Name;
    public Person (String Name)
    {
        this.Name = Name;
    }
    public String getName()
    {
        return this.Name;
    }
    public boolean isSameName(String Name)
    {
        return this.Name.equals(Name);
    }
}(3)設計/實現客戶端代碼main()
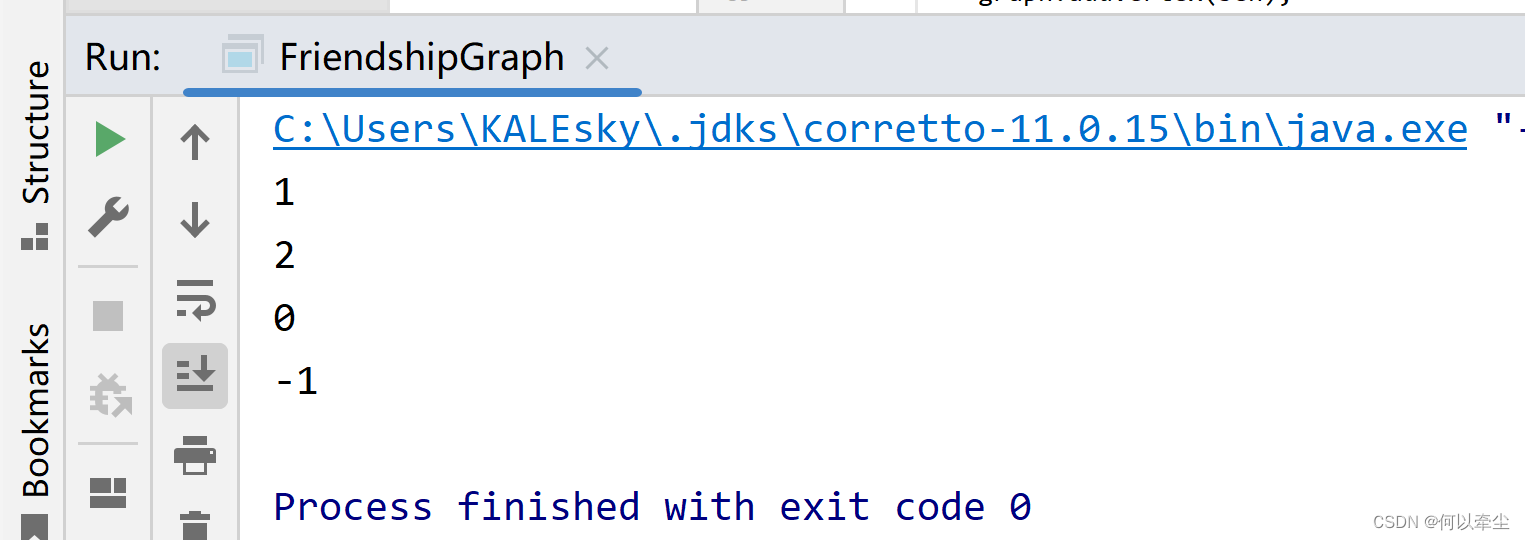
a、不修改提供的main()的代碼
測試結果如下:
b、註釋掉“graph.addEdge(rachel, ross)”
測試結果為:
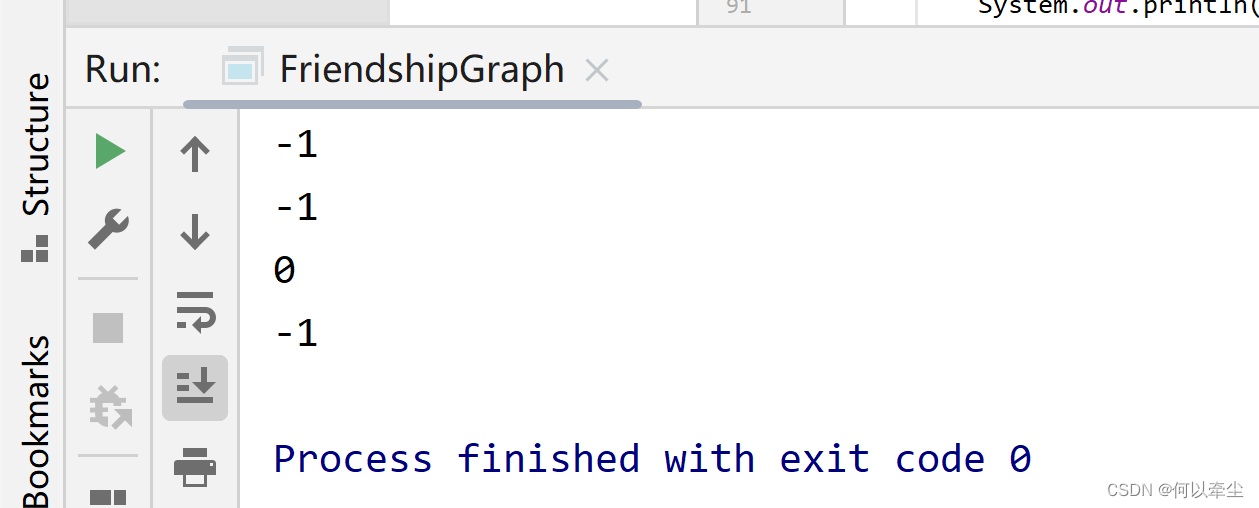
原因是:
從rachel到ross的邊不存在了,所以rachel,和ross距離-1,其他點也無法達到。只有getDistance(rachel, rachel)返回0。
c、修改main()輸入重覆姓名測試

測試結果為:
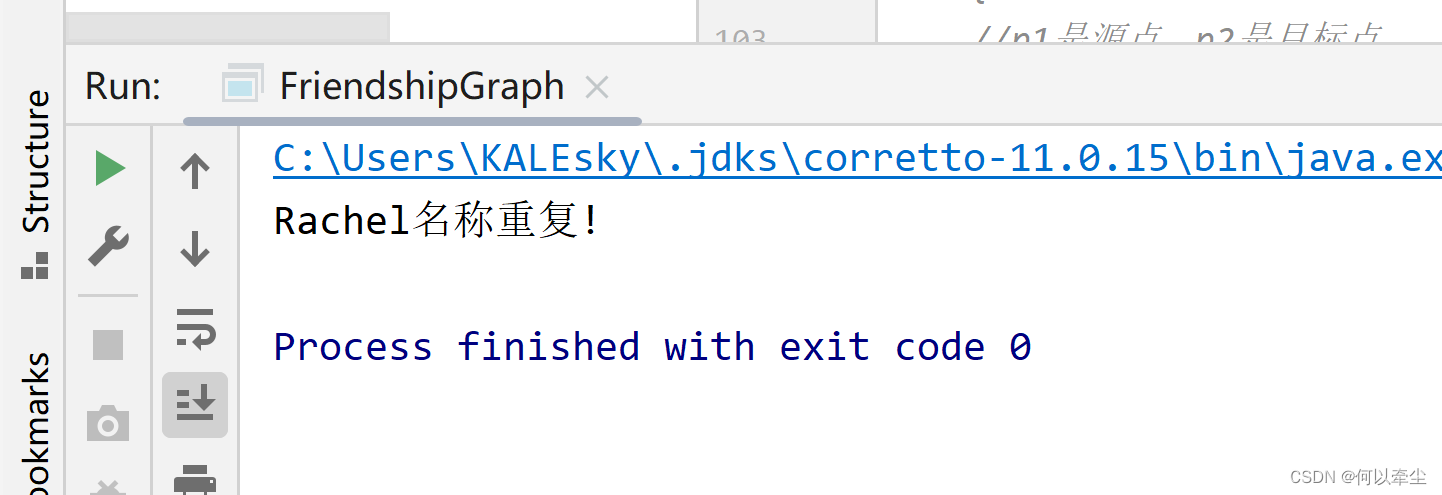
原因是在前面代碼中設置了查找到重覆名字就退出的檢查:
(4)設計/實現測試用例
根據FriendshipGraph類和Person類設計了一個test檢測各種距離和不可到達的情況。
package P3;

import static org.junit.Assert.assertEquals;
import org.junit.Test;

public class FriendshipGraphTest {

    @Test(expected = AssertionError.class)
    public void testAssertionsEnabled() {
        assert false; // make sure assertions are enabled with VM argument: -ea
    }

    @Test
    public void testBasicFriendshipGraph() throws Exception
    {
        FriendshipGraph graph = new FriendshipGraph();
        Person a = new Person("a");
        Person b = new Person("b");
        Person c = new Person("c");
        Person d = new Person("d");
        graph.addVertex(a);
        graph.addVertex(b);
        graph.addVertex(c);
        graph.addVertex(d);
        graph.addEdge(a, b);
        graph.addEdge(b, c);
        graph.addEdge(c, d);
        assertEquals("expected distance", 1, graph.getDistance(a, b));
        assertEquals("expected distance", 1, graph.getDistance(b, c));
        assertEquals("expected distance", 1, graph.getDistance(c, d));
        assertEquals("expected distance", 2, graph.getDistance(a, c));
        assertEquals("expected distance", 2, graph.getDistance(b, d));
        assertEquals("expected distance", 3, graph.getDistance(a, d));
        assertEquals("expected distance", -1, graph.getDistance(b, a));
    }

}
四、實驗收穫
1、經驗/教訓
對java語言的掌握十分不足,下一次實驗前需要加強。
認識到了趁手的工具軟體對程式員的幫助有多大,“工欲善其事必先利其器”,下一次實驗前將配置好更得心應手的工具軟體。
2、感想
(1)Java編程語言是否對你的口味?與你熟悉的其他編程語言相比,Java有何優勢和不足?
非常對我的口味,具體就是有很多數據結構直接可以使用,Java提供的庫函數功能十分強大,深受我的喜愛。
在此之前,我只熟悉C語言,相比之下,Java相較於C語言的優點是:C語言特別簡陋,許多常用的數據結構的實現都需要自己重新編寫;而Java簡單易上手。缺點是:C語言更接近程式的底層邏輯,運行效率更高,且更能鍛煉程式員的基礎能力;而Java並不能使程式員瞭解一些數據結構的具體實現。
(2)關於Eclipse或IntelliJ IDEA,它們作為IDE的優勢和不足;
在2021夏季小學期開始使用過Eclipse,小學期快結束時接觸到了IDEA,因此我對其感受頗深。Eclipse的優勢在於其免費,其餘無任何優勢。IDEA的優勢在於插件豐富,集成更智能,界面更美觀,使用十分舒心,不足在於旗艦版收費,但可使用學生郵箱認證身份來免費使用。
(3)關於Git和GitHub,是否感受到了它在版本控制方面的價值;
需要繼續學習才能熟練掌握使用。
(4)關於CMU和MIT的作業,你有何感受;
能夠向世界一流電腦專業學習是邁向世界一流的必經之路。
(5)關於本實驗的工作量、難度、deadline;
工作量大,難度不小,deadline撞車《形式語言與自動機》課程的期末考試,因此時間十分緊張,高強度學習知識並編寫代碼的同時很難統籌兼顧其他課程的複習與預習。
(6)關於初接觸“軟體構造”課程;
有趣,可學習性強,頗有難度,英語閱讀困難。


