既然選擇了遠方,便只顧風雨兼程! __HANS許 系列:零基礎搭建前後端分離項目 系列:零基礎搭建前後端分離項目 [email protected] 創建項目 Vue的Debug(調試) Vue的Http請求 提示:本篇圖片較多,所以篇幅較長。 在前面幾篇文章我們講了Vue的基本內容,語法,組件,插件等等。但例 ...
既然選擇了遠方,便只顧風雨兼程! __HANS許
系列:零基礎搭建前後端分離項目
提示:本篇圖片較多,所以篇幅較長。
在前面幾篇文章我們講了Vue的基本內容,語法,組件,插件等等。但例子卻是是以平常樣式那樣引用JS來創建,那接下來我們就是Node的環境來創建項目。
[email protected] 創建項目
cli(command-line interface)命令行界面,它通常不支持滑鼠,用戶通過鍵盤輸入指令,電腦接收到指令後,予以執行。
我們先創建一個文件夾"Vue",然後在"Vue"裡面創建創建兩個文件夾"VueCli"和"VueUi",那第一個我們用命令創建,另一個我們用界面創建。
-
安裝
執行命令
npm install vue -g與npm install -g @vue/cli-service-global,Vue與Vue-cli都全局安裝。在終端執行Vue -v,就查看Vue的版本。

-
命令創建
-
執行
vue create cliproject
在項目根目錄文件夾,執行上述命令,會出現下麵的圖片,有兩個選項,第一個就是預設了,直接創建項目,我們選擇第二個,進行定製化,下移,確定。


-
接著我們上下移,按空格鍵,選擇,按確定鍵
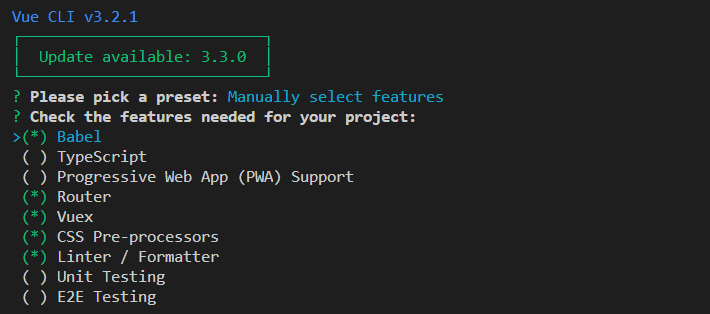
enter description here- 然後接下來就一頓選擇,按確定則是預設

enter description here
enter description here
enter description here
enter description here
enter description here
enter description here
enter description here- 最後我們創建了項目
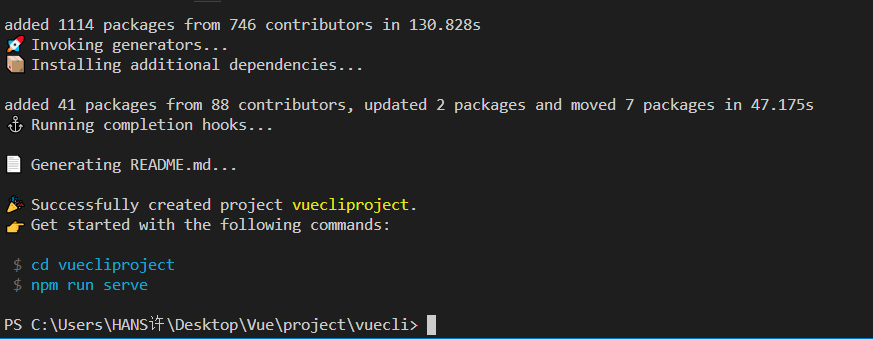
enter description here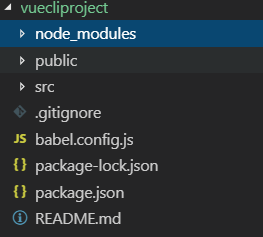
enter description here這樣我們就創建了一個Vue項目。
-
-
界面創建
-
執行
vue ui

-
接著訪問
http://localhost:8000/,可以看到如下界面

-
我們可以指定一個目錄,創建Vue項目
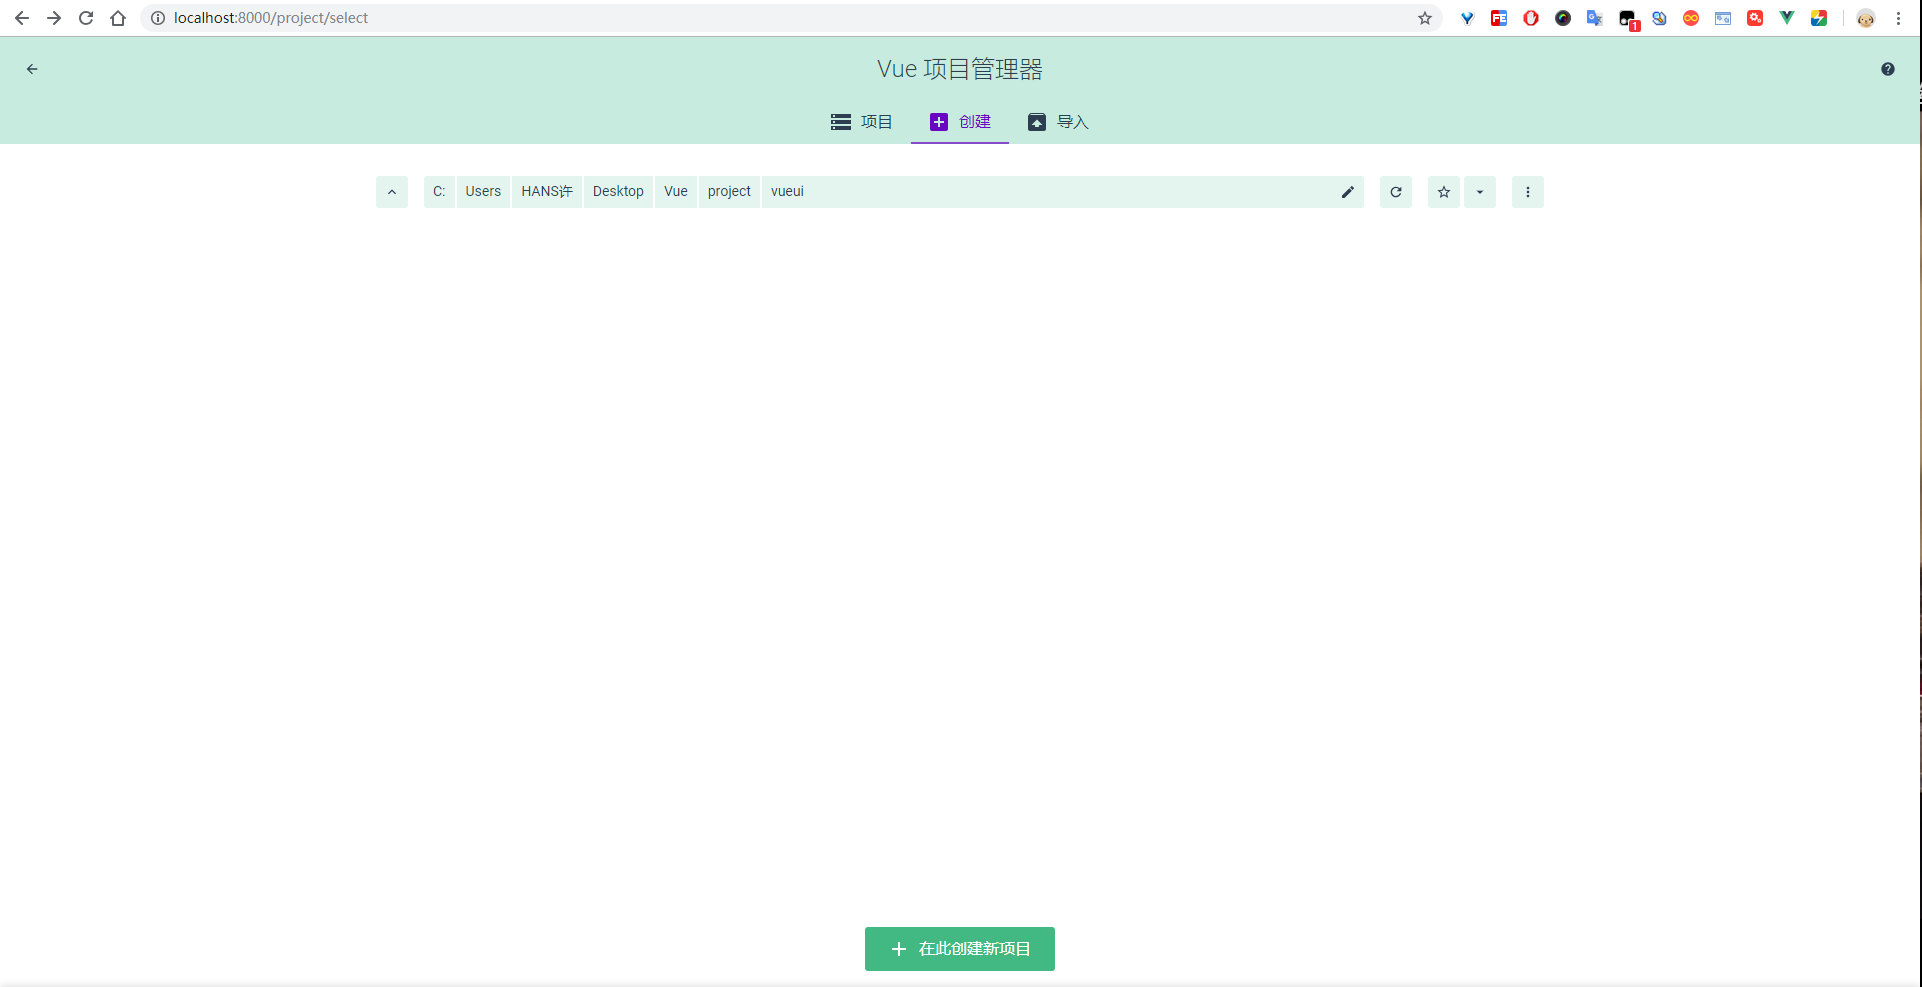
enter description here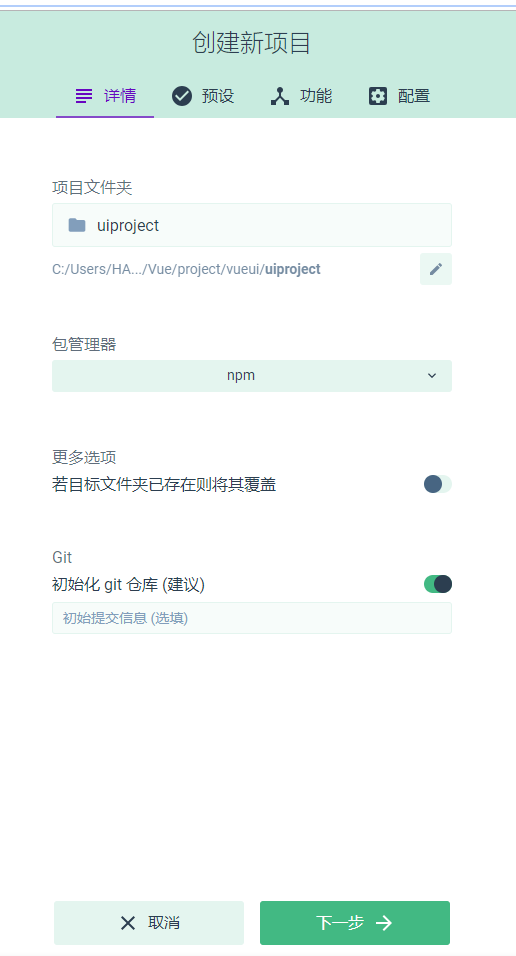
enter description here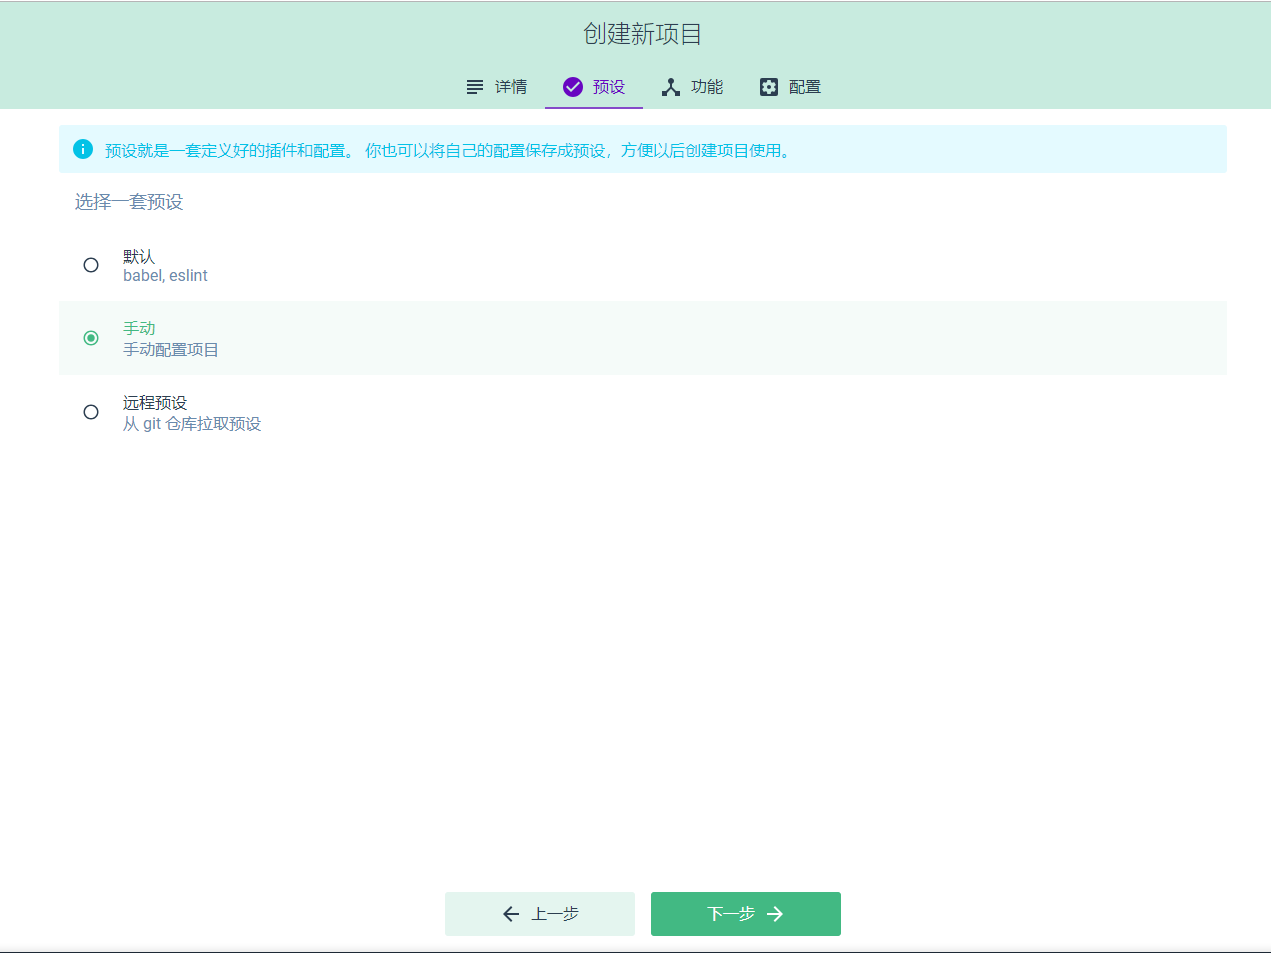
enter description here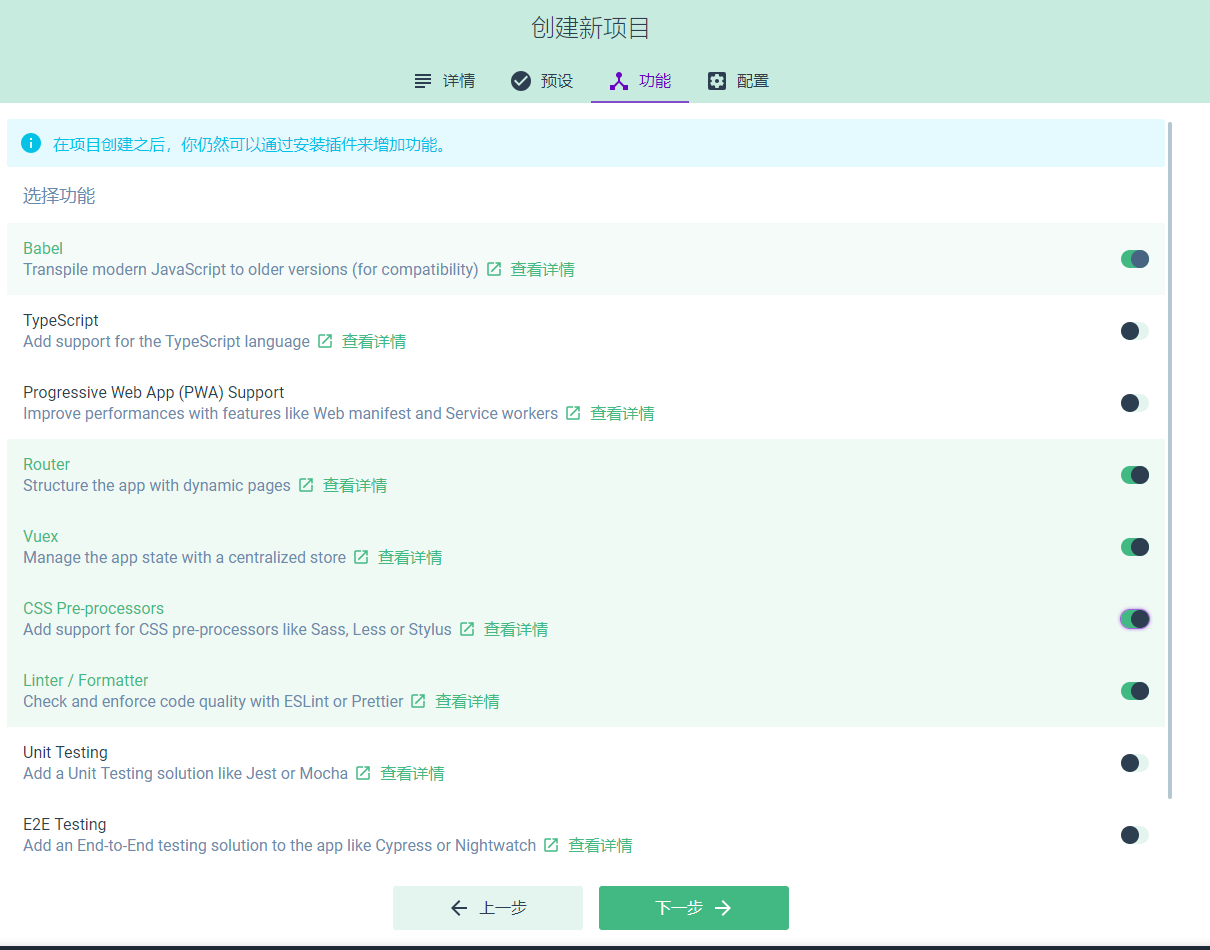
enter description here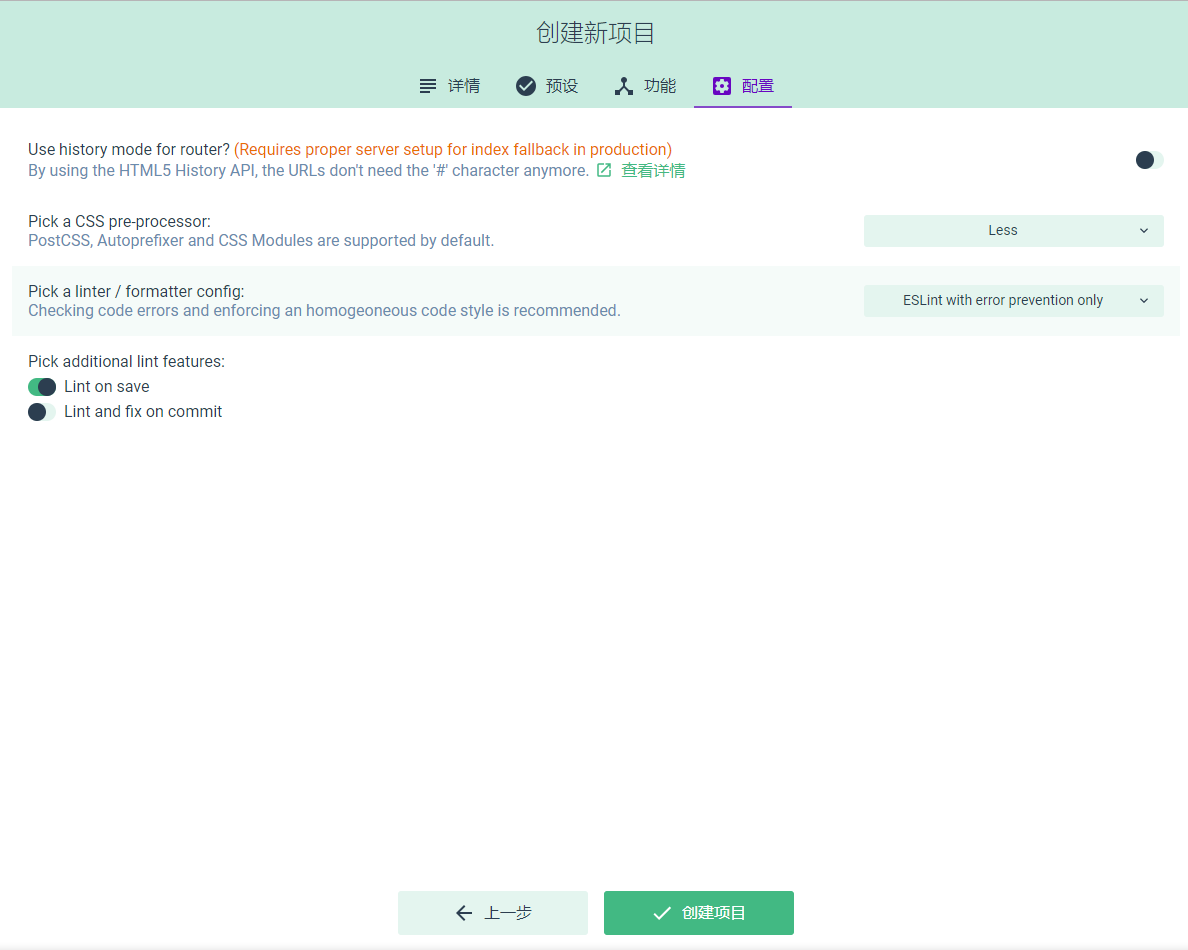
enter description here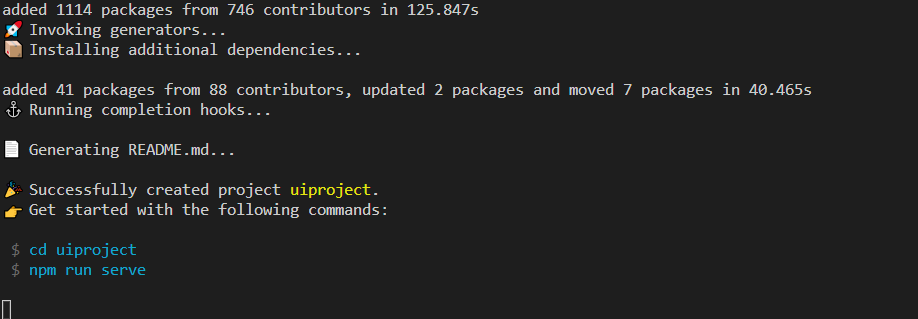
enter description here我們可以在UI這邊可視化添加插件,添加依賴,配置項目,運行任務
- 插件

enter description here- 依賴

enter description here- 配置

enter description here- 任務
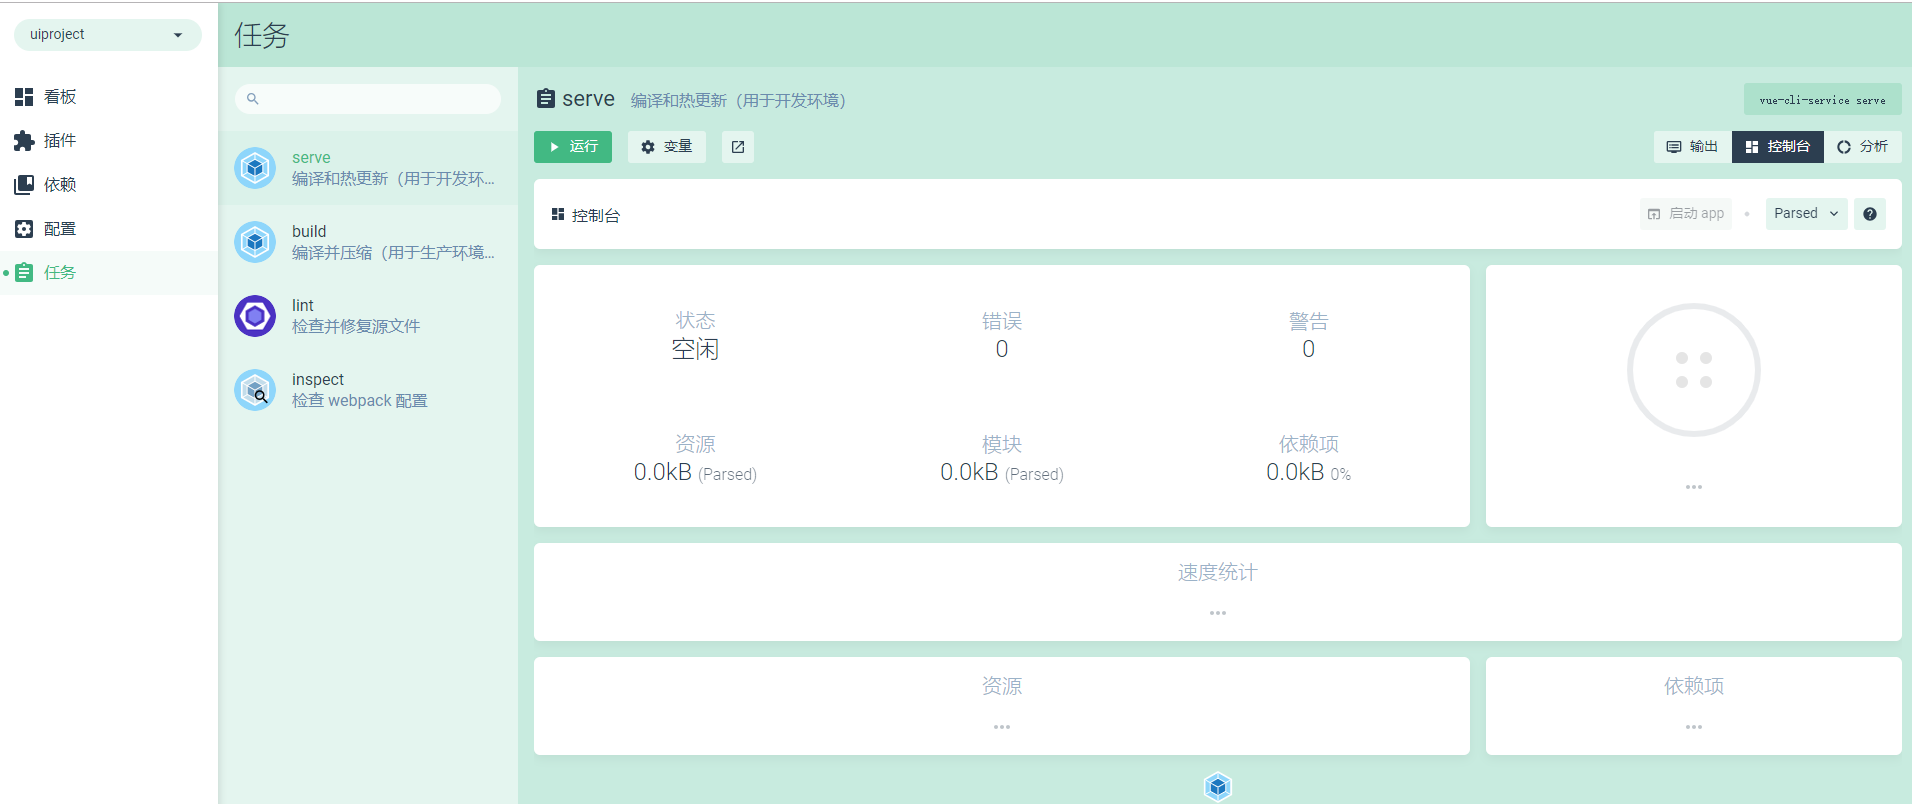
enter description here -
如果項目熟悉,用第一種方式去創建項目更快,若是新手可以使用第二種,第二種會避免較少的錯誤。
最終效果:
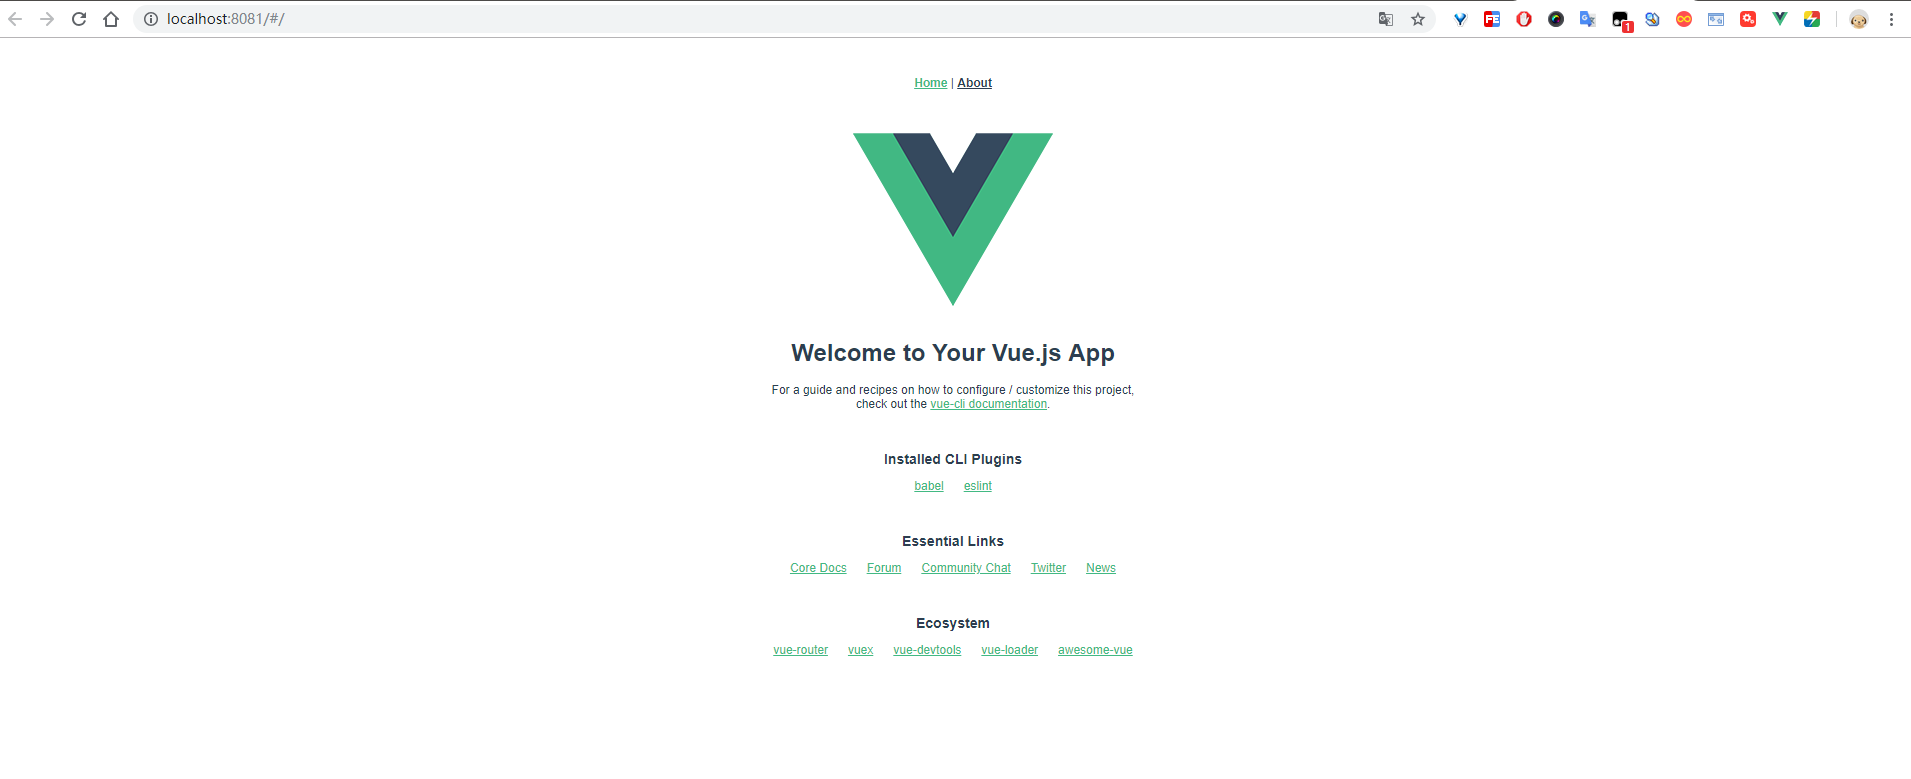
enter description here
Vue的Debug(調試)
作為開發人員,我們肯定要學會調試的。,官方說明:https://cn.vuejs.org/v2/cookbook/debugging-in-vscode.html
- 瀏覽器(Chrome)
瀏覽器要安裝插件(vue-devtools),大家可以去這邊博客進行下載:https://segmentfault.com/a/1190000009682735
安裝完後之後,就可以在瀏覽器的插件看到,記得要把插件的“允許訪問文件網址”的許可權打開
在引用的vue.js等不是壓縮的,按起F12便會出現一個vue的選項,可以在視窗查看修改data,vuex,event
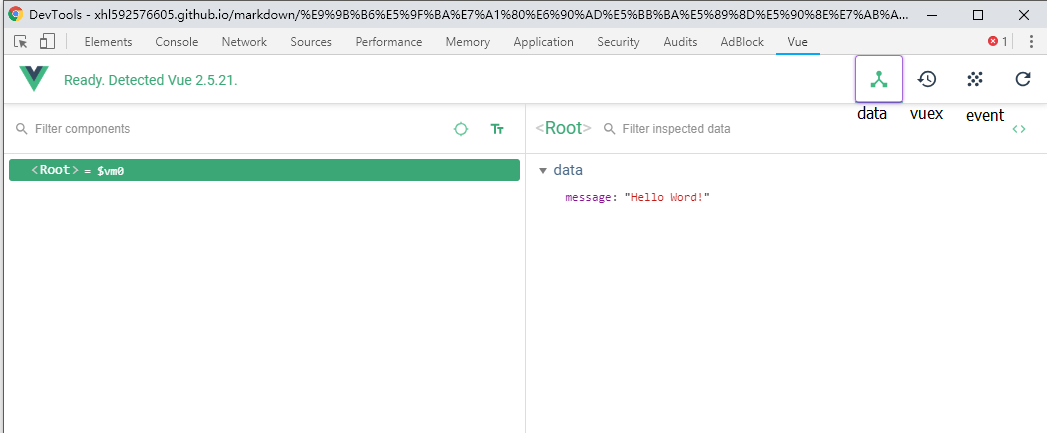
enter description here
- 編輯器(VsCode)
-
在編輯器上的調試按鈕,添加新的調試配置
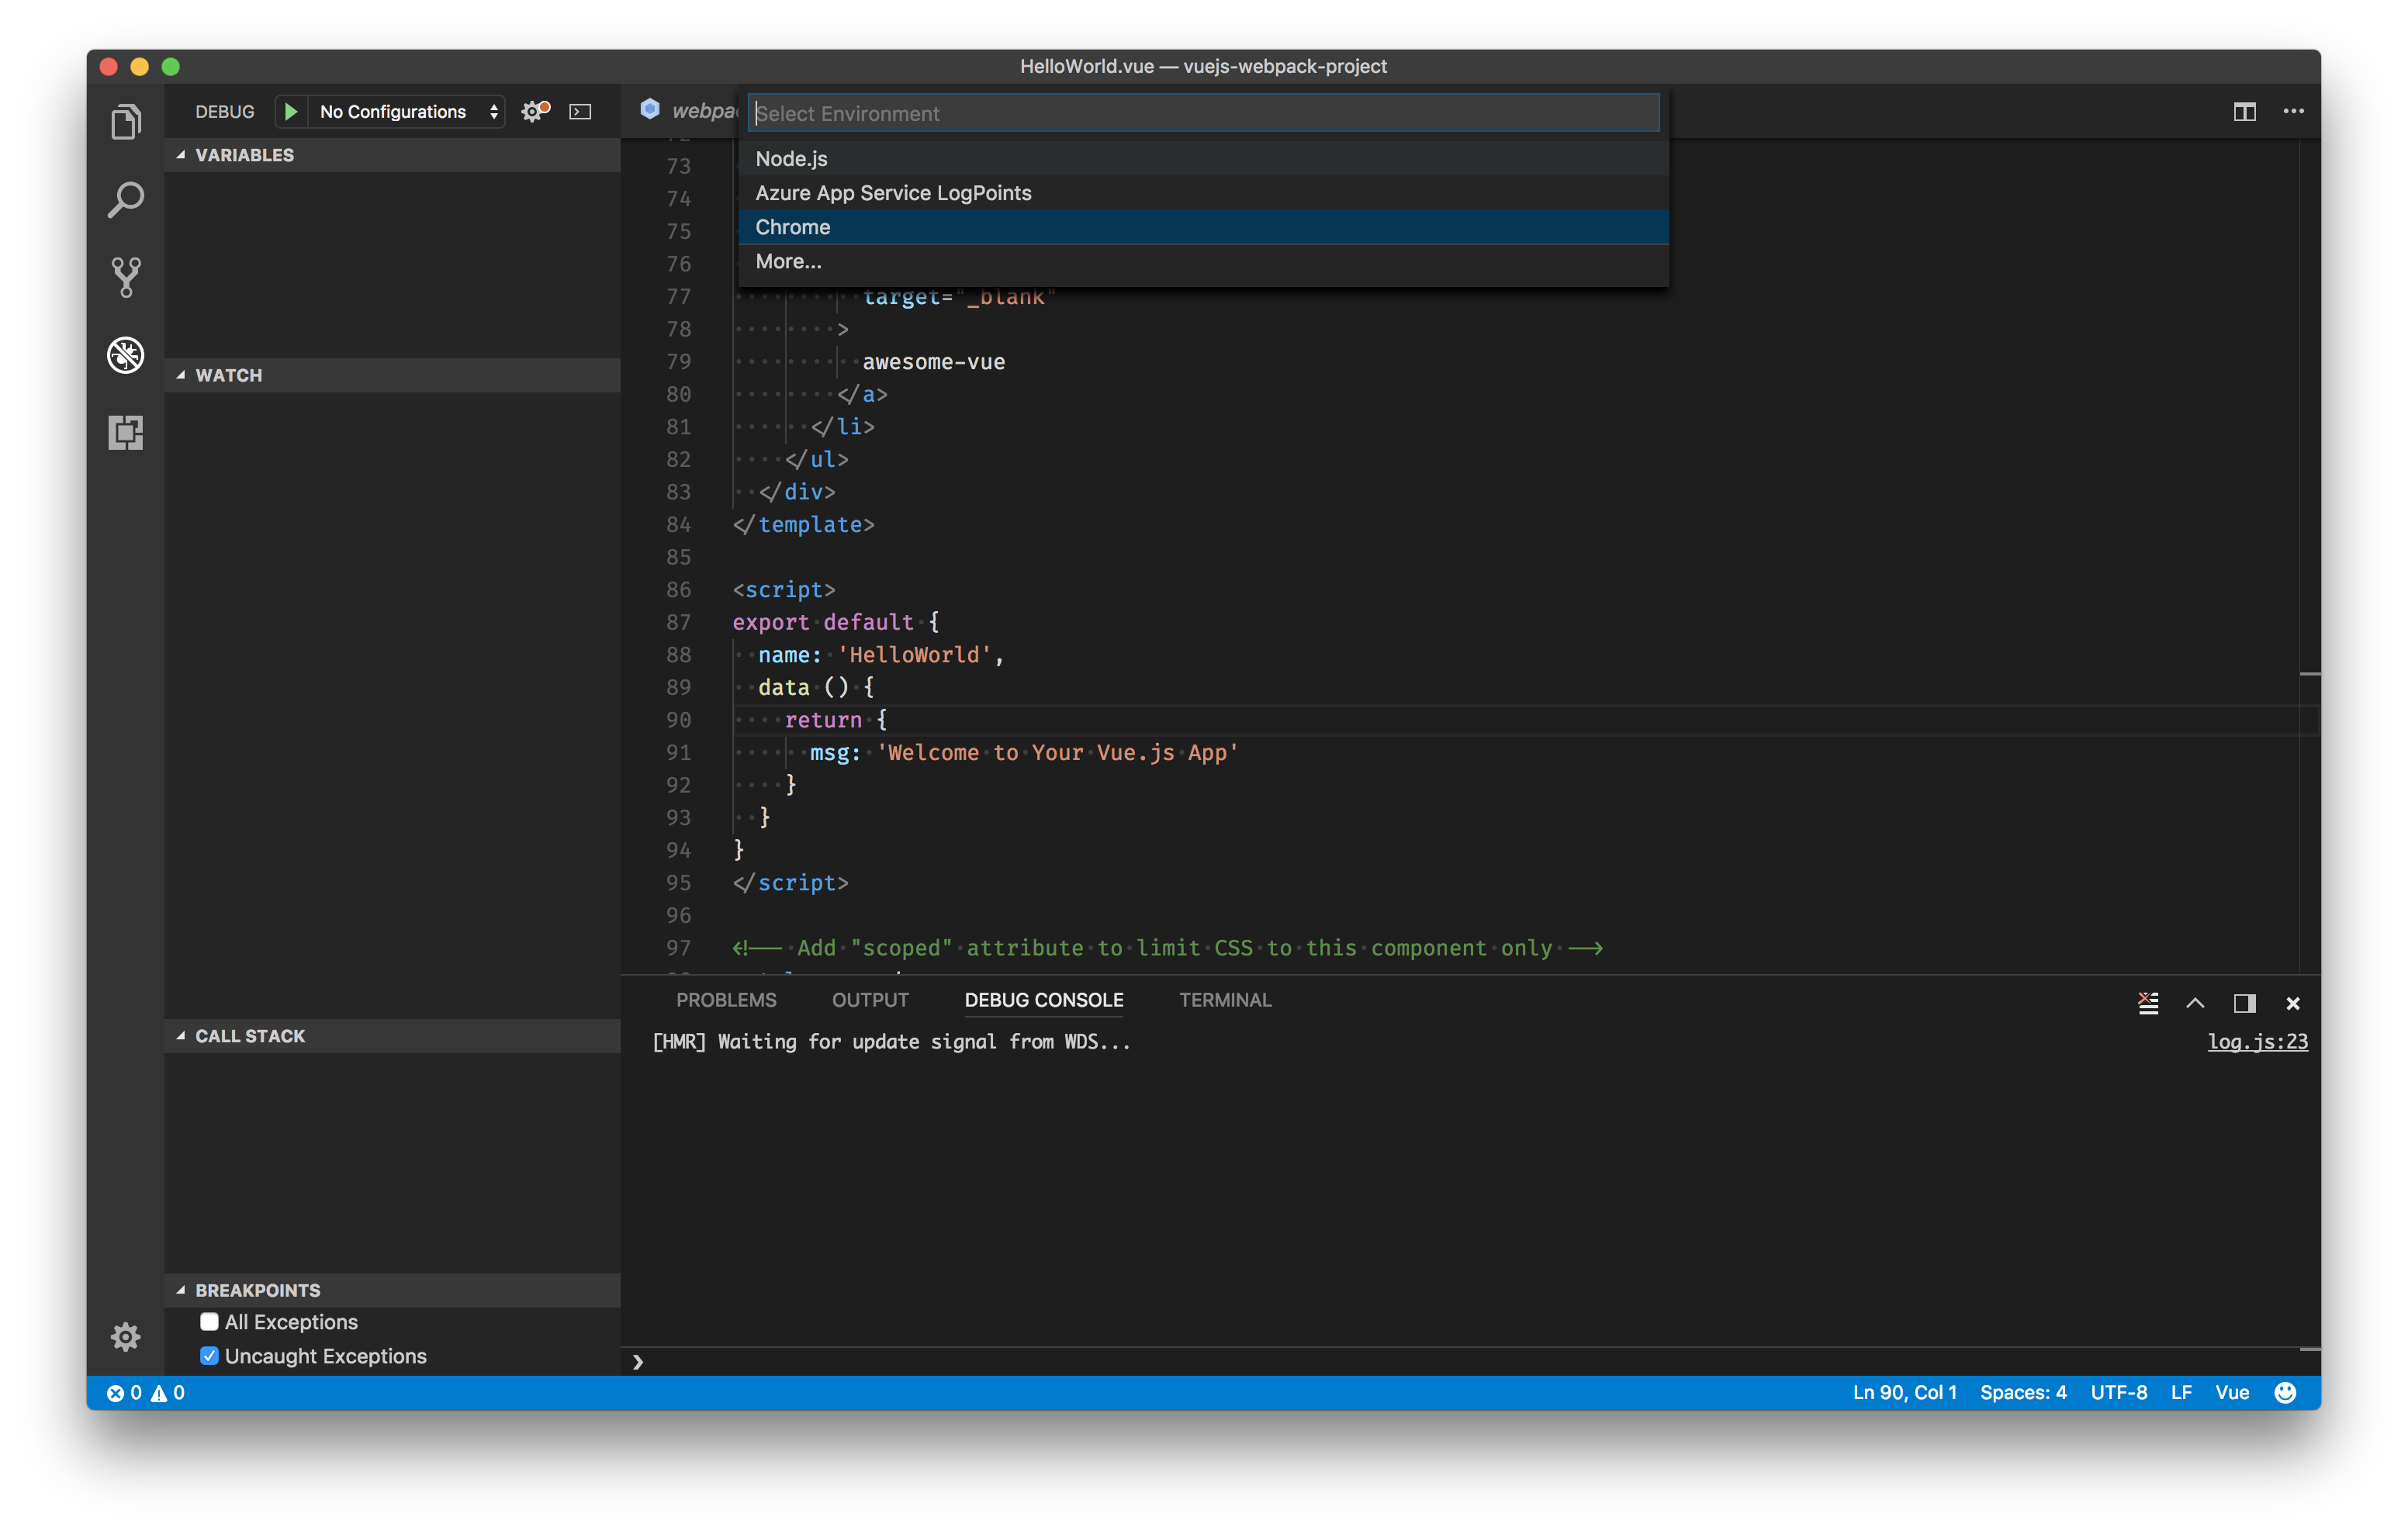
-
講以下的代碼覆蓋到調試配置文件
{ "version": "0.2.0", "configurations": [ { "type": "chrome", "request": "launch", "name": "vuejs: chrome", "url": "http://localhost:8080", "webRoot": "${workspaceFolder}/src", "breakOnLoad": true, "sourceMapPathOverrides": { "webpack:///src/*": "${webRoot}/*" } }, { "type": "firefox", "request": "launch", "name": "vuejs: firefox", "url": "http://localhost:8080", "webRoot": "${workspaceFolder}/src", "pathMappings": [{ "url": "webpack:///src/", "path": "${webRoot}/" }] } ] } -
設置斷點
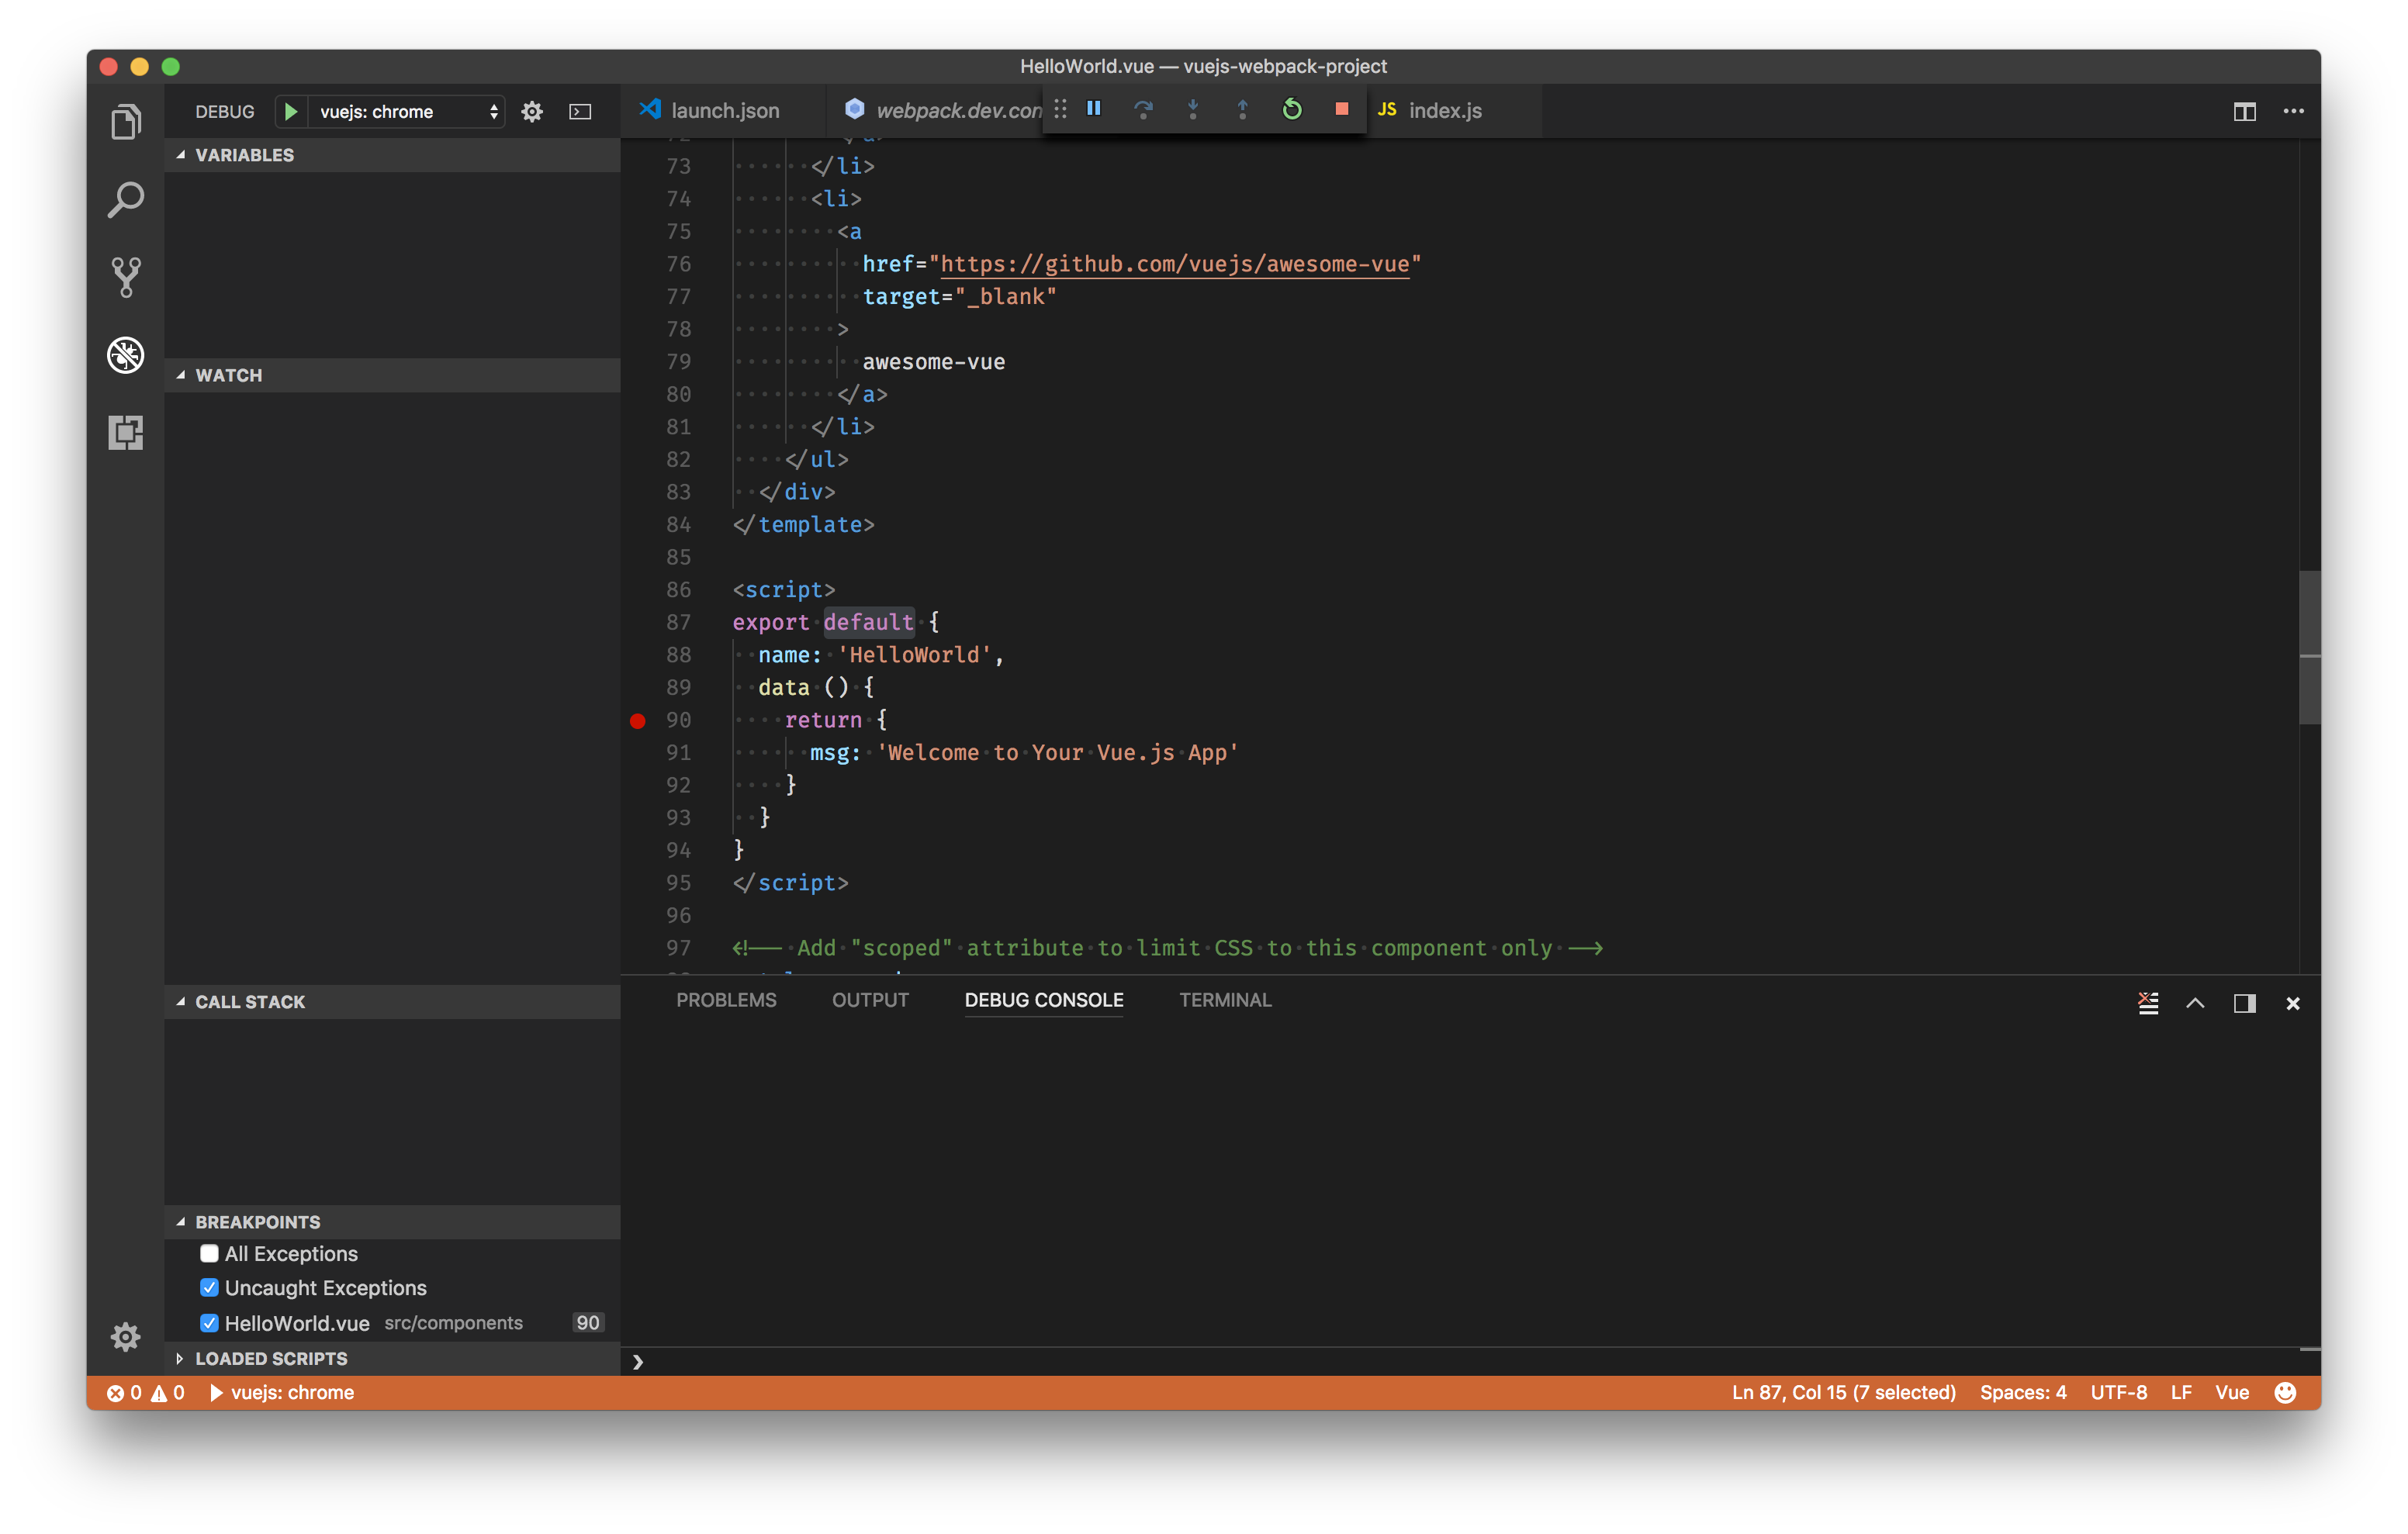
enter description here
- 然後
F5運行,便可以調試到代碼了
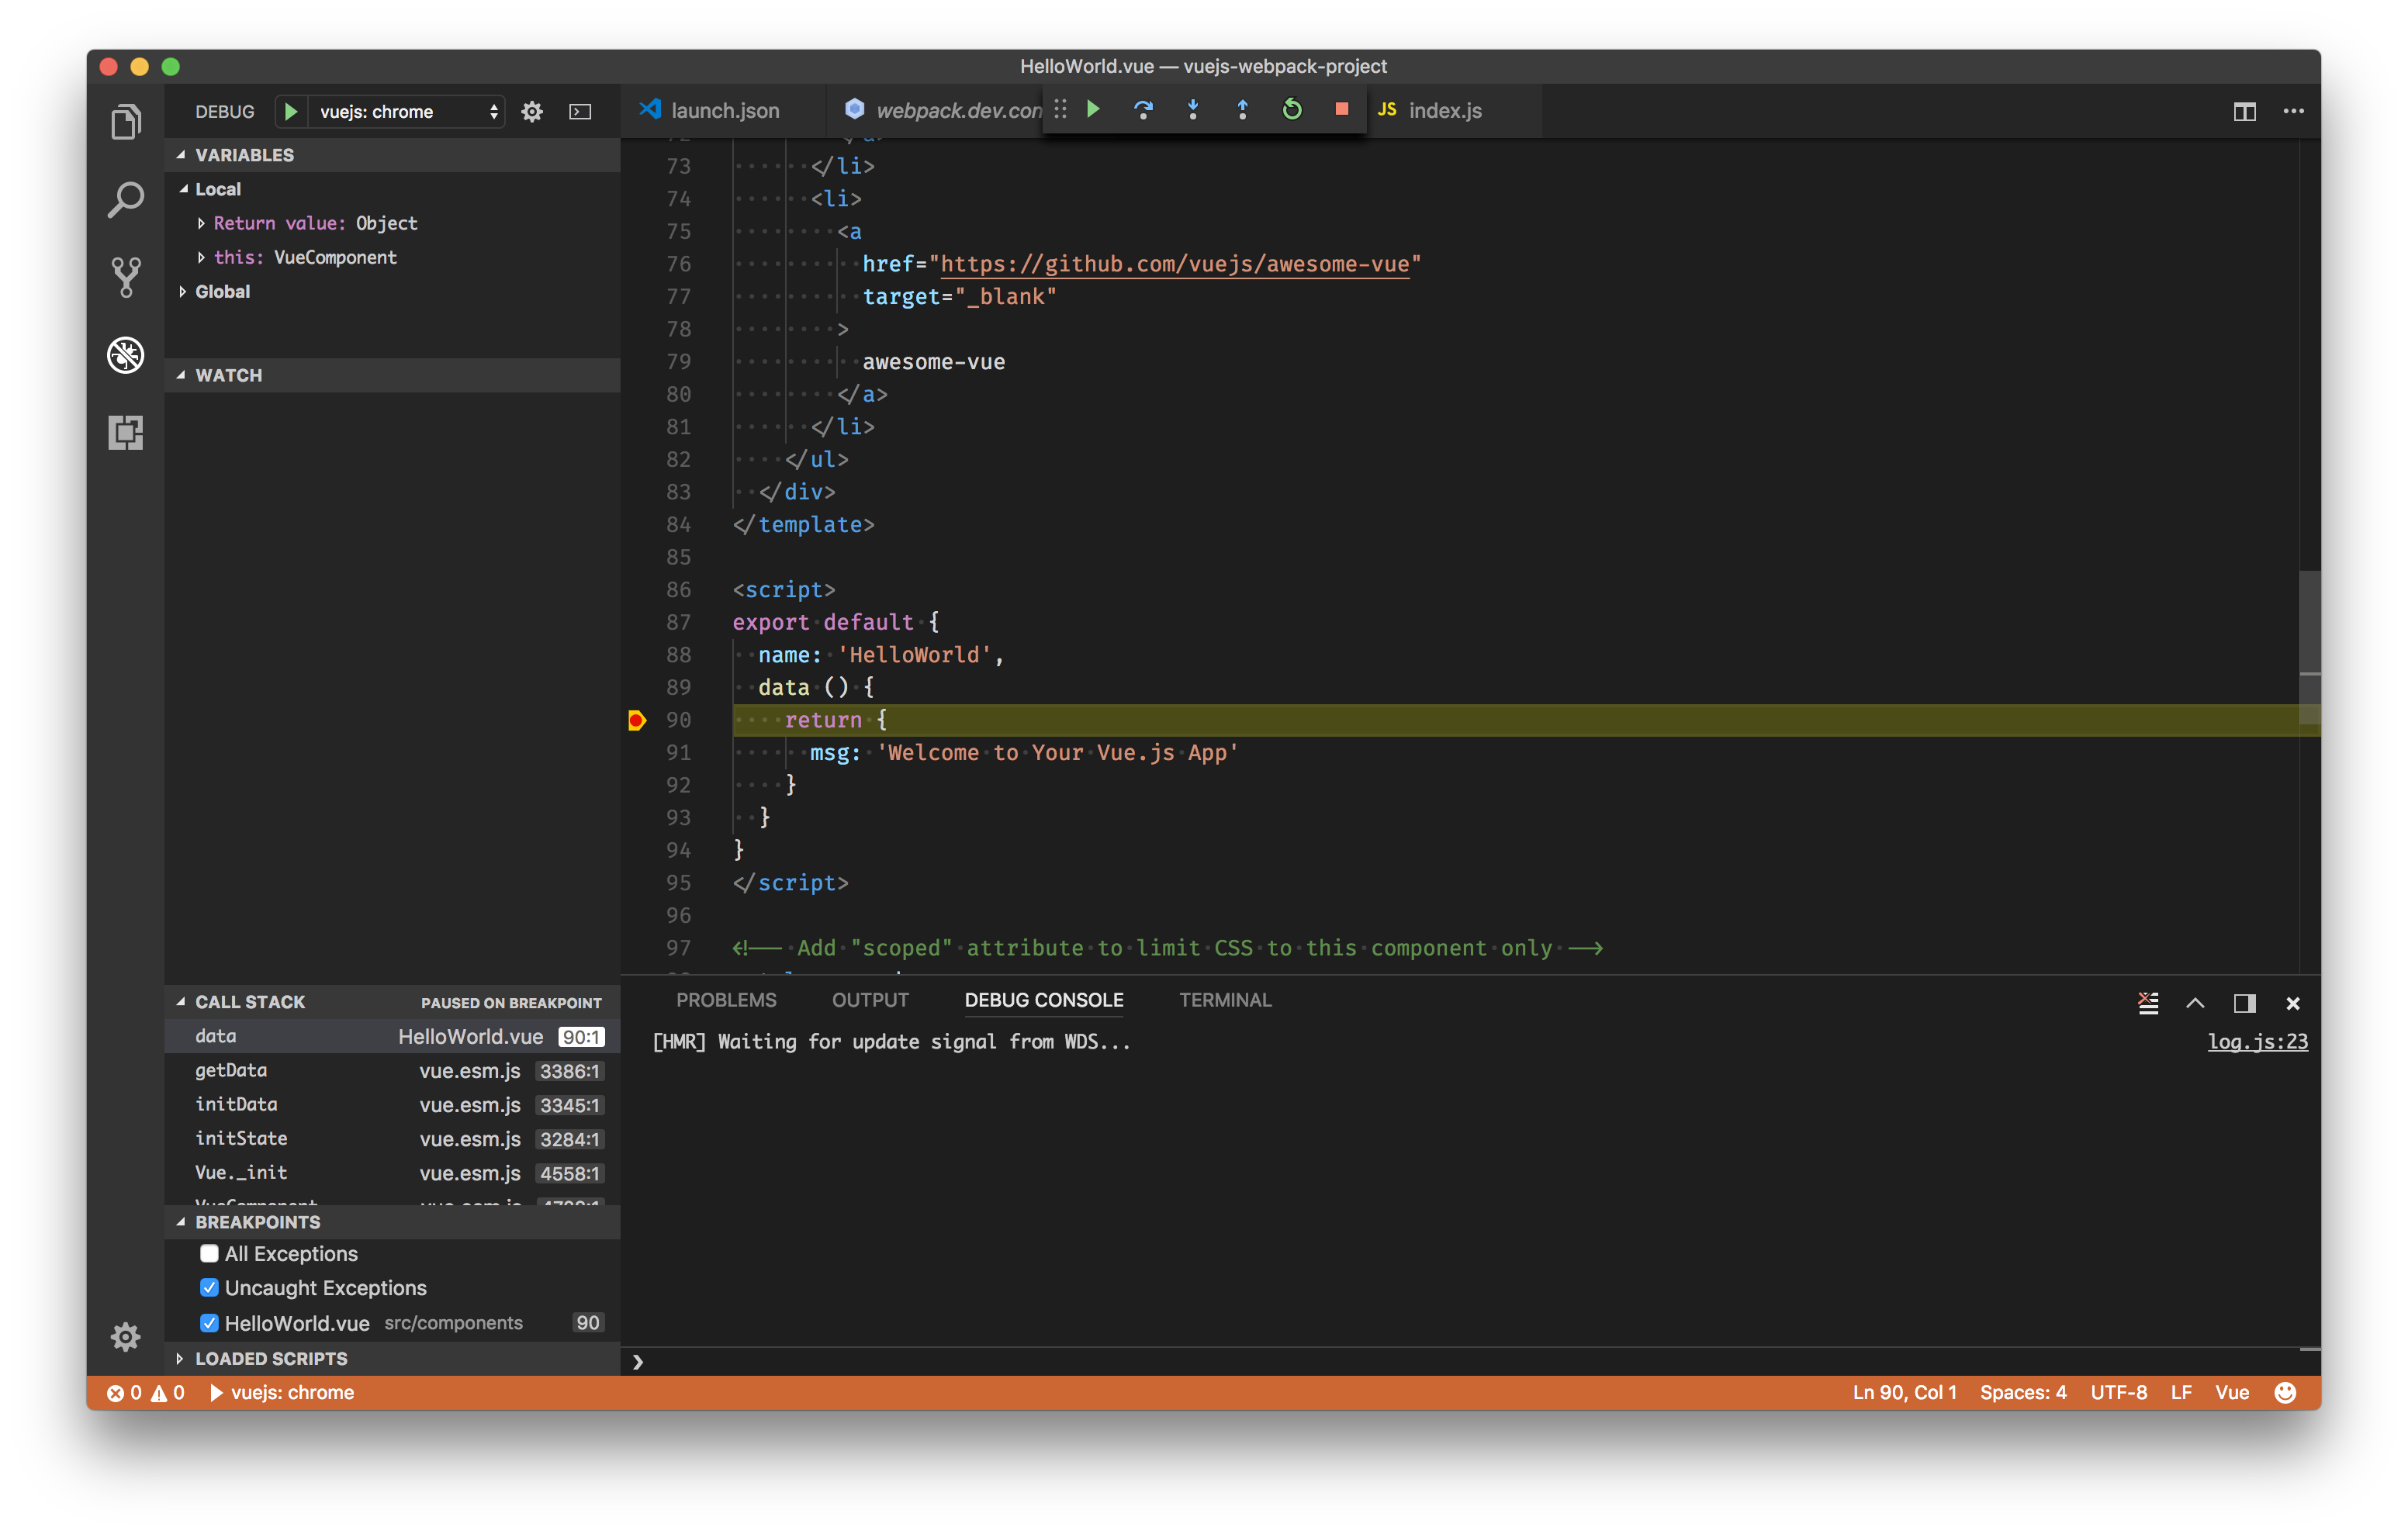
enter description here
個人而言,我比較喜歡第一種調試方式,vue-devtools可以做到我們在調試工具改數據,頁面立馬響應。邊切有很好的可視化效果。還有一點就是配合“熱更新”可以做到一個很好的調試效果。
Vue的Http請求
- vue-resource
vue-resource提供了使用XMLHttpRequest或JSONP 發出Web請求和處理響應的服務。
也就是可以進行服務端請求
-
安裝
同樣的道理,你可以直接引用
<script src="https://cdn.jsdelivr.net/npm/[email protected]"> </script>也可以npm install vue-resource -
初始化
但是最重要的是要將插件引用到Vue裡面,在
main.js裡面引用。- 引用
import VueResource from 'vue-resource' Vue.use(VueResource) -
用法
this.$http.get('url').then(res=>{ console.log(res.data) },res=>{ alert(res.data) }) this.$http.post('url', {foo: 'bar'}).then(res=>{ console.log(res.data) },res=>{ alert(res.data) }) -
axios/vue-axios
Axios 是一個基於 promise 的 HTTP 庫,可以用在瀏覽器和 node.js 中。
用於將axios集成到vuejs的插件
所以兩者都是可以進行Http請求的。
-
安裝
同樣道理,可以引用JS,也可以使用npm install --save axios vue-axios,將兩者都引用起來。 -
初始化
- axios
單獨使用axios的情況,他是不支持Vue,use(axios),所以引用進來,我們可以創建vue的一個屬性給他,然後通過這個屬性調用。
import axios from 'axios' Vue.prototype.$axios = axios- vue-axios
vue-axios依托與axios,所以兩者都要引用過去。並且有個先後順序。
import axios from 'axios' import VueAxios from 'vue-axios' Vue.use(VueAxios, axios) - axios
-
用法
- axios
this.$axios.get('url',params).then(res=>{ alert(JSON.stringify(res.data)) },res=>{ alert(res.data) })更多用法:https://github.com/axios/axios
- vue-axios
Vue.axios.get(api).then((response) => {
  console.log(response.data)
})

this.axios.get(api).then((response) => {
  console.log(response.data)
})

this.$http.get(api).then((response) => {
  console.log(response.data)
})
**如何選擇呢?**vue更新到2.0之後,作者就宣告不再對vue-resource更新,而是推薦的axios,所以你懂得!
跨域問題:
我們在開發的過程中,可能會去請求不同伺服器上的介面,所以我們會經歷到跨域的問題。由於vue-cli3.x將所有的配置(Vue配置,WebPack配置等)全部集成在vue.config.js上,所以以前與現在不太一樣,但是配置節點,內容是一樣的。那下麵提供2個鏈接,針對以前與現在:
- 以前:https://blog.csdn.net/my_csdn2018/article/details/82909989
- 現在:https://segmentfault.com/a/1190000014474361?utm_source=channel-hottest
特別強調配置完跨域,F12看請求的時候,上面的鏈接還是原來的鏈接,但是內部已經綁定轉到你配置的地址上去了。
感言:終於把零基礎搭建前後端分離項目寫完了。前端的知識還有很多很多,要學的還有很多很多。後面也可能用實際的項目還講講自己遇到的坑,怎麼解決的。那這個系列就這了,下個系列在再見。


